You can transform your outdoor area with a beautiful DIY planter bench. This versatile addition combines seating with gardening, maximizing space and enhancing beauty. For instance, combining seating with integrated planters effectively uses small outdoor areas, reducing clutter and adding greenery.
Outdoor living space improvements, like new decks, often yield strong ROIs of up to 80%. This guide provides simple planter bench plans. You will learn how to plan, build, and maintain your own custom planter bench. These diy planter bench plans are perfect for beginners.
Key Takeaways
A DIY planter bench saves space. It combines seating and gardening in one unit. This makes your outdoor area look better.
Building your own planter bench saves money. It costs much less than buying one. You get a strong, custom piece of furniture.
Plan your bench carefully. Decide on the right size for the bench and planters. Choose strong wood that can handle weather.
Use the right tools and safety gear. Cut wood precisely. Build the planter boxes and bench frame strongly. Attach seating securely.
Finish your bench with sealant. This protects the wood. Line the planters properly for healthy plants. Clean and care for your bench each year.
Why Build a Planter Bench
Space-Saving Design
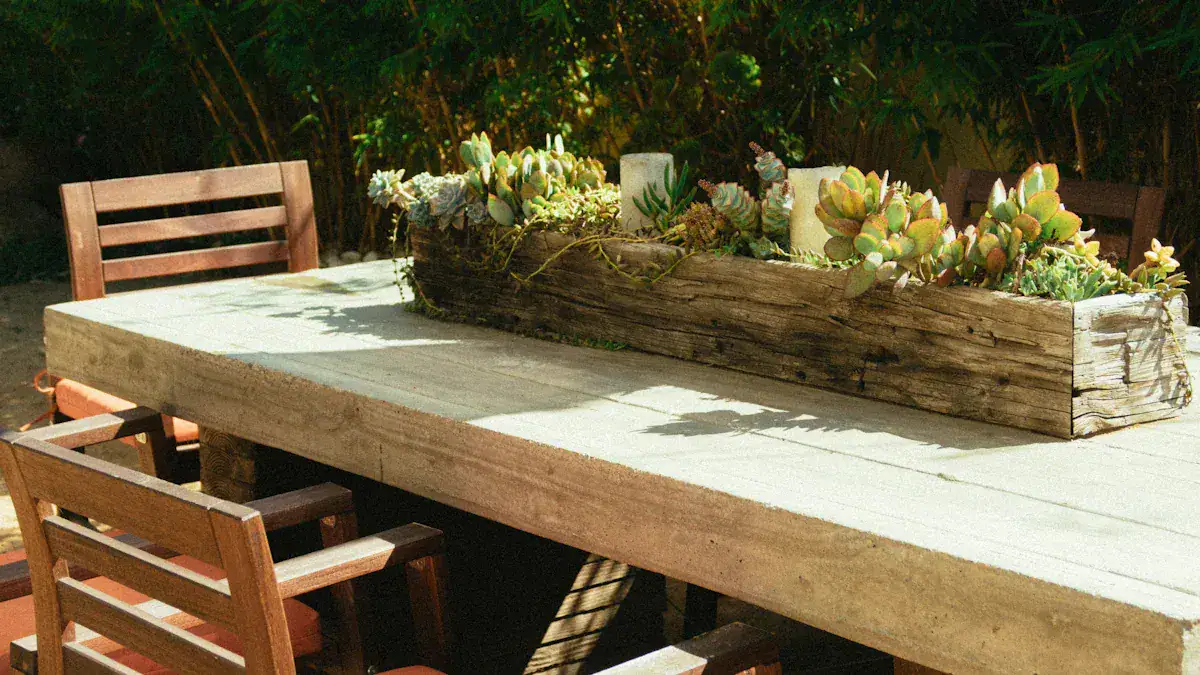
You might wonder why you should build a planter bench. One main reason is its space-saving design. A planter bench optimizes space in compact outdoor areas. It integrates two distinct elements: seating and planting. This combination means you do not need separate spaces for benches and planters. This maximizes efficiency in limited outdoor footprints. For example, you can see this space-saving approach in commercial projects. They use custom planters to flank benches in hallways. This shows how well a combined unit works.
Curb Appeal and Aesthetics
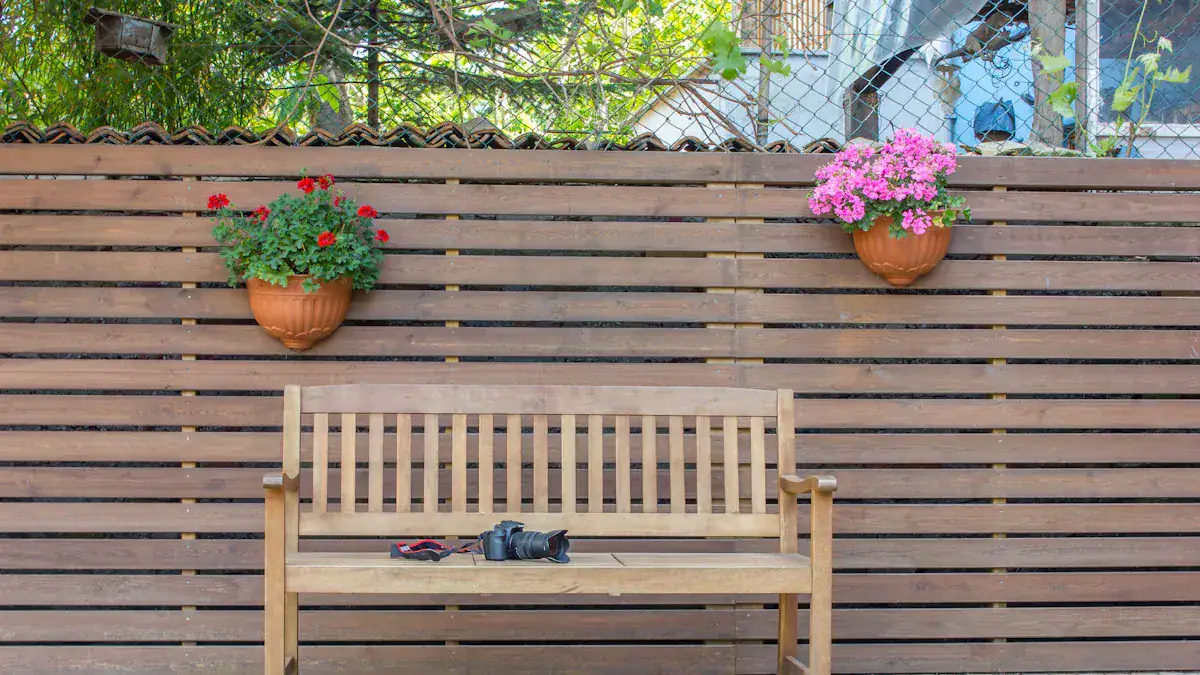
A planter bench also boosts your home’s curb appeal and aesthetics. It offers a convenient and beautiful focal point. This central visual element breaks up landscaping. It adds definition to your outdoor spaces. Separate elements might not integrate as seamlessly. An integrated simple planter bench provides a comfortable place to sit and relax. This makes your outdoor areas more inviting and functional.
Customization Options
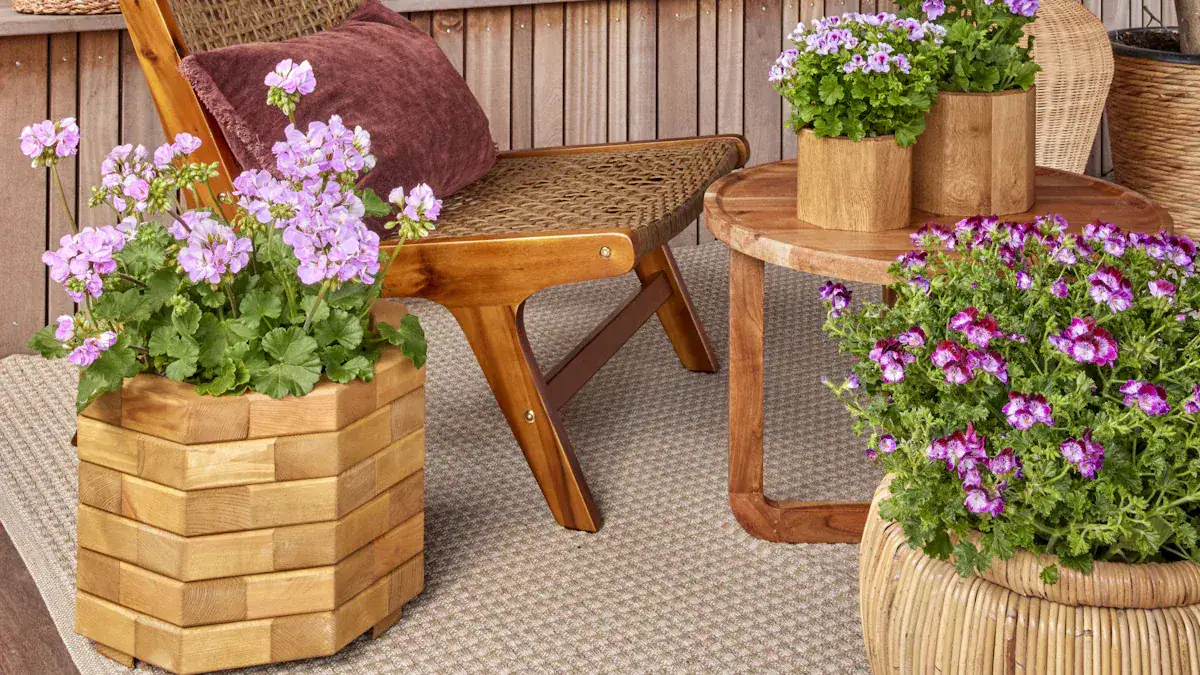
You have many customization options with a DIY planter bench. You can choose various shapes, styles, and sizes. You can also select materials and finishes. Options include plain, unpainted wood or concrete blocks. You can paint or stain the wood for a custom look. Fiberclay pots can mimic concrete for a sophisticated look. Fiberglass planters offer many colors and finishes. You can use simple planters for a minimalistic style. Or, you can add bright, colorful planters for a ‘pop of color’. Some designs include storage space for gardening supplies. This can be a toy box style bench with a hinged lid. You can also add cushions for comfort and extra color.
Cost-Effectiveness
Building your own planter bench is very cost-effective. A DIY potting bench can cost around $48.85. A similar pre-made bench often costs over $150. You can save a lot of money. For example, three 2x2x8 pine boards cost about $1.98 each. Three 2x4x8 pine boards cost about $3.34 each. Four 2x6x8 pine boards cost about $6.73 each. A box of 2 1/2 inch pocket hole screws costs about $5.97. The total DIY cost is much lower. You get a solid wood piece of furniture that can last a lifetime. This is for a fraction of the price of buying something. Store-bought items might be smaller and made of less durable materials.
Plan Your DIY Planter Bench Plans
You need to plan your project carefully before you start building. This initial design phase helps you create a functional and attractive planter bench. Consider your outdoor space, whether it is a porch, patio, or deck.
Bench Dimensions
First, think about the size of your bench. Standard dimensions ensure comfort.
Feature | Standard Dimension |
|---|---|
Seat Height | 16–18 inches |
Seat Depth | 15–20 inches |
Bench Length | 4-8 feet |
Backrest | Recommended for comfort during long periods of sitting |
You should aim for a seat height of 16 to 18 inches. This allows for comfortable sitting and easy standing. A seat depth of 15 to 20 inches also adds to comfort. For the bench length, 4 to 8 feet works well for most spaces. Consider adding a backrest for extra comfort during long periods of sitting. These are important details for your diy planter bench plans.
Planter Box Size
Next, decide on the size of your planter boxes. The size depends on the plants you want to grow. Larger plants need bigger boxes. Make sure the boxes are deep enough for roots to grow.
Material Selection
Choosing the right material is crucial for your planter bench plans. You want durable and weather-resistant wood.
Proper drainage is essential for healthy plants. You must ensure your planter boxes have good drainage.
Ensure a drainage hole at the bottom of the container: This is critical. It lets water drain freely. It also ensures enough air for roots. This prevents root rot from stagnant water. If a pot does not have a hole, you should make one. For example, you can drill a hole.
Utilize self-watering pots: These pots draw water from a reservoir into the soil. They do this without over-saturating it. They use methods like capillary action or wicking. They work well for plants that need consistent moisture.
Employ double potting techniques: This means you place a plant in a pot liner. This liner is often plastic. You then put this inside a slightly larger decorative container. You can easily remove the inner pot to drain water from the outer pot. This stops the plant from sitting in water. You can put gravel in the bottom of the outer pot. This collects extra water without the plant roots standing in it.
Avoid using gravel at the bottom of individual pots: Some people think gravel helps drainage inside the pot. This is a myth. Water tends to ‘perch’ in the soil above the gravel. The soil gets saturated before water drains into the gravel layer. So, it does not prevent waterlogging.
Seating Comfort
Finally, think about seating comfort. You want your planter bench to be a relaxing spot.
Wood naturally remains cooler in direct sunlight. This is compared to hard materials like concrete and metal. This makes wood a more comfortable choice for seating areas.
Adding cushions or built-in backrests makes the bench much more comfortable. This is especially true if you plan to sit for a long time.
A proper seat height (16 to 18 inches) allows for comfortable seating. It also makes it easy to stand up.
A slight backward tilt in backrests gives better support. This helps you relax more.
Wooden seat panels on concrete bases prevent discomfort from temperature extremes. Wood does not absorb as much heat.
Thick cushions, armrests, and side pillows on swing benches create a more enclosed and relaxing feel.
These considerations will help you create effective plans for your planter bench.
Tools and Materials Checklist
Before you begin building, gather all necessary items. This checklist helps you prepare for your planter bench project.
Essential Tools
You need some basic tools. A hand saw, a drill, and a measuring tape are minimal tools. They help you get the job done. For more efficiency, you can use power tools. A miter saw helps you make precise cuts. A drill/screw gun makes assembly faster. A staple gun is useful for attaching materials. You can also use a circular saw or a table saw. These tools make your work easier and quicker.
Safety Gear
Safety is important when you work with tools. You must protect yourself. Wear safety glasses to keep sawdust away. Dewalt Clear Anti-Fog Dual Mold Safety Glasses are a good choice. They offer clear vision. You need safety ear muffs when you use power tools. Mpow Noise Reduction Safety Ear Muffs protect your hearing. A respirator with a P100 rating filters sawdust and paint fumes. Sawdust is a carcinogen. Wear work gloves to protect your hands. Handyman gloves or Firm Grip gloves prevent splinters and cuts.
Wood List
Choosing the right wood is key for your planter bench plans. You want durable and weather-resistant lumber. Cedar is a good choice. You will need specific dimensions.
Wood Type | Dimensions | Quantity (Shopping List) |
|---|---|---|
2×4 lumber | 8′ long | 9 pieces |
3/4” plywood | 2’x4′ | 1 piece |
1×4 lumber | 8′ long | 8 pieces |
1×6 lumber | 8′ long | 11 pieces |
1×2 lumber | 8′ long | 1 piece |
You can also use four 2x4x8 boards and ten 1x6x72 fence pickets.
Fasteners
You need strong fasteners for outdoor use. They must resist rust and corrosion. Stainless steel fasteners are best for all-weather durability. They work well in humid areas. Galvanized steel is a budget-friendly option. It works for general outdoor use. Hot-dipped galvanized fasteners have a thick zinc coating. This gives strong rust resistance. Type 300 Series stainless steel is a good choice for treated wood.
Finishing Supplies
Finishing your bench protects the wood. It also makes it look good. You can use stain, sealant, or paint. Stain enhances the natural wood grain. It provides UV protection. It is also water-resistant. Paint offers full coverage. It protects against the elements. It comes in many colors. Paint can hide wood imperfections. Sealants, like varnish or polyurethane, create a protective layer. They resist water and UV damage.
Liners and Drainage
Proper drainage keeps your plants healthy. You need good materials for planter box liners. A TREMdrain Board is a waffled plastic pad. It increases the drainage area. It has channels for water flow. A layer of geotextile fabric covers it. This filter fabric reduces drain blockage. It stops silt from building up. A Biobarrier fabric prevents root growth. This stops roots from blocking drains. These materials ensure water drains well from your planter boxes.
Step-by-Step Planter Bench Plans
You are ready to start building your planter bench. This section gives you detailed, easy-to-follow instructions. These steps are perfect for beginner woodworkers.
Cut Wood
First, you need to cut all your wood pieces. Accuracy is very important here. You want all your pieces to fit together well.
Clamp your board securely before you cut. This stops the wood from moving.
Measure twice before you cut. This helps you avoid mistakes.
Cut slowly and deliberately. This gives you a cleaner, more accurate cut.
Use a sharp blade for optimal results. A dull blade can tear the wood.
Practice making cuts to improve your skill. You will get better with each cut.
If you need many pieces of the same size, use a stop block on your miter saw. You can screw a piece of scrap wood to the miter saw’s fence. This extends it. This method allows for quick and accurate repeat cuts. This is especially helpful for your diy planter bench plans. You will have many identical pieces.
Assemble Planters
Now, you will build the planter boxes. These boxes will hold your plants. Strong joinery makes durable planter boxes.
Arrange your cut sections into a rectangular frame. Position two longer pieces parallel. Insert shorter pieces at each end. This forms the width of your box.
Align the corners precisely. This ensures a snug fit.
Fasten the corners. Use 2-inch galvanized wood screws. Pre-drill holes with a 1/8-inch drill bit. This prevents the wood from splitting.
Use a carpenter’s square. This guarantees 90-degree angles for your box.
Attach the base. Place the pre-cut bottom panel inside the frame. Align its edges flush with the bottom.
Secure the base with screws. Space them every 6 inches along each edge.
Double-check all joints for tightness. Ensure structural integrity.
You can reinforce the corners of the planter box. Use 1-inch wooden dowels. This enhances structural integrity. These steps help you build strong planter box components for your planter bench plans.
Build Bench Frame
Next, you will construct the main bench frame. A stable and strong frame is essential. It must support weight safely.
Your bench needs a weight load capacity that supports its use. Heavy-duty benches can support around 5,000 pounds. Construct the bench with reinforced frames. Use sturdy legs and robust work surfaces. These parts must support heavy equipment and materials. Consider using strong materials like wood for construction.
Employ clamping and screwing methods to attach braces. Use 2 1/2-inch screws for inner braces.
Use a quick flip drill and driver. This often has a built-in countersink. It gives a more finished look. You can also fill the holes later.
Square and clamp side tabletop braces to the outsides of the leg tops. Then pilot drill and screw them in place.
Square and clamp front and rear long tabletop braces. Add extra screws where needed for additional fastening.
Be prepared to use ‘elbow grease’ to align warped or imperfect wood. This contributes to the bench’s strength.
Add wood glue to the inner shelf and tabletop. This creates a more permanent and stronger solution.
Avoid using a single 2×4 stud for each leg. Instead, use multiple 2×4 studs for legs. This design is highly stable. Utilize 2x4x96 studs for the frame. The quantity depends on your desired bench size. For example, you might need 8-9 studs for a 4×4 square bench. Use wood sheeting like plywood, OSB, or 3/4-inch thick melamine for the tabletop and shelves. Employ various screw sizes. They can range from 1 1/2 inches to 2 1/2 inches for assembly.
Attach Seating
Now, you will attach the seating slats to the bench frame. Secure methods ensure a safe and comfortable seat. This creates your simple planter bench.
Position the bench face down on the slats.
Place the bottom frame between the two seat slat cross pieces.
Secure the frame. Use wood glue and pocket hole screws. Drive them through the seat slat cross piece into the seat support.
A Kreg Pockethole Jig is recommended. It creates hidden screw joints. This keeps the fasteners out of sight. You also use this method for joining base components. These include rails, cross pieces, and legs. This makes the screws almost invisible.
Use 1 1/4-inch deck screws for the seat slats.
Pre-drill holes before fastening.
Position the outer slats snugly against the frame.
Evenly space the remaining slats across the seat.
Integrate Planters
You will now integrate the planter boxes into the bench structure. This creates a seamless look. This step brings your diy planter bench plans together.
Join benches and planters for mutual support. This creates an integrated look. You can often incorporate decking material. For maximum stability, integrate the bench into the deck framing. Or, attach it with toe-screwed fasteners to the deck. Tie it into a planter for additional support.
Planter height is important. Avoid tripping hazards. Ensure planters are at least 18 inches tall. 30 inches is a comfortable maximum. Start planter construction with a waterproof container. Build around it. For custom sizes, consider a sheet-metal fabricated container. When building a simple planter, plan dimensions to allow room to lift out the container. Use a 2x platform if you need more height. Attach full-width decking for vertical sides without spacing. Use trim-head screws. For top edging, glue miters if you use PVC decking. For a more integrated bench approach, prepare for the bench before installing decking. Add blocking to support single posts every 6 feet. The 2×6 framing for the bench will conceal these posts. Be prepared to adjust your plans. For example, you might lower a planter’s height to maintain views. Or, you might add benches to create a U-shaped layout.
Finish and Line
The final steps involve finishing the wood and lining the planters. This protects your simple planter bench and its plants.
Use stainless steel screws for outdoor applications. This is especially true in corrosive environments or with pressure-treated lumber. They offer superior rust resistance.
Select finishes that provide UV protection and moisture resistance for outdoor furniture.
Apply finishes according to the manufacturer’s instructions. Reapply as needed to maintain protection.
Here is how to line your planters:
Measure the planter: Determine the interior length, width, and depth. Add extra for overlap.
Cutting the liner: Cut your chosen liner material to size. Ensure it is large enough to cover the interior and fold over the edges.
Fitting the liner: Place the liner evenly inside the planter. Cover all sides.
Securing the liner: Fold excess liner over the edges. Use staples or nails for wooden planters. Use adhesive tape or glue for other containers.
Ensure proper drainage: Verify the planter has sufficient drainage holes. If not, create additional ones.
Prevent soil loss: Place small garden gravel stones at the bottom of the planter. This prevents soil from washing away through drainage holes.
To secure the liner inside the planter box, carefully place it. Smooth out any creases. For wooden planters, use a staple gun. For metal or plastic, use double-sided tape or glue. Ensure the liner is taut but not overstretched. Trim any excess liner. Leave about an inch of liner above the soil line. Trim neatly with a sharp tool. Consider folding the edge for added strength before securing.
For sealing the wood:
Preparation: Select a wood sealer. Commercial wood sealers are effective. Plant-safe options are available, but they may need more frequent reapplication.
Applying the Sealer: Apply an even coat of wood sealer to all surfaces. Cover the inside, outside, and underneath. Ensure knots, corners, and pockets are fully covered. Allow it to dry as per product instructions. Then apply a second coat and let it dry completely.
Testing the Sealer: Test the sealer by wetting a small area. If water beads up or is not absorbed after a few minutes, the sealing is effective. If water is absorbed, apply additional coats.
Lining the Wooden Planter: Use a black trash bag as a simple and inexpensive liner. Cut away any excess length to fit the planter.
Keeping the Lining in Place: Secure the bag to the top of the planter with binder clips. Punch 2-3 small holes at the bottom for drainage. Place small rocks at the bottom. This keeps the bag in place and prevents holes from clogging.
Finishing Up: Fill the planter with soil. Keep it a couple of inches below the lining level. Remove the clips.
Customization and Maintenance
You have built your planter bench. Now, you can make it truly yours. Proper care will also keep it looking great for years.
Customization Ideas
You can personalize your planter bench in many ways.
Add Storage: Build a hinged lid into the bench seat. This creates a hidden space. You can store gardening tools or outdoor toys there.
Incorporate Raised Planters: Design taller planter boxes. This makes gardening easier. You do not need to bend over as much.
Paint or Stain: Choose a color that matches your outdoor decor. Paint offers a fresh look. Stain highlights the wood’s natural beauty.
Add Cushions: Place comfortable cushions on the seat. This makes your bench more inviting. You can also add decorative pillows for extra flair.
Plant Selection
Choosing the right plants is important. Consider these factors:
Size: Select plants that fit your planter box size. Avoid plants that will quickly outgrow the space.
Sunlight Needs: Match plants to the amount of sun your bench receives. Full sun plants need at least six hours of direct light. Shade plants prefer less.
Drainage: Pick plants that thrive in well-drained soil. Most herbs and many flowers prefer this.
Cleaning
Regular cleaning keeps your bench looking new.
Remove Debris: Brush off leaves, dirt, and other loose debris.
Wash: Mix mild soap with water. Use a soft brush or cloth to scrub the wood.
Rinse: Rinse the bench thoroughly with a hose. Make sure no soap residue remains.
Dry: Let the bench air dry completely.
Sealant Reapplication
Sealant protects your wood from weather damage.
Check Annually: Inspect your bench every year. Look for signs of wear on the sealant.
Reapply as Needed: If water no longer beads on the surface, it is time to reapply. Clean the bench first. Then, apply a fresh coat of outdoor wood sealant. Follow the product instructions for best results.
Winter Care
Protect your planter bench during cold months.
Empty Planters: Remove plants that cannot survive winter outdoors. Empty the soil from the planter boxes.
Clean Thoroughly: Give the bench a good cleaning.
Cover or Store: Use a waterproof cover to protect the bench from snow and ice. If possible, move smaller benches into a shed or garage. This extends its life.
You have successfully learned to build a DIY planter bench. This project brings great satisfaction. It also adds beauty and function to your outdoor area. Now, embark on your own project. You can create a unique and functional outdoor feature. It will perfectly fit your specific needs and your outdoor space plans. Enjoy your new, personalized living space.