
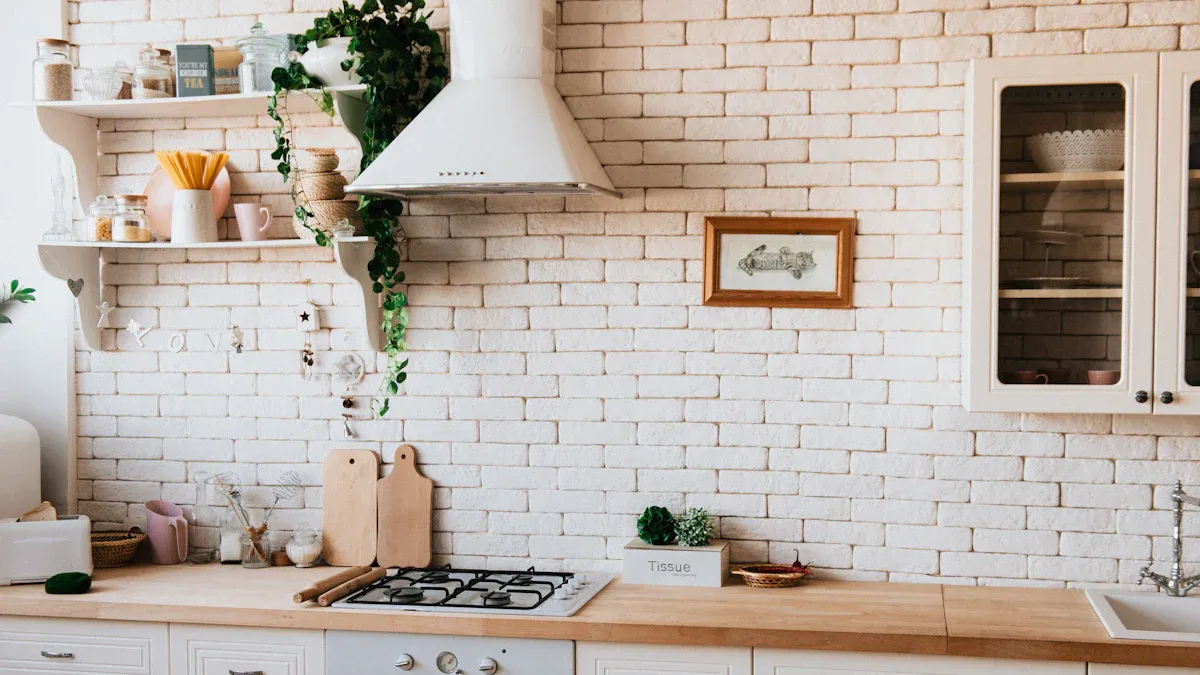
“Can you really paint a tile backsplash?” Absolutely, you can! Painting a tile backsplash is a fantastic way to update your kitchen backsplash. This DIY project offers huge savings. Painting costs roughly $2 per square foot. Replacing tile, however, costs $10 to $20 per square foot. You can save 80% to 90% over replacement! Painting kitchen backsplashes gives your space a fresh, new look quickly. With the right materials and techniques, your painted kitchen backsplash will be durable and beautiful. Just remember, it’s not as permanent as installing brand-new tile. Ready for a change? We’ll give you a comprehensive, step-by-step guide.
Essential Materials to Paint a Tile Backsplash
Cleaning and Prep Supplies
You need the right tools to start your project. First, gather your cleaning and prep supplies. You will need a strong degreaser. TSP (trisodium phosphate) is an excellent choice.
TSP (trisodium phosphate) is an excellent degreaser and cleaner, ensuring a squeaky clean tile for ultimate adhesion. This cleaner removes all grease and grime. You also need fine-grit sandpaper. This helps the paint stick.
220 grit: For scuffing glossy tile glaze.
400 grit: For refining the surface before primer application. Use 220-grit sandpaper to scuff the glossy tile glaze. Then, use 400-grit sandpaper to refine the surface. Don’t forget painter’s tape. This protects areas you don’t want to paint. Drop cloths keep your counters and floors clean. Caulk removal tools help you get rid of old caulk.
Primers and Durable Paints
Choosing the right primer and paint is key. You need a high-quality bonding primer. This primer helps the paint stick to smooth tiles. For painting surfaces like ceramic tile, two top contenders for bonding primers are Stix Waterborne Bonding Primer by Benjamin Moore and Extreme Bond® Primer by Sherwin-Williams. Both are specifically designed to bond to challenging surfaces such as glossy tiles, ensuring paint adhesion without peeling. These primers ensure your paint lasts. Next, pick a durable paint.
Semi-Gloss Finish: This is great for backsplashes. It is easy to clean and resists moisture.
High-Gloss Paint Finish: This offers a very shiny look. It is also durable and easy to clean.
Interior Acrylic Paint: This paint is washable and resists moisture. It helps prevent water damage. Consider a clear topcoat or sealer. This adds extra protection.
Artisan Enhancements Clear Topcoat Sealer is recommended for areas with moisture. It makes your finish last longer. This sealer is durable and water-resistant. For light colors, Artisan Enhancements Clear Finish helps prevent yellowing.
Application Tools and Protection
You need good tools to apply the paint smoothly.
Brushes: Nylox brushes are great for smooth projects. They give an ultra-smooth finish without brush marks. Use angled brushes for detail work.
Rollers:
Fabric: Woven roller covers are best. They prevent lint and give a smooth finish.
Nap: A 1/4″ nap is perfect for very smooth surfaces. Small foam rollers also work well. You will need roller trays for your paint. Always wear gloves to protect your hands. Safety glasses protect your eyes from splashes.
Backsplash Prep: Foundation for Flawless Painted Tiles
Great results come from great preparation. This prep work is the most important step. It makes sure your paint sticks well and lasts a long time. You want a smooth, clean surface for your new look.
Clear, Protect, and Clean Backsplash
First, clear everything from your counters. Remove small appliances, decorations, and anything else near your backsplash. Lay down drop cloths to protect your countertops and floor. Use painter’s tape to mask off cabinets, walls, and outlets. You want sharp, clean lines.
Now, clean your backsplash thoroughly. Grease and grime are common in kitchens. You must remove all of it. Use a strong degreaser like TSP (trisodium phosphate). It cuts through tough kitchen grease. Other excellent choices include Krud Kutter Cleaner/Degreaser. This cleaner is safe for the environment and works on many stains. Dawn Professional Heavy-Duty Degreaser also works wonders. It tackles greasy stains and burnt food on various kitchen surfaces.
Don’t forget the grout lines! They can hold a lot of dirt.
Gather your supplies: grout cleaner, a soft-bristle brush, sponges, a spray bottle, gloves, and warm water.
Clear the area completely. You need full access to all grout lines.
Sweep or vacuum the backsplash area. This removes loose dirt. You don’t want to push it into the grout later.
Open windows or use fans. Good ventilation is important, especially with chemical cleaners.
Mix a DIY cleaning solution. Combine ½ cup of baking soda with ¼ cup of hydrogen peroxide. This makes a thick paste that breaks down stains.
Apply the paste generously to the grout lines. Cover all stained areas.
Let the solution sit for 10 minutes. It lifts stains and loosens grime.
Scrub gently with a soft-bristle brush. Use circular motions. This removes dirt and discoloration without damaging the grout.
Wipe clean with a sponge or cloth. Then, rinse thoroughly with warm water. This removes all residue.
Dry the surface with a clean towel. Inspect your work. Repeat for heavily stained areas if needed.
Scuff Sand and Repair Tiles
After cleaning, you need to scuff sand your tiles. This creates a rough surface. Paint sticks much better to a rough surface than a smooth, glossy one. Use 180 to 240 grit sandpaper. This grit removes the glaze from ceramic or porcelain tiles. If you have a lot of built-up crud, you can start with 80 or 120 grit sandpaper. Lightly sand the entire tile surface. You don’t need to sand aggressively. Just dull the shine.
Next, check for any chips or cracks in your tiles or grout. You must repair these before painting.
For small chips and cracks, consider E-Z Patch® 15 Glazed Ceramic Tile Repair. It comes in many colors and includes an applicator brush. It dries fast, usually within an hour.
MagicEzy Tile REPAIREZY™ is another good option. It fills and colors chips and cracks in ceramic and porcelain tiles.
For deeper gouges or drill holes, MagicEzy Tile Deep Chip Filler works well.
Fill any damaged areas. Let the repairs dry completely according to the product instructions. You want a smooth, even surface before you apply primer.
Remove Old Caulk and Re-Caulk
Old caulk often looks dirty or cracked. You must remove it before you paint. Paint does not stick well to silicone caulk. It will peel off later. Use the right tools for this job.
A Saker Silicone Caulking Tool is a great all-around choice. It has a three-in-one design.
For small areas, try a Coitak Angled Grout Saw.
A Dekeones Razor Blade Scraper works well for scraping.
You can also use a liquid remover like Motsenbocker’s Lift Off Spray Caulk Remover. It can make the job easier.
Knives, specialized caulk removing tools, and even oscillating tools with the right blade can help you cut through old caulk.
Carefully remove all the old caulk. Clean the area thoroughly. You will re-caulk after your paint has fully cured. For re-caulking around your newly painted kitchen backsplash, choose a high-quality sealant. Kwik Seal Ultra Premium Siliconized Kitchen & Bath Sealant is an excellent choice. It offers lifetime mold and mildew resistance. It also repels water, dirt, and stains. This keeps your backsplash looking clean. It is water-ready in just four hours. This type of sealant provides strong adhesion to tile and ceramic. It prevents cracking and ensures long-lasting durability.
How to Paint Tiles: Step-by-Step Application
This section gives you a clear step-by-step guide on how to paint a tile backsplash. Follow these step-by-step instructions to get a beautiful, lasting finish.
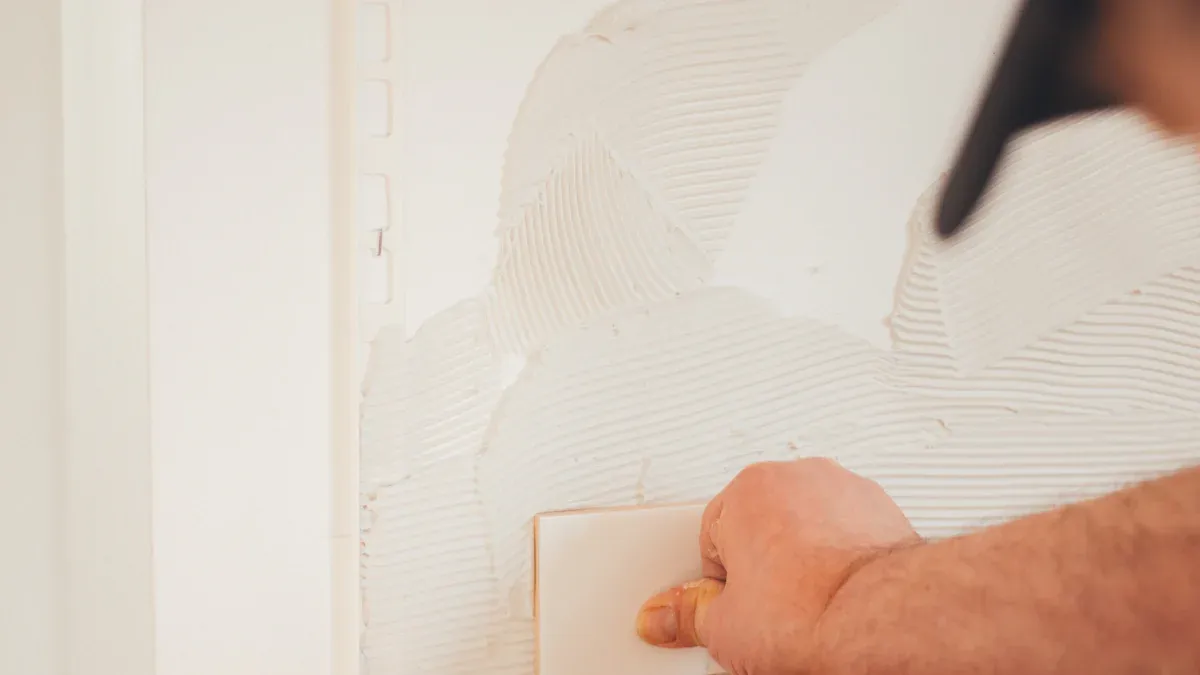
Apply Bonding Primer
You’ve prepped your surface, and now it’s time for the first layer of magic: the primer. Applying a bonding primer is a crucial step. It makes sure your paint sticks to those smooth tiles. You want to cover every inch of your backsplash with this primer. Use a good quality brush for the edges and a small foam roller for the larger tile surfaces. Apply it evenly. For optimal adhesion on glossy tile surfaces, a high-quality primer like ‘Extreme Bond Primer’ is designed as a one-coat application. This waterborne acrylic bonding primer helps paint stick to many hard-to-paint surfaces, including ceramic wall tile. You need minimal surface preparation for it. Just make sure you get good coverage. Let the primer dry completely. Check the product instructions for specific drying times.
First Coat of Durable Paint
Once your primer feels dry to the touch, you can apply the first coat of your chosen durable paint. This is where your backsplash starts to transform! Use an angled brush for cutting in around the edges and a small foam roller for the main tile areas. Roll the paint on in thin, even layers. Don’t try to get full coverage with this first coat. You just want a good base.
💡 Pro Tip: Proper drying time, also called ‘flash time,’ is very important between paint coats. It stops problems like bubbling, wrinkling, or uneven texture. It also helps each layer stick correctly.
Here are some recommended drying times:
Coating Type | Recommended Drying Time (Flash Time) |
|---|---|
Solvent-based Basecoat | 10 to 15 minutes (until matte and tack-free) |
Urethane Primer | 20 to 30 minutes (longer for high-build primers) |
Clear Coat | 5 to 10 minutes (until slightly tacky with uniform gloss) |
Midcoat (Candy, Pearl, Chameleon) | 15 to 20 minutes |
Always follow the manufacturer’s instructions for drying times. Rushing this step can lead to a less durable finish.
Achieve Even Coverage
Now you’re ready to achieve that perfect, even finish. You will likely need two or three thin coats of paint to get full coverage. Apply each coat just like the first, using your brush for edges and roller for the main surfaces. Let each coat dry completely before applying the next. This prevents drips and ensures a smooth look. This is how you paint tiles for a professional look.
To make sure you get even coverage across both your tile faces and grout lines, follow these steps:
Choose the right tools: Use a small brush or roller made for painting grout lines. This helps you apply paint precisely.
Mix the paint well: Stir or shake your grout paint thoroughly before you start.
Tape off surrounding areas: Protect your tiles from spills. Use painter’s tape around each tile edge.
Apply thin coats of paint: Carefully apply thin coats of grout paint along each line. Keep going until you have full coverage. Work in small sections. Let each coat dry enough. You might need two or three coats. It depends on the color and how opaque the paint is.
You can also try these methods:
Paint all grout lines first with a brush. Then, use rollers for the base coat to cover the tiles quickly.
If you are stenciling, apply several light coats of paint. This helps stop bleeding.
You can use a small paintbrush to go over every single tile. This creates crisp lines.
How do you know if you need another coat? Look for these signs of insufficient paint coverage:
Shadowing
Uneven sheen
Visible roller marks
Patchy coverage (especially if your tiles were very absorbent)
Visible streaking (if you changed the color a lot and the old color shows through)
Keep applying thin coats until you see a consistent color and finish.
Seal and Protect Your Finish
You’ve finished painting tile, and it looks amazing! Now, you need to protect your hard work. Sealing your painted backsplash is essential. It guards against moisture, stains, and daily wear. Choose a high-quality, kitchen-grade sealant. It should be waterproof and mold-resistant. It also needs to be made for tile and grout.
Consider these excellent options:
Pro Seal Max Kitchen & Bath sealant is a great choice. It is 100% waterproof. It also has a permanently flexible hybrid formula. This sealant works well for interior projects with moisture. You can use it on countertops, backsplashes, stone/marble, glass, porcelain, and ceramic tile.
Advanced Silicone 2® Kitchen & Bath Sealant offers more flexibility. It is water-ready in just 30 minutes. It also protects against mold for 10 years.
All Purpose Silicone 1® Sealant stays flexible forever. It is rain-ready on the same day. It protects against mold for 7 years.
Sealing gives you waterproof protection. It stops water from getting behind your tiles or into grout lines. Silicone sealants are flexible and strong. They can expand and shrink with temperature changes. This makes them perfect for kitchens. Many silicone sealants also stop mold and mildew from growing. Plus, sealing makes your backsplash edges look clean and polished.
After you apply the sealer, you must let it cure properly. This is very important. While the sealer’s curing time is most critical for a backsplash, remember that the paint underneath also needs to cure. Latex paint usually takes about 30 days to fully cure. Oil-based paint cures in 7-10 days. During these times, avoid heavy cleaning or scrubbing. This helps the paint last longer.
For a painted and sealed backsplash, most sealers need 48-72 hours to fully cure. This is before you can expose them to regular use, like moisture or cleaning. This time allows the sealer to get completely hard. It then gives you the best protection. Before you put on a clear polyurethane sealer, let the paint dry for 24 to 48 hours. It should not be sticky anymore. Once the sealer is on, it needs to dry. Then the area is ready for use. But remember, the full curing time for moisture or cleaning is usually longer than just drying.
Tips for Success and Long-Lasting Results
You have transformed your kitchen! Now, let’s make sure your painted backsplash looks great for years. These tips help you achieve a professional finish and keep it that way.
Choosing Colors and Designs
Picking the right color makes a big difference. Always test paint colors in a hidden spot first. This helps you see how the color looks in your kitchen’s light. You can also get creative with your design. For example, you can use stencils to add patterns. Stenciling lets you create precise designs on your tiles. You prepare a clean surface, choose a stencil, and then carefully apply paint with a sponge or brush. You can also paint individual tiles different colors. Or, you can leave grout lines unpainted for a varied look.
Avoiding Common Painting Flaws
Nobody wants peeling paint! Many things can cause paint to peel or chip on your kitchen backsplash. Poor surface preparation is a big one. Dirt, grease, or glossy finishes stop paint from sticking. Skipping primer also causes problems. A bonding primer is vital for smooth surfaces. Using the wrong paint or applying it too thickly also leads to weak adhesion. Kitchens have humidity, grease, and changing temperatures. These things weaken paint over time. To prevent these issues, always clean surfaces well with a degreaser. Sand glossy areas. Use a high-quality bonding primer. Apply thin, even coats of paint. Allow proper drying time between coats. This helps your paint last.
Maintaining Your Painted Backsplash
Keeping your painted backsplash clean is easy. You should inspect painted surfaces every year. Look for wear, water damage, or chips. Clean your backsplash regularly. Spot clean with a gentle cleanser and a damp cloth every three months. For cleaning, use liquid cleansers like Simple Green® or Dawn®. Disinfectant wipes, foaming cleansers, and all-purpose cleaners also work well. White vinegar is great for tough stains. Use standard household sponges and soft, damp cloths. You can also use isopropyl alcohol. Do not use abrasive scrubber pads, metal scrapers, or steel wool. Avoid bleach or ammonia-based cleaners. Do not use oil or wax-based cleaners.
You can truly transform your kitchen with a painted tile backsplash. This DIY project offers affordability, speed, and a stunning aesthetic change. With proper prep, materials, and sealing, you achieve great durability.
Painted tile backsplashes in less used areas can last over 7-10 years.
High-quality products can extend this lifespan.
Kitchen backsplashes, especially near stovetops, may decline faster.
“The key is to test the paint on a small, hidden area first,” says Cherniak. “This trick ensures the results will meet your expectations, though it is also critical to note that particularly in high-traffic areas like the kitchen, the painted tiles may not last as long as the newer ones and can peel or chip over time.”
Remember, it’s durable, but not as permanent as new tile. Go ahead, try painting kitchen backsplashes! Share your amazing makeovers!
FAQ
Can you paint over any type of tile?
You can paint most ceramic, porcelain, and even some stone tiles. The key is proper preparation. Always clean and sand the surface well. Use a high-quality bonding primer. This helps the paint stick.
How long does painted tile last?
With good prep and materials, your painted backsplash can last 5-10 years. High-traffic areas might show wear sooner. Regular cleaning and proper sealing help extend its life. ✨
What if I want to change the color later?
Yes, you can repaint your backsplash! Just clean the surface. Lightly sand it to create a good grip for the new paint. Then, apply a fresh coat of primer and your new paint color. It’s that easy!
Is painted tile durable enough for a kitchen?
Absolutely! When you use durable paints and a strong topcoat, your painted backsplash stands up to kitchen life. It resists moisture and everyday splashes. Just remember to clean it gently. 🧼


