
Creating your own diy radiator covers can transform your space in more ways than one. Not only do they improve the overall aesthetics of your home, but they also enhance safety by keeping curious hands away from hot surfaces. Plus, this project is easier than you might think! You can customize your cover to fit any decor style, making it a perfect addition to your living space. Why not add a personal touch to your home with a beautiful and functional radiator cover?
Key Takeaways
Creating DIY radiator covers enhances your home’s decor while ensuring safety by covering hot surfaces.
Gather essential tools like a drill, saw, and clamps before starting your project for a smoother building process.
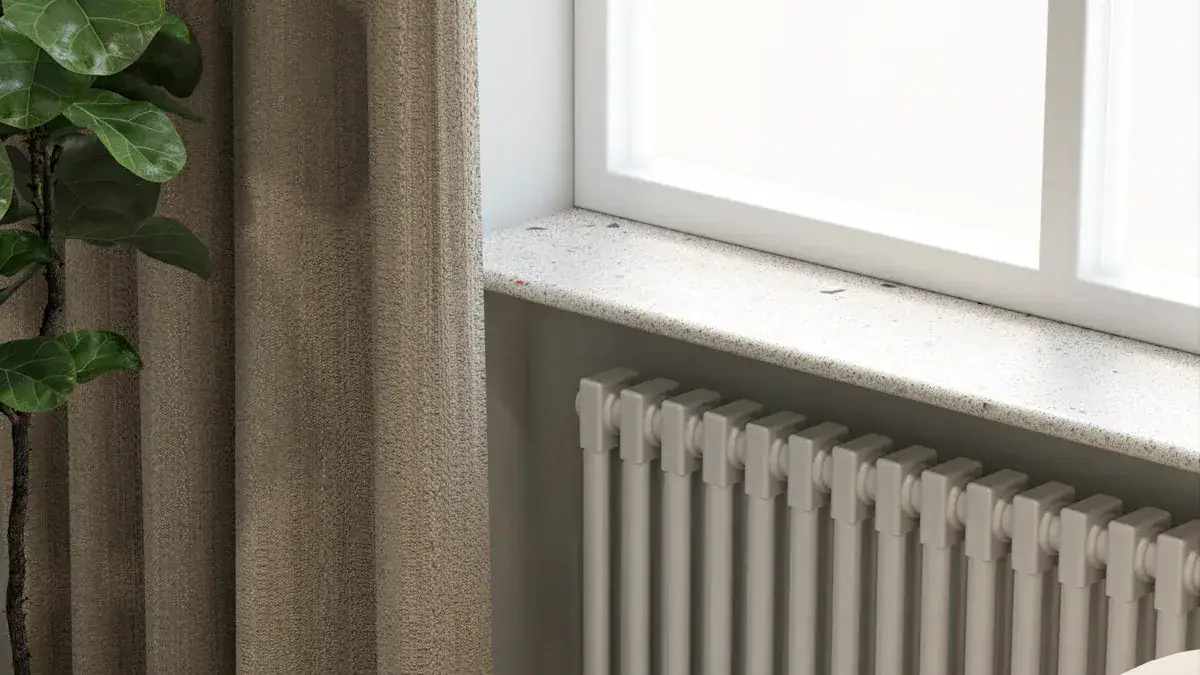
Accurate measurements are crucial; always leave at least one inch of clearance around the radiator for proper heat circulation.
Choose heat-resistant materials for your cover to maintain safety and efficiency in heating.
Customize your radiator cover to reflect your personal style and consider multifunctional designs for added utility.
Materials for DIY Radiator Covers

When you decide to create your own DIY radiator covers, gathering the right materials and tools is essential. Here’s a breakdown of what you’ll need to get started.
Tools Needed
To build your radiator cover, you’ll need a few essential tools. Here’s a handy list to guide you:
Drill/driver
Combination countersink drill bit
Spade bit (1/2 inch)
Circular saw
Clamps
Jigsaw
Staple gun
Scribe tool
Tip: A block plane is also a great tool to have. It helps you create a slight “back bevel” on the edges of the wood that touch the wall. This adjustment allows for a tighter fit and makes it easier to scribe the cover to the wall.
Recommended Materials
Choosing the right materials for your radiator cover can make a big difference in both aesthetics and functionality. Here’s a table that outlines some commonly used materials along with their characteristics:
Material | Characteristics |
|---|---|
Metal or steel | Blocks the least amount of heat, allows air circulation, cheaper but can dent. |
Wood | Blends well with natural wood trim, transfers less heat, more expensive. |
Engineered wood | Sturdy like hardwoods, cheaper, good for painted covers. |
Combo | Structure made of wood or MDF with metal grilles. |
When selecting materials, consider the following:
Material Matters: Ensure you choose heat-resistant materials. Always ask suppliers about specifications.
Precision is Key: An ill-fitting cover might be unstable or leave sections of the radiator exposed. Precise measurements before purchase are crucial.
Ventilation Vigilance: Opt for a design that supports effective heat dispersal. Poor ventilation can lead to degradation and even fire hazards.
You might also want to consider using reclaimed wood. It not only adds character but also significantly reduces your carbon footprint compared to virgin lumber. Plus, it promotes recycling and helps curb deforestation.
In terms of cost, building your own DIY radiator covers can be more economical than purchasing pre-made options. For instance, off-the-shelf covers typically cost around £95 for one or two, while bespoke covers can range from £200 to £300. By creating your own, you can customize the design and dimensions to fit your space perfectly.
Now that you know what materials and tools you need, you’re one step closer to creating your own beautiful radiator cover!
How to Build Radiator Covers
Building your own radiator cover can be a rewarding project. Let’s break down the steps you need to follow to create a beautiful and functional cover for your radiator.
Measuring Your Radiator
First, you need to measure your radiator accurately. This step is crucial for ensuring a perfect fit. Here’s how to do it:
Measure the height from the floor to the top of the radiator.
Measure the total lengths of the front and sides.
Take measurements from the farthest points, usually around valves or pipes.
Tip: Remember to leave at least one inch of clearance around the radiator for proper heat circulation.
Common mistakes when measuring include forgetting to count the sections properly and neglecting to check thread compatibility with modern valves. Make sure you double-check your measurements to avoid any issues later on.
Cutting the Pieces
Once you have your measurements, it’s time to cut the pieces. You can use a circular saw or a table saw for this task. Circular saws are great for making straight cuts in wood, while table saws offer stability and precision for larger projects.
Here’s a quick guide to ensure accuracy in your cuts:
Use a miter saw for precise cuts, ensuring straight, square ends for better fitting.
If you don’t have a miter saw, consider using a miter box and back saw for improved accuracy.
Note: Always wear safety gear when using power tools!
Assembling the Cover
Now that you have all your pieces cut, it’s time to assemble your radiator cover. Here are some effective assembly techniques:
Use a doweling jig for precise holes.
Pocket screws work well for tight fits and hidden fastening.
Consider rabbet joints for securing the back panel.
For a sturdy assembly, attach a two-inch cleat to the wall between the radiator and the wall. Secure the top of the cover to the wall cleat using 1-1/4-inch finish screws.
Tip: Timber wedges can also be used for a clean look. One wedge screws to the wall, and the other to the cover, allowing the cover to drop over the wall wedge.
Finishing Touches
After assembling your cover, it’s time for the finishing touches. Sand down any rough edges to ensure a smooth surface. You can paint or stain the cover to match your decor.
Finally, when installing the finished radiator covers, make sure everything is secure and fits snugly against the wall.
Reminder: If you’re using a cover for a radiator that runs very hot, ensure it’s designed to maintain heating efficiency.
By following these steps, you’ll learn how to build radiator covers that not only look great but also serve a practical purpose in your home.
Design Ideas for Wooden Radiator Covers
When it comes to designing your wooden radiator covers, you have plenty of options to explore. Let’s dive into some style inspirations that can elevate your home decor.
Style Inspirations
Here are a few popular design styles for wooden radiator covers:
Design Style | Description |
|---|---|
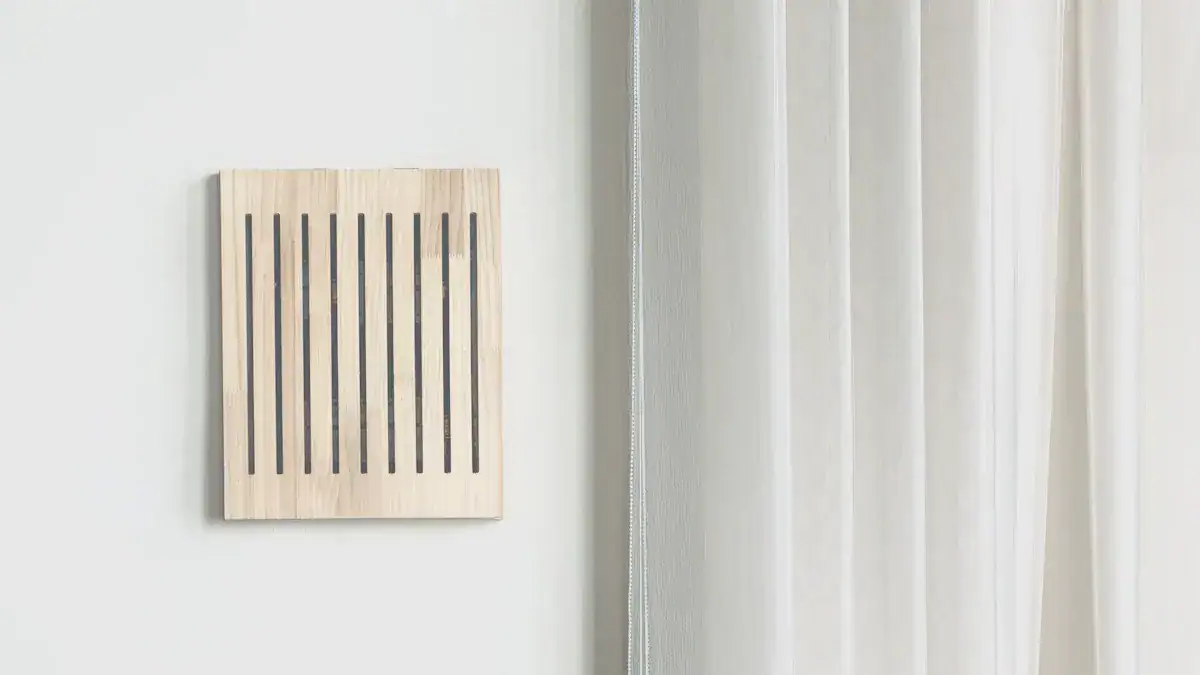
Slatted Wood Cover | Adds elegance and blends seamlessly with natural wood elements in your room. |
Cozy Seating | Features vertical hardwood slats and serves as a bench, providing a charming distraction. |
Raw Style | Utilizes pallet wood for a rustic look while maximizing heat transmission. |
Decorative Covers | Elegant wooden covers that integrate heaters into traditional and country-style interiors. |
These styles not only enhance the visual appeal of your space but also serve practical purposes. For instance, a cozy seating design can double as a bench, making it perfect for small areas.
Customization Tips
Customizing your radiator cover allows you to reflect your personal style. Here are some popular customization options:
Seamless Integration: Tailor your cover to fit specific radiator dimensions for a harmonious look.
Personalized Design: Choose design elements that resonate with your taste, whether traditional or contemporary.
Enhanced Safety: Covers conceal hot radiators, preventing burns and injuries, especially in homes with children or pets.
Optimized Functionality: Design your cover for efficient heat distribution and airflow, enhancing room heating.
Easy Maintenance: Select durable materials that are easy to clean.
You can also think about multifunctional uses for your covers. For example, consider converting the radiator into a bookshelf by hollowing out the bottom half. This way, you can store books vertically while keeping the radiator accessible. Another idea is to use pillows on top of a radiator cover to create a warm seating area during colder months.
By exploring these design ideas and customization tips, you can create beautiful wooden radiator covers that not only look great but also serve multiple purposes in your home.
Creating your own diy radiator covers offers many benefits. You can enhance your home’s decor while ensuring safety by keeping hot surfaces covered. Plus, the satisfaction you feel after completing a diy project is unmatched.
Remember, maintaining your wooden radiator cover is simple. Regular cleaning keeps dust away, and checking for loose screws ensures stability. You might also want to treat it occasionally, like with annual waxing, to keep it looking great.
So, why not take the plunge? Personalize your space with a beautiful radiator cover that reflects your style!
FAQ
What materials do I need for a DIY radiator cover?
You’ll need wood or engineered wood, screws, and a finish of your choice. Tools like a drill, saw, and clamps are essential for assembly. Always choose heat-resistant materials to ensure safety.
How do I measure my radiator for a cover?
Measure the height, width, and depth of your radiator. Don’t forget to leave at least one inch of clearance for proper heat circulation. Accurate measurements ensure a snug fit.
Can I customize my radiator cover design?
Absolutely! You can choose different styles, colors, and finishes to match your decor. Consider adding shelves or using reclaimed wood for a unique touch.
How do I maintain my radiator cover?
Regularly dust your cover to keep it clean. Check for loose screws and tighten them as needed. If you’ve stained or painted it, consider reapplying the finish annually to maintain its appearance.
Will a radiator cover affect heating efficiency?
If designed properly, a radiator cover won’t hinder heating efficiency. Ensure your cover has adequate ventilation to allow heat to circulate effectively.
