
Different types of sand play a critical role in paver installation. They ensure stability and longevity for your paved surface. We will discuss base sand, jointing sand, and polymeric sand. These are common types of sand for pavers. Choosing the correct sand is as vital as selecting the pavers themselves for a successful paving project. This guide will clarify the differences, uses, and benefits of each type for your paving project. You can make informed decisions for your paving.
Key Takeaways
Base sand creates a strong and level foundation for your pavers. It supports the weight and helps water drain away.
Jointing sand fills the gaps between pavers. It locks them together to make a stable and unified surface.
Polymeric sand hardens when wet. It creates a strong bond between pavers, stops weeds, and keeps insects out.
Choosing the right sand is important for your paving project. Consider your project type, local weather, and budget.
Properly installing each type of sand makes your paved surface last longer. This includes good site prep and compaction.
Base Sand: The Foundation:
What is Base Sand:
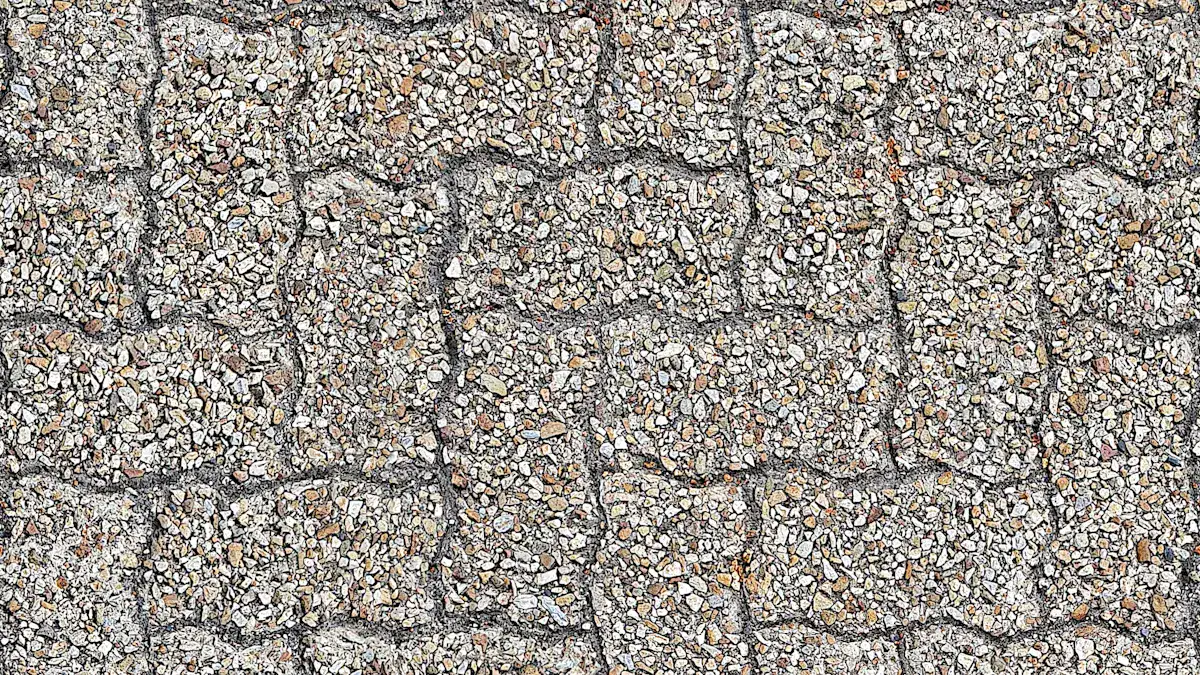
Base sand forms the crucial foundational layer for your pavers. You lay it directly on the prepared subgrade. This layer provides stability and proper drainage for your paving project. It is often called concrete sand due to its coarse nature. This type of sand is fundamentally made of unconsolidated granular materials. These include rock fragments, mineral particles, or oceanic materials. Silicate minerals and silicate rock granular particles are predominant. Quartz, also known as silicon dioxide, is typically the most dominant mineral. This is because it resists weathering well. Feldspar, a very common group of minerals on Earth’s surface, is also a significant component.
Base Sand Characteristics:
Base sand, like concrete sand, has specific characteristics. It is typically coarse and angular. This allows for excellent compaction. It also promotes good drainage. You will find it free from organic matter and excessive fines. This ensures a stable and durable base for your paving.
Base Sand Essentials:
You must use base sand to create a level and stable surface. This layer supports the weight of your pavers and prevents settling. It distributes the load evenly across the subgrade. This is essential for the long-term integrity of your paved surface. Concrete sand is a common choice for this critical role.
Base Sand Benefits:
Using the correct base sand offers many benefits. It provides a firm foundation. This prevents your pavers from shifting or sinking. It also allows water to drain efficiently. This reduces the risk of water damage and erosion. A well-prepared base with concrete sand extends the life of your paving.
Base Sand Drawbacks:
While essential, base sand, including concrete sand, has some drawbacks. Its extraction and processing can impact the environment.
Habitat Destruction and Biodiversity Loss: Extraction disrupts habitats in riverbeds, coasts, and forests. This leads to the loss of plants and animals.
Water Quality Degradation: Sediments and pollutants enter water systems. This increases turbidity and reduces oxygen. It can also introduce harmful chemicals.
Alteration of River and Coastal Dynamics: Removing sand and gravel changes natural flow patterns. It causes erosion and can increase flood areas.
Landscape and Aesthetic Degradation: Extraction significantly alters landscapes. It leaves disfigured pits and quarries. This affects natural beauty and tourism.
Air and Noise Pollution: Extraction and transportation generate dust. This contributes to air pollution and health problems. Heavy machinery causes noise pollution, disturbing wildlife and humans.
Impact on Groundwater Resources: Overburden removal and water table depression affect aquifer recharge. This leads to declining groundwater levels and potential contamination.
Climate Change Contribution: Heavy equipment and trucks emit greenhouse gases. Land-use changes from extraction reduce carbon sequestration.
Jointing Sand: Filling Gaps:
What is Jointing Sand:
Jointing sand fills the spaces between your pavers. This sand is crucial for the stability of your paving. It helps lock the individual units together. This creates a unified paved surface. Jointing sand, like INCRETE PRO-PAVER POLYSAND, often contains re-dispersible dry polymers and finely graded natural sand. These components help it perform its job effectively.
Jointing Sand Types:
You will find different types of joint sand. Some common types include silica sand and fine dry sweeping sand. These are often used for filling paver joints. Dry joint sand stabilizers can also be added. These stabilizers are organic, inorganic, or polymer compounds. They enhance the sand’s performance.
Jointing Sand Application:
Applying joint sand correctly is vital for your paving. After you compact your pavers, sweep and vibrate dry joint sand into the paver joints. You must fill them completely. If the sand is damp, let it dry first. Vibrate and fill paving joints up to 6 feet from any unconfined edge each day. After final compaction, you must inspect the paver joints. You can use a thin, rigid putty knife. Insert it into the joint and press down. It should not go deeper than 1/4 inch. If it does, you need more compaction. Factors like sand moisture, gradation, and weather affect this process.
Jointing Sand Benefits:
Joint sand offers many benefits for your paving. It creates a vertical interlock between pavers. This helps transfer loads. When you compact the sand, it forces into the paving joints. This turns individual pavers into a strong, interlocking system. This system distributes weight horizontally. It prevents cracking and degradation of your paved surface. This ensures a durable and stable installation.
Jointing Sand Considerations:
When using joint sand, consider several factors. The sand’s moisture content and angularity are important. Weather conditions also play a role. The size and condition of your vibrating plate matter. The thickness and configuration of your pavers also affect the outcome. Your skill as the vibrating plate operator is also key. Always ensure proper consolidation when filling paver joints. This guarantees the longevity of your paving.
Polymeric Sand: Advanced Stabilization:
What is Polymeric Sand:
Polymeric sand is a special blend of fine sand and unique additives. These additives are polymers. You use this sand to fill the spaces between your pavers. It creates a strong, flexible bond. This makes your paving more stable and durable. This type of sand is a reliable choice for many projects.
How Polymeric Sand Works:
Polymeric sand works by hardening when you add water. The polymers in the sand react with water. This binds the sand particles together. This process locks your pavers in place. It prevents them from shifting.
Once the sand has been misted with water, the polymers begin a chemical reaction that binds the particles together. Polymeric sand is a blend of fine sand and additives, typically silica, which act as bonding agents once activated by water. This formulation is engineered to harden in place, forming a firm yet flexible bond between paver joints. The curing process further enhances these properties by solidifying the sand into a semi-rigid structure. This hardening also stops weeds and moss from growing in your paver joints.
Polymeric Sand Advantages:
Using polymeric sand offers many benefits for your paving. It locks pavers tightly, preventing movement. This creates a very stable paved surface. It also stops weeds and insects from getting into the paver joints. This reduces maintenance for you. Polymeric sand is suitable for various materials, including porcelain, natural stone, wetcast, and concrete pavers. You can use it for residential and commercial pedestrian applications.
Polymeric Sand Limitations:
Polymeric sand has some limitations you should know. Its curing process depends on temperature and humidity.
Temperature (°C) | Compressive Strength (MPa) | Flexural Strength (MPa) |
|---|---|---|
60 | 24 | 15 |
40 | 22 | 14 |
25 | 20 | 13 |
0 | 15 | 11 |
-10 | 13 | 10 |
Lower temperatures can weaken the bond. The connection between the curing film and sand particles can relax. This leads to less strength. High temperatures can also affect the curing. They can cause the film to detach. You need to apply polymeric sand in the right weather conditions. |
Polymeric Sand Application:
Applying polymeric sand correctly ensures the best results.
Ensure surfaces are completely dry before installation. This prevents premature activation of the sand.
Sweep the sand into the joints. Compact the surface. Remove any excess sand and residue.
Activate the sand with a light mist of water. Ensure the surface is clean beforehand for a haze-free finish.
Install in moderate weather. Temperatures should remain above 32°F (0°C) for 48 hours after installation. This allows for proper curing. You spray water over the polymeric sand to activate its binding agents. This creates a strong bond. After filling, compact the sand using a plate compactor. This ensures proper settlement into the joints. Once compacted, lightly mist the area with water to solidify the sand.
Selecting the Right Sand for Your Paving Project:
You must choose the correct types of sand for your paving project. This decision impacts the look, durability, and cost of your finished surface. Selecting the right sand ensures a successful paving project. Consider several factors when you make this important choice.
Project Type Factors:
The type of project you undertake heavily influences your sand selection. A pedestrian walkway has different needs than a heavy-duty driveway. You need to match the sand to the expected use of your paving.
For heavy-duty driveways, you need a strong foundation. A graded mix of gravel sizes provides optimal stability and drainage.
Base layer (4-6 inches): Use 2″-3″ or 1½″ gravel for strong foundational support.
Middle layer (3-4 inches): Use 1″-1½″ or 3/4″ gravel to lock in stability.
Top layer (2-3 inches): Use 3/8″ or 3/4″ gravel for a polished, easy-to-maintain finish. This combination ensures proper compaction, optimal drainage, and minimal surface movement.
For lighter traffic areas, like residential driveways or walkways, 3/8″ driveway gravel works well as a top dressing. It creates a smooth, refined surface. You can walk and drive on it easily. This gravel is best for residential driveways with light traffic. It also suits decorative or secondary driveways. You can use it for walkways and parking areas near landscaping. It offers a sleek, finished appearance. It provides good traction for vehicles and pedestrians. It resists displacement when you compact it properly. It works beautifully as a final layer over larger base materials like 3/4″ or 1″-1½″ gravel.
For pedestrian walkways and garden trails, landscaping sand is a better choice than regular play sand. Landscaping sand contains a blend of crushed stones, pebbles, and other durable aggregates. These materials withstand foot traffic. When you compact it properly, it forms a solid yet slightly yielding surface. This surface is comfortable and supportive. Its coarser grains also provide excellent drainage. This prevents mushiness after rain. It resists erosion better than fine play sand.
Permeable paver systems also require different materials. They do not use sand in their joints.
Permeable paver joints are filled with crushed, angular chip stone, not sand.
The size of the crushed, angular chip stone can vary from approximately 1/16 to 3/8 inch. This depends on the joint width.
Common sieve gradations for permeable chips include:
ASTM #9 for joint widths of 1/4 inch or less.
ASTM #8 for joint widths of 1/2 inch or less. The chip joint material in permeable systems serves multiple purposes. It binds pavers through friction. It allows rapid rainwater flow. It filters water to capture metals, suspended solids, sediment, and other debris.
Traditional non-permeable pavers use stiff joints filled with sand. Polymeric sand is an example. Permeable pavers feature much wider joints. You fill these with 1-1½ inches of ¼ inch #10 aggregate. This wider joint and specific aggregate allow water to drain easily through the cracks. Water then goes into the underlying soil. This provides a stable yet highly permeable surface.
Feature | Permeable Paver Systems | Traditional Paver Installations |
|---|---|---|
Joint Material | Crushed, angular chip stone | Polymeric sand (mixture of fine sands with additives) |
Joint Width | Wider (e.g., 1/4 to 1/2 inch) | Narrower |
Material Purpose | Binds pavers, allows rapid water flow, filters water | Creates ‘lock-up’ (friction between pavers) |
Specifics | ASTM #9 (1/4″ joints), ASTM #8 (1/2″ joints) | Silica mixed with polymers, creates strong, solid medium when hydrated |
Climate Considerations:
Your local climate plays a big role in choosing sand for your paving project. If you live in an area with heavy rain, you need sand that drains well. Polymeric sand works best in dry conditions for application. It needs specific moisture levels to cure properly. Extreme temperatures can affect its bond strength. Always check the product’s climate recommendations. This ensures the best performance for your paving.
Budget Implications:
Cost is always a factor in any paving project. Different types of sand have different price points. Polymeric sand offers many benefits, but it costs more upfront. Using polymeric sand instead of traditional jointing sand adds an extra cost of $0.85 to $1.25 per square foot. You must weigh the initial cost against long-term savings. These savings come from reduced maintenance and increased durability. Consider your budget when selecting the right sand.
Aesthetic and Maintenance:
The appearance of your finished paving is important. The sand you choose affects this. Colored sands can complement your paver colors. This makes the area more visually pleasing. The color of the sand primarily influences the visual appeal. It does not affect the functional maintenance aspects. However, the type of sand, like polymeric sand, impacts long-term maintenance. It prevents weeds and insects.
Polymeric sand significantly reduces maintenance. It inhibits weed growth and deters insects. It also resists erosion. Regular sand does not offer these benefits.
Feature | Polymeric Sand | Regular Sand |
|---|---|---|
Weed Growth | Inhibits weed growth due to binding agents. | Prone to weed growth as seeds can easily germinate in the sand. |
Insect Infestation | Deters ants and other insects from burrowing. | Can be a habitat for ants and other insects. |
Erosion | Resists erosion from rain and wind due to its hardened state. | Easily washes away or erodes with rain and wind. |
Cracking/Shifting | Provides a flexible yet firm joint, reducing paver movement. | Less stable, pavers are more likely to shift or crack over time. |
Maintenance Frequency | Requires less frequent maintenance; occasional sweeping and reapplication if joints crack. | Requires frequent sweeping, refilling, and weed removal. |
Cleaning | Can be cleaned with a pressure washer (with care not to dislodge). | Pressure washing can easily remove the sand, requiring reapplication. |
Cost | Higher initial cost. | Lower initial cost. |
Longevity | Lasts longer, maintaining joint integrity for years. | Shorter lifespan, requiring more frequent replenishment. |
Application | Requires specific moisture conditions for proper curing. | Simple application, just sweep into joints. |
Staining | Some types can stain pavers if not applied correctly. | Generally does not stain pavers. |
Water Permeability | Less permeable once cured, can affect drainage if not properly installed. | Highly permeable, allowing water to drain easily. |
Appearance | Available in various colors, can enhance aesthetic. | Natural sand color, can look dull over time. |
Freeze-Thaw Resistance | Good resistance to freeze-thaw cycles, preventing cracking. | Can be susceptible to freeze-thaw damage, leading to joint failure. |
Efflorescence | Can sometimes contribute to efflorescence if not properly installed. | Less likely to cause efflorescence. |
Environmental Impact | Contains polymers, which may have a higher environmental impact than natural sand. | Natural product, generally lower environmental impact. |
Durability Goals:
Your durability goals are paramount for your paving project. The foundation is crucial for paver longevity. Even expensive pavers will fail on a poorly prepared base. Proper installation is key for a driveway that lasts for generations.
You must ensure the base is deep enough. It should be 6 to 12 inches, depending on use. You must compact it thoroughly. Use polymeric sand in the joints to block weed growth and resist erosion. With high-quality materials and proper installation, concrete pavers can last decades longer than poured concrete slabs. Polymeric sand, when set, creates a durable bond. This bond can last between 10 to 15 years. It reduces the need for frequent replacements.
Paver Type | Expected Lifespan |
|---|---|
Concrete Pavers | 25 – 50 years |
Brick Pavers | 25 – 30 years |
Natural Stone | 100+ years |
Permeable Pavers | 25 – 50 years |
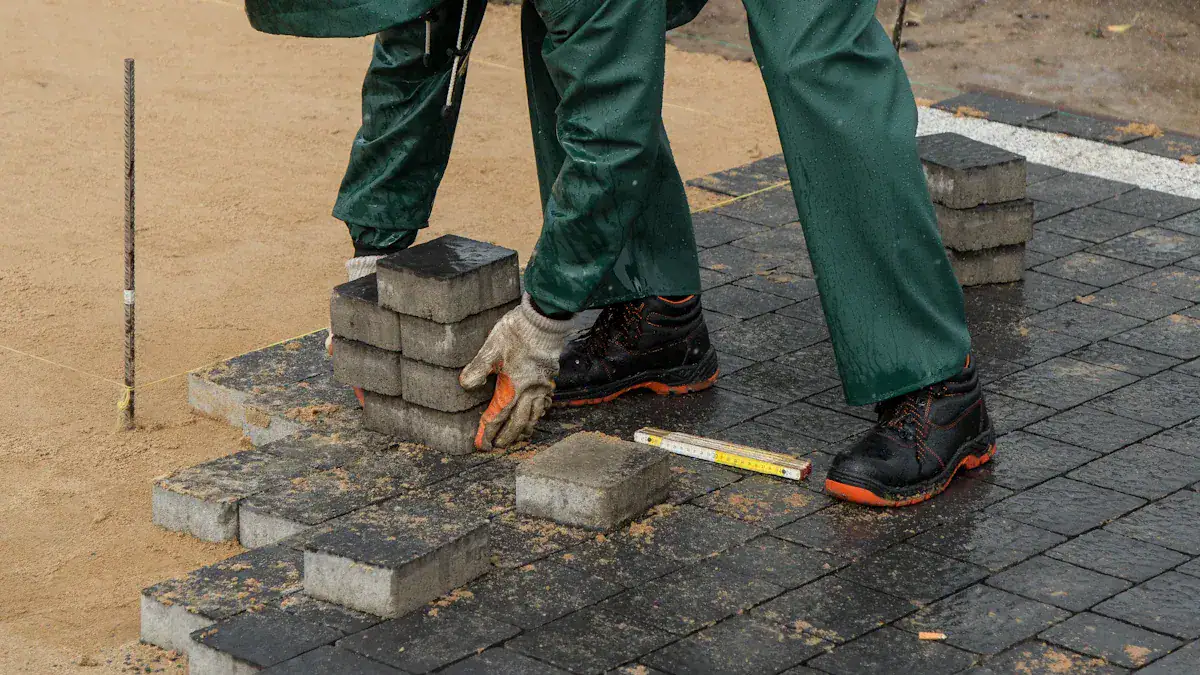
Paver Installation: Best Practices:
Properly installing your pavers ensures a long-lasting and beautiful surface. Following best practices for each step is crucial. This includes preparing the site, laying the base, compacting, and applying sand.
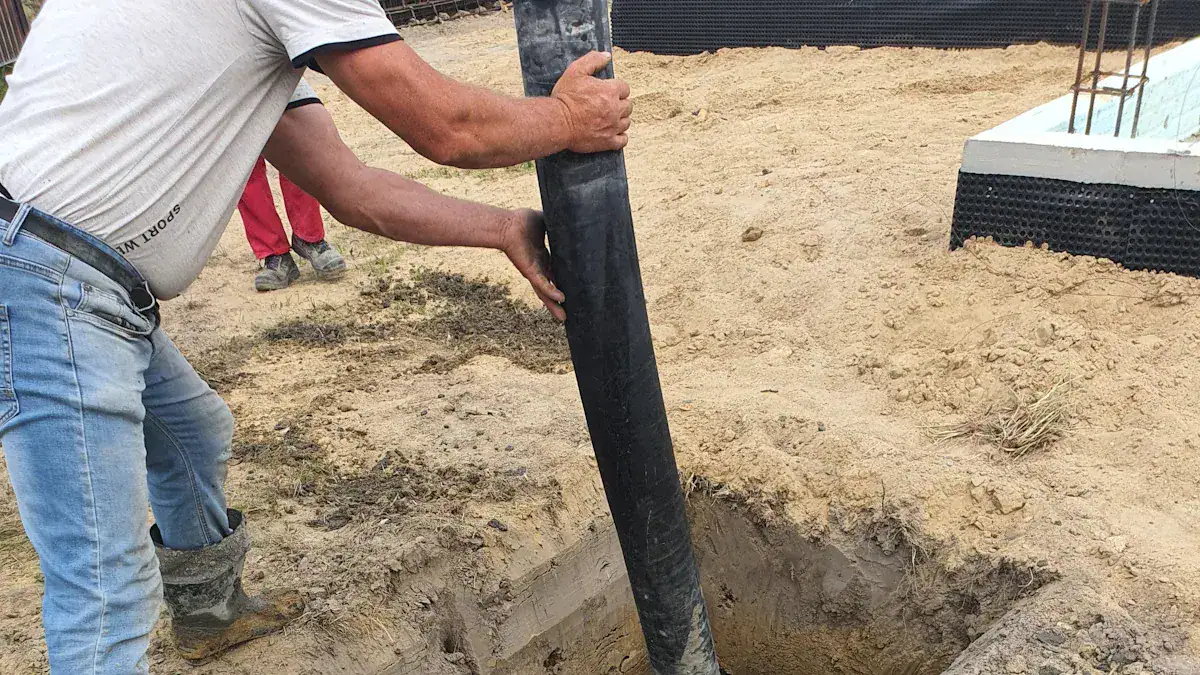
Site Preparation:
You begin by clearing the area. Remove all vegetation, debris, and old materials. Grade the subgrade to ensure proper drainage. This initial step sets the stage for successful paving.
Base Sand Layering:
You lay the base sand directly on your prepared subgrade. This forms the foundation for your pavers. The base should slope away from buildings. Aim for about 1/4 inch per foot. This ensures proper water flow. It prevents puddles. On top of the paver base, you need a 1-inch thick layer of coarse sand. This bedding material creates a smooth, level surface for laying pavers. It also allows for minor adjustments.
Compaction Techniques:
Compacting the base sand is vital for stability. You must compact soil in 6- to 12-inch layers. Each layer needs proper density. Avoid over-compaction. Too dense soil can prevent proper drainage. Do not ignore moisture content. The correct amount of water lubricates soil particles. This makes compaction easier. Use plate compactors for granular soils. These are ideal for walkways, patios, and driveways. They use downward force and vibrations. For larger paving projects, use ride-on or tandem rollers. Residential paving often uses drum widths between 700 and 1400 millimeters.
Jointing Sand Application:
Applying joint sand correctly prevents future problems. Do not use subpar jointing sand. This compromises the integrity of your paving. Sweep sand into the gaps. This locks pavers in place. It prevents weed intrusion. After sweeping, compact the joint sand. This ensures optimal density. Avoid over- or under-filling the joints. Overfilling can cause flaking. Underfilling compromises structural integrity. Sweep the sand as low as possible. Remove any excess. Over-watering polymeric sand can cause hazing. Insufficient watering prevents proper binding.
Polymeric Sand Curing:
After applying polymeric sand, you must cure it properly. This activates the polymers. It creates a strong bond. Ensure surfaces are completely dry before installation. This prevents premature activation. Sweep the sand into the joints. Compact the surface. Remove any excess sand. Activate the sand with a light mist of water. Ensure the surface is clean. This prevents a haze-free finish. Install in moderate weather. Temperatures should stay above 32°F (0°C) for 48 hours. This allows for proper curing. This final step secures your pavers.
You now understand the distinct roles of different types of sand. Base, jointing, and polymeric sands each contribute to robust paving. They create a durable paved surface. Selecting the right sand is vital for your paving project. Consider your specific paving project needs, conditions, and desired outcomes. Invest time in understanding each sand type. Follow best application practices for your paving. This ensures a long-lasting and beautiful paving project. Approach your next paving project confidently with this knowledge. This ensures a successful paving project.
FAQ
What is the main purpose of base sand?
Base sand creates a strong foundation for your pavers. You lay it on the subgrade. This layer supports the paver weight. It also helps with drainage. This prevents your pavers from shifting or sinking.
How does jointing sand help pavers?
Jointing sand fills the spaces between your pavers. It locks them together. This creates a stable surface. It helps transfer loads across the pavers. This prevents individual pavers from moving.
What is the biggest advantage of polymeric sand?
Polymeric sand hardens when you add water. This locks your pavers in place. It stops weeds and moss from growing in the joints. It also deters insects. This makes your paved surface more durable and reduces maintenance.
Can you use regular sand instead of polymeric sand?
You can use regular sand, but it offers fewer benefits. Regular sand does not harden. It will not stop weeds or insects. It also washes away easily. Polymeric sand provides better stability and less maintenance.
Why is proper compaction important for paver sand?
Proper compaction makes your paver base stable. It prevents settling and shifting. You must compact each sand layer. This ensures a firm and level surface. A well-compacted base makes your paving last longer.


