
Modern homes increasingly need efficient kitchen storage. Custom diy pantry cabinet plans can transform your cluttered kitchen into a well-organized pantry. Building your own pantry cabinet offers a rewarding, cost-effective solution. You achieve unparalleled customization for your kitchen cabinet, fitting unique spaces and storage requirements. These diy pantry cabinet plans help you build a storage cabinet that perfectly fits. Enjoy the satisfaction of a diy project and the practical benefits of tailored pantry storage.
Key Takeaways
Building your own pantry cabinet saves money. It also lets you design it exactly how you need it.
Plan your pantry carefully. Measure your space and decide what you will store. This helps you create a good layout.
Use the right tools and materials. A track saw and plywood are important. This makes your cabinet strong and accurate.
Follow steps to build your cabinet. Cut pieces carefully. Assemble the box. Add shelves, doors, and drawers.
Finish your pantry well. Sand the wood. Paint or stain it. This makes your new pantry look professional and last longer.
Why DIY Pantry Storage
Building your own kitchen pantry offers many advantages. You gain control over the design and save money. This approach ensures your new cabinet perfectly fits your home and needs.
Cost Savings and Value
You save a lot of money when you build your own cabinet. Many homeowners choose DIY projects because they believe it will be cheaper. They also trust their own skills to finish the work. This belief is true for a diy pantry. You avoid labor costs by doing the work yourself. Material costs for a pantry cabinet vary. Options range from wood veneer and laminate to solid wood, acrylic, and stainless steel. Solid wood generally costs more than plywood. Remember to budget for hinges, screws, cabinet door pulls, and protective coatings. These small items add to the overall cost.
Customization for Your Space
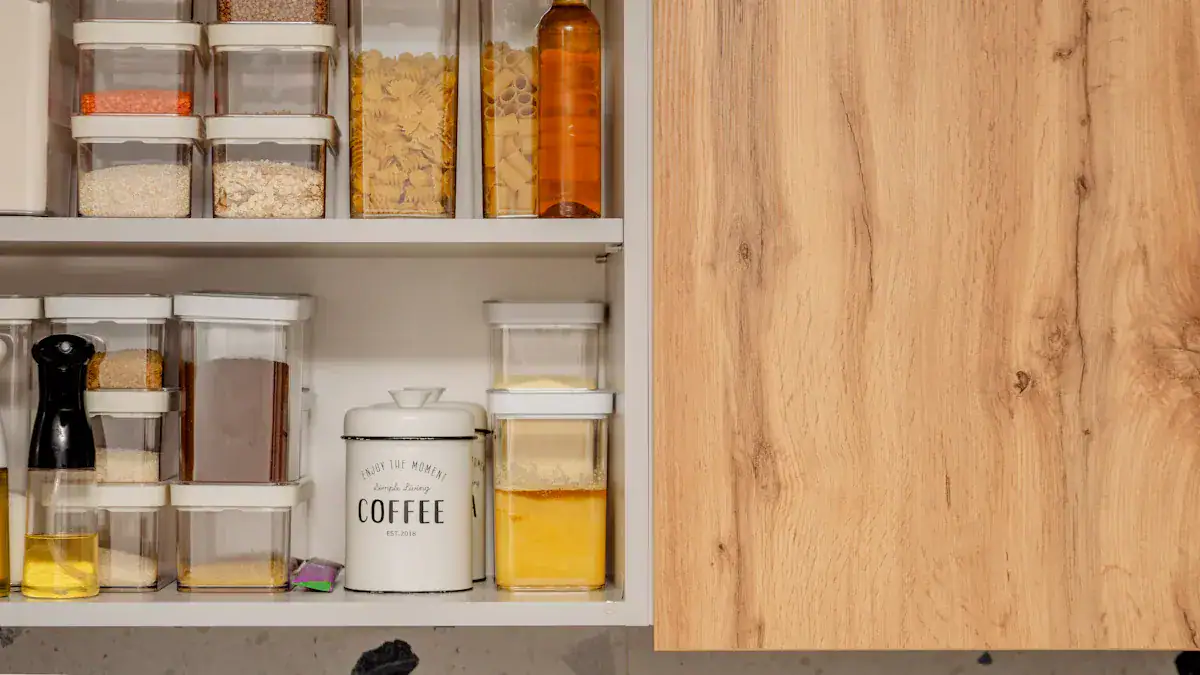
Pre-built storage units often do not fit your kitchen layout well. This can limit your storage options. You might find wasted vertical space or awkward corners. Shelves can become crammed with hard-to-reach items. Building your own pantry cabinet solves these problems. You can design specific elements for maximum storage efficiency. Consider pull-out shelves for easy access to deep spaces. Lazy Susans work well for corner areas. Vertical dividers organize items like baking sheets. You can also use airtight containers, labels, and shelf risers. Pantry door organizers provide extra storage for smaller items. These custom features make your kitchen pantry truly functional.
Personal Achievement
Completing a DIY project brings a strong sense of accomplishment. You feel great seeing your vision come to life. This hands-on effort increases your emotional reward. Renovations allow you to update your home to a preferred design style. This is a primary motivation for many homeowners. You create a living space that reflects your unique style. This gives you more control over your environment. Finishing a small DIY home improvement project boosts your confidence. You feel pride in your home and your skills.
Pantry Planning and Design
You need careful planning before you start building. This initial phase guides you through creating a functional and beautiful pantry. Your diy pantry cabinet plans begin here.
Assess Your Space and Needs
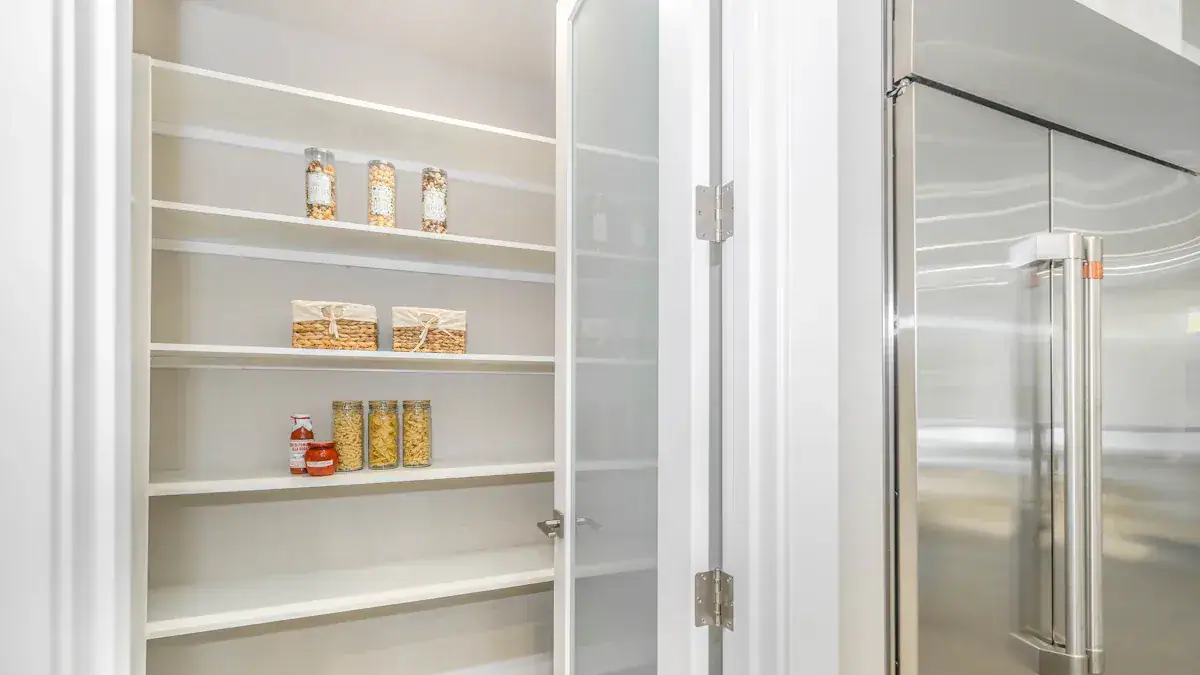
First, evaluate your available space. Measure the width and height of your walls. Consider existing kitchen cabinets and appliances. You might need to relocate or resize them. Look for underutilized areas, corners, or alcoves. These spots offer great potential for pantry integration. Determine the type of pantry you want. Options include a walk-in, reach-in, or pull-out pantry. Ensure your choice does not impede movement or disrupt kitchen flow. Think about what you store. Non-perishable foods, small appliances, and baking supplies are common items. Your kitchen pantry needs to hold at least a week’s worth of groceries.
Design Your Custom Layout
Now, design your custom pantry layout. Sketch basic configurations. Consider different storage elements. Shelves can be fixed or adjustable. Drawers and pull-outs offer easy access. Organize items by category. This creates smaller, manageable sections. Keep distinct categories separate. For example, store soups away from cereals. You can even alphabetize items on shelves for easy location. Basket drawers work well for bagged items like pasta. Stackable bins are good for bulk items such as potatoes. Use shelves and racks to maximize space. Corner shelving creates productive areas. Racks on side walls or inside cabinet doors provide extra storage. Standard pantry depth is 24 inches. Shelf depth should be 12 to 18 inches. This accommodates most items efficiently. For walk-in pantries, ensure at least 36 inches of aisle clearance. This allows comfortable movement. Look for pantry inspiration to spark your ideas.
Choose Styles and Hardware
Finally, select your door styles and hardware. These choices match your kitchen aesthetics. Flat-panel (slab) cabinets offer a minimalistic style. Shaker cabinet doors are a timeless choice. Glass-front cabinets make your kitchen feel brighter. Natural wood cabinets add warmth. You can mix and match styles. For example, pair white cabinets with black hardware for a bold contrast. Metal mesh cabinets add decorative interest. Consider your overall kitchen design. Your pantry cabinet should complement it. Explore various pantry inspiration sources for ideas.
Tools and Materials for Building
You need the right tools and materials for a successful DIY project. Gathering everything beforehand saves you time and frustration. This section lists what you will need to build your custom storage cabinet.
Essential Tools for Building
You will use several tools to construct your pantry cabinet. A measuring tape is crucial for accurate dimensions. For cutting wood, a saw is essential. Consider a track saw for precise straight-line cuts. It works well for large sheets like plywood and MDF. A TSO Parallel Guide System helps you make consistent, repeatable rip cuts. A GRS-16 Guide Rail Square ensures your cuts are perfectly perpendicular. Always wear safety goggles and hearing protection when using power tools. Use a drill for making pilot holes and driving screws. A Kreg pocket hole jig simplifies joining wood pieces. You secure the Kreg Jig Jr. with a clamp. Then, you drill evenly spaced pocket holes. You connect each joint with pocket hole screws. Clamps hold pieces together while glue dries or screws are driven. A level ensures your cabinet is plumb and square. Remember to maintain a clean workspace and unplug tools when changing accessories.
Key Materials Required
Selecting the right materials ensures your cabinet is sturdy and lasts long. You will need plywood or MDF for the main structure. Three-quarter inch birch plywood works well for cabinet sides and shelves. You will also need screws to assemble the pieces. Wood glue provides strong bonds for your joints. Titebond is a popular choice for wood-to-wood joints. Titebond III Ultimate Wood Glue offers superior bond strength. It is also waterproof. Sandpaper smooths rough edges. Paint or stain finishes your cabinet. Hinges attach your cabinet doors. Drawer slides allow drawers to open and close smoothly.
How to Build a Kitchen Pantry Cupboard: Step-by-Step
Building your own kitchen pantry cupboard is a rewarding project. Follow these step-by-step instructions to create a functional and beautiful storage solution.
Prepare and Cut Components
Accuracy is key when you prepare your wood pieces. Precise cuts ensure your cabinet fits together perfectly. You need to cut all the main components: the sides, top, bottom, shelves, and back panel.
To achieve precise and square cuts, especially for large panels, you can use the Five-Cut Method. This technique helps you check the squareness of your sheet goods.
Prepare Your Workpiece: Start with a medium-sized panel, about 25 inches on all sides. Secure it to your worktop.
Set Up the GRS-16: Attach the GRS-16 Guide Rail Square to your track saw’s guide rail.
Make the First Cut: Mark the front-right corner ‘1’. Position the guide rail to trim about 1/2 inch from the right side. Keep the workpiece against the GRS-16.
Rotate the Workpiece: Turn the panel 90 degrees clockwise. The freshly cut edge now rests against the GRS-16. Mark the new front-right corner ‘2’.
Repeat the Process: Make the second cut, removing about 1/2 inch. Keep the workpiece against the GRS-16. Repeat this rotation and cutting two more times, marking ‘3’ and ‘4’.
Make the Final Cut: Rotate clockwise one more time. You return to the original position (‘1’ in the bottom-right). Aim to remove about 1 inch from the right side. Support the offcut.
Inspect the Offcut: Measure the width of the offcut at each end using vernier calipers.
Do the Math: Calculate the difference in width between the offcut ends. Add the lengths of all four sides of the panel plus the offcut length. Divide the offcut difference by the total cut length. This gives you the squareness error per foot of cut.
For these precise cuts, you need specific tools:
Track (Plunge) Saw: This guided system uses aluminum tracks for straight cuts.
GRS-16 Guide Rail Square: This tool attaches to your track saw’s guide rail. It ensures square cuts to the workpiece. A precision woodworking triangle also works.
Track Clamp: This secures the guide rail to the workpiece. It maintains a fixed position during the cut.
Supportive Working Surface: Use a work surface that fully supports your workpiece. This prevents bowing or deflection.
Vernier Calipers: You use these to accurately measure the squareness error.
Assemble the Cabinet Box
Now, you assemble the main cabinet box. This forms the carcass of your diy kitchen pantry cupboard. You can use pocket holes or dowels for strong joints. For maximum durability, consider advanced joinery techniques. Mortise and tenon joints offer strength and versatility. Box joints (finger joints) create a structurally sound connection. They have interlocking fingers and a large gluing surface. This makes them resistant to pulling forces.
When you assemble the cabinet, avoid common mistakes. Inaccurate measurements lead to ill-fitting cabinets. Ensure your cabinet is level and plumb. Crooked doors and sticking drawers result from an unlevel cabinet. You must properly clamp and screw cabinets together. This forms a solid unit.
Install Shelves and Back Panel
Next, you install the shelves. You can choose between fixed or adjustable options. Adjustable shelves give you flexibility. You can change their height easily by moving shelf pins.
To install adjustable shelves, follow these instructions:
Use a shelf pin jig for consistent spacing and squareness. You can use scrap blocks to help keep the jig properly spaced and square.
Start each set of holes at the same height across the cabinet. For example, if you start 6 inches from the bottom on one side, do the same on the other.
Hold or clamp the jig tightly to the cabinet side while drilling. This prevents tear-out.
Use an indicator pin to move the jig up. Place the indicator pin through the bottom hole of the jig into the last hole drilled. This maintains consistent spacing.
If you do not want holes all the way to the bottom, use a piece of scrap wood under the jig. This raises its starting point.
Lightly sand the drilled area to smooth out any rough spots.
Adjust the stop collar on your drill bit to set the correct depth. Ensure it is slightly more than the length of the shelf pin peg. Test the depth with a couple of holes and a shelf pin.
Offset holes when drilling on both sides of a divider panel. This prevents interference. You can drill one side 1 inch further back or start one side 1/2 inch higher.
Drill the front set of holes about 1 inch less than the depth of the shelf from the back of the cabinet. For example, for 12-inch shelves, drill 11 inches from the back.
To avoid tear-out, ensure your drill bit is sharp. Clamp the jig tightly. Consider applying painter’s tape where you plan to drill.
After drilling the holes:
Place shelf pins into the desired holes. Use four pins per shelf. Ensure they are in corresponding holes to keep the shelf level.
Cut shelving material (¾″ hardwood plywood is recommended) to the desired depth.
Trim the width of the shelf to about ¼″ less than the inside width of the cabinet. For example, for a 24″ wide cabinet, cut shelves to 23 ¾″. This allows for easy adjustment and removal.
Place the shelves on the pins.
Finally, attach the back panel. This adds rigidity to your pantry and keeps items from falling out the back.
Add Doors and Drawers
Now, you build and attach the doors and drawers. If you include drawers, heavy-duty slides are best for pantry pull-outs. These slides use thicker metal and more ball bearings. They support more weight than standard slides, typically 75-100 lbs. Side-mount ball-bearing slides offer smooth operation and high load capacities. Pantry slides are special-application slides. They often include three slide sets for smooth riding and full access.
For doors, you will likely use concealed hinges. Here are the installation instructions:
Attach the mounting plate to the hinge: Slide the mounting plate into the hinge. Rotate it down towards the rocker-latch until it snaps into place.
Mount the hinge to your cabinet door: Insert the hinge base into the 35mm hinge cup. Rotate the hinge until indentations drop into the smaller alignment holes. Push the locking flange down to secure it.
Hang Cabinet Doors with Overlay Hinges:
Measure out your overlay: Attach a straightedge or draw a line below the cabinet opening. This marks the overlay. Sit the cabinet door on the straightedge for proper alignment.
Align the door and hinges: Position the door so hinge mounting brackets are against the cabinet face-frame. Mark the cabinet’s face-frame through the elongated slots in the mounting brackets. Drill pilot holes in the center of these marks. Loosely attach mounting plates to the face-frames.
Attach the doors to the mounting plates: Snap the doors (with hinges installed) onto the mounting plates.
After installation, you need to align the doors:
Install cabinet door bumpers: Apply two rubber bumpers per door on the side opposite the hinges. Place one at the top and one at the bottom.
Complete the three-axis door alignment process:
Vertical alignment: Loosen the mounting plate screws. This allows 5/32 inch (4mm) vertical movement. Adjust by alternating between top and bottom hinges until the door is equally distanced from the face-frame.
In-and-out alignment: Use the screw farthest from the cabinet door on the hinge body. This adjusts the distance between the door and face-frame (3/16 inches or 5mm range). This compensates for bumper thickness.
Left-right adjustment: Use the screw closest to the cabinet door. This adjusts left-right (3/32 inches or 2mm range). This allows independent movement of the top and bottom of the door. It also helps set the gap between double doors. Make small adjustments until the door is perfectly plumb.
Apply Finishing Touches
The final step for your pantry is applying finishing touches. This includes sanding, painting or staining, and hardware installation. Proper surface preparation is crucial for a professional look.
Here are the recommended steps for preparing wood surfaces:
Repair Imperfections: Fill any voids, nail holes, or other imperfections with crack filler. Ensure the filler is sanded down so it only remains within the void.
Remove Excess Glue: If glue is still wet, flush it away with clean water. If dry, carefully cut it away with a sharp chisel or knife. Then sand any remaining spots completely. Glue prevents stain absorption.
Initial Sanding: Begin sanding with medium-grit sandpaper (e.g., #120-150) in the direction of the wood grain. Avoid starting with very fine sandpaper on unfinished wood.
Progressive Sanding: Gradually move to finer grits. For most raw woods, progress to #220 grit for water-based stains and #180 grit for oil-based stains.
Address End-Grains: Give end-grain areas an additional sanding. This helps control stain absorption.
Avoid Over-Sanding: Do not sand excessively. This can seal the wood and prevent it from properly accepting a finish.
Clean Dust: After sanding, remove all dust. Use an air hose, a damp cloth, or an oil-free tack cloth. Do not use tack cloths containing linseed oil with water-based finishes.
Optional Pre-Wetting (for water-based finishes): For woods like oak and ash, pre-wet the surface with a damp cloth. This raises the grain. Allow it to dry for 30 minutes before a final light sanding. This achieves a smoother finish.
Avoid Steel Wool: Do not use steel wool when preparing wood for water-based finishes. Steel particles can cause rust spots.
Here is a guide for sanding grits based on wood type:
Wood Type | First Sanding (Grit) | Second Sanding (Grit) | Final Sanding (Grit) |
|---|---|---|---|
Oak | 120 | 150 | 180 |
Birch | 120 | 150 | 180 |
Maple | 120 | 120 | 180 |
Mahogany | 150 | 180 | 220 |
Walnut | 150 | 180 | 220 |
Fir | 120 | 150 | 180 |
Pine | 120 | 150 | 220 |
Cherry | 120 | 150 | 220 |
White Ash | 102 | 150 | 180 |

After sanding, apply your chosen paint or stain. Follow the product instructions for application and drying times. Once the finish is dry, install your chosen hardware. This includes cabinet door pulls and drawer handles. Your new pantry is now ready for use!
Tips for a Successful Pantry Build
Building your own pantry is a rewarding project. These tips help you avoid common mistakes and ensure a smooth, successful DIY experience.
Accuracy in Measurements
Precise measurements are crucial for your cabinet. Inaccurate measurements lead to gaps or crooked cabinets. Always measure twice before you cut. You should account for obstructions like window trim, crown molding, and baseboards. Use a consistent reference surface, like the top or left edge of a piece. This helps you maintain accuracy. Avoid mixing multiple measuring tools for one measurement. Instead, use one tool consistently.
Ensure Square Cuts
Square cuts make your pantry look professional. They also ensure all parts fit together correctly. You can verify the squareness of your cuts. Use a method like the five-cut test. This involves cutting a panel, rotating it, and cutting again several times. Then, you measure the offcut to check for any error. This helps you confirm your saw is cutting perfectly square.
Prevent Wood Splitting
Wood can split when you drive screws or nails too close to an edge. To prevent this, drill pilot holes before you drive screws. The pilot hole guides the screw and reduces pressure on the wood. Clamping pieces together before fastening also reinforces the wood. This makes it less likely to split. Using screws instead of nails can also help prevent splitting.
Test Fit Components
Always dry-fit your cabinet components before final assembly. This means putting the pieces together without glue or permanent fasteners. Dry-fitting helps you spot any dimensional or alignment problems early. You can identify potential installation issues, like needing filler strips. It also ensures proper clearance for doors and drawers. This step allows you to correct mistakes before they become harder to fix.
Take Your Time Finishing
Do not rush the finishing steps. Proper sanding, painting, or staining takes time. Rushing can lead to a less professional look. Apply finishes in thin, even coats. Allow each coat to dry completely. This patience results in a beautiful, durable finish for your new pantry.
Building a DIY pantry cabinet is an achievable project. You can enhance your kitchen. These diy pantry cabinet plans offer lasting benefits. Enjoy improved organization and functionality. Your custom pantry storage increases home value. You gain personal satisfaction. Take the first step. Careful planning and execution of these diy pantry cabinet plans help you. You create a beautiful, practical storage cabinet. This kitchen pantry is perfectly tailored to your home. This custom cabinet provides excellent storage.
FAQ
What is the best material for a DIY pantry cabinet?
You can use plywood or MDF. Plywood is strong and durable. MDF is smooth and good for painting. Both work well for building a sturdy cabinet. Choose ¾-inch birch plywood for a good balance of strength and appearance.
What is a pocket hole jig used for?
A pocket hole jig helps you join wood pieces. It drills angled holes. You then drive screws through these holes. This creates strong, hidden joints. It is very useful for assembling your cabinet frame.
What is the ideal depth for pantry shelves?
Pantry shelves should be 12 to 18 inches deep. This depth lets you see and reach items easily. Deeper shelves can hide things. Shallower shelves might not hold much. This depth works well for most kitchen items.
How do I ensure my cabinet doors hang straight?
You need to adjust the hinges. Concealed hinges have screws for alignment. One screw adjusts vertical movement. Another screw changes the in-and-out position. A third screw moves the door left or right. This helps you get your cabinet doors perfectly straight.

