Do you dream of a stunning bathroom but dread the high costs? You are not alone! Achieving a beautiful bathroom doesn’t demand a huge budget. You can create amazing diy bathroom makeovers. Stunning transformations come from clever diy projects, even on a tiny budget. You will discover an easy makeover is possible. These budget-friendly ideas are perfect for any skill level. This post provides 15 concrete ideas to inspire your own bathroom glow-up.
DIY Bathroom Makeover Essentials
You can transform your bathroom into a beautiful space. Start your diy bathroom makeovers with smart planning. This sets you up for success.
Prioritize Impact, Maximize Savings
Think about what changes will give you the biggest visual impact. You want to maximize your savings. Paint offers an easy way to save money. It adds style to your bathroom. You can choose a bold accent wall or paint the ceiling for drama. As Leslie Eiler, Design Manager at CRD Design Build, says:
“Paint is an easy way to save money while adding style to your bathroom. Choose the perfect color for a bold accent wall or add some drama with a painted ceiling.”
Consider updating your vanity. Devin Shaffer, Lead Design Expert at Decorilla, notes:
“Surprisingly enough, no matter how unsightly the vanity is, the design dilemma can be solved for under $100 – even for a double vanity.” You can replace hardware, paint the vanity, or change the countertop. These are all budget-friendly ideas.
Smart Material Choices & Repurposing
Choose budget-friendly materials for your diy projects. Luxury vinyl tile mimics stone or wood. It is durable and waterproof. Water-resistant laminate works well for half-baths. For walls, consider acrylic or PVC panels. They are cost-effective and easy to clean. Ceramic tiling is another strong, budget-friendly option for both walls and floors.
You can also repurpose existing items. An old dresser can become a unique vanity. Just add a sink and plumbing. This saves money and adds character.
Install floating shelves on empty walls for storage.
Hang baskets for towels or plants.
Repurpose mason jars as organizers for small items.
Essential Tools for a Pro Finish
Good tools make your makeover easier. They help you achieve a professional look. For painting, use painter’s tape for crisp lines. Rollers cover large areas, and brushes handle detailed work. A sanding block smooths surfaces. When updating fixtures, you need caulk and a caulking tool. These seal gaps and prevent water damage. An adjustable wrench helps with faucets and showerheads. Screwdrivers are essential for hardware. Quality tools, like some Japanese tools, can significantly improve the finish of your remodel projects. Don’t forget gloves for protection and a level to ensure everything is straight.
Wall & Surface Transformations
You can completely change your bathroom’s look with updates to its walls and surfaces. These projects offer big impact without a big price tag.
Paint Power: Instant Refresh
Paint is your secret weapon for an instant refresh. You can transform any space with a fresh coat. Choose colors that make your bathroom feel larger and brighter. For windowless bathrooms, pick mid-range hues with a high Light Reflective Value (LRV). These colors bounce light around. They add warmth and depth, giving you a cozy feel without stark white. You can also use dark colors like black or navy. Paint your ceiling or an accent wall with these shades. This creates an illusion of height or depth. It also hides imperfections and makes the space look longer.
Designers often recommend soothing white for its ability to visually expand a room. Consider Benjamin Moore’s Simply White for a crisp look. Farrow & Ball’s White Tie brightens and enlarges a room while adding warmth. Warm gray shades also introduce a sense of ease and openness. Katrina Blair Sullivan, a small-space living expert, loves Dulux’s Designer Grey. You will love the fresh feel paint brings.
Stenciled Walls for Custom Style
Stenciling gives your walls a custom, designer look without the high cost of wallpaper. You can add unique patterns that reflect your personal style.
Ombre Waves complement coastal decor.
Art-Deco Fan Shapes evoke vintage elegance. They pair beautifully with brass fixtures.
Minimalist Line Art suits contemporary spaces. It offers sophistication.
Vintage Floral Repeats add a charming touch to classic powder rooms. They look great with pedestal sinks.
Large-Scale Mandalas can serve as striking wall art behind your vanity.
Playful Polka Dots are ideal for kids’ bathrooms. Use soft colors or pastels for a sweet touch.
Many other stencil ideas exist. You can find patterns like Damask, Modern & Geometric, Farmhouse, Moroccan, or even African & Tribal designs. These options let you create a truly unique space.
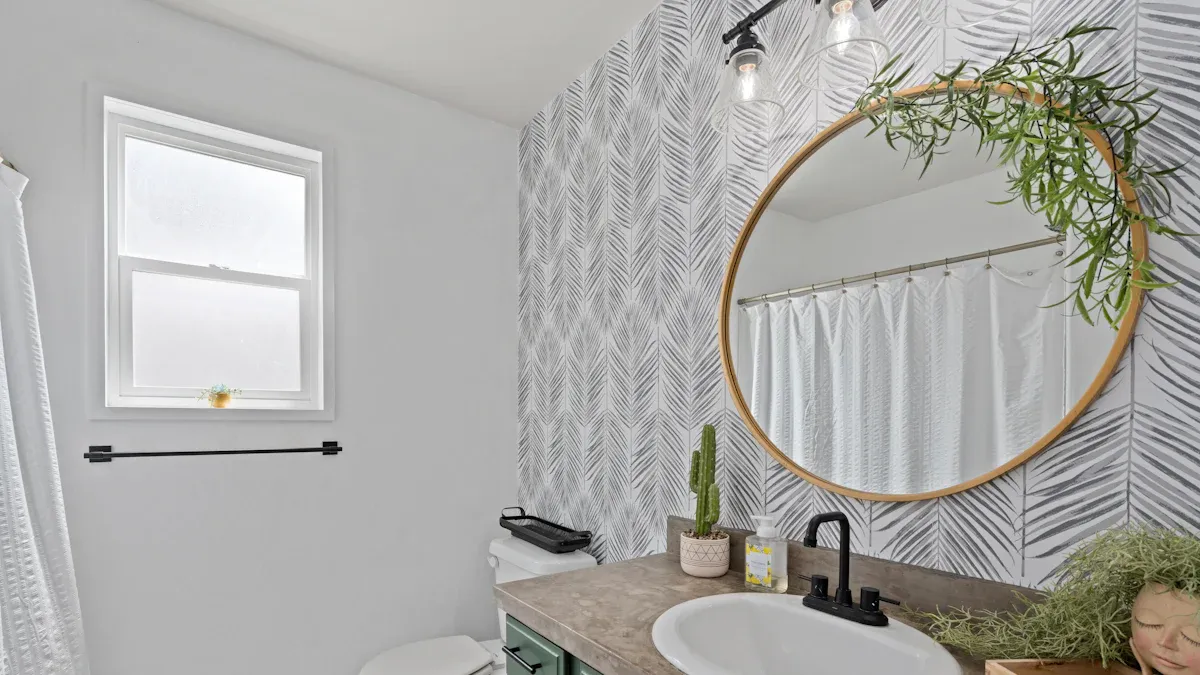
Peel and Stick Wallpaper Magic
Peel and stick wallpaper offers a quick and easy way to add pattern and texture. It is perfect for renters or those who like to change their decor often. For high-humidity bathroom environments, choose wisely and apply carefully.
Here are the best practices for a lasting finish:
Select Moisture-Resistant Wallpaper: Choose high-quality vinyl or polyester-based wallpapers. They withstand humidity and temperature changes.
Thorough Wall Preparation: Clean your walls well. Remove dirt, moisture, or mold. Make sure the surface is dry and even for the best adhesion.
Proper Installation Techniques: Carefully remove the backing. Align the wallpaper at the top. Smooth it onto the wall gradually. Use a wallpaper smoother or squeegee to remove air bubbles.
Seal Edges: Apply clear caulk to the wallpaper edges. This prevents moisture from getting underneath. It ensures long-term adhesion.
Effective Humidity Management: Improve ventilation. Use exhaust fans during and after showers. This regulates humidity levels. It protects your wallpaper from damage.
Regular Maintenance: Gently clean the wallpaper with a soft, damp cloth. Avoid harsh scrubbing. Promptly reapply any peeling edges. Use heat to help them stick again.
DIY Board and Batten Accent
A diy board and batten accent wall adds architectural interest and charm. It creates a custom look that feels high-end. You can achieve this project with basic tools and materials.
Here is what you will need:
Materials: 1×4 and 1×2 pre-primed MDF boards, 1 1/4″ and 2″ brad nails, construction adhesive, paintable caulk, lightweight spackle, paint, and primer.
Tools: Miter saw, brad nailer, level, stud finder, measuring tape, utility knife, prybar, and hammer.
Follow these steps for a beautiful result:
Remove Existing Baseboards: Score caulk lines. Use a prybar and hammer to carefully remove old baseboards.
Install New Baseboard: Measure and cut your 1×4 board. Find wall studs with a stud finder. Nail the new baseboard into place. Ensure it is level.
Attach the Middle Board: Decide on your desired height. For example, place the bottom of a middle 1×4 board 48 inches above the baseboard. Mark with a level. Cut the board to size. Nail it into wall studs.
Add Vertical Battens: Measure and cut your 1×2 boards for the vertical pieces. Space them evenly. Attach them with brad nails and construction adhesive.
Finish and Paint: Fill all nail holes with lightweight spackle. Let it dry, then lightly sand. Caulk all seams and corners. Finally, paint your new board and batten wall. Prime first if your boards were not pre-primed. You will love the transformation!
Fixture & Surface Updates
You can dramatically change your bathroom’s feel by updating its fixtures and surfaces. These budget-friendly ideas offer a significant impact. You will love the fresh look these small changes bring to your bathroom makeover.
Grout and Caulk Clean-Up
Dirty grout and cracked caulk make any bathroom look tired. You can easily restore them. Start by tackling stubborn grout stains. For light to moderate stains, mix baking soda with water to form a paste. Apply this paste to the grout lines. Then, spray vinegar over it.
This creates a fizzing action that breaks down grime. For tougher stains, especially mold or mildew, hydrogen peroxide works wonders. Apply it directly to the grout, let it sit, then scrub and rinse. If DIY methods are not enough, commercial grout cleaner products are available. Always follow their instructions and test a small area first. For an eco-friendly deep clean, consider steam cleaning. High heat and pressure lift dirt and grime, sanitizing the area and restoring grout color. After cleaning, replace old, cracked caulk. New, clean caulk instantly brightens the space and prevents water damage.
Painting Old Floor Tiles
Do you want to transform your floor without replacing tiles? You can paint your bathroom tile! This is a fantastic way to update your floor on a budget. First, clean your tiles thoroughly. Make sure they are free of dirt and grime. Next, lightly sand the surface to help the paint adhere. Apply a high-quality primer designed for tiles. Once dry, apply several thin coats of durable floor paint. Choose a paint specifically made for high-traffic areas and moisture. Finish with a clear, protective sealer. This protects your new finish and makes it last. You will be amazed at the difference!
Spray Paint Fixtures & Hardware
Old, tarnished fixtures can drag down your bathroom’s look. You can give them a new life with spray paint. This simple trick works for faucets, showerheads, towel bars, and cabinet pulls. First, remove the fixtures. Clean them thoroughly and lightly sand any rough spots. Use painter’s tape to protect areas you do not want to paint. Apply a metal-specific primer. Then, use several light coats of spray paint. Choose a color and finish that complements your new design. Matte black, brushed nickel, or even gold can create a stunning effect. Always use paint designed for metal and high-moisture environments. Let each coat dry completely before applying the next. You will love the updated, cohesive look.
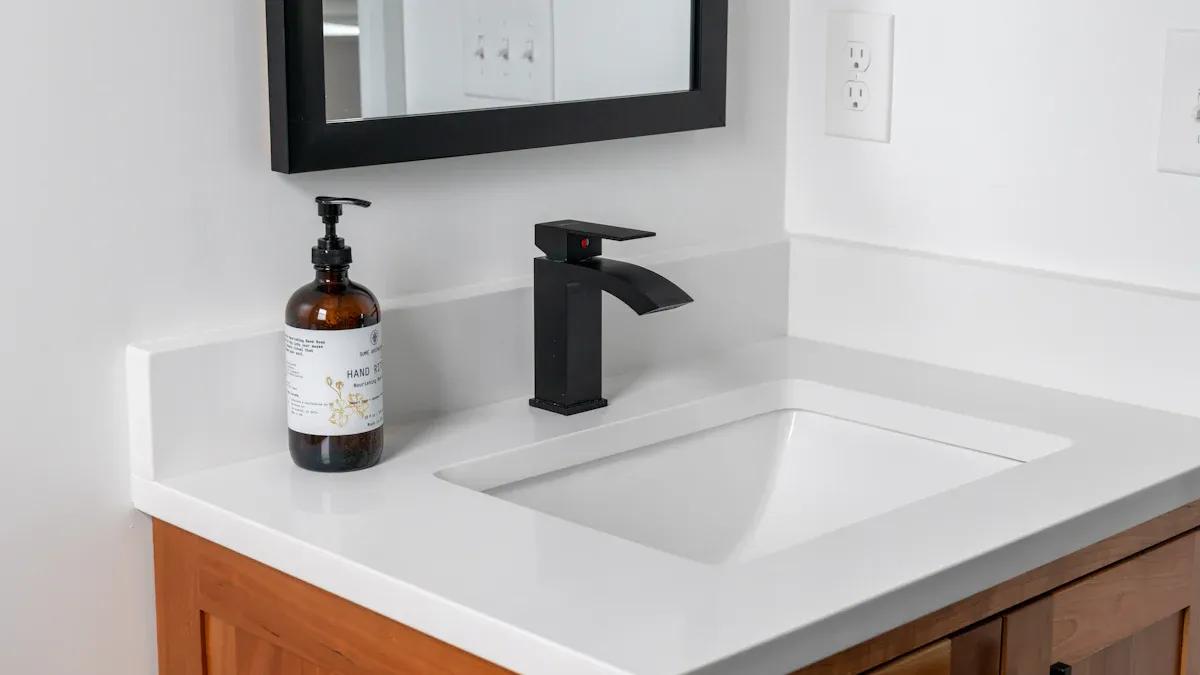
DIY Vanity Refresh
Your vanity is often the focal point of your bathroom. You do not need to buy a new one to make a big impact. You can upgrade the vanity with a few simple steps. One of the most effective changes is painting or staining. You can paint your bathroom vanity a fresh color. Clean and sand the surface first. Then, apply a water-resistant paint or stain. Seal all surfaces for durability. Another quick win is updating the hardware. Replace old knobs and pulls with new, modern designs. Different metals or unique ceramic handles can completely change the look. Finally, improve functionality with organizational solutions. Add pull-out shelves or drawer dividers. For vanities without drawers, use shelf organizers, baskets, and bins. These ideas maximize space and reduce clutter. You will create a beautiful and functional space.
Smart DIY Bathroom Remodel Ideas
You can transform your bathroom with smart diy projects. These ideas offer big impact. They also keep your budget in check. You will love the fresh look these bathroom remodel ideas bring.
Open Shelving from Reclaimed Wood
Open shelving adds style and function to your bathroom. You can create beautiful shelves using reclaimed wood. This choice gives your space a unique, rustic charm. It also saves you money. You can find reclaimed wood from old barns, fences, or even pallets.
One user loved using ‘fence boards’ for a bathroom closet. They noted the boards’ versatility. Another person considered ‘white chippy boards’ from an old barn for kitchen walls. This shows their potential for interior use.
When you choose reclaimed wood, you give old materials new life. You also add character to your remodel. These shelves provide perfect spots for towels, plants, or decorative items.
Upcycled Ladder Storage
An old ladder can become a fantastic storage solution. This diy bathroom remodel project uses vertical space. It helps you organize your bathroom. You can create a stylish and functional piece.
Find an old ladder. Gather hardware hooks, baskets, wood crates, trays, and nametags.
Paint your ladder and matching parts if you wish.
Assemble your ladder. Attach baskets to each step with nails. Add hooks on the side for hanging towels. Use a large wood crate for bigger towels. Baskets can hold items like toilet paper and undergarments.
“Oh Kelly what a cool way to use a ladder…you find the most creative ways to re-purpose items…Love the bathroom…I will call the front desk for reservations!”
“I adore this ladder!! What a creative storage solution!”
An old ladder combined with baskets offers effective bathroom remodel ideas for storage. You can also repurpose an old ladder as a towel rack. It uses vertical wall space. This creates the look of built-in towel racks. You do not need professional installation.
DIY Framed Mirror Upgrade
A plain mirror can look much better with a simple frame. This diy project adds elegance to your bathroom. You can build a frame from wood trim. Paint or stain it to match your decor. This small change makes a big difference. It elevates the entire space. You will love this budget-friendly remodel idea.
Creative Towel Storage
You need smart solutions for towel storage. This is especially true in smaller bathrooms. You can easily declutter by adding storage space. These ideas help keep your towels neat and accessible. They also add style to your diy bathroom makeovers.
Over-the-Door and Ladder Style Towel Racks: These racks use vertical space. They are easy to install. Ladder racks lean against a wall. They offer a modern touch.
Baskets, Bins, and Under-Sink Organizers: These are great for rolled towels. Place baskets on shelves or under sinks. Under-sink organizers maximize hidden space. They keep your bathroom remodel ideas tidy.
Floating Shelves and Corner Racks: Floating shelves free up floor space. They add an elegant touch. Corner racks use neglected corners. They store rolled towels or toiletries efficiently.
Hooks, Pegs, and Magnetic Solutions: These are simple and effective. They take up minimal space. You can place them anywhere on walls. Magnetic solutions offer drill-free installation.
You can also try these diy bathroom remodel options:
Ladder Towel Rack: Repurpose an old wooden ladder. Lean it against a wall to store towels. You can paint it for a fresh look. It can even hold small containers for accessories.
DIY Basket Shelves: Mount wicker baskets on the wall above the vanity. This creates floating shelves. They are perfect for hand towels and washcloths.
Repurposed Coatrack: Use a coat rack from an entryway in the bathroom. It provides multiple easy-access hooks. Hang damp towels or store extras near the shower.
These creative solutions help you organize your towels. They also enhance your bathroom’s look.
Small Bathroom Ideas & Ambiance Boosters
You can make even the smallest bathroom feel like a spacious retreat. These small bathroom ideas focus on maximizing light, adding natural elements, and personalizing your space. You will create a refreshing and inviting atmosphere. Remember to use airy colors and clean lines. These choices visually enlarge the space.
Light Fixture Swap for Brightness
Lighting transforms any room. In a small bathroom, it makes a huge difference. You can make your space feel larger and brighter with the right fixtures. Consider compact or floating fixtures. They save precious wall and ceiling space. You have many options for modern lighting:
Smart lighting systems: Control these lights with your smartphone. They offer convenience and light up your bathroom beautifully.
Motion sensor lights: These lights save energy. They provide an efficient and modern lighting solution.
Cove lighting: This creates a soft, welcoming radiance. It gives a subtle, inviting ambiance. This is perfect for a relaxing atmosphere.
Mirror cabinets with integrated lighting: These seamlessly incorporate LED lighting. They enhance practicality and style. They illuminate reflections and brighten the entire space. They are smart and stylish additions.
Vintage fixtures: These bring timeless elegance and classic charm. They add character and make your bathroom unique and visually appealing.
You will love the bright, open feel new lighting brings.
Adding Greenery for Spa Vibes
Bring the outdoors in! Adding greenery instantly creates a spa-like atmosphere. Plants thrive in the humid environment of a bathroom. They also purify the air. Botanical-pattern wallpaper or light-colored painted tiles can also visually enlarge the space. You can choose low-maintenance plants that love humidity and tolerate low light.
Plant Species | Low-Maintenance | Thrives in Humidity | Tolerates Low Light |
|---|---|---|---|
Peperomia | Yes (super easy to care for) | Yes (loves humidity) | Yes (small-growing, low-light plant) |
Snake Plant (Sansevieria) | Yes (nearly impossible to kill, needs little to no water) | Yes (if in humid bathroom, might never need watering) | Yes (tolerates almost any growing condition, from almost no light to bright light) |
Philodendron (Philodendron scandens) | Yes (will tolerate dry conditions) | Yes (high-humidity plant) | Yes (doesn’t require much light to thrive) |
Pothos (Epipremnum aureum) | Yes (low-maintenance beauty) | Yes (exceptionally pretty in a bathroom hanging basket) | Yes (keep out of direct sunlight) |
Neon Pothos (Epipremnum aureum) | Yes (just as easy to care for as golden pothos) | Yes (best bathroom plant) | Yes (even when grown in low light conditions) |
Spider Plant (Chlorophytum comosum) | Yes (no-fuss, low-light bathroom plant, can dry out between waterings) | Yes (enjoy a little humidity) | Yes (tolerate low light like champs) |
These plants are perfect for your bathroom. They add life and freshness without much effort.
DIY Artwork on a Budget
Personalize your space with unique artwork. You do not need to spend a lot of money. These small bathroom ideas for DIY art are perfect for any budget. You can create stunning pieces that reflect your style. This helps your bathroom remodel feel truly yours.
Framing prints or photos: Find moisture-resistant frames. You can buy inexpensive ones or thrift them. Download free art online. Print your favorite photos. Group smaller frames into a gallery wall.
Creating your own photo mat: Use free printable bathroom art. Wrapping paper works well too. You can create a custom photo mat with wrapping paper.
Turning a blank canvas into a sign: Get a cheap blank canvas. Use a free printable design. You can make a funny bathroom sign. For example, “On a Scale of 1 to 10, pee.”
Decoupaging and other techniques: Use free printables, vintage frames, paint, scrap wood, or scrapbook paper. You can decoupage items. Create signs. Make sunburst mirrors. Frame art.
These creative ideas add character and charm. They make your small bathroom feel special.
You can achieve stunning diy bathroom makeovers. A tiny budget is no barrier. Your creativity and effort make a big difference. DIY empowers you. You feel great transforming your own bathroom space. Pick one or two ideas from this list. Start your own bathroom makeover journey today. Share your amazing budget diy bathroom makeovers with us!
FAQ
Can a beginner really do these DIY bathroom makeovers?
Absolutely! Many of these projects are perfect for beginners. You can start with simple tasks like painting or updating hardware. You will build confidence with each step. You can achieve amazing results with a little patience and effort. ✨
How much money can I truly save with DIY projects?
You can save a significant amount of money. DIY projects cut labor costs. You also choose budget-friendly materials. For example, painting your vanity costs less than buying a new one. You control your spending. This helps you stay within your budget.
Will my DIY bathroom updates last?
Yes, your DIY updates can last. You need to choose the right materials. Proper preparation and application are also key. For example, use moisture-resistant paint in bathrooms. Seal peel and stick wallpaper edges. Your careful work ensures durability.
Where should I start my budget bathroom makeover?
Start with what bothers you most. Does your paint look dull? Paint it! Do you hate your vanity? Refresh it! Choose one project that excites you. This helps you see progress quickly. You will feel motivated to do more.