
Basements often become a catch-all for various items, creating significant clutter. You might find exercise equipment, old holiday decorations, and boxes simply labeled ‘stuff’ accumulating there. This constant mess shows your need for effective storage solutions. You can solve this problem with diy basement shelving. A cinder block shelving system offers a simple, sturdy, and budget-friendly diy project. This guide will walk you through every step. You will achieve better organization.
Key Takeaways
Build sturdy basement shelves easily with cinder blocks and lumber. This project saves you money.
Customize your shelves to fit any space. You can change heights and widths for different items.
Ensure your shelves are safe. Distribute weight evenly and secure the structure to prevent tipping.
Add finishing touches like paint or stain. This makes your DIY shelves look professional.
Benefits of DIY Basement Shelving
You gain many advantages when you choose to build your own diy basement shelving. This method offers practical solutions for organizing your space. You create storage that works for your specific needs.
Affordable and Accessible Materials
You find materials for this project easily and affordably. Cinder blocks are inexpensive. You can buy them at any home improvement store. Lumber for the shelves also comes at a low cost. This makes diy storage a budget-friendly choice for you. You save money compared to buying pre-made units.
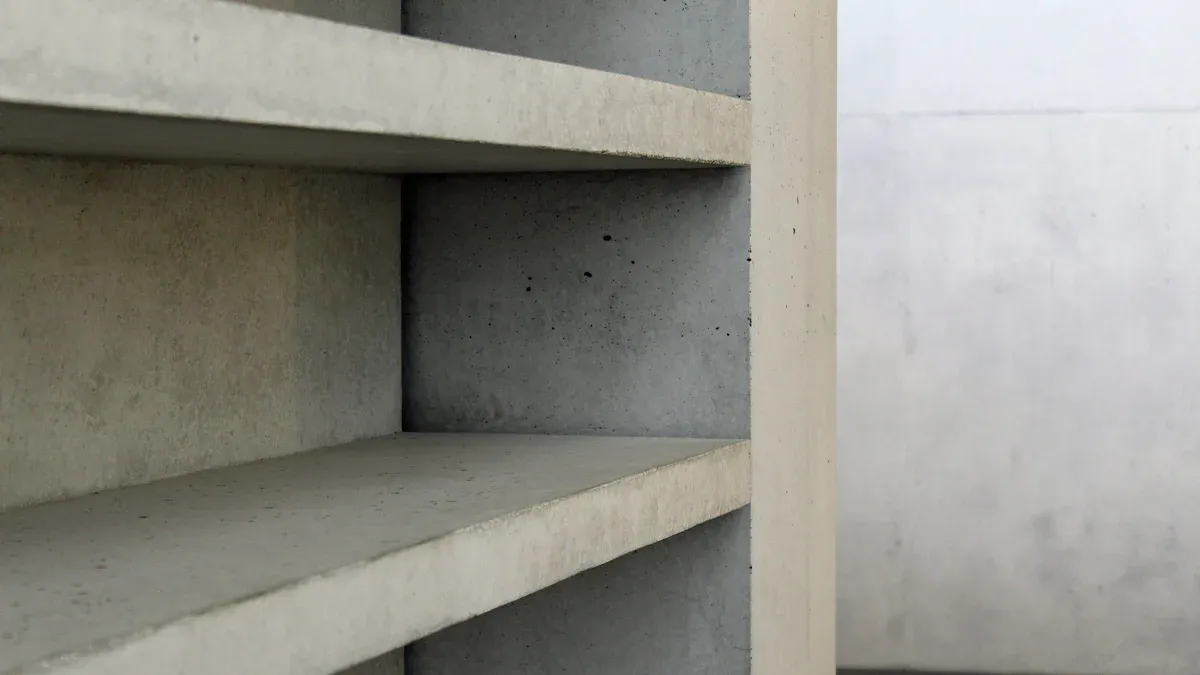
Durable and Sturdy Storage
Cinder blocks are incredibly strong. They provide a very stable base for your shelves. Your finished unit will hold heavy items without sagging or breaking. This means you get sturdy concrete shelves that last for many years. You can store tools, boxes, or even heavy equipment with confidence.
Simple Construction for Any DIYer
You do not need special skills or power tools for this project. You can assemble these easy shelves in minutes. The process is straightforward. You stack blocks and lay boards. If you want to refine your cuts, you might use a few basic tools:
A miter box
A handheld saw
A caulk gun (for optional adhesive)
A four-foot level (for ensuring straightness)
You complete this diy project quickly and efficiently.
Versatile Design Options
You customize your block shelving to fit any space or storage need. You adjust the height and width of your shelves easily. Consider these design variations:
Stack two full-size blocks for 16-inch spaces, perfect for large boxes.
Use block-and-a-half sizes for ideal book heights.
Create 8-inch high shelves with single block depth for small items like CDs.
Vary shelf depth by using one board or two 2x8s side by side.
Inset blocks or change stacking patterns for a more refined look.
Lay cinder blocks on their sides to hide the rough holes and improve aesthetics.
You design a system that truly works for you.
Materials for Your DIY Cinder Block Shelves
You need specific materials to build your sturdy and practical storage. Gathering these items before you start makes the building process smooth. You will find all these materials at your local home improvement store.
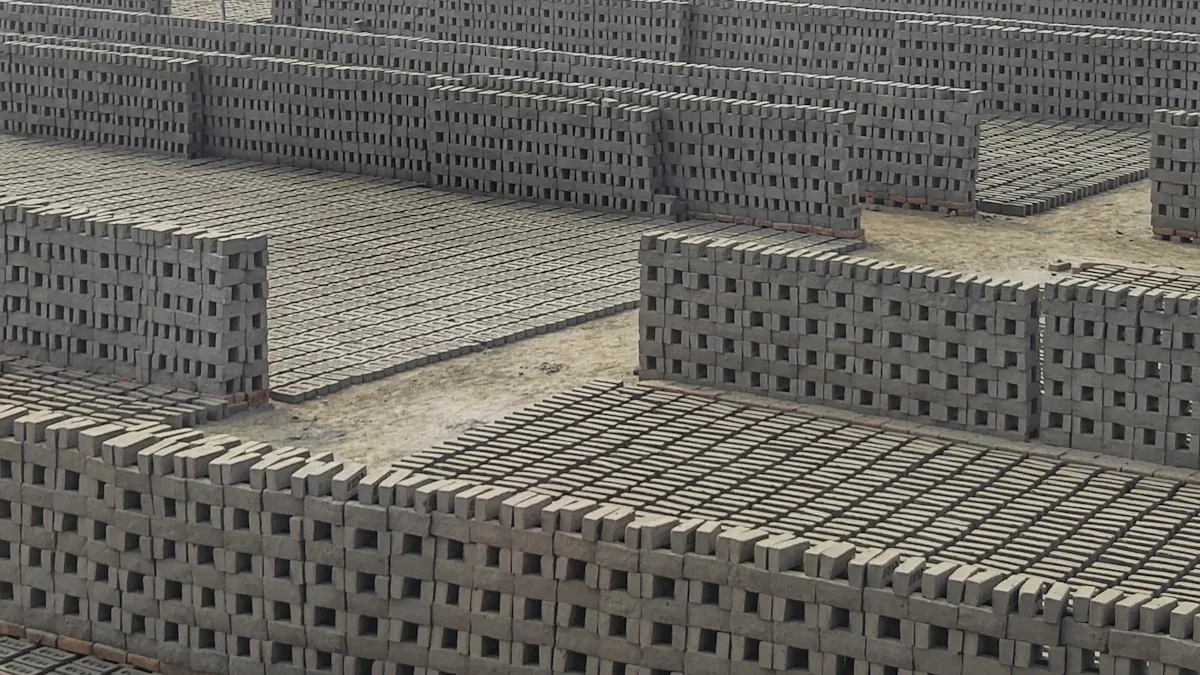
Cinder Blocks: Quantity and Type
You first determine the number of cinder blocks you need. This depends on your desired shelf height and length. Each vertical support column requires blocks. For example, a three-shelf unit needs four blocks per column. A standard 8″ x 8″ x 16″ cinder block weighs about 38 pounds. This common size often has two holes. You can choose from various sizes and weights for your project.
Concrete Block Size | Average Weight |
|---|---|
2″ x 4″ x 8″ brick (solid) | 5 pounds (2.27 kg) |
8″ x 8″ x 8″ (hollow half block) | 23 pounds (10.43 kg) |
2″ x 8″ x 16″ (solid) | 16 pounds (7.26 kg) |
4″ x 8″ x 16″ (hollow) | 24 pounds (10.89 kg) |
4″ x 8″ x 16″ (solid) | 33 pounds (15 kg) |
6″ x 8″ x 16″ (hollow) | 30 pounds (13.6 kg) |
6″ x 8″ x 16″ (solid) | 56 pounds (25.4 kg) |
8″ x 8″ x 16″ (hollow) | 38 pounds (17.24 kg) |
8″ x 8″ x 16″ (60% solid) | 47 pounds (21.32 kg) |
8″ x 8″ x 16″ (solid) | 54.125 pounds (24.55 kg) |
10″ x 8″ x 16″ (hollow) | 46 pounds (20.87 kg) |
12″ x 8″ x 8″ (hollow) | 31 pounds (14.06 kg) |
12″ x 8″ x 16″ (hollow) | 58 pounds (26.3 kg) |
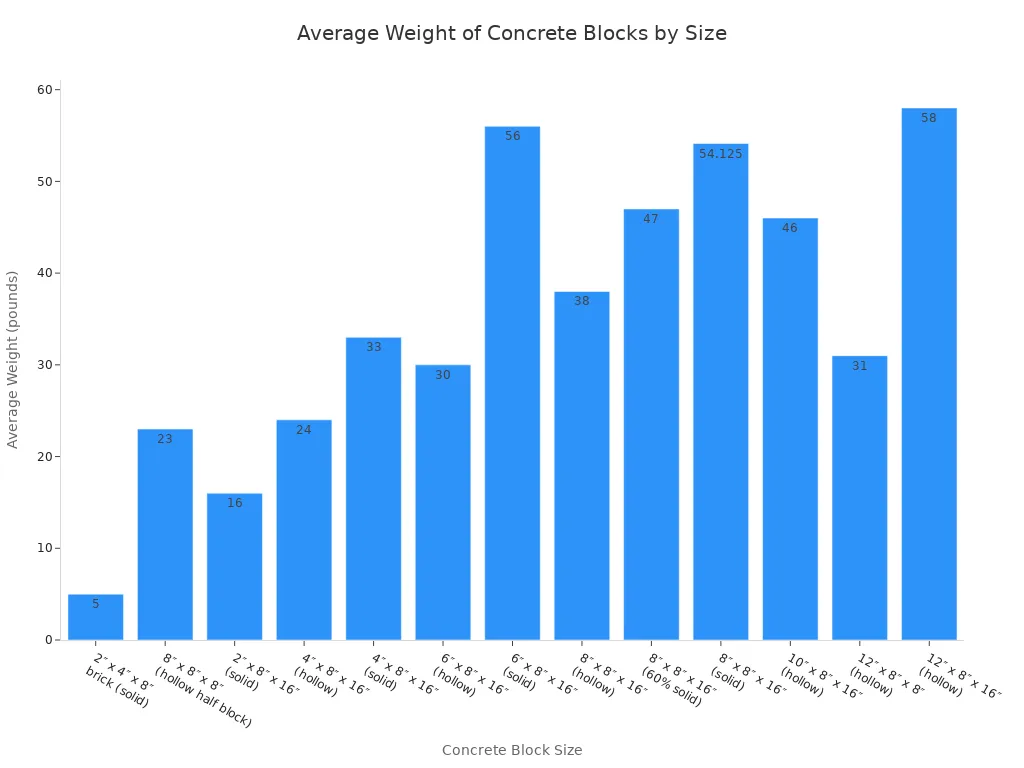
You can choose lighter blocks if you plan to move your shelves often. Heavier blocks provide more stability for permanent structures.
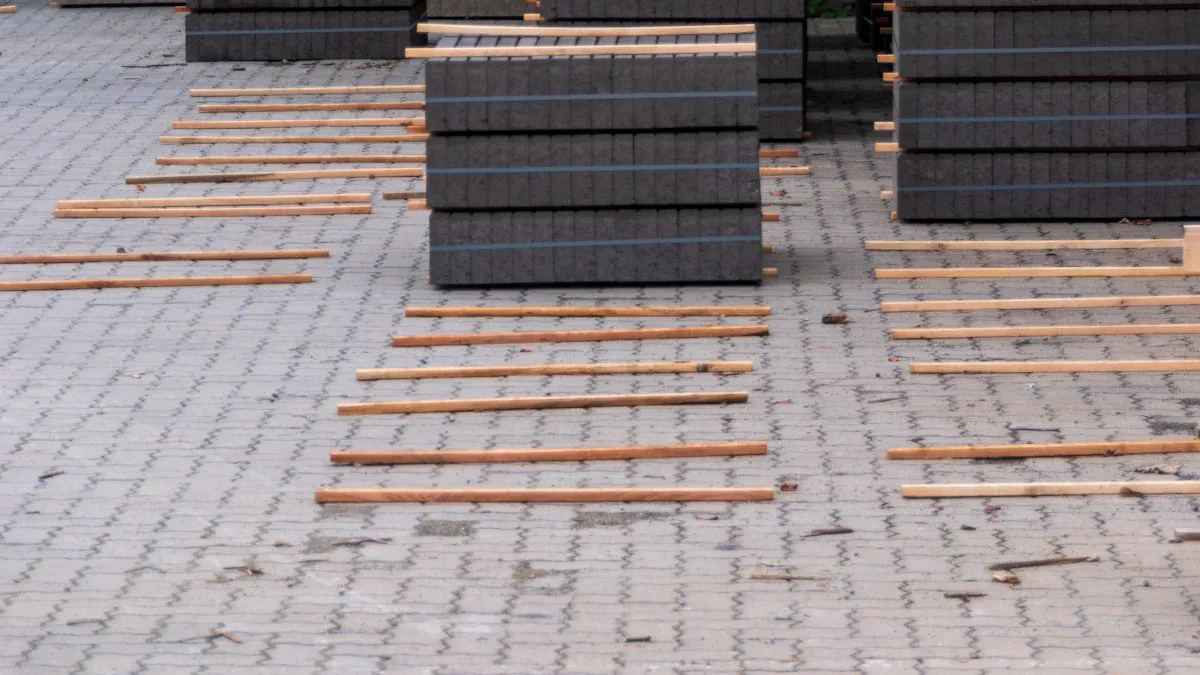
Lumber for Shelves: Boards, Plywood, or Stair Treads
You need lumber for the actual shelf surfaces. You have several options. Common choices include 2x4s, 2x6s, plywood, MDF, or even pre-cut stair treads. Using 2x4s with cinder blocks offers a very cost-effective solution. Plywood is another popular choice. It provides a flat, continuous surface.
Consider the pros and cons of plywood versus solid boards:
Feature | Plywood | Solid Boards (Solid Wood) |
|---|---|---|
Pros | Cost-effective, versatile, resistant to shrinking/warping | Natural beauty, strength, durability, aesthetic appeal, long-lasting |
Cons | Less aesthetic appeal (especially edges), strength limitations | More expensive, vulnerable to moisture (warping, cracking), limited size/availability |
Best Uses | Shelving, cabinets, subflooring, outdoor projects | High-end furniture, flooring, trim, custom woodworking, structural applications |
Plywood works well for general storage. Solid boards offer a more finished look if aesthetics matter. You can also use pre-cut stair treads for a quick and easy shelf surface.
Essential Tools and Optional Enhancements
You need very few tools for basic assembly. A tape measure helps you plan your layout. A level ensures your shelves are straight.
You can add optional items to enhance your diy cinder block shelves. Wood glue or construction adhesive can secure boards to blocks for extra stability. Sandpaper smooths rough edges on your lumber. Paint or stain improves the appearance of your shelves. Shims help level your structure on uneven basement floors. These enhancements make your project look more professional.
How to Build Your DIY Cinder Block Shelves
You can easily build your own diy cinder block shelves. This process involves simple steps. You will create a strong storage unit.
Plan Your Layout and Measure Space
First, you must plan your shelf layout. Measure the area where you want to place your shelves. Consider the height, width, and depth you need. Think about the items you will store. Large boxes need taller shelves. Smaller items fit on shorter ones. Sketch your design on paper. This helps you visualize the final structure. You ensure your plan fits your space and needs.
Prepare Materials for Assembly
Gather all your materials. You need your cinder blocks and lumber. If your lumber is not the right size, cut it now. You can use a hand saw or ask the store to cut it. Clean any dirt or debris from the blocks. This makes them easier to handle. You prepare everything before you start to build the shelves.
Lay the First Course of Blocks
Begin by placing your first layer of blocks. Position them on the floor. These blocks form the base of your shelf supports. Ensure they are level. Use a spirit level to check. Proper leveling prevents wobbling later. Space the blocks according to your planned shelf length. You create a stable foundation for your storage.
How to Install Shelves: Placing Boards
Now, you will install shelves. Place your first set of lumber boards directly on top of the base blocks. Make sure the boards rest evenly across the blocks. You want a flat surface. Adjust the boards so they are centered. This provides a secure platform for your items.
Continue Stacking Blocks and Boards
You will continue to build the shelves by stacking more blocks and boards. Place the next layer of blocks on top of the first set of boards. Align them directly over the blocks below. Then, place another set of boards on these new blocks. Repeat this process. You add layers until you reach your desired shelf height. Each layer adds strength to your structure.
Secure and Stabilize Your Structure
You must secure your shelves. This prevents tipping. Heavy items can make shelves unstable. You have several options for securing your cinder block structure.
Expansion Anchors: These work well in solid parts of the block. They also work in mortar joints. Their strength in hollow sections depends on the remaining material.
Concrete Screws (Tapcons): These screws make their own threads. You can use them in all parts of a cinder block. They need at least one inch of embedment in hollow sections.
Through-Bolts: You drill a hole through the block. Then, you secure it with a washer and nut. This method gives consistent strength. It works best when you can reach both sides of the block.
Epoxy: This method offers strong holding power. It is good for areas with vibrations. You use a screen tube with a threaded rod. This creates a strong bond inside the block.
You can also use different types of anchors:
Anchor Type | Description | Suitable Sections | Notes | |
|---|---|---|---|---|
1 | Sleeve Anchors | Pre-assembled, easy to use, available in various diameters and lengths. | All three sections (solid, hollow, mortar joints). | Excellent holding values; available in different head styles (acorn, hex, flat Phillips, round). |
2 | Lag Shield Anchors | Used for many years, available in short (for hard material) and long (for softer material) versions. | All areas of the cinder block. | Diameters from 1/4” to 3/4”. |
3 | Single Expansion Anchors | Female fastener, holding strength from a single source. | Solid section only. | Not recommended for hollow sections due to minimal expansion length; requires a separately purchased bolt with national coarse threads; diameters from 1/4” to 3/4”. |
4 | Double Expansion Anchors | Expands along its entire length, ideal for softer or suspect base material. | Both hollow and solid sections. | Requires a separately purchased bolt with national coarse threads; available in six diameters from 1/4” to 3/4”. |
5 | Machine Screw Anchors | Requires the bottom of the hole for proper setting and expansion; needs a setting tool. | Primarily solid section; special hollow-set tool for hollow sections. | Setting tool strikes against solid base material; available in various diameters from #6 to 3/4”. |
6 | Hammer Drive Anchors | Light-duty anchor, simple to use, pre-assembled nail and anchor body. | Solid section and hollow section (if enough base material remains). | Mushroom head prevents pullover; cannot be removed without cutting the head; available in 3/16” and 1/4” diameters. |
Choose the best method for your specific wall and block type. This ensures your shelves are safe.
Finishing Touches for Your DIY Shelves
You can add finishing touches to your shelves. Sand any rough edges on the lumber. This makes them smoother. You can paint or stain the wood. This improves the appearance. You can also paint the blocks. This gives a more finished look to your diy project. These steps complete your new storage unit. You have successfully built and can now install shelves for your items.
Customizing Your Cinder Block Shelves
You can make your storage system truly your own. Customizing your shelves helps them fit your specific needs and style.
Varying Shelf Heights for Different Items
You can easily adjust the height of your shelves. This allows you to store many different items. For tall boxes, stack fewer blocks between shelves. This creates more vertical space. For smaller items like tools or books, you can stack more blocks. This makes shorter, more frequent shelves. You design the perfect setup for everything you own.
Adding Backing or Sides
You might want to add backing or sides to your shelves. This prevents items from falling off the back or sides. You can use thin plywood or hardboard for this. Cut the material to size. Then, attach it to the back or sides of your shelf structure. You can use construction adhesive or small screws. This gives your shelves a more finished look. It also makes them more functional.
Painting or Staining for Aesthetics
You do not have to leave your shelves plain. You can paint your cinder blocks. Use a masonry paint for the best results. This changes their industrial look. You can also paint or stain the wood boards. Choose colors that match your basement decor. A fresh coat of paint makes your diy project look professional. It brightens up your storage area.
Leveling on Uneven Floors
Basement floors are often uneven. This can make your shelves wobble. You can fix this problem easily. Use shims under the base block. Shims are small pieces of wood or plastic. Place them under the lowest points of your structure. Use a level to check your work. Adjust the shims until your shelves stand perfectly straight. This ensures stability and safety for your storage.
Safety for Cinder Block Shelving
You must prioritize safety when you build and use your cinder block shelves. Proper planning prevents accidents. You protect yourself and your stored items.
Proper Weight Distribution
You must avoid overloading your shelves. Even if overloaded shelving appears to hold weight without immediate damage, the added strain puts the entire structure at risk of sudden collapse. This also accelerates wear and tear on key components. They degrade faster. Overloaded shelving systems pose safety risks. They can cause costly damage to equipment or nearby surfaces. Shelves carrying excessive weight may bend, collapse, or lead to accidents. You face several dangers. Items can fall from shelves, potentially causing head injuries. The shelving unit itself can collapse. This leads to severe injuries or even fatalities for anyone nearby. Overloading can also block fire sprinkler heads. This hinders fire extinguishment by reducing the required 18-inch clearance. You should understand your shelf’s limits. Do not use racks designed for lighter items to store heavier goods. You must also avoid incorrect load calculations. These lead to overloading specific sections.
Ensuring Shelf Stability
You need to make sure your shelves are stable. An unstable structure is dangerous. Weak shelves, unstable flooring, or overloaded beams in storage areas can collapse under weight. This causes injury or property damage. You can secure your shelves to a concrete block wall. This adds significant stability. You can also use construction adhesive between the blocks and boards. This creates a more rigid structure. Always check for wobbling. Adjust shims under the base if your floor is uneven.
Ventilation Considerations
You should think about ventilation for your basement shelves. Basements often have high humidity. This can lead to mold and mildew on stored items. You must ensure adequate airflow around stored items. This prevents moisture accumulation. Avoid overcrowding your shelves. This allows items to “breathe.” You can utilize fans to maintain air circulation. This prevents damp spots. Open windows on dry days. You can also install basement vents. This enhances fresh air movement. Consider integrating your basement into the home’s HVAC system. This regulates airflow and temperature.
You now understand the ease and benefits of building diy basement shelving. This simple project transforms your cluttered space. You gain sturdy, affordable storage. Tackle this diy task today. You will enjoy a more organized basement.
Easy to build: No special skills needed.
Cost-effective: Save money on materials.
Highly customizable: Fit any space.
Share your finished diy basement shelving creations below. You can also ask any questions you have!
FAQ
Can I use cinder block shelves outside?
Yes, you can use cinder block shelves outdoors. Cinder blocks are durable. They withstand weather conditions well. You might want to seal the wood shelves. This protects them from moisture.
How much weight can these shelves hold?
Cinder block shelves are very strong. They hold a lot of weight. You must distribute the weight evenly. Avoid overloading any single section. This ensures stability and safety.
Do I need to clean the cinder blocks before building?
Yes, you should clean your cinder blocks. Remove any dirt or debris. This makes them easier to handle. It also helps if you plan to paint them. Clean blocks look better.
Can I paint the cinder blocks for a better look?
Absolutely! You can paint your cinder blocks. Use masonry paint for the best results. This changes their appearance. It gives your shelves a more finished look. You can match your decor.


