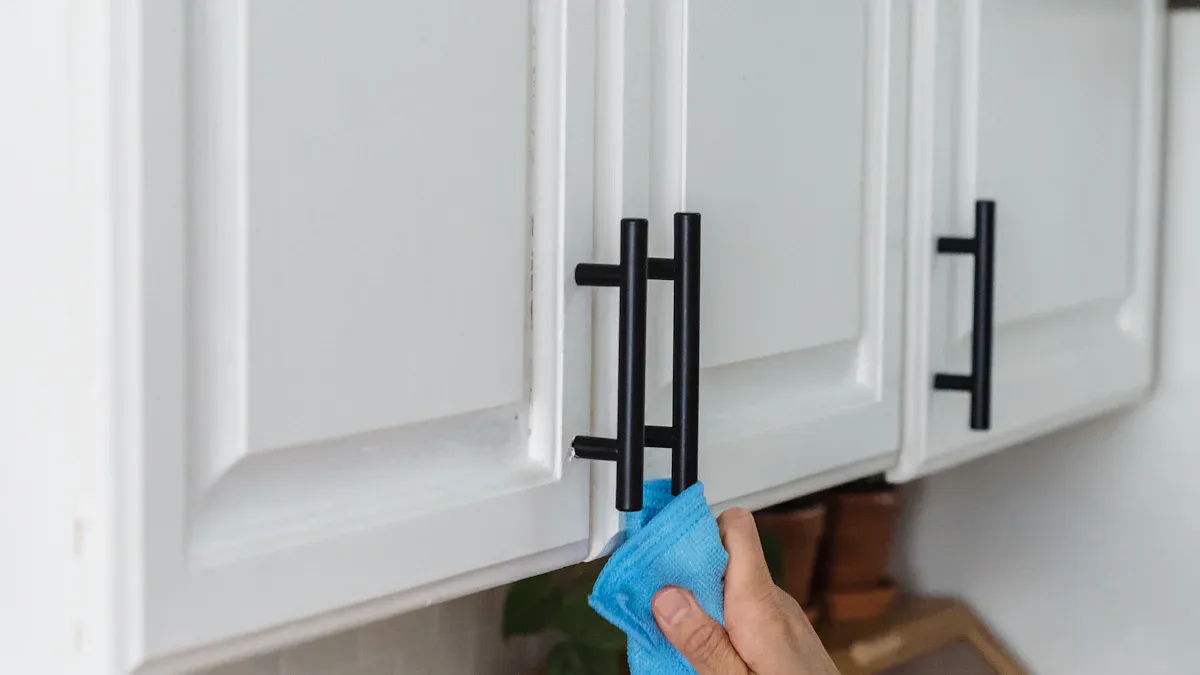
Want to give your kitchen or bathroom a fresh, new look without spending a fortune? Repainting your cabinets offers an amazing transformation! It is a budget-friendly way to update your home. You can actually save 30% to 70% compared to replacing them entirely. While this is a rewarding DIY project, great results come from proper preparation and technique. This comprehensive tutorial provides a detailed, step-by-step guide to help you repaint painted cabinets, ensuring a durable, professional-looking finish.
Why Repaint Painted Cabinets
Cost-Effective Home Update
You might wonder why you should go through the effort to repaint painted cabinets. The biggest reason is often your wallet! Repainting offers a significant update without the high cost of new cabinets. You save money on materials and labor. This makes it a smart choice for budget-conscious homeowners. You get a fresh look for a fraction of the price.
Aesthetic Personalization
Your home should reflect your style. Repainting cabinets gives you the power to personalize your space. You can choose from countless colors and finishes to match your vision. Modern trends offer exciting options:
High-Performance Finishes: Think anti-fingerprint matte laminates or sleek acrylic glossy panels.
Mixed Materials: Combine natural walnut with matte beige for a unique look.
Popular Colors:
Blissful Blue: Pale blues like Sherwin-Williams’ Upward or richer options like Springhouse.
Warm Neutrals: Creamier whites such as Butter Cream or Frosted Trail.
Dark & Daring: Charcoal, black, or Espresso for a sophisticated touch.
Natural Wood Tones: Vintage Oak or Autumn Walnut offer warmth and texture.
This level of customization is hard to beat. You can transform your kitchen or bathroom to perfectly suit your taste.
Extending Cabinet Life
Beyond looks, repainting cabinets also protects your investment. Proper refinishing creates a tough, durable coating. This coating resists scratches, stains, and even heat. It starts with good preparation, like sanding, priming, and sealing. These steps ensure new layers bond well. Applying a sealant adds an extra protective barrier. It guards against water damage and UV fading. You also need to allow several days for the paint to fully harden. This makes the finish much more durable. By taking these steps, you significantly extend the functional lifespan of your cabinets.
Planning Your Cabinet Repaint
Before you even pick up a paintbrush, good planning sets you up for success. This initial stage helps you understand the project and avoid surprises.
Assess Project Scope and Cost
First, look at your cabinets. How many doors and drawers do you have? Do you need to paint the cabinet frames too? This helps you figure out how much time and material you will need. Consider your budget. Repainting painted cabinets yourself can save you a lot of money compared to hiring a professional.
Category | DIY Cost Range | Professional Cost Range |
|---|---|---|
Total Project Cost | $250 – $800+ | $1,000 – $6,500 |
Labor | N/A (your time) | $500 – $3,000+ |
Paint & Primer | $60 – $160 | $150 – $450 |
Tools & Materials | $30 – $300+ | $50 – $150 |
As you can see, doing it yourself significantly cuts costs. This makes it a great option for a budget-friendly home update.
Select Paint Type and Finish
Choosing the right paint is crucial for a lasting finish. You want paint that stands up to daily use.
Oil-Based Enamel: This paint offers great durability. It creates a smooth, tough finish that cleans easily. However, it can yellow over time.
Water-Based Enamel (Latex/Acrylic): These are eco-friendly and dry fast. They are easier to clean up. Acrylic paints are a good choice because they resist chipping and cracking. They adhere well to surfaces.
General Enamel Paint: This type is popular for its smooth surface. It resists dirt, scratches, and wear. It gives a long-lasting finish, especially for areas like kitchen cabinets.
For durability, oil-based paints are often superior. However, modern acrylic enamels offer excellent resistance to wear and tear. When you paint kitchen cabinets, you need a durable product. Think about the finish too. Semi-gloss or satin finishes are popular because they are easy to clean and hide imperfections better than high-gloss.
Prepare Your Workspace
A clean and organized workspace makes the job easier and safer. Clear out everything from your cabinets and countertops. Cover your floors and any nearby appliances with drop cloths. Use painter’s tape to protect walls and other areas you don’t want to paint. Good ventilation is very important when you are painting.
Tip: Set up fans to create airflow. Place intake fans low near fresh air and exhaust fans high to push out fumes. This helps reduce VOCs and ensures even drying. Never blow fans directly onto wet paint, as this can cause bubbles or streaks.
This careful preparation is one of the most important cabinet painting basics. It ensures a smooth refinishing process.
Essential Tools and Materials
Getting the right tools and materials is like having the best ingredients for a recipe. You need them all to make your cabinet repainting project a success. This list helps you gather everything before you start.
Cleaning and Repair Supplies
First, you need to clean your cabinets really well. You will need:
Degreaser: This is super important, especially for kitchen cabinets. Grease builds up over time.
You can use simple dish soap and warm water for gentle cleaning.
A vinegar and water spray (equal parts) works as a natural degreaser and disinfectant.
Look for gentle all-purpose cleaners that are non-toxic and ammonia-free. Always test them in a hidden spot first.
Ammonia-free glass cleaner gives a streak-free shine, especially on glossy surfaces.
Murphy’s Oil Soap is a good choice if you want a gentle, wood-safe cleaner that also conditions.
There are also specialty cabinet cleaners made just for cabinet finishes.
Clean rags: Lots of them! You will use them for cleaning and wiping.
Scrub brush: A soft one helps get into corners and remove stubborn grime.
You also need to fix any damage. You will need:
Wood filler: This helps you fill small holes or dents. A “bondo-like” red filler is often used on cabinets for its strength.
Vinyl spackling compound is easy to use and dries fast. It turns white, and you can sand and paint it. It is good for small cracks.
Water-based filler, like Gorilla all-purpose wood filler, cleans up easily with water. You can stain or paint over it.
Wood filler sticks, like Guardsman wax wood furniture filler sticks, are super convenient. They are like crayons for the smallest cracks.
Putty knife: This helps you apply the wood filler smoothly.
Sanding and Priming Essentials
Sanding is key for paint to stick. You will need:
Sanding blocks: These help you sand flat surfaces evenly.
Orbital sander: This tool makes sanding much faster, especially for larger areas.
Various grit sandpaper:
For the first sanding, to scuff up the old paint, use 120–150 grit sandpaper. This creates tiny scratches for the new paint to grab onto.
After you prime, use 180–220 grit sandpaper. This makes the surface super smooth and ready for paint.
Priming is the next step. You will need:
Adhesion primer: This primer is designed to stick to tricky surfaces, like old paint or laminate.
Stain-blocking primer: If your cabinets have stains (like water or grease), this primer will stop them from showing through your new paint.
Paint and Application Tools
Now for the fun part: painting! You will need:
Cabinet-specific paint: Choose the type you decided on earlier, like enamel, latex, or oil-based.
Topcoat: Sometimes, you might want an extra clear topcoat for more durability.
How you apply the paint matters a lot. You have options:
High-quality brushes: These are great for cutting in edges and getting into detailed areas.
Foam rollers: These give a smoother finish than regular rollers, especially on flat surfaces.
Paint sprayer: This tool can give you the most professional result.
Feature | Paint Sprayer | Paint Roller | Paint Brush |
|---|---|---|---|
Finish Quality | Smooth, even, superior, no brush marks | Relatively even, but leaves slight texture | Can leave visible drip marks and brush strokes |
Speed | Most efficient and effective method | Fast for large, flat areas | Time-consuming |
Detail Work | Can be precise with practice | Struggles with intricate details, nooks, crannies | Excellent for corners, crevices, and touch-ups |
Ease of Use | Requires practice, learning curve | Relatively easy for broad areas | Easy for detail, but tedious for large areas |
Preparation | Extensive, critical for overspray prevention | Necessary, but less critical than sprayer | Necessary, but less critical than sprayer |
A paint sprayer gives you a truly smooth finish with no brush marks. It is faster too, but it needs more practice and setup.
Safety and Workspace Protection
Safety first! Protect yourself and your home.
Protective gear:
Face mask: Protects your face from paint fumes and dust.
Goggles: Keep paint and dust out of your eyes.
Gloves: Protect your hands from paint and chemicals.
Dust mask: Essential when you are sanding.
Respirator: Use this if you have poor ventilation or are working with strong chemicals.
Workspace protection:
Drop cloths: Cover your floors and countertops to catch drips and spills.
Painter’s tape: Use this to protect walls, appliances, and areas you do not want to paint.
Step-by-Step Repainting Cabinets
You are ready to start your cabinet makeover! This detailed tutorial guides you through each step. You will achieve a beautiful, durable result.
Step 1: Prepare and Disassemble
First, you need to get your cabinets ready. This means emptying them completely. Then, you will remove all doors and drawer fronts. Take off all hardware, like hinges, handles, and pulls.
It is very important to keep track of all these small parts. You can use bins, Solo cups, or even Tupperware for sorting. Label these containers clearly. This helps you know where everything goes later. For example, you can label cups for:
Drawer glides
Hinges
Various screws
You should sort hardware right away. This makes reassembly much easier. Separate specific screws by size and purpose. Large screws might be for front frames. Small screws could be for rear brackets. Label your cups with a Sharpie for clear identification.
You might have special hardware. For instance, beige tentex brackets for inset jobs go in their own bin. Bronze-colored Phillips head screws (four per job) can go in one bin. Machine screws (two per job) for glide rails to tentex brackets get their own bin or cup. Hinge bodies, angle brackets, and bumpers for inset hinges belong in separate boxes or bins. Large Phillips head screws (four per job) for hinge brackets to the front frame go in a ‘hinge screw cup’. Medium-sized screws (four per job) for hinges to doors go in a ‘medium screw cup’. Small screws (two per job) for brackets to the cabinet floor go in a designated bin. Orange release clips (left and right) for drawer boxes go in a box. Rear angle brackets (labeled L or R) go in a box. Glide rails stay in their original large square box. Large screws for mounting front frames to glide rails go in a ‘large screw bin’. Small screws for holding rear brackets to the cabinet go in a ‘small screw box’. This careful organization saves you a lot of time later.
Step 2: Thoroughly Clean Surfaces
Now, you must clean your cabinets very well. This is a crucial step. Any grease or grime left on the surface will stop your new paint from sticking.
You have several effective cleaning options:
Distilled White Vinegar and Dish Soap: This mix cuts through grease. It also helps absorb bad smells.
Baking Soda Paste: For tough, stuck-on grease, make a paste from baking soda and water. Its coarse texture helps scrub away grime.
Citrus Oils: Products with citrus oils (like lemon or orange) are strong degreasers. Their acidic properties break down grime. They also leave a fresh scent.
Soap and Warm Water: For everyday dirt and less severe grease, a simple mix of soap and warm water works well.
Use a clean rag and your chosen cleaner. Wipe down every surface you plan to paint. Make sure you get into all the corners and crevices. Rinse the surfaces with clean water. Let them dry completely before moving on.
Step 3: Repair Imperfections
Next, you will fix any flaws on your cabinet surfaces. You want a smooth finish. First, examine your cabinets closely. Look for scratches, dents, cracks, or nail holes. Use a flashlight to highlight these imperfections. Mark them so you do not miss any.
Clean the surface again. Use mild detergent and warm water, or a degreaser for tougher stains. This removes any dirt, grease, or grime. It ensures your fillers and paint will stick properly.
Now, fill scratches and small holes. Apply wood filler or putty with a putty knife. Press it firmly into the imperfections. Smooth it level with the surface. For deeper holes, apply multiple layers. Let each layer dry before adding the next. This step is vital for a professional-looking refinishing job.
Step 4: Sand for Adhesion
Sanding is a non-negotiable step. It creates tiny grooves on the cabinet surface. These grooves help the primer and paint stick better. This process also removes glossy layers that resist new coatings. It opens wood pores for better primer absorption. It creates a uniform surface for even paint application. This enhances adhesion and extends the finish’s lifespan. Each paint layer bonds perfectly to the prepared surface.
You will use different grits of sandpaper:
Start with coarse 80–120 grit. This removes old finishes and levels rough areas.
Move to medium 150–180 grit. This smooths out deeper scratches. It provides intermediate smoothing.
Finish with fine 220+ grit. This refines the surface. It minimizes scratches. It creates an ultra-smooth base before priming.
Skipping grits in this progression can cause problems. Coarse scratches might show through the primer. This results in visible lines and poor paint bonding. Always follow the full grit sequence. This ensures uniformity and durability of your paint finish.
Step 5: Apply Primer
Priming is your next critical step. Primer creates a uniform base. It helps your paint stick better. It also blocks stains from showing through. Apply a thin, even coat of high-quality primer. Make sure it is suitable for your cabinet material.
Different primers have different drying times:
Primer Type | Touch-Dry Time | Before Second Coat/Paint |
|---|---|---|
Latex-Based | 30 minutes – 1 hour | 1-3 hours |
Oil-Based | 6-8 hours | 6-8 hours (or longer) |
Shellac-Based | 45 minutes – 1 hour | N/A (dries quickly) |
Always check the manufacturer’s instructions on your primer can. They will give you the most accurate drying times.
Step 6: Paint First Coat
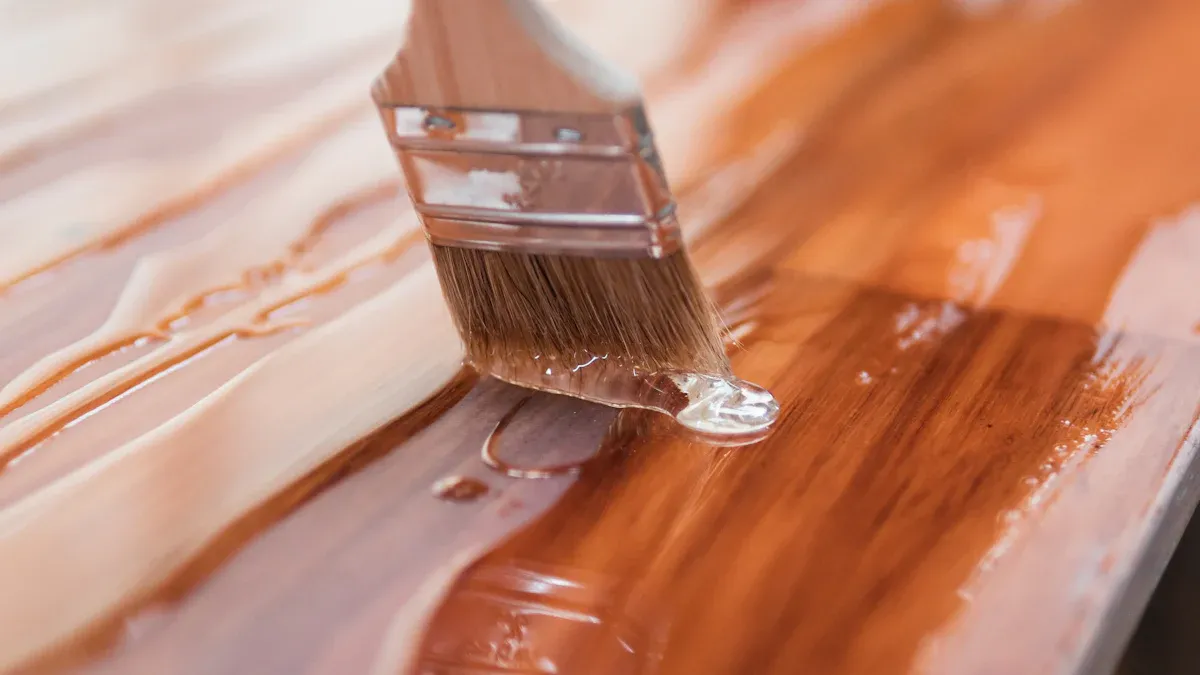
You are ready to apply your first coat of paint. Remember, thin layers are best. This prevents drips and peeling. Thick layers of paint take longer to dry. They can also lead to dripping and peeling. Applying multiple thin coats, with proper drying time between each, results in a more durable and long-lasting finish. Use a high-quality brush or foam roller for the best application. A paint sprayer can also give you a very smooth finish.
Step 7: Light Sanding Between Coats
After your first coat of paint dries, you will do a light sanding. This step creates a smoother surface for the next coat. It also helps the new paint adhere better. For most cabinet paints, a 220–320 grit sandpaper is ideal for sanding between coats.
Here is a guide for grit sandpaper between coats:
220 grit: Use this for the first sanding after the base coat.
320 grit: This is ideal for smoothing mid-coats.
400 grit: This is best for the final sanding before applying the topcoat.
Lightly sand the entire surface. Then, wipe away all dust with a tack cloth.
Step 8: Apply Subsequent Coats
Now, you will apply more coats of paint. Repeat Step 6 and Step 7. Apply thin, even coats. Allow each coat to dry completely. Lightly sand between coats. Continue until you achieve full coverage and a consistent color. Two to three coats are usually enough for a good result when you repaint painted cabinets.
Step 9: Cure and Reassemble
You have finished painting! Now, you must let your cabinets cure. This is very important. Curing is when the paint hardens completely. This makes it achieve maximum durability. For cabinet paints, full curing can take up to a week. This is essential before heavy use.
Water-based paint typically cures in about 21–30 days. Oil-based paint usually cures in 7–14 days. Some systems, like the Lightspeed® Nano Instant-Cure system, use UV light. They cure finishes immediately. This makes them ready for use right away.
Once your cabinets are fully cured, you can reassemble them. Put all the hardware back on. Rehang the doors and reinsert the drawers. You have completed your cabinet makeover!
Tips for a Professional Finish
You want your repainted cabinets to look amazing, right? These tips and tricks will help you achieve a professional-looking result.
Ensure Proper Ventilation
Always make sure you have good airflow when painting. Open windows and use fans. This helps clear fumes and allows paint to dry properly. Good ventilation is key for your health and for a great paint job.
Avoid Drips and Brush Marks
Getting a smooth finish is everyone’s goal. Skilled painters work hard to make their brushed finishes look sprayed. You can achieve a smooth finish too!
Clean and Prep: Start with very clean cabinets. Sanding between primer coats is super important. It removes any bumps or fuzz. This creates a smooth base for your paint.
Right Tools and Paint: Use high-quality, soft-bristled brushes. Choose cabinet-specific paint that levels well. Oil-based enamel paints are great for this.
Thin Coats: Apply paint in thin, even layers. Thick coats often lead to drips and visible brush marks.
Choose the Right Paint Finish
The right paint finish changes the look and feel of your space. Here is a quick guide:
Characteristic | Satin Finish | Semi-Gloss Finish |
|---|---|---|
Durability | Moderate | High |
Resistance to Stains | Good | Excellent |
Ideal for High-Traffic Areas | Yes | Yes |
Ease of Cleaning | Can be wiped down | Wipes down easily, perfect for areas that get dirty often |
Longevity | Lasts about 5-7 years | Can last 7-10 years |
Effect on Light | Soft glow | Bright reflection |
Visual Effect | Subtle sheen, hides imperfections | Shiny surface, can show imperfections more easily |
Ideal Applications | Living rooms, bedrooms | Kitchens, bathrooms, trim |
For cabinets, semi-gloss is often a popular choice. It offers excellent durability and is easy to clean. This helps you get a finish with tough coat.
Respect Drying Times
Patience is a virtue, especially with painting! Do not rush the drying process. Applying new coats too soon traps moisture. This can cause your paint to bubble, peel, and crack later. Always follow the manufacturer’s drying time instructions. This ensures a long-lasting and beautiful smooth finish.
Post-Painting Care
Once your cabinets are painted and cured, you need to care for them.
Everyday Cleaning: Use mild dish soap and warm water. A soft cloth works best.
Tougher Stains: A mix of vinegar and water can help. Always spot-test first. You can also use commercial cleaners made for painted wood.
Avoid Harsh Products: Never use abrasive scrubbers, bleach, or ammonia. These can damage your new finish.
Common Mistakes to Avoid
You have put in a lot of effort to repaint your cabinets. You want them to look great and last a long time. But some common mistakes can ruin your hard work. Knowing these pitfalls helps you avoid them.
Skipping Preparation
This is the biggest mistake you can make. Many people want to jump straight to painting. But skipping prep work leads to big problems later. Inadequate preparation often causes peeling paint and more noticeable scratches on your cabinets.
Here is what happens if you skip proper prep:
Mistake | What Happens |
|---|---|
Skipping prep work | Paint won’t stick, peels easily |
Painting over grease | Fish-eye marks, bubbling |
Skipping proper cleaning and degreasing | Destroys adhesion, causes bubbling or peeling |
Skipping primer | Paint will peel, chip, or scratch under daily use |
Remember, grease, even invisible oils, destroys paint adhesion. This leads to bubbling or peeling. Also, applying paint directly to wood or laminate without primer results in failure. Primer chemically bonds the surface and topcoat. It provides a durable foundation. Without it, your paint will peel, chip, or scratch.
Using Incorrect Products
Choosing the wrong paint or primer can also cause issues. Not all paints are made for cabinets. You need durable products that can handle daily use. Using house paint on cabinets often leads to chipping and wear. Always pick paints and primers specifically designed for cabinets or high-traffic surfaces.
Rushing the Process
Patience is key when you are repainting cabinets. Each step needs enough time to dry and cure. If you apply a second coat too soon, the paint underneath might still be wet. This can cause bubbling or an uneven finish. Always follow the drying times on the product labels. This ensures a strong, lasting bond.
Over-Applying Paint
You might think more paint means better coverage. But applying paint too thickly is a common mistake. Thick coats lead to drips, runs, and a bumpy texture. This prevents you from getting a smooth finish. It is always better to apply several thin, even coats. This gives you a much more professional and durable result.
You can truly transform your home by choosing to repaint painted cabinets. This project saves you money and gives your space a fresh, new look. Remember, success comes from following each step carefully, from planning and preparation to the final curing. This comprehensive tutorial guides you to a beautiful, long-lasting result. Go ahead, start your cabinet makeover! You will love the satisfaction of a successful DIY project and your renewed space. ✨
FAQ
How long does cabinet repainting usually take?
The entire process can take several days. This includes disassembly, cleaning, repairs, sanding, priming, painting multiple coats, and curing. You should plan for at least a long weekend. Full curing can take a few weeks. This ensures maximum durability.
Can you paint over laminate cabinets?
Yes, you can paint over laminate cabinets! You need to use the right primer. Choose an adhesion primer. This primer helps the paint stick to the smooth laminate surface. Proper cleaning and light sanding are still very important steps.
What happens if you skip priming?
Skipping primer is a big mistake. Your paint will not stick well. It can peel, chip, or scratch easily. Primer creates a strong bond between the cabinet surface and your new paint. It also blocks stains from showing through.
Do you really need to sand between coats?
Yes, you really need to sand between coats. This step creates a smoother surface. It also helps the next coat of paint stick better. Use fine-grit sandpaper, like 220–320 grit. Then, wipe away all dust before applying more paint. ✨