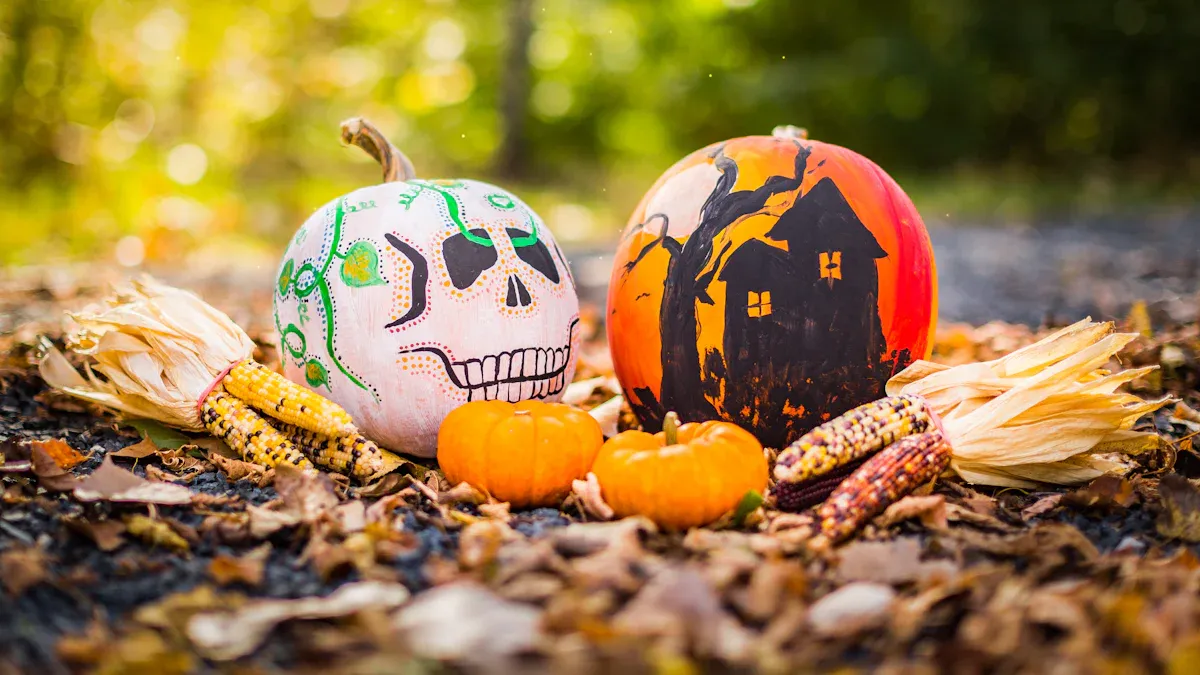
Looking for a fresh way to decorate with pumpkins this fall? You’ve found it! DIY paint pour pumpkins offer a unique, vibrant, and surprisingly simple touch for your home. The market for DIY fall decorations, especially pumpkin crafts, is booming, and this fun paint pour project lets you join the trend.
You can create a stunning pumpkin with ease, regardless of your artistic background. Each pumpkin becomes a custom masterpiece, bringing joy to your fall season. This amazing pumpkin is perfect for everyone. The paint pour technique is so satisfying.
Essential Supplies for DIY Paint Pour Pumpkins
Ready to make your own amazing diy paint pour pumpkins? You need a few things before you start. Gathering your supplies makes the whole project much smoother. Let’s look at what you’ll need for this fun craft.
Choosing Your Pumpkins
First, you need a pumpkin! You can use real pumpkins or artificial ones. Artificial pumpkins work great because you can keep them year after year. Think about the size and shape you like. You have many choices for your decorative pumpkin.
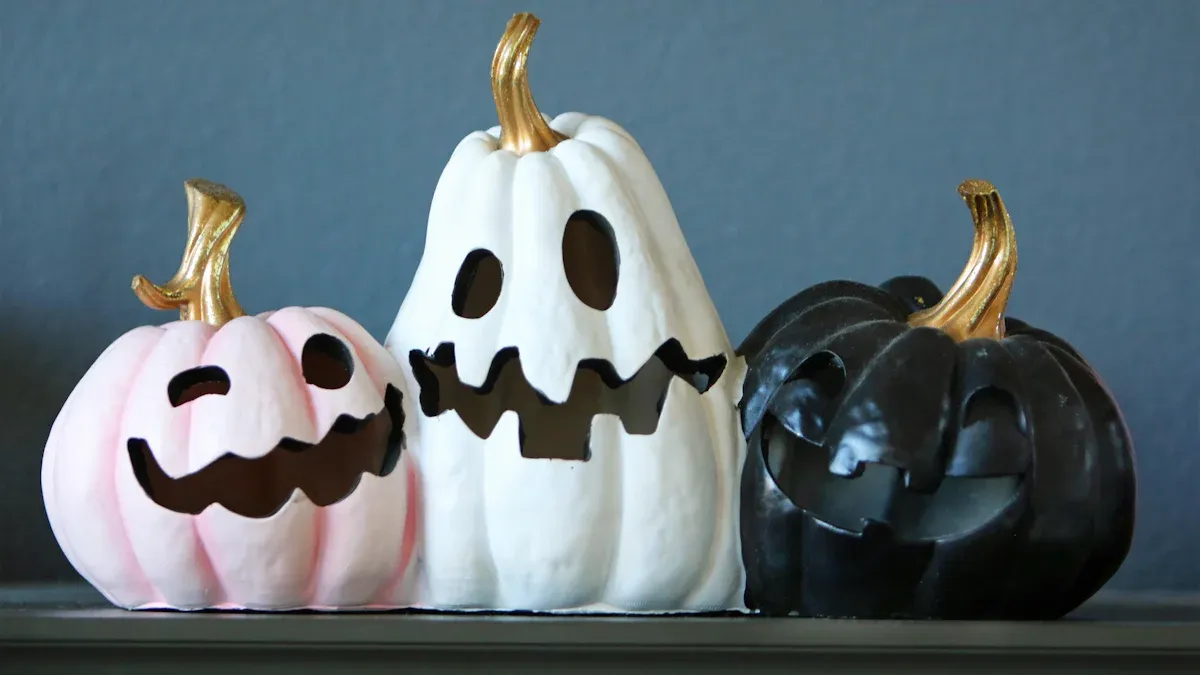
Elegant White Mini Pumpkins: These are small and chic.
Harvest-Orange Mini Pumpkins: A classic fall look.
Painted Day of the Dead Pumpkins: For a unique, artistic touch.
Sleek White Luna Silhouette Pumpkins: Very modern and smooth.
Painted Little Ghoul Pumpkins: Fun for Halloween.
Painted Silhouette Pumpkins: You can add your own designs.
Pumpkin Patch Pals: Cute and friendly options.
Pick a pumpkin that fits your style. Remember, you will cover it in paint, so the original color does not matter too much.
Paints and Pouring Mediums
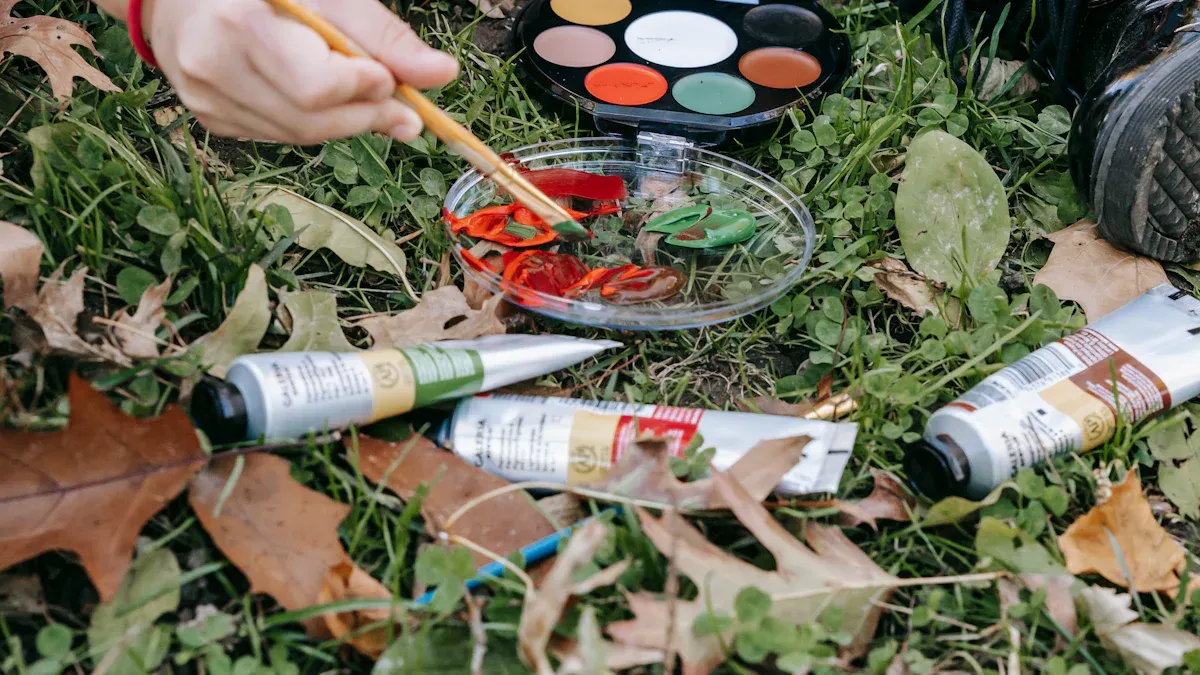
Now, let’s talk about the color for your pumpkin. You need acrylic paint. Common acrylic craft paint works very well for this project. You can also find pre-mixed pouring paints, like Color Pour, which are super easy to use.
Many brands make good acrylic paint. Apple Barrel is a popular choice. It costs less money and comes in many colors. People find it easy to mix with pouring medium because it is a bit thinner. You might use more paint with this brand, sometimes almost equal parts paint and pouring medium. It flows nicely and is perfect for acrylic pouring.
You can also try other great paint brands:
Liquitex Basics: This is a good, affordable option. You can thin it easily with pouring medium.
Arteza paints: These paints have many colors. They are good quality for the price. They are great for beginners.
Blick Acrylic paints: Another reliable choice for your art.
Golden Fluid Acrylics: These paints have rich colors. They have a perfect thickness. You do not need to thin them much for bright colors and smooth flow.
Next, you need a pouring medium. This special liquid changes how your paint works. It makes the paint thinner so it flows better. It also helps stop your paint from cracking when it dries. A pouring medium adds glue-like qualities to your paint. This helps the paint stick well to your pumpkin.
Some professional pouring mediums you can use include:
Liquitex Pouring Medium: This one helps your pours stay smooth. It stops cracks. It also keeps your colors bright. It keeps colors from mixing into muddy shades. It gives a smooth, shiny finish. This medium helps your paint last a long time. It prevents tiny cracks and bubbles.
Golden’s GAC 800: Another high-quality option.
Lukas Pouring Medium: A good choice for smooth results.
DecoArt Pouring Medium: Works well for many projects.
Amsterdam: A reliable brand for artists.
You can also find cheaper options. Floetrol is a popular choice. It helps house paint flow better, and it works great for acrylic pouring too. You can find it easily. PVA Glue, like Elmer’s Glue All, mixed with a little water, is another simple and cheap option.
Tools and Protection
You need a few more things to keep your workspace clean and safe.
Always wear gloves when you are paint pouring. Some pouring mediums can be tough on your skin. They can be hard to wash off. Gloves stop skin irritation. They also protect your hands from getting messy.
Here are some other important items:
Good Ventilation and Air Purifier: Make sure your work area has fresh air. This is very important if you pour often. It is also key if you use a torch to heat your pours.
Fire Extinguisher: Keep one close by if you plan to use a torch or heat gun. Safety first!
Drop Cloths or Old Newspapers: Cover your work surface completely. This project can get messy!
Plastic Cups: You will need these for mixing your paint and pouring medium.
Stirring Sticks: Use these to mix your colors.
A Rack or Elevated Surface: Place your pumpkin on this while it dries. This lets excess paint drip off.
Having these supplies ready makes your diy paint pour pumpkin project fun and easy.
How to Paint Pour Your Pumpkins
You are about to discover how simple it is to create stunning diy paint pour pumpkins! This entire process can take as little as 5 minutes for the actual pouring, making it a super quick and satisfying project. Follow this step-by-step tutorial to transform your ordinary pumpkin into a vibrant piece of art.
Prep Your Workspace and Pumpkins
Before you start pouring paint, you need to set up your area. This project can get messy, so proper preparation is key!
First, protect your surfaces. Cover your furniture and flooring with high-quality drop cloths or old newspapers. This safeguards against any accidental drips and spills. Clear away any unnecessary items and clutter from your work area. This helps you work efficiently and prevents damage to your personal belongings. Keep buckets for rinsing brushes and rags for immediate spills close by. This allows you to act quickly if a mess happens.
Next, prepare your pumpkin. If you use a real pumpkin, clean it thoroughly with warm, soapy water. This removes any dirt, wax, or residue. Paint will not stick well to a dirty surface. Make sure your pumpkin is completely dry before you start painting. It is best to let it dry overnight. Any moisture will prevent the paint from adhering properly and could lead to peeling later.
Mixing Your Pour Paints
Now, let’s get your colors ready! You will mix each paint color in its own plastic cup. This keeps your colors separate until you are ready to combine them.
The key to successful paint pour designs is the right consistency. You need to thin your acrylic paint with a pouring medium. A common starting point is to mix 1 part acrylic paint to 5 parts pouring medium. However, this can vary. For example, if you use GOLDEN Color Pouring Mediums (CPMs), a good ratio is 10 parts CPM to 1 part paint. This ratio helps you get uniform pours and clean borders. If you want very transparent glazes, you can even use 100 parts CPM to 1 part paint. Even a higher ratio, like 3 parts CPM to 1 part paint, is still pourable. But, the surface uniformity might change depending on the paint brand and color.
You can also add other things to your paint mixture for special effects. Flow improvers thin the paint. They allow for better movement without making the color less intense. Silicone oil is a popular additive. It helps create distinct cells and promotes separation within the paint layers. This gives you unique visual effects. The pouring medium itself helps balance the paint’s flow and drying time. It is crucial for preventing cracking in your finished artwork.
Stir each color gently but thoroughly. You want a smooth, lump-free consistency. Avoid creating too many air bubbles.
Pouring Techniques for Designs
You are ready for the fun part! This is where you create your unique paint pour designs.
Layer Your Colors: Take a larger plastic cup. This will be your “dirty pour” cup. Start by pouring a small amount of one color into the bottom of this cup. Then, gently layer your other chosen colors on top, one by one. You do not need to stir them in this cup. You can swirl the cup slightly to mix the colors a little, but do not overdo it.
The Flip: Place your pumpkin upside down on a raised surface, like a small cup or a block. This allows the paint to drip off freely. Now, quickly flip your “dirty pour” cup over onto the top of your pumpkin. Hold it there for a few seconds. This lets the paint settle.
Release and Spread: Lift the cup. Watch the beautiful colors flow and spread over your pumpkin! You can gently tilt the pumpkin to help the paint cover all sides. You can also add more paint directly from your individual color cups if you see any bare spots or want to add more of a specific color.
Repeat if Needed: If your pumpkin is large, or you want more coverage, you can repeat the process. Mix another “dirty pour” cup with your chosen colors and apply it to any areas that need more paint.
This paint pouring technique is incredibly satisfying. Each pumpkin will have its own unique pattern.
Drying Your Paint Pour Pumpkins
After you finish pouring, the drying process is important for a lasting finish.
Place your painted pumpkin on a rack or an elevated surface. This allows any excess paint to drip off. Let your pumpkin dry for a full 24 hours before you handle it too much. This gives the paint time to set properly.
To prevent cracking or peeling, you need to seal your finished pumpkin. This is especially important if you plan to display it outdoors. You can use an appropriate protective coating. Artist’s Final Varnish provides professional-grade protection. Clear Coat Polyurethane offers a durable, weather-resistant finish. Mod Podge is easy to apply and readily available. Acrylic Sealer is specifically designed for painted surfaces. Apply sealers in thin, even coats using a foam brush. Let each coat dry completely before you add more layers. Avoid using hairspray as a long-term sealant. It does not have the durability of proper acrylic sealers or varnishes.
Remember, choose fresh, firm pumpkins without soft spots or blemishes if you are using real ones. Store your painted pumpkins in cool, dry conditions when you are not displaying them. Handle them minimally to prevent damage to the painted surface. Bring your pumpkins inside when temperatures drop to freezing or on very hot days. This helps your beautiful diy paint pour pumpkins last longer.
Tips for Perfect Paint Pour Pumpkins
You can make your paint pour pumpkins look amazing. This is a great no-carve pumpkin decor technique. It lets you create beautiful designs without any sharp tools.
Vibrant Color Combos
Choosing your colors is fun! Color theory helps you pick colors that look good together. Colors opposite each other on the color wheel, like blue and orange, create strong contrast. Colors next to each other, like yellow and orange, give a smooth, harmonious look. For fall, you can use warm metallics like gold or copper. Earthy tones, such as rich brown, also work well. You can also use classic autumnal hues like orange and crimson. These fall colors make your pumpkin feel festive. You can also try unique combinations like black, gray, white, purple, and pink for different effects. If you want to make diy pink pumpkins, choose bright pinks with white or gold.
Troubleshooting Pouring Issues
Sometimes you might run into small problems when you pour. Do your colors look dull or muddy? This happens if your colors are too similar. It can also happen if you use a colored base instead of white with light colors. Make sure your chosen colors have enough contrast. Use a white base when you pour light colors to keep them bright.
Does your paint look thick or lumpy? This means your paint is too thick. It will not flow well. Your paint should drizzle smoothly from a stir stick. If it forms a mound, it is too thick. Adjust your paint consistency. Do you see lumps in your paint? This can be from your pouring medium or unmixed paint. Strain your Floetrol if you use it. Mix your paint very well to get rid of any clumps.
Finishing and Durability
After your paint pour pumpkin dries, you need to protect it. This is especially true if you want to display your pumpkin outside. You want a finish that resists chipping, scratching, and fading. A good sealant creates a strong barrier. It protects your pumpkin from moisture and UV light. This helps your beautiful pumpkin last longer.
Creative Paint Pour Pumpkin Ideas
You have made your beautiful paint pour pumpkins. Now, let’s explore more ways to make them truly unique. You can try different pouring styles. You can also add fun embellishments. Then, you can display your pumpkins in creative spots. This project offers so many possibilities!
Exploring Pouring Styles
You can go beyond basic pours. Try advanced pouring techniques for unique patterns. A “Bottle Pour” uses a cut plastic bottle. It creates flower-like designs as paint flows. You can also use a “Strainer Pour.” This involves pouring paint through a colander. It makes a kaleidoscope effect. For a modern look, use craft paint. You can apply paint near the stem. Then, tilt the pumpkin to create drips. Let each color dry before adding the next. You can even try a “Shibori-inspired” technique. Paint a pumpkin white. Then, dip it into water with scattered nail polish. Swirl it for a cool pattern.
Adding Embellishments
Your finished pumpkin can get even more flair. Add embellishments to make it pop. Glitter gives a sparkling effect. Apply it while the paint is still wet. This helps it stick better. Rope adds texture and a rustic feel to faux pumpkins. You can dye the rope to match your colors. For Halloween, add decorative spiders to metallic-painted gourds. Dried flowers look great on sugar skull pumpkins. Gems or sequins add sparkle around eye areas. Use a paint pen for precise details. You can create beautiful designs like stripes, dots, or word art. If you want to make diy pink pumpkins, consider adding white glitter or small pearls for extra charm.
Displaying Your Pumpkins
You have created your masterpieces. Now, display your pumpkins! You can line your front steps for a welcoming entrance. Set up a pumpkin-themed porch display. Gather them on your patio table. Inside, fill your fireplace with a charming collection. Add them to your coffee table with candles. Line your mantel with a single gourd or a row of them. Mix them with florals for lush arrangements. Create a centerpiece for your dining table. Use pint-sized pumpkins to fill clear vases. You can also scatter them around your bookshelves. Place them on your kitchen counter. Even your office can get a small pumpkin for fall spirit. Consider a “paint pouring pink pumpkins” theme for a vibrant display.
You now know how simple and fun creating diy paint pour pumpkins can be! This project lets you embrace your creativity. You can personalize your fall decor easily. It offers a unique, beautiful, and easy way to celebrate the autumn season. Go ahead, make your own amazing pumpkin art! We can’t wait to see your diy creations.
FAQ
How long does the paint take to dry completely?
Your paint pour pumpkin needs about 24 hours to dry fully. You should let it sit on a raised surface. This lets excess paint drip off. You can then apply a sealant for extra protection. 🕰️
Can I use real pumpkins for this project?
Yes, you can definitely use real pumpkins! Just make sure you clean them well first. You need to remove any dirt or wax. Let them dry completely before you start pouring paint. This helps the paint stick better. 🎃
What if my paint cracks after drying?
Paint cracking often happens if you use too little pouring medium. Or, your paint might be too thick. You can prevent this by mixing your paint and medium correctly. Make sure you use enough pouring medium for good flow. 💧
Is this project suitable for kids?
Absolutely! Paint pouring is a fantastic activity for kids. It is very forgiving and fun. Just make sure you supervise them. Also, cover your workspace well. They will love seeing the colors swirl! 🎉