
Building your own diy table legs brings immense satisfaction. You save money, and you gain complete freedom to customize your table. DIY legs can update an old table. They can also enhance new woodworking projects. This transforms any tabletop into unique furniture. This diy project is accessible for many skill levels. It unlocks great creative possibilities for your table legs. Embark on this rewarding DIY journey.
Key Takeaways
Building your own table legs saves money and lets you create furniture that fits your style.
You can choose from many materials like wood, metal, or even recycled items for your table legs.
Always plan your design carefully, thinking about how stable the table needs to be and what tools you have.
Use the right tools and materials, and always put safety first when building your table legs.
Test your table’s stability and reinforce joints to make sure it is strong and lasts a long time.
Why Build DIY Table Legs
Cost Savings and Customization
You save a lot of money when you build your own table legs. Store-bought legs often come with high price tags. You can find affordable table leg solutions by choosing your own materials and doing the work yourself. This allows you to control your budget. You also get complete customization. You decide the exact height, width, and style of your diy table legs. This means your table will fit your space perfectly. You pick the wood, metal, or other materials. You choose the finish. You make all the decisions.
Personal Style and Unique Furniture
Building your own legs lets you express your unique style. Mass-produced furniture often looks the same. Your table can stand out. Building custom legs allows for unique design elements. You will not find these in mass-produced furniture. These products are not made on an assembly line. Instead, they are made-to-order. This enables you to custom order your own turned wooden leg designs. This provides a level of personalization. You will not find this in mass-produced furniture. Your diy project becomes a one-of-a-kind piece. It truly reflects your taste.
The Satisfaction of Creation
There is great satisfaction in creating something with your own hands. You see your vision come to life. You build the legs for your table. This feeling of accomplishment is very rewarding. These projects give you pride. Every time you look at your table, you remember the effort you put in. You made it yourself. This makes your furniture more meaningful.
What Can Be Used for Table Legs
You have many choices for materials when you build your own table legs. The material you pick affects the look and strength of your table. Consider what can be used for table legs to match your project.
Wood Options for DIY Legs
Wood is a classic choice for table legs. It offers warmth and versatility. You can choose from many types of wood for your diy table legs. Each type has unique features.
Wood Type | Characteristics |
|---|---|
Hardwoods | |
Maple | Very strong, durable, fine grain, light color, takes stain well. Good for formal or modern styles. |
Oak | Very strong, durable, prominent grain, light to medium color, takes stain well. Good for traditional or rustic styles. |
Cherry | Moderately hard, beautiful reddish-brown color that darkens with age, fine grain, takes stain well. Good for elegant or classic styles. |
Walnut | Moderately hard, rich dark brown color, attractive grain, takes stain well. Good for luxurious or sophisticated styles. |
Ash | Strong, durable, similar to oak in grain but lighter in color, takes stain well. Good for contemporary or minimalist styles. |
Birch | Hard, strong, fine grain, light color, takes stain well. Good for modern or Scandinavian styles. |
Mahogany | Moderately hard, reddish-brown color, fine grain, polishes well. Good for traditional or antique styles. |
Softwoods | |
Pine | Softer, lighter, more affordable, prominent knots, light color, takes stain well but can be blotchy. Good for rustic or farmhouse styles. |
Poplar | Softer hardwood, inexpensive, light color with green or purple streaks, takes paint very well. Good for painted furniture or budget-friendly options. |
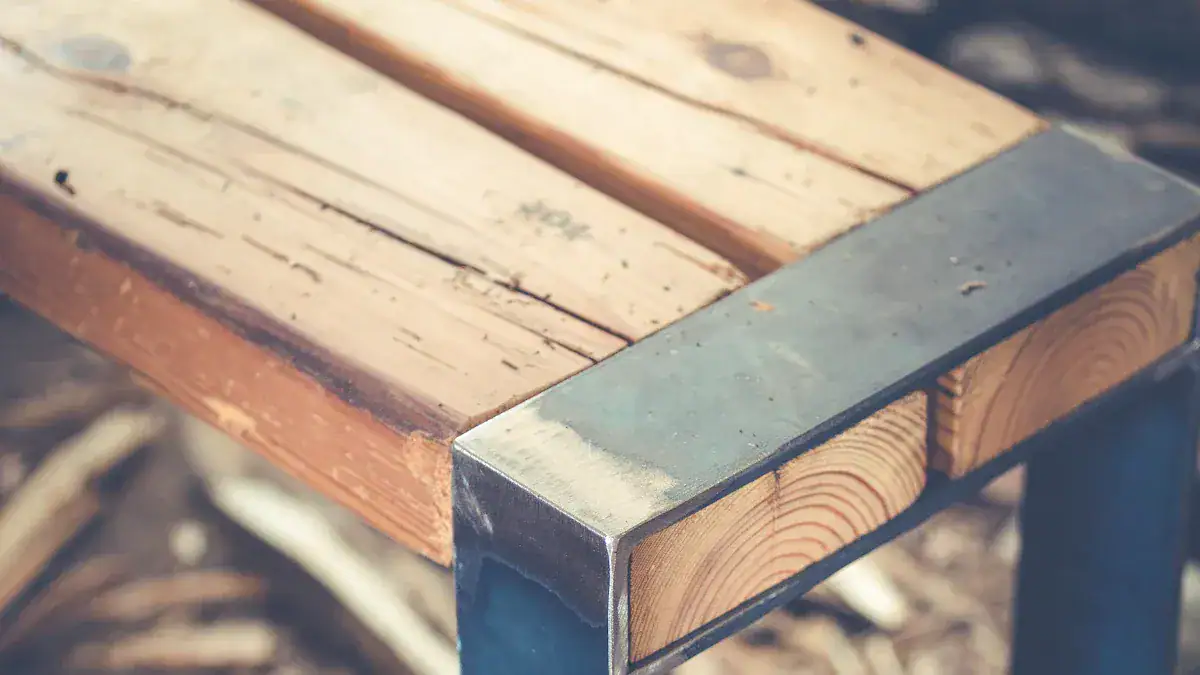
Metal Options for DIY Legs
Metal provides a modern or industrial look for your table. Metal table legs are very strong and durable. Different metals offer various aesthetics and properties.
Metal Type | Characteristics |
|---|---|
Steel | Excellent strength, heavy for stability, affordable. Rusts without treatment. |
Aluminum | Lightweight, rust-resistant, good strength-to-weight ratio. More expensive than steel. |
Stainless Steel | Highly rust-resistant, very strong, premium look. Most expensive. |
Cast Iron | Extremely heavy, very stable, durable. Classic or rustic appearance. |
Wrought Iron | Strong, malleable for designs, heavy. Ornate and artistic. |
Chrome | Durable, shiny, modern look. Easy to clean. |
Brass | Durable, warm golden color, classic. Can tarnish. |
Copper | Durable, unique reddish-brown, develops patina. Softer than steel. |
Alternative Materials and Upcycling
You can also get creative with what can be used for table legs. Many items can become unique table legs. This is a great way to add personal flair to your diy table.
Steel tubes: Offer a modern look.
Copper: You can craft these into legs for small tables.
Reclaimed wood: Often pairs well with metal pipe legs.
Old books: Stack and secure them for unique legs.
Lamp bases: Repurpose them as a pedestal for side tables.
Sewing machine bases: Upcycle these into bases for desks.
Wire baskets: Transform them into side tables.
Pottery bowls: Use them in sculptural table projects.
Footboard spindles: Repurpose them as bases for double pedestal tables.
Wooden hangers: Utilize these as table legs for side tables.
Metal card catalog drawers: Repurpose them into side tables.
Choosing Your Table Leg Design
When you build your own table, selecting the right leg design is crucial. This choice affects how your table looks and how well it works. Consider these points before you start building your diy table legs.
Style Considerations
Your personal style should guide your table leg design. Do you like modern, rustic, or industrial looks? Modern tables often have sleek, simple legs. Rustic tables might use chunky wooden legs. Industrial tables often feature metal legs. Think about the room where your table will go. The legs should match your existing furniture. This ensures your new table fits perfectly. The right design makes your table a focal point.
Stability and Weight Needs
You must think about stability and weight. A dining table needs very strong legs. It holds heavy dishes and people. A small side table needs less support. Consider the total weight your table will hold. Wider legs or more legs provide better stability. For a heavy tabletop, choose robust legs. You want your table to be safe and sturdy. Strong legs prevent wobbling.
Material and Tool Match
Match your chosen design to your materials and tools. If you have basic woodworking tools, simple wooden legs are a good choice. If you have welding equipment, metal legs are an option. Some designs require specific skills. Do not pick a complex design if you lack the tools or experience. Start with a simpler design if you are new to diy projects. This helps you succeed. You can always try more complex legs later.
Essential Tools and Materials
Building your own table legs requires the right tools and materials. Having these ready makes your project smoother. You can create strong and beautiful legs for your table.
Basic Tool Kit
You need a few basic tools for most DIY table leg projects. A measuring tape is essential for accuracy. A pencil helps you mark your cuts. You will need a saw to cut your materials. A hand saw works for wood. For metal, you need a metal cutting saw. Drills are useful for making holes and attaching hardware. Clamps hold pieces together while glue dries or you fasten screws. Safety glasses protect your eyes. Gloves protect your hands.
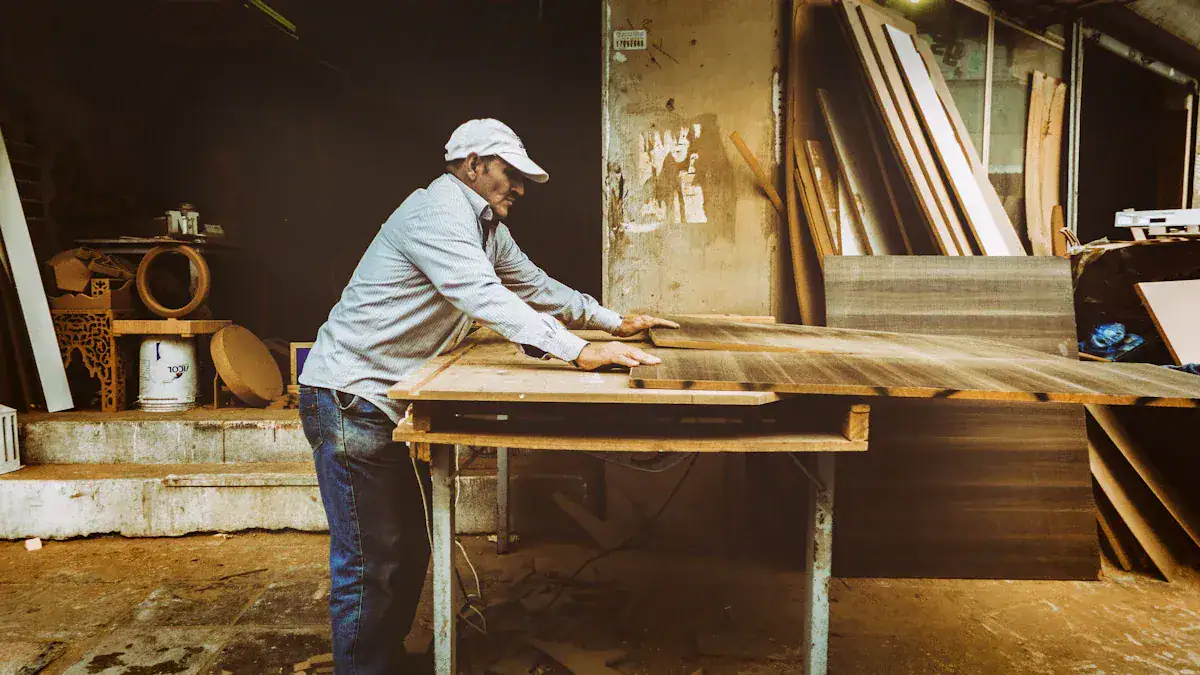
Material Sourcing
Finding the right materials is key. For wooden legs, you can buy lumber from a local hardware store. You can also find reclaimed wood for a rustic look. Remember to measure twice and cut once when working with wood. For metal legs, you might need specialized suppliers. Companies like Flowyline Design offer custom metal table legs. They can make them to your exact specifications. You can find various metal table leg options from them. These include legs for coffee tables, benches, and bar tables. You can contact them at [email protected] or +1 (323) 990-2487. It is often better to buy custom metal legs than to cut existing ones yourself.
Hardware and Finishes
The right hardware secures your legs to your tabletop. Finishes protect your materials and enhance their look.
Hardware Type | Material Options | Finish Options | Design Notes |
|---|---|---|---|
Legs With Metal Top Plates | N/A | N/A | Cheapest option, straight or angled top plates, best for small/low tables (legs <= 25″) |
Removable Angled Legs | Wood or Metal | Unfinished wood, black steel, antique brass | Tapered or hairpin designs, often used with mid-century modern decor, attached with angled cleats |
Removable Metal Table Legs | Metal | Satin stainless, black steel, antique brass, hammered brass | Tapered, hairpin, and square four steel designs, optional casters, modern/industrial flair |
You can choose from many finishes. For wooden legs, you might use stain, paint, or clear coat. Metal legs often have contemporary finishes like powder coating or clear lacquer. These choices protect your table and make it look great.
Simple DIY Table Legs: A Step-by-Step Guide
You can build your own simple diy table legs. This section focuses on basic wooden leg construction. It is suitable for beginners. You will learn how to measure, cut, assemble, and reinforce your legs.
Measuring and Cutting
You start your project with precise measurements. This ensures your diy table legs fit perfectly. First, regularly check and calibrate your measuring tools. For a combination square, draw a line, flip it, and draw another. If the lines are not parallel, adjust the square. Verify your tape measure against a known distance. For calipers, measure a known dimension. Compare protractors to a reference. Also, perform regular maintenance on your measuring tools. Clean, lubricate, and tighten loose parts. This prolongs their lifespan and maintains accuracy. Use measuring tools from the same brand. This avoids minor differences from varying calibrations.
For precise layouts, use a fine-lead pencil (5H). A carpenter’s pencil creates a line that is too thick. Employ a marking knife for surgically precise marks. The knife severs wood fibers. This creates a shallow kerf. This kerf serves as an ideal starting point for chisels or saws. When you use a marking knife, place a steel rule on the ‘keeper’ piece. Draw the knife along with its flat face against the rule. Select a precise, finely etched 12-inch steel rule as your primary measuring tool. Calibrate all other measuring devices against it. Use a quality combination square for both 90° and 45° angles. Verify its accuracy by drawing two lines with the square flipped. If the lines are parallel, the square is true. For measurements longer than 12 inches, use only one 12-foot tape measure. Check its accuracy against your steel rule.
Always measure from consistent reference edges and faces. For example, when you lay out multiple drawer openings, measure from the same end of each stile. Sight directly down on the ruler when you mark. This avoids parallax errors. Draw a ‘V’ extending from the ruler instead of a single tick mark. This defines a precise dimension. To extend a line, place your knife or pencil at the tip of the ‘V’. Slide your square or ruler to it. Draw lines with moderate pressure and only once. This avoids widening the mark and reducing accuracy. For identical layout marks on multiple pieces, clamp the pieces together. Mark across all of them simultaneously. This ensures alignment for your legs.
Basic Leg Assembly
Now you are ready to assemble your simple diy table legs. This section focuses on basic wooden leg construction. It is suitable for beginners.
Milling and Marking: Prepare your wood stock. Ensure it is square and to size. Mark out the mortise. These are holes in the
legs. Ensure all rails (tenons) are the same size. Use a combination square to mark the front-facing edge. Then mark the width of the rail on the other side. Cut along these lines with a marking knife. This prevents splintering.Removing Material From the Leg: Use a drill press to remove most of the material from the marked mortise area. Drill a series of holes with a depth stop. Then, use a router with a stop block and fence. Clean up the cut lines. Start with the outside face. Repeat this for all
legs. Adjust the fence for the second line. Aim for a snug fit. It is better to cut mortises undersize. Then sand rails to fit.Cut Shoulder Into Rail: Cut a small notch (shoulder) out of the bottom of each corner of the rail. This allows the rail to sit flush against the leg. It also covers the curved corners left by the router in the mortise. Use a marking knife for precise cuts.
Glue Up: Once you achieve a snug fit, apply glue. Use a ratchet strap or clamps to pull the
legsinto the rail. It is best to do this in two stages. This ensures the rail is 90 degrees to the leg. This creates a strong base for yourtable.
Joint Reinforcement
Reinforcing the joints of your simple diy table legs is crucial. This ensures your table is strong and lasts a long time. For tables that get regular use, beefing up joinery at any 90-degree corner is important. Common furniture often gets abused.
Consider using corner blocks. These are beveled on each end. They run between aprons at each corner. They connect to the aprons using pocket hole joints. You also use bolts to connect the corner block to the leg itself. This method, combined with other joints like mortise and tenon, dowel, or pocket hole, significantly strengthens the leg attachment. It prevents wobbling.
Mounting blocks are another option. You often find these in pre-fab table kits. These blocks attach to each of the four corners of the tabletop with screws. A screw hole in the center of the block receives a bolt pre-installed into the table leg.
The mortise and tenon joint is traditionally very strong. Its interlocking design makes it robust. However, the overall strength also depends on your craftsmanship and the quality of your materials.
You can combine multiple attachment methods. This is often called the “belt and suspenders” approach. It provides extra strength and stability. For example, you can use dowel joints with corner blocks. This reinforces the connection.
Some experts suggest steel reinforcement. A welded face frame is good, especially if the edges of the top and legs are on the same plane. This works well if pieces have about 2 inches of thickness. Legs should be mortised. Securely fasten 1/4-inch thick steel. You can also use four T-shaped plates welded from 1/2-inch plate steel. Epoxy these into a mortise in the top of the leg. Route a recess in the underside of the top. Elongated holes in the flange allow for expansion. Adding two low-profile rails can also prevent racking.
For a central stretcher, you can screw the top to the base. This can feature three massive blind tenons on each leg. The central one is glued. Side ones are in longer mortises for expansion. Emphasize the importance of surface in joints. Multiple stub tenons along the top edge of verticals provide enough glue surface. For regular use, add 3-4 stretchers, 3-1/2 inches wide, down the center of the table. Tenon these into the verticals. This also allows for floating the top.
Curving the legs can also firm things up. Legs forming a slight ‘v’ along their length, mortised into the top and set at a slight flare, can prevent racking. Reinforcement blocking next to the legs, set in from the edge of the top, should also be added.
This comprehensive approach ensures your diy project results in a very sturdy table.
Creative DIY Table Leg Ideas
You can make your table truly unique with creative table leg designs. This section gives you many ideas. You can find inspiration for your next DIY project here.
Wooden Leg Designs
Wood offers warmth and classic beauty for your table. You can create many different wooden leg designs.
Consider building trestle legs. You can construct these from two pieces of cherry wood. A slightly thicker walnut strip separates them. This walnut strip stands out for a nice visual effect. You can pre-cut the walnut strip to make sections for through mortises. This makes creating the mortises much easier before you glue the pieces together. Use spacers and clamps when you glue the pieces. This ensures all mortises are the same size and in the right place.
You can cut mortises for loose tenons into the legs, feet, and supports. Use a router with an edge guide and a 1/2-inch spiral bit for this. Taper the legs and supports on each side. This gives your table a bottom-heavy look. You can also add a dimpling texture to the walnut accent strip. This creates a unique visual detail.
Loose tenon construction lets you make custom tenon stock. This ensures a perfect fit. You can cut grooves into the face of tenons. This allows air and glue to escape. It creates a better bond. Rail tenons are more complex. They have their own mortise. You can make rail tenons at the table saw first. Then fit them to the leg’s mortise. Cut a mortise into the rail tenon itself. Use a router with a bearing-guided pattern bit. Scrap plywood can guide this. Use chisels for the final work on the rail tenons. This ensures a strong and beautiful wooden leg design.
Metal Leg Designs
Metal table legs offer a modern or industrial look. They are very strong. You have many options for metal table legs.
Leg Type | Structure | Applications | Manufacturing Method |
|---|---|---|---|
Hairpin Legs | Made from bent metal rods, typically steel, forming a hairpin shape. | Popular for mid-century modern, industrial, and minimalist furniture. Used for coffee tables, side tables, desks, and dining tables. | Bending and welding metal rods. |
Tapered Legs | Legs that gradually decrease in thickness from top to bottom. Can be round, square, or rectangular. | Versatile, suitable for various styles including modern, contemporary, and traditional. Used for dining tables, desks, and console tables. | Machining, turning, or casting metal. |
Spider Legs | Multiple slender legs that splay outwards from a central point, resembling a spider’s legs. | Often used for modern and contemporary dining tables, coffee tables, and conference tables, providing a unique aesthetic. | Welding and fabrication of multiple metal tubes or rods. |
Pedestal Legs | A single central column or base that supports the tabletop. Can be simple or ornate. | Ideal for small spaces, cafes, and contemporary dining areas, offering stability and maximizing legroom. | Casting, welding, or machining a central column and base. |
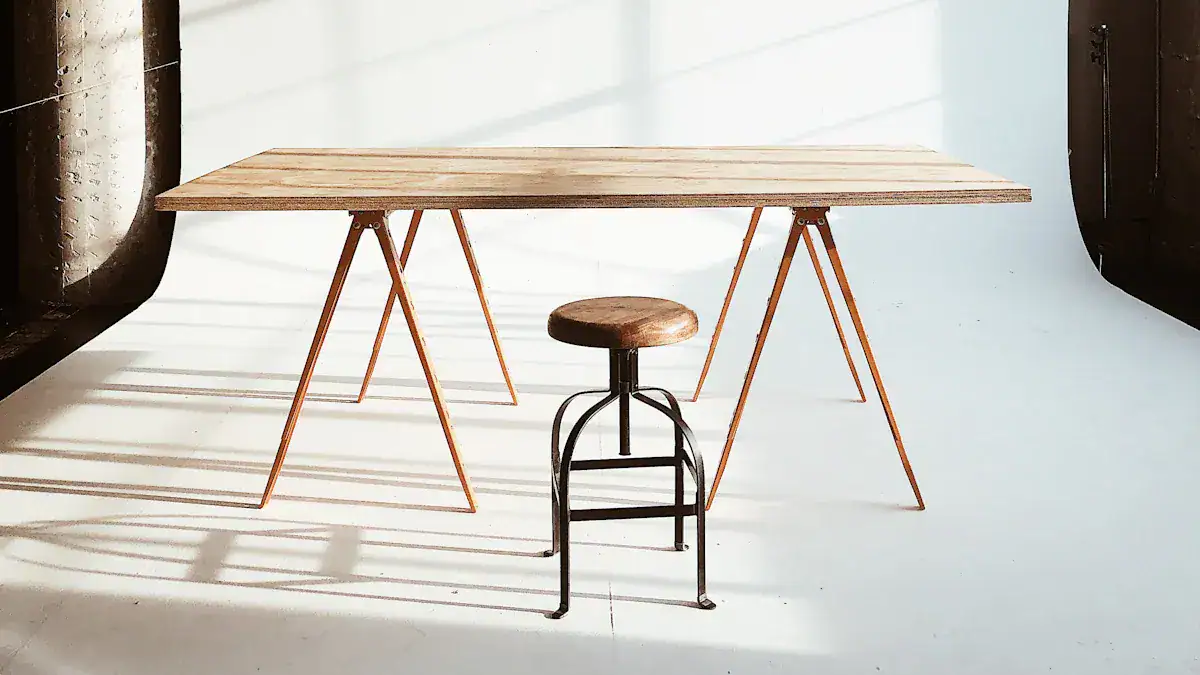
A-Frame Legs | Legs that form an ‘A’ shape, providing a sturdy and visually interesting base. | Commonly used for industrial, rustic, and modern farmhouse tables, including dining tables and desks. | Welding and bolting metal tubes or flat bars. |
X-Frame Legs | Legs that cross to form an ‘X’ shape, offering excellent stability and a bold design. | Popular for industrial, rustic, and modern dining tables, benches, and desks. | Welding and bolting metal tubes or flat bars. |
U-Frame Legs | Legs shaped like a ‘U’, providing a clean, minimalist, and stable base. | Often used for modern, industrial, and minimalist desks, dining tables, and benches. | Bending and welding metal tubes or flat bars. |
Box Legs | Legs formed by a rectangular or square metal frame, offering a robust and contemporary look. | Suitable for industrial, modern, and minimalist dining tables, desks, and coffee tables. | Welding and fabrication of metal tubing or square stock. |
Column Legs | Thick, cylindrical or square legs that provide a classic and substantial look. | Used for traditional, transitional, and contemporary tables, offering strong support. | Machining, casting, or welding thick metal stock. |
Slab Legs | Wide, flat metal panels used as legs, creating a solid and modern aesthetic. | Ideal for contemporary and minimalist dining tables, desks, and conference tables. | Cutting and welding large metal sheets or plates. |
Wishbone Legs | Legs that resemble a wishbone, often with a curved and elegant design. | Popular for mid-century modern and contemporary dining tables and desks, offering a distinctive look. | Bending and welding metal rods or tubes. |
Trapezoid Legs | Legs that are wider at the top and taper towards the bottom, forming a trapezoid shape. | Commonly used for industrial, modern, and minimalist dining tables, desks, and benches. | Welding and fabrication of metal tubing or flat bars. |
Trestle Legs | Two A-frame or X-frame supports connected by a stretcher bar, often with a rustic or industrial feel. | Ideal for large dining tables, conference tables, and workbenches, providing robust support. | Welding and bolting metal components. |
Adjustable Height Legs | Legs with mechanisms that allow the table height to be adjusted. | Used for standing desks, versatile workstations, and tables that need to adapt to different uses. | Incorporating telescopic mechanisms, gas lifts, or crank systems. |
Folding Legs | Legs that can be folded flat against the tabletop for easy storage and transport. | Suitable for temporary tables, banquet tables, and portable workstations. | Hinged mechanisms and locking systems. |
Caster Legs | Legs equipped with wheels (casters) for easy mobility. | Ideal for mobile workstations, utility carts, and tables that need to be frequently moved. | Attaching casters to standard leg designs. |
Custom Fabricated Legs | Unique designs created to meet specific aesthetic or functional requirements. | Used for bespoke furniture pieces, artistic installations, and specialized applications. | Custom metal fabrication techniques including cutting, welding, bending, and finishing. |
Industrial Pipe Legs | Legs made from industrial pipes and fittings, giving a raw, utilitarian look. | Popular for industrial, rustic, and steampunk-themed tables, including desks and coffee tables. | Assembling standard pipe sections and fittings. |
Sculptural Legs | Legs designed as artistic elements, often with intricate shapes and forms. | Used for high-end, designer furniture pieces where the legs are a focal point. | Advanced metal fabrication techniques, often involving casting, forging, and intricate welding. |
Minimalist Legs | Simple, clean, and understated leg designs that blend seamlessly with the tabletop. | Ideal for modern and contemporary interiors, emphasizing functionality and clean lines. | Precision cutting, welding, and finishing of metal profiles. |
Hairpin legs are a very popular choice. They are made from bent metal rods. These form a distinctive hairpin shape. You can use them for coffee tables, side tables, or dining tables. Hairpin table legs fit well with mid-century modern or industrial styles. Industrial pipe legs use standard pipe sections and fittings. They give your table a raw, utilitarian look. U-frame legs are shaped like a ‘U’. They provide a clean, minimalist, and stable base. X-frame legs cross to form an ‘X’. They offer excellent stability and a bold design. A-frame legs form an ‘A’ shape. They provide a sturdy and visually interesting base.
Upcycled and Unique Concepts
You can get very creative with your DIY table legs. Use upcycled materials to make a truly unique table.
Reclaimed wood or branches: Use these for a rustic look.
Repurposed metal: Metal pipes or rods create an industrial-rustic hybrid.
Old metal vintage casket carrier: Repurpose this for dining room table legs.
Salvaged pieces: Use parts from old furniture or architectural elements. These make vintage-style table legs.
Scrap wood: Create unique shapes like X-shaped legs. This is especially good for outdoor tables. You can use reclaimed 2x4s.
You can use epoxy for joining different materials. This creates strong bonds. Add silicone bumpers to the bottom of your legs. This protects your floors and prevents slipping. These unique concepts make your table a conversation piece.
Finishing and Installation
You have built your table legs. Now you need to finish and install them. This makes your table look great and last a long time.
Surface Preparation
Proper surface preparation is key. First, you should sand the surface. Lightly sand to rough it up. Do not try to remove the old finish. This is important unless your furniture is unfinished. Move the sander up and down. Do not press too hard. Focus on most of the surface. For ornate details, fold sandpaper. Sand back and forth. After sanding, wipe down the legs. Use a damp cloth to remove all dust. Next, apply a primer. This is especially true over stained or previously painted wood. Spraying primer works best. It gives better adhesion. Choose your primer color carefully. Use white primer for light paint. Use gray primer for dark paint. Apply a light coat of primer. This helps the paint stick well.
Finishing Options
Finishing your legs smoothly can be tricky. Intricate shapes are hard to coat with a brush. You can hang your table legs from the ceiling. Use wire for this. Then, spray them for a smoother finish.
Polyurethane is a great clear finish. It is easy to use and very durable. Oil-based polyurethane dries slower. This gives you more time to work. It also has an amber tone. Water-based polyurethane is colorless. You can choose based on the look you want. For stains, apply at least three coats. This gives a thicker layer of protection. A thicker layer protects the wood better. It also makes future refinishing easier. Some people even use four or five coats.
Leg Attachment
Attaching your legs securely is vital.
Tabletop Material | Recommended Attachment Method |
|---|---|
Wooden Tabletops | Threaded inserts (M5 bolt or 5mm threaded insert for 6mm leg holes) for frequent assembly/disassembly or professional finish. Longer screws for heavier tops if material allows. |
Glass or Acrylic Tabletops | Specialized adhesives designed for these materials. |
Heavy Stone or Concrete Tabletops | Consult a professional or use heavy-duty attachment methods capable of supporting significant weight. |
For wooden tabletops, use threaded inserts. An M5 bolt or 5mm threaded insert works well for a 6mm leg hole. This allows for wood expansion. It also helps with alignment. For heavier tabletops, use longer screws. Make sure your tabletop material can handle them. After attaching the legs, flip the table. Gently rock it to check for stability. Tighten any loose screws if the table wobbles.
Tips for DIY Success
You build your own table legs. You want them to be strong and safe. These tips help you achieve success.
Stability Testing
You need to test your table’s stability. A wobbly table is not good. You can fix common stability issues.
Here are effective methods for testing the stability of newly constructed legs:
Technique | Implementation Complexity | Resource Requirements | Expected Outcomes | Key Advantages |
|---|---|---|---|---|
Wooden Wedge or Shim Method | Low | Minimal (scrap wood or pre-made wedges) | Stable table; may slip over time | Inexpensive, customizable, no table modification |
Self-Adhesive Furniture Felt Pads | Very low | Minimal (felt/rubber pads) | Moderate wobble fix; floor protection | Easy to install, inexpensive, protects floors |
Adjustable Threaded Leveling Feet | High | Moderate (metal parts and tools) | Precise, permanent stability | Most precise, durable, adjustable over time |
Table Leveling Wedges/Stabilizers | Low to moderate | Minimal to moderate (plastic wedges) | Durable, slip-resistant stability | Durable plastic, anti-slip, water-resistant |
Sugar Packet/Folded Paper Method | Very low | None (readily available paper) | Temporary fix; prone to degradation | Free, accessible anywhere, easily adjustable |
Table Leg Shortening Method | High | Moderate (woodworking tools and skills) | Permanent, exact fix without additional parts | Permanent, no slipping, maintains original look |
You can also follow these steps to ensure your table is stable:
Assess the Table and Identify the Problem: Examine each leg for unevenness or damage. Gently rock the table. Observe which leg lifts off the ground. Inspect joints for loose hardware. Grasp and wiggle each leg. This helps you find uneven legs or loose joints.
Tighten Hardware: Check where legs attach to the table. Look for loose bolts, screws, or fasteners. Tighten any loose hardware. Use an appropriate wrench or screwdriver. Do not overtighten. If wobbling continues, reinforce joints with wood glue. Clamp them tightly until dry.
Level Uneven Legs: One or more legs might be shorter. Turn the table upside down. Place it on a protected flat surface. Identify the shorter leg. You can use a ruler. Add thin washers underneath the shorter leg. Layer them until it matches the height of the others. Use a carpenter’s level for confirmation. Test for wobbling after turning the table right-side up. For a permanent fix, glue washers in place.
Weight Customization
You need to customize your legs for specific weight requirements. A heavy tabletop needs strong support. A 3-inch thick oak dining surface needs robust support. A lightweight plywood coffee table needs less. The chosen legs must handle the tabletop’s weight.
Material choice is important. Metal legs, especially steel, are stronger. They support more weight with a smaller profile. This makes them ideal for very heavy tabletops. Wood legs offer a classic look. You can customize their shape and finish. The material, construction, and attachment method all make your table stable and long-lasting. They ensure it bears the weight of the tabletop and anything you place upon it.
Safety First
Safety is always important when you build your own furniture. You must use appropriate protective gear. Follow all necessary safety precautions.
Always follow all safety instructions provided with your table saw.
When you use a table saw:
Ensure the blade and gate are parallel. This prevents kickback.
Install the table saw’s riving knife. Most modern saws have this. It helps prevent kickback.
Wear safety glasses. Protect your eyes from flying debris. Use gloves to protect your hands. Work in a well-ventilated area. This is especially true if you are welding or using strong finishes. Your safety ensures a successful project.
Building your own diy table legs offers great benefits. You save money and create personalized furniture. This diy project is very rewarding. Take the first step today. Embrace your creativity, no matter your skill level. Enjoy your custom-built table. Share your unique legs. Find design inspiration on Pinterest. Join Facebook groups for community support.
FAQ
How do I attach legs to a tabletop?
You can use threaded inserts for wooden tops. These allow easy assembly. For heavier tops, use longer screws. Always match the attachment method to your tabletop material.
Can I use reclaimed wood for table legs?
Yes, you can use reclaimed wood. It gives your table a unique, rustic look. Make sure the wood is strong and free from rot. Clean and prepare it properly before building.
How do I make sure my table legs are stable?
Test your table by gently rocking it. Tighten all hardware. Use shims or adjustable leveling feet for uneven legs. Reinforce joints with corner blocks for extra strength.
What basic tools do I need for wooden legs?
You need a measuring tape, pencil, and a saw. A drill helps with holes and fasteners. Clamps hold pieces while glue dries. Always wear safety glasses for protection.
How can I protect my floors from metal legs?
Attach silicone bumpers or felt pads to the bottom of metal legs. This prevents scratches. It also helps stop the table from sliding. Choose durable pads for long-lasting protection.


