
Choosing the right sander can be tricky for any diy beginner. You often wonder: mouse vs orbital sander, which sander is right for your project? Both are popular choices, but the best sander isn’t a universal answer. The ideal sander depends entirely on your specific DIY task. We will explore factors like the type of work, desired finish quality, speed, and cost. This guide helps you pick the perfect beginner tool for your needs.
Key Takeaways
Choose a mouse sander for small, detailed jobs. It fits into tight corners and is easy to control.
Use an orbital sander for large, flat surfaces. It removes material quickly and leaves a smooth finish.
An orbital sander works faster on big projects. A mouse sander is slower and best for small areas.
An orbital sander gives a smoother finish on flat surfaces. A mouse sander can leave swirl marks if not used carefully.
Owning both sanders gives you many options. You can handle any sanding task, big or small.
Sander Basics: Mouse and Orbital
You need to understand how each sander works. This knowledge helps you choose the right tool for your project. Both sanders remove material, but they do it differently.
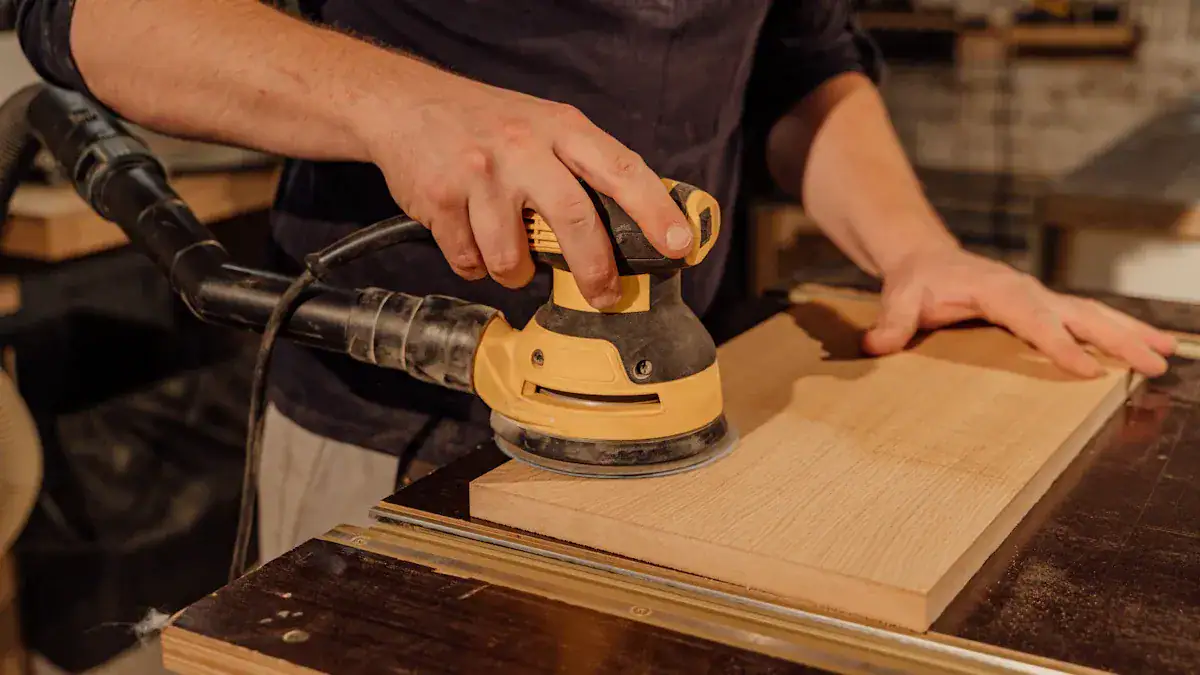
Orbital Sander Overview
An orbital sander is a versatile electric sander. It uses a round sanding pad. This pad moves in tiny circles. It also spins at the same time. This dual motion creates a “random orbit.” The random orbit prevents the sander from leaving noticeable swirl marks on your surface. You get a very smooth finish. This sander works best on larger, flat surfaces. It quickly prepares wood for painting or staining. A random orbital sander is a great general-purpose sander for many DIY tasks.
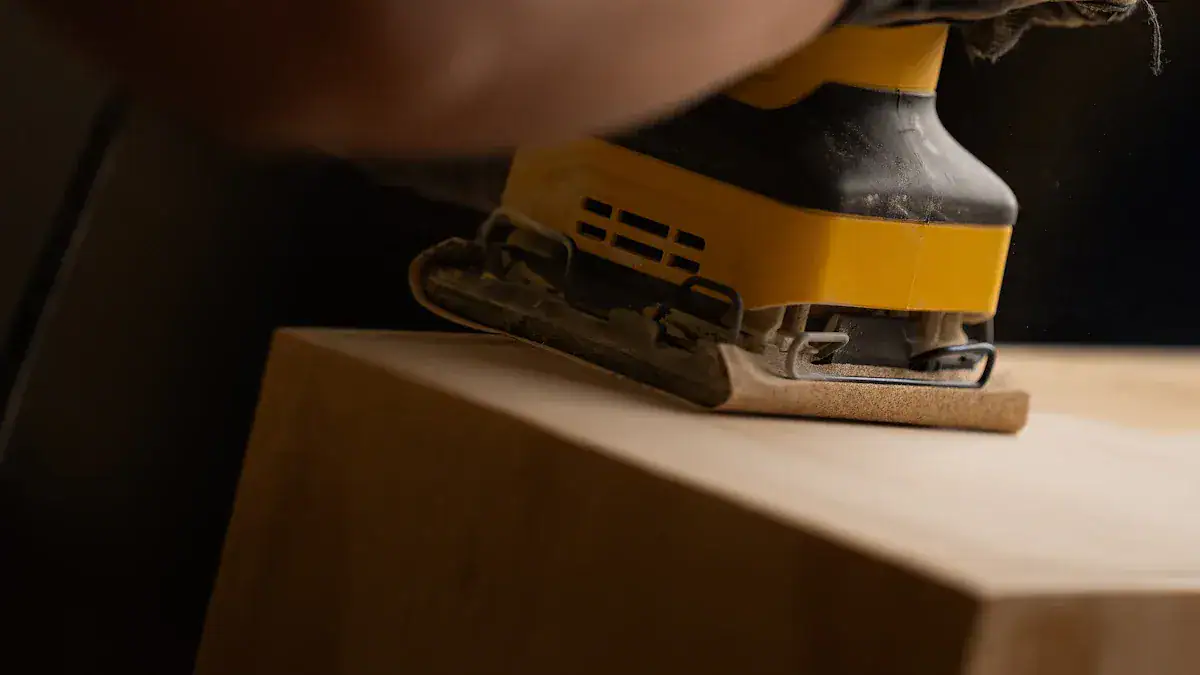
Mouse Sander Overview
A mouse sander gets its name from its shape. It has a small, triangular sanding pad. This pad vibrates rapidly in a small oscillating motion. It does not spin like an orbital sander. The triangular shape lets you reach tight spots. You can sand corners, edges, and intricate details easily. This sander is lightweight. You can maneuver it with precision. It is perfect for small projects where a larger sander cannot fit.
Mouse Sander: Pros, Cons, and Ideal Projects
You need to understand the strengths and weaknesses of a mouse sander. This helps you decide if it is the right tool for your project.
Mouse Sander Advantages
You will find many benefits when you use a mouse sander. It excels at detail work. This tool reaches into corners and along edges with ease. Its small, triangular pad is ideal for this precision. This sander is lightweight. You can maneuver it effortlessly. For example, the SKIL Corded Detail Sander weighs only 1.77 lbs. The Black & Decker 1.2 Amp Mouse Detail Sander is 2.8 lbs. Its compact and ergonomic design gives you control. You can access tight corners and spaces. Some models even offer a two-position grip for enhanced control. A detail finger attachment can be interchanged. This lets you sand hard-to-reach areas. This makes it a great choice for small projects. It is often more affordable than larger sanding tools.
Mouse Sander Limitations
This type of sander has some drawbacks. It is slower for large areas. It removes material less aggressively than an orbital sander. You might see swirl marks if you do not use it correctly. Pushing too hard causes swirl marks. Not starting the sander on the surface can also cause them. Moving the sander too quickly is another cause. Tipping the sander can also create marks. Poor quality sandpaper contributes to this issue. Dust and debris can clog the tool. This leads to larger scratches. Always progress through grits. Do not skip grits. The dust collection system on a mouse sander is often smaller. This means more dust in your workspace.
Mouse Sander: Ideal Projects
A mouse sander shines in specific projects. It is ideal for detailed sanding tasks. You can effortlessly maneuver it into tight spaces and intricate corners. Consider it the best sander for refinishing furniture with intricate details. This includes intricately carved furniture or pieces with complex designs. It handles carvings, moldings, and hard-to-reach areas on furniture. For window frames, a mouse sander is invaluable. Its compact size allows access to tight spaces. The detail finger attachment is interchangeable. You can sand extremely small surfaces. This makes it suitable for accessing smaller and tighter surfaces. It is also a great sander for small craft projects. If you are working on stairs, especially spindles or tight risers, this detail sander can be very useful. It might not be the best sander for stairs overall, but it handles the detailed parts.
Orbital Sander: Pros, Cons, and Best Uses

You need to understand the strengths and weaknesses of an orbital sander. This helps you decide if it is the right tool for your project.
Orbital Sander Advantages
An orbital sander offers many benefits. It removes material quickly. This saves you time on large or rough surfaces. You can cover a lot of space in less time. For example, a 6-inch random orbital sander covers over 30% more surface area than a 5-inch sander. This allows for wider passes and quicker coverage. These larger sanders often have more powerful motors. This increases sanding speed. A 6-inch sander can complete tasks approximately 50% faster than a comparable 5-inch model.
Feature | Orbital Sander | Sheet Sander |
|---|---|---|
Material Removal Speed | Faster | Slower, more precise |
Surface Area Coverage | Covers a lot of space in less time | Not ideal for large or rough surfaces due to slow material removal |
This sander creates a smooth finish on flat surfaces. Its random orbit motion prevents noticeable swirl marks. This makes it a great finish sander. You will find it less prone to leaving marks than other sanders. It is efficient for larger areas. It also has better dust collection systems. This keeps your workspace cleaner. You can use it for lighter sanding tasks and even curved surfaces.
Orbital sanders are highly effective as finish sanders. Their unique motion prevents noticeable streaks in the wood. This results in a smooth finish. They are useful for small sections of wood flooring and cabinet finishing.
Orbital Sander Limitations
An orbital sander does have some drawbacks. It cannot reach tight corners. Its round pad makes this impossible. It is also heavier than a mouse sander. A DEWALT Cordless Orbital Sander weighs 3.13 ounces without a battery. The Bosch ROS20VSC Professional orbital sander weighs 3.5 lb. A Makita BO6050J 6″ Random Orbit Sander has a reduced weight of 5.7 lbs. This makes it less precise for intricate work. It is generally more expensive than a mouse sander.
Orbital Sander: Ideal Projects
An orbital sander excels in many DIY projects. It is the best sander for large, flat surfaces. You can use it for sanding tabletops, doors, and cabinets. It is excellent for general surface preparation before painting or staining. This sander is often the best sander for removing paint from larger, flat surfaces. You can use it in renovation projects to prepare surfaces for new coatings. It quickly removes old paint and varnish from wood, doors, and windows. The ROTEX eccentric sander is very effective for this task.
You can also use it for deck sanding. Here are the steps:
Clear the Deck Surface: Remove all items like furniture and planters. Sweep away debris. Power wash the surface. Allow 24-48 hours for complete drying.
Start with Coarse Sandpaper: Use 60-grit sandpaper. Sand along the wood grain. Avoid staying in one spot.
Move to Medium Grit: Switch to 80-grit sandpaper. This refines the surface.
Finish with Fine Grit: Use 120-grit sandpaper for a smooth finish. This is important if you plan to stain the deck.
For large-scale projects like sanding hardwood floors, an orbital sander is invaluable. It also works well for smaller tasks like polishing wooden tabletops. It is a versatile sander for removing old finishes, paint, or varnish. You can achieve a polished surface with fine sanding. While a mouse sander handles intricate parts of stairs, an orbital sander is a great general sander for the flat treads and risers.
Mouse vs Orbital Sander: Direct Comparison
You often face a choice between a mouse vs orbital sander. Each tool offers unique benefits. You need to understand these differences. This helps you pick the right one for your project.
Sanding Speed and Area
You will notice a big difference in speed. An orbital sander covers large areas quickly. Its random orbit motion removes material fast. This makes it the best sander for big projects. For example, sanding a 10 square foot surface with an orbital sander is much faster than with a mouse sander. If you sand a floor with an orbital sander, it can take 2-4 days per room. A handheld orbital sander might double that time.
Richard Cunningham states, “I did an 10×4 ft hall, 12 stairs and a walk in closet with a hand held orbital. yes it took some time but no need of renting a big sander. all the flooring still looks great 4 years later. don’t let this article intimidate you if you have a small job to do.”
A mouse sander works much slower. It has a smaller pad. You use it for small, detailed areas. It is not the best sander for large surfaces. You will spend a lot more time if you try to sand a big table with a mouse sander.
Finish Quality
You want a smooth finish. An orbital sander generally gives you a smoother result. Its random orbit motion helps prevent swirl marks. This is especially true on flat surfaces. For a swirl-free finish on drywall, you should use a grit range of 180-220.
You can use a grit progression like P80, then P120, then P180, then P220. This reduces rework on materials like MDF.
For corners, try P120 for material removal, then P180 to blend, then P240 for the final finish. This avoids ‘pigtails’ after priming.
High-quality sanders with fine grits (P180+) create almost invisible scratches.
A mouse sander can leave swirl marks. Its oscillating motion can create them. This happens if you push too hard or move too fast. You can minimize these marks.
Move the sander slowly. Aim for about 12 inches every 20 seconds. This stops swirls from stretching.
Progress through grits without skipping. Use 80, 120, 150, 180, then 220.
Remove all residue from the previous grit. Blow off the surface or wet it.
Use a vacuum system. This collects dust. It prevents stray grit from causing marks.
Use a sander with a smaller orbit size for finish sanding.
Place the sander on the surface before turning it on. This prevents initial swirl marks.
Exit the workpiece with a sweeping motion. Keep it as parallel to the surface as possible.
Maneuverability and Access
You need to reach tight spots. A mouse sander is the clear winner here. Its small, triangular pad fits into corners. It gets into intricate details. It is lightweight and easy to control. This makes it the best sander for detailed work. It is also the best sander for stairs, especially for spindles and tight risers.
An orbital sander has a round pad. It cannot reach into tight corners. It is heavier. You use it on open, flat surfaces. It is less precise for intricate tasks.
Cost and Value
You consider your budget. A mouse sander is usually more affordable. It is a good entry-level sander for small projects. You get good value for detail work.
An orbital sander costs more. However, it offers greater versatility. It handles a wider range of tasks. It is a better all-rounder for general DIY. It is often the best sander for refinishing furniture with large, flat surfaces. For many DIYers, owning both tools gives you the most options. You can tackle any project.
Both a mouse sander and an orbital sander are valuable tools for your DIY projects. Each offers unique strengths. You choose the right sander based on your project’s specific needs. Consider large, flat surfaces for an orbital sander. Use a mouse sander for intricate details. For many avid DIYers, owning both tools provides the ultimate versatility. This ensures you always have the best sander for any task. Assess your typical projects to decide which sander, or both, will best serve your needs.
FAQ
Can I use a mouse sander for large projects?
No, a mouse sander is not ideal for large areas. Its small pad makes big surfaces very slow to finish. You will spend too much time. Use it for small, detailed tasks instead.
Can an orbital sander reach into corners?
No, an orbital sander has a round pad. This shape prevents it from reaching tight corners. You need a mouse tool for those intricate spots. An orbital tool works best on open, flat surfaces.
Which tool is better for a beginner?
Both tools are good for beginners. A mouse tool is easier to handle for small details. An orbital tool is more versatile for general tasks. Your project type determines the best choice for you.
Should I own both a mouse and an orbital tool?
Yes, owning both tools gives you great versatility. You can tackle any project. Use the orbital tool for large, flat areas. Use the mouse tool for details and tight spaces. This covers all your finishing needs.
