
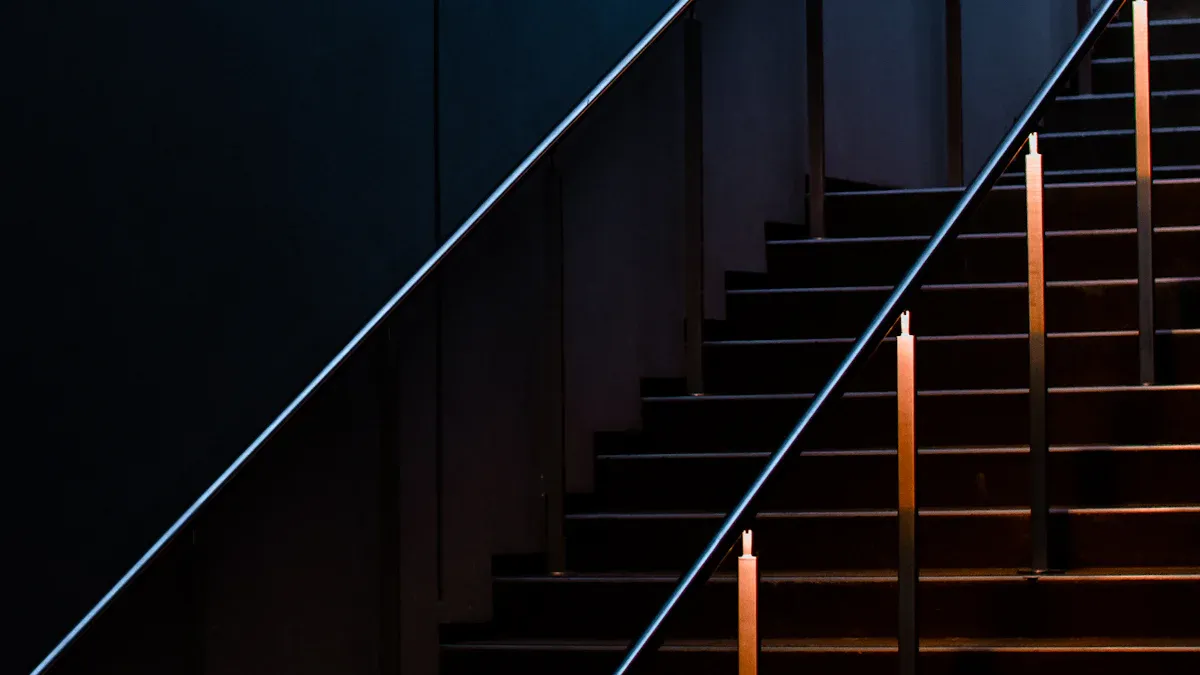
A black handrail and banister can dramatically change your home’s look, instantly modernizing the space. You’ll gain significant black staircase inspiration from this simple change. A well-renovated staircase can even boost your home’s value by up to 10%. Updating staircases with new railings offers a smart, stylish move for a high return on investment.
This DIY project is rewarding, though it requires careful planning and execution. Consider your decision carefully before you commit to black. This update also adds safety; strong handrails demonstrate good home upkeep, which helps increase home value. This guide will show you how to repaint your staircase, and specifically how to repaint stair handrail for a professional look.
Gather Tools & Materials to Repaint
To successfully repaint your staircase and achieve that modern black look, you need the right tools. This DIY project starts with gathering everything. Knowing how to repaint your handrail properly begins here.
Select Black Paint & Primer
You need high-quality paint and primer. They must stand up to heavy use. For metal surfaces, you need specific primers. For steel or iron, use a rust-inhibiting oil-based primer. Galvanized steel needs a self-etching primer. Aluminum also benefits from self-etching or DTM primer. Stainless steel works best with epoxy or DTM primer. Brands like Rust-Oleum Professional Rusty Metal Primer or Kilz Adhesion High-Bonding Interior Primer are good choices. These primers ensure your black paint sticks well.
Essential Sanding & Cleaning Supplies
For cleaning, you want a degreaser that leaves no film. For wooden surfaces, a mild dish soap solution works well. Mix a small amount of mild dish soap with warm water. This removes dirt without harming the wood. For tougher stains on wood, try equal parts white vinegar and water. Vinegar cleans and disinfects. For metal surfaces, especially aluminum, a diluted white vinegar solution is also great. Use two parts water to one part white distilled vinegar. After cleaning, you will sand. Use medium-grit sandpaper first. This smooths any rough spots. Then, finish with fine-grit sandpaper. This makes the surface very smooth. A smooth surface helps the paint stick better.
Protective Gear & Drop Cloths
Protect yourself and your home. Wear protective gear. This includes chemically resistant disposable coveralls. Use advanced respirators or N95 masks. These protect your lungs from paint fumes. Wear ANSI-certified safety glasses to protect your eyes. Chemical-resistant gloves protect your hands. For your floors, use canvas-backed, plastic-lined drop cloths. These prevent paint from soaking through. For furniture, thin plastic sheets work well. If you are painting a staircase, non-slip canvas drop cloths are best. They have rubber nubs to prevent slipping.
Brushes, Rollers & Applicators
Now, choose your applicators. For intricate details on your banister, use a special brush. The Zibra Round Brush is excellent for spindles and detailed moldings. Its 1-inch round bristles conform to ornate surfaces. This brush holds a lot of paint, so you dip less often. For flat surfaces, use a roller. A short nap roller, 1/4 inch or 3/16 inch, is best for smooth finishes. Foam roller covers are ideal for high-gloss paints. They leave no brush marks.
Prepare for a Flawless Black Finish
Achieving a stunning black finish on your staircase requires careful preparation. This is the most important step for a durable and beautiful result. You want your newly repainted stair handrail to look professional. This DIY project needs a solid foundation. Knowing how to repaint correctly means you pay attention to these details.
Protect Your Surroundings
Before you start any work, protect your home. Lay down your canvas-backed drop cloths. Cover the floor around the staircase. Use painter’s tape to mask off any areas you do not want to paint. This includes walls, newel posts, or balusters that will not be black. Taping around surfaces prevents paint from getting on unintended areas. This step saves you a lot of cleanup later.
Clean Handrail & Banister Thoroughly
Now, clean your handrail and banister. You need to remove all dirt, grease, and grime. A hard-working all-purpose cleaner is excellent for this initial cleaning. It tackles tough buildup. For very stubborn spots, you can use a degreaser like Krud Kutter. This product cuts through grease without leaving a film. After cleaning, use a disinfectant antimicrobial. This step eliminates germs. It also provides a protective coating for both wooden and metal surfaces. A clean surface helps the paint stick better.
Sand for Optimal Adhesion
Sanding is crucial for optimal paint adhesion. Do not skip this step, even if some products claim “no sanding” is needed. A light sanding removes glossy varnish or old coatings. This creates a rough surface for the new paint to grip.
Begin with 80-grit sandpaper. This effectively removes stubborn rust or old paint layers.
Transition to 150-grit sandpaper. This creates a smooth surface. It prepares the handrail and banister for paint.
After sanding, clean the surface again. Use detergent and water. This removes any dust or debris. Dust can stop primer or paint from sticking well.
Repair Imperfections & Fill Gaps
Inspect your handrail and banister closely. Look for any dents, divots, or cracks. You need to repair these before painting. Use wood filler for wooden surfaces. Apply it with a putty knife. Smooth it out. For metal, use an appropriate metal filler. Let the filler dry completely. Then, sand the repaired areas smooth with fine-grit sandpaper. This ensures a seamless look under your new black paint.
Apply Primer for Black Paint
Applying primer is a must. Primer creates a uniform base for your black paint. It helps the paint adhere better. It also blocks stains from bleeding through. For a black finish, a dark gray or black primer is ideal. This helps you achieve a rich, deep black color with fewer coats of paint. Apply one to two thin, even coats of primer. Follow the manufacturer’s drying times between coats. This step is vital for a long-lasting finish.
How to Paint a Smooth Black Coat
You have prepared your staircase. Now comes the exciting part: applying the black paint. This is where your vision for a modern look truly comes to life. Remember, the tall post of a banister generally looks better when it is the same color as the rail. This creates a cohesive and sophisticated appearance for your entire staircase. While some methods claim “no sanding or chemical stripping,” proper preparation is always key for a lasting paint job.
First Coat Application Techniques
You are ready for the first coat of paint. Choose your tools wisely to minimize brush strokes and roller marks. For detailed areas, like around the balusters, a quality brush works best. Load your brush wisely, about one-third to one-half the bristle length. Brush with the grain if you are painting wood. Apply paint with smooth strokes and let it self-level. Use the brush tip for corners and maintain a wet edge. This means you always work into paint that is still wet.
For flatter surfaces, a foam roller provides a good finish. Use light pressure and roll in one direction for the final pass. If you want an excellent, professional finish, especially for a larger project, consider an HVLP sprayer. Practice on cardboard first. Hold the sprayer perpendicular, about 6-8 inches away. Use smooth, overlapping strokes. Apply multiple thin coats. Choose high-quality paint that flows smoothly and self-levels as it dries. Latex (water-based) paints offer easy cleanup and a smooth finish. Oil-based paints are durable and self-leveling, but they take longer to dry.
Sand Between Coats for Smoothness
You have applied your first coat. Now, patience is important. Allow the paint to dry completely according to the manufacturer’s instructions. This is crucial before you do anything else. Once dry, you will lightly sand the surface. This step is your secret weapon for a truly smooth finish. For painted finishes, lightly scuff the surface with 220-grit sandpaper between coats. Some experts even suggest 180-220 grit sandpaper for enamel. This removes any minor imperfections or dust nibs. After sanding, wipe the surface thoroughly with a tack cloth. This removes all dust. Dust can prevent the next coat of paint from adhering properly.
Apply Subsequent Coats Evenly
Now you will apply your subsequent coats. You want two to three thin, even topcoats for optimal coverage. This ensures an even color and a durable finish. Use the same careful techniques you used for the first coat. Keep your brushes and rollers wet. Frequently reapply paint and maintain tool moisture. This prevents dragging paint and uneven textures. Load enough paint for each section. Work in smaller segments. Mist or dip brushes lightly if needed.
Monitor the drying conditions in your room. Maintain an ideal temperature, usually 60-80°F. Manage humidity to prevent slow drying. Always allow sufficient drying time between coats. This ensures a stronger bond and prevents smudging. Remember, applying thin coats is better than one thick coat. Thin coats prevent drips and runs. They promote a smooth, professional look.
Address Drips & Imperfections
Even with careful application, drips or imperfections can happen. Don’t worry; you can fix them. If you spot a wet paint drip, act quickly. Lighten the excess paint by brushing in the direction of the existing stroke. If there is a lot of excess paint, wipe the surface with a damp cloth before smoothing. Avoid overspreading. This prevents rough, uneven textures as the paint dries. Gently feather to blend the cleaned drip into the surface. This maintains texture and color.
For dried paint drips, confirm the drip is completely dry first. Use a scraper blade or putty knife. Hold it at a 30–45-degree angle. Carefully remove the excess paint. Try to minimize gouging the surface. After removing the bulk of the paint, sand the drip. Use a sanding block or sponge until it is level with the surrounding paint. Then, use finer-grain sandpaper to feather the edges. This creates a seamless transition. If scraping and sanding damage the surface, repair it with spackle. Sand away the excess. Clean away all dust with a damp rag or sponge. Then, repaint the area. Check if priming is needed. Use the same paint and tools if possible for consistent sheen. Apply a thin coat, let it dry, then apply a second coat. Feather and blend the edges. Proper tool loading, consistent pressure, and good lighting checks help prevent drips. This ensures your black banister and balusters look perfect. These tips on painting balusters will help you achieve a flawless finish.
Ensure Durability & Pro Look

You have worked hard on your staircase. Now, let’s make sure your beautiful black finish lasts. This final stage protects your work and gives it a professional look.
Understand Drying & Curing Times
Paint needs time to dry. It also needs time to cure. Drying means the paint feels dry to the touch. Curing means the paint hardens completely. This process makes it durable. Always follow the paint manufacturer’s instructions for both drying and curing times. Rushing this step can lead to chips or scratches. Give your newly painted staircase the time it needs before heavy use.
Apply Protective Topcoat for Longevity
You want your black handrail and banister to stay looking great. A protective topcoat is your best friend here. It adds an extra layer of defense. For super tough surfaces like rail caps, consider an epoxy base coat. It goes under your primer and paint. This makes your finish much stronger. If you have older wood railings with cracks, high-build elastomeric coatings are great. They flex with the wood and seal cracks. For a clear, hard shield, use polyurethane clear coats. They resist water, chemicals, and scratches. Water-based polyurethanes can protect your project for years.
Final Inspection & Touch-Ups
Take a good look at your work. Walk around your staircase. Check every angle. Do you see any small spots you missed? Are there any tiny drips you did not catch? Now is the time to fix them. Use a small artist’s brush for tiny touch-ups. Apply paint sparingly. You want to blend it in smoothly. This final inspection ensures a perfect, flawless look.
Proper Cleanup & Tool Care
You finished your repaint project! Now, clean your tools. This saves them for your next diy task. For brushes, remove excess paint with a brush comb. Wash them in warm, soapy water. Reshape the bristles while they are damp. Then, hang them upside down or lay them flat to dry. Store dry brushes in their original packaging. For rollers, rinse them under a tap. Use a 5-in-1 paint scraper to remove extra paint. Wash them in warm, soapy water. Store dried rollers in a zip lock bag. Proper care means your tools will be ready when you are.
You have seen the transformative power of a black handrail and banister. This project offers true black staircase inspiration for your home. You learned how to repaint your staircase, from thorough preparation and careful paint application to proper finishing. This ensures a durable result.
Now, take pride in your newly updated staircase! Enjoy the sophisticated, contemporary look you created. To keep your handrail and banister pristine, use only mild detergents for cleaning. Avoid abrasive cleaners. Keep touch-up paint handy for any chips. Pair your new black staircase with white walls and dark wood flooring for a bright, modern farmhouse look.
FAQ
What type of paint works best for a black handrail?
You should choose a durable, high-quality enamel paint. Look for options designed for high-traffic areas. Both oil-based and water-based (latex) enamels work well. Oil-based paints offer great durability. Water-based paints clean up easily. Consider a semi-gloss or satin finish for a modern look.
What happens if you skip sanding between paint coats?
Skipping sanding between coats can lead to a less smooth finish. Paint might not adhere as well. You could see brush strokes or small bumps. A light sanding creates a better surface for the next coat. This helps your final finish look professional and last longer.
What is the difference between paint drying and curing?
Drying means the paint feels dry to the touch. It is surface-dry. Curing means the paint has fully hardened and reached its maximum durability. This process takes much longer than drying. You should wait for full curing before heavy use. This prevents chips and scratches.
What is the best way to clean your newly painted black handrail?
You should clean your black handrail with mild soap and water. Use a soft cloth. Avoid harsh chemicals or abrasive cleaners. These can damage the paint finish. Gently wipe down the surface. This keeps your handrail looking fresh and new. ✨


