
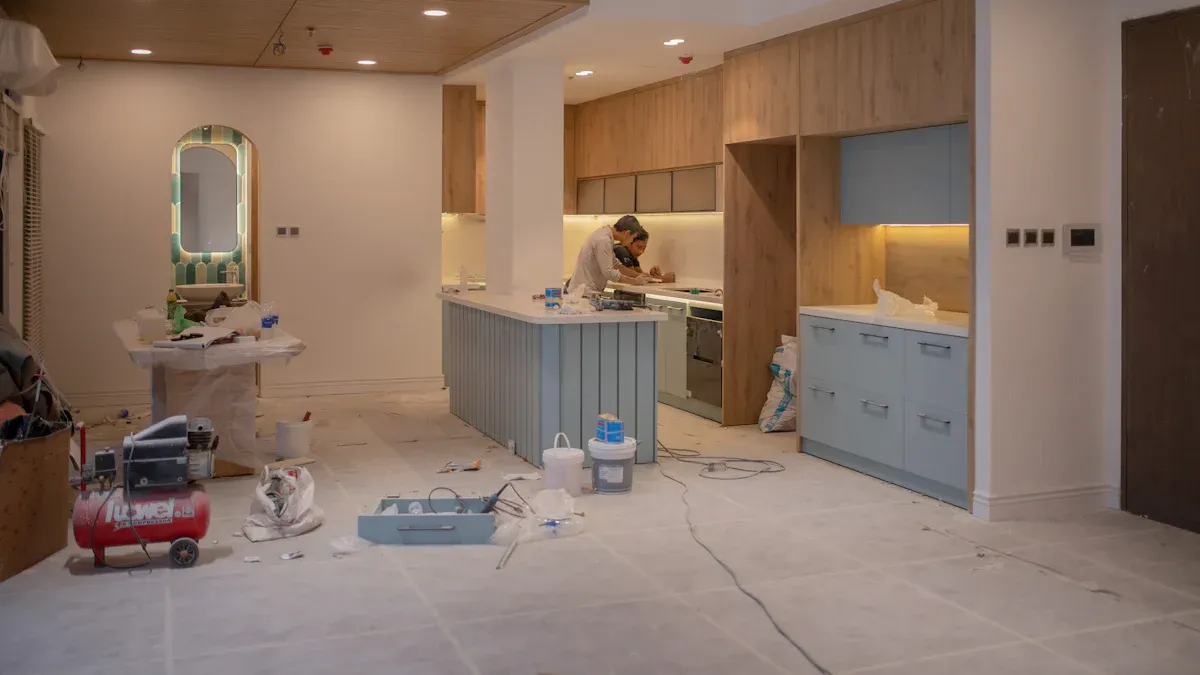
You can dramatically update your kitchen’s look without a full renovation. Painting cabinets offers a cost-effective solution. This project typically costs only one-third to one-half the price of installing new cabinets, which often exceeds $10,000. This how to paint kitchen cabinets step-by-step guide provides a complete tutorial. You will achieve a professional, durable painted finish, even as a DIY beginner. Painting cabinets adds significant value and personal satisfaction to your home.
Why Paint Your Kitchen Cabinets
Painting your kitchen cabinets offers many benefits. You can transform your kitchen without spending a lot of money. It also lets you show your unique style.
Cost-Effective Kitchen Refresh
Replacing kitchen cabinets can be very expensive. It often costs thousands of dollars. Painting cabinets is a much cheaper option. You save a lot of money. This project gives your kitchen a fresh, new look for a fraction of the cost. You get a big impact without a big budget.
Personalize Your Space
Your kitchen should feel like yours. Painting your cabinets lets you choose any color you want. You can match your home’s style or try something new. This is a great diy project to make your kitchen truly unique. You create a space that reflects your taste and personality.
Increase Home Value
An updated kitchen makes your home more attractive to buyers. Freshly painted cabinets show care and attention. This can increase your home’s value. Many markets show a good return on investment (ROI) for cabinet updates. You can expect an effective ROI of roughly 70–80% on targeted cabinet refreshes. Refinishing your cabinets can even increase your home’s resale value by as much as 7%. Painting kitchen cabinets is a smart investment.
Essential Tools and Materials

Gathering all necessary supplies is the first step before starting your cabinet painting project. Having everything ready makes the process smoother and more efficient.
Safety Gear
Protect yourself during this project. You need proper safety gear.
Face mask: This protects your face from dust and paint.
Goggles: Wear these to shield your eyes from splashes and particles.
Gloves: Gloves keep your hands clean and safe from chemicals.
Respirator: Use a respirator if you work in a poorly ventilated area or with strong chemicals.
Dust mask: A dust mask is essential when you sand your cabinets.
Cleaning Supplies
Clean cabinets are crucial for paint adhesion. You need strong cleaners.
Krud Kutter: This is a powerful degreaser. It cuts through cooking grease and tough stains. You can use it full strength for very greasy spots.
Dish Soap: Use dish soap for lighter grease stains. It is a gentler option.
Trisodium Phosphate (TSP): TSP is great for removing problematic residues. It prepares surfaces well but requires careful handling.
White Vinegar: Mix white vinegar with water. This solution cuts through grease without leaving residue.
Screwdrivers and Drills
You will use screwdrivers and drills to remove cabinet doors, drawers, and hardware. Keep them handy for disassembly and reassembly.
Sandpaper or Sanding Tools
Sanding helps paint stick better.
Clean your cabinets first.
Then, sand with 150 grit sandpaper. You can use a random orbital sander for flat surfaces. A sponge sander works well for details.
After priming, sand with finer grits like 220 or 240.
Sand with 300 grit between paint coats for a very smooth finish.
Wood Filler or Spackle
You can repair imperfections before painting.
Water-based wood fillers are good for indoor use. They work for larger gaps, holes, or damaged areas. These fillers provide a strong repair.
Wood putty is best for small surface flaws. Use it for nail holes or minor cracks.
Painter’s Tape and Drop Cloths
Protect areas you do not want to paint. Use painter’s tape to mask off edges. Lay down drop cloths to cover floors and countertops.
Primer Options
Choosing the right primer is key. Oil-based primers are often the best primer for kitchen cabinets.
They offer superior adhesion on smooth surfaces.
They block tannins from wood, preventing stains.
They seal raw MDF, stopping it from absorbing water-based primers. This prevents a rough finish.
Paint Options
Durability is important for kitchen cabinets.
Benjamin Moore Advance Waterborne Alkyd gives beautiful and durable results.
Sherwin Williams Urethane Trim Enamel is another excellent, durable choice. It resists chips, scratches, and dings.
Application Tools
Achieve a smooth finish with the right tools.
Microfiber application cloths help with even stain distribution.
Professional-grade synthetic brushes offer smooth, streak-free paint coverage.
Specialized mini rollers reach tight spots without leaving marks.
HVLP spray systems provide uniform paint coverage and reduce overspray.
Tack Cloths
Use tack cloths to remove all dust after sanding. This ensures a clean surface for painting.
Optional Finishing Products
Consider a clear topcoat for extra durability. This adds an extra layer of protection to your newly painted cabinets. This diy project will look great.
Key Preparation Steps
This section is crucial for the success of your “how to paint kitchen cabinets” project. Proper preparation ensures a durable and beautiful finish. You will create flat surfaces and set up a dedicated work area.
Empty and Label Cabinets
First, you must empty all your cabinets and drawers. Remove everything from inside. This prevents damage and gives you clear access. As you remove items, label each cabinet door and drawer front. Use a numbering system. For example, “Upper 1 Left” or “Drawer 3”. Write these labels on a piece of painter’s tape. Stick the tape to the back of each item. Also, draw a simple map of your kitchen layout. Mark where each numbered piece belongs. This makes reassembly much easier.
Remove Doors, Drawers, and Hardware
Next, you will remove all cabinet doors, drawer fronts, and hardware. Use your screwdrivers and drills for this task. Take off hinges, handles, and pulls. Place all hardware into separate, labeled bags. This keeps screws and small parts organized. You will not lose them. Store these bags in a safe place. This step is important for painting cabinets evenly. You get a smooth finish without hardware in the way.
Thorough Cleaning and Degreasing
You must clean your cabinets thoroughly before painting. Kitchen cabinets collect grease and grime over time. This residue prevents paint from sticking properly.
Tip: Degreasing and cleaning techniques are vital. You can use Trisodium Phosphate (TSP) for heavy grease. Mix it according to package directions. Wear gloves and eye protection. For lighter grease, a mix of white vinegar and water works well. You can also use a dedicated degreaser like Krud Kutter. Apply your chosen cleaner with a sponge or cloth. Scrub all surfaces of the cabinet boxes, doors, and drawer fronts. Rinse with a clean, damp cloth. Let the surfaces dry completely.
Repair Imperfections
Now, inspect your cabinets for any damage. Look for dents, scratches, or holes. Use wood filler or spackle to fix these imperfections. Apply a small amount of filler with a putty knife. Press it firmly into the damaged area. Make sure it is flush with the surface. Let the filler dry completely. Drying times vary, so check the product instructions. Once dry, lightly sand the repaired areas smooth. This creates a seamless surface for painting.
Proper Sanding for Adhesion
Sanding is a critical step for good paint adhesion. You need to create a surface that paint can grip.
Initial Sanding: Begin by sanding all cabinet surfaces with 120-grit sandpaper. This removes old layers of paint and finish. It also scuffs the surface.
Smoothing: After removing the old finish, use 220-grit sandpaper. This smooths the surfaces. It prepares them for a professional-quality finish.
Sanding Primed Surface: Once the primer is dry, lightly sand the surface with 220-grit sandpaper. This achieves a smooth base for the paint. It also removes minor imperfections.
Sanding Between Coats: Lightly sand the surface with 220-grit sandpaper after the first paint coat has dried. This smooths out imperfections. It also improves adhesion for subsequent coats.
Cleaning: After each sanding step, wipe away all dust with a clean, damp cloth. This ensures a clean surface for painting. Any remaining dust can interfere with paint adhesion.
Post-Sanding Dust Removal
After sanding, you must remove all dust. Dust particles will create bumps in your paint finish.
Wipe away dust with a lightly-dampened cloth.
Use a vacuum cleaner equipped with a brush attachment. This picks up loose dust.
Dampen a paper towel with naptha and wipe the surface. Naptha evaporates quickly. It also offers additional cleaning benefits. This is especially true for refinishing projects where wax or silicone might be present.
Avoid tack rags. They can contaminate the surface. This is especially true when you use water-borne finishes. Contamination can lead to imperfections like ‘fish-eyes’ in the dried film.
Protect Your Workspace
Finally, prepare your work area. Lay down drop cloths to cover your floors and countertops. Use painter’s tape to mask off any areas you do not want to paint. This includes walls, appliances, and the inside of cabinet boxes. A dedicated work area helps you stay organized. It also protects your home from paint splatters. This careful preparation makes your diy painting cabinets project much easier and cleaner.
Priming for a Flawless Finish
Priming is a vital step when painting cabinets. You prepare the surface for the paint. This ensures a long-lasting and beautiful finish.
Why Priming is Crucial
Priming kitchen cabinets is crucial. It prepares the surface for better paint grip. Primer blocks stains and seals the wood. This prevents bleed-through. Without primer, your paint job can look uneven. It might wear out quickly or peel over time. Kitchen cabinets endure daily use, cooking oils, grease, steam, and humidity. Primer acts as ‘armor’ for them. It makes the paint stronger and locks everything in. Primer also ensures the paint color looks better, richer, and smoother. It prevents issues like bubbling, sliding, uneven absorption, visible wood grain, or resurfacing stains.
Adhesion: Primer creates a surface for paint to stick to. This prevents premature peeling, chipping, or fading.
Color accuracy: A primed surface ensures the paint’s true color. The original wood color will not affect it.
Uniformity: Priming helps you achieve an even finish. This is especially crucial for porous materials like wood.
Protection: Primer seals the wood. It offers extra protection against moisture, dust, and environmental elements.
Revealing imperfections: Primer highlights surface flaws. You can correct these before painting.
Saves resources: A well-primed surface often needs only one coat of paint. This saves time and materials.
Primer is the unsung hero of cabinet painting. It seals the surface, blocks stains, and gives your paint something solid to grip. Skip it, and you are almost guaranteed peeling, blotches, and regret.
Choosing the Right Primer
You need the right primer for your project. Oil-based primers are often the best primer for kitchen cabinets. They offer superior adhesion on smooth surfaces. They block tannins from wood. This prevents stains. They also seal raw MDF. This stops it from absorbing water-based primers. This prevents a rough finish.
Primer Application Techniques
Proper application ensures the best results.
You must prep first. Clean, degloss, then sand and control dust. Preparation accounts for 80% of the finish.
Oak needs fill. Use a grain filler like Cabinet Mud before primer. This prevents pores from showing through the enamel.
Consider bonding versus blocking. For tough surfaces, choose an adhesion primer. For fresh oak or damaged finishes, use a strong stain-blocking primer.
You can spray or roll a sample door. This confirms dry times, build, and sheen under your specific lighting conditions.
Apply a uniform coat of primer to cabinet frames and doors.
Use a brush for corners and crevices.
Use a mini foam roller for the rest of the surface. This covers visible brush strokes for a smooth finish.
Consider using a paint sprayer for cabinet doors. This gives an impeccable finish. Move in a slow, even motion.
After the primer dries, lightly sand the surfaces. This ensures a smooth finish.
Remove any dust with a tack cloth or damp cloth after sanding.
To ensure a smooth surface, brush the primer on quickly. While it is still wet, roll over it a couple of times with a dry foam paint roller. This smooths out any brush strokes. The primer does not need to be applied thickly to be effective.
Understanding Drying Time
Always follow the manufacturer’s instructions for drying times. Primers typically dry to the touch within an hour or two. However, they need more time to fully cure. This can take several hours or even overnight. Do not rush this step. Applying paint too soon can lead to poor adhesion and a less durable finish.
Painting Cabinets for a Professional Look
You have prepared your cabinets. Now, you are ready to apply paint. This step brings your vision to life. Follow these steps for a professional finish.
Choosing the Right Paint
Selecting the right paint is crucial for durability. Kitchen cabinets face daily wear and tear. They need a tough finish. You want paint that resists chips, scratches, and moisture.
Benjamin Moore Advance Waterborne Alkyd offers beautiful and durable results. It flows smoothly and levels well. This creates a hard, furniture-like finish.
Sherwin Williams Urethane Trim Enamel is another excellent choice. It provides superior resistance to chips, scratches, and dings. This paint stands up to heavy use.
These paints are designed for high-traffic areas. They give your cabinets a long-lasting, beautiful look.
Color Selection Tips
Choosing a paint color sets the mood for your kitchen. Consider your home’s overall style. Think about the natural light in your kitchen.
Natural Richness: Deep, saturated colors are popular. Think earth tones, cinnamon, or rich browns. Some people even choose surprising reds and purples. These colors bring warmth and versatility to your space.
Cheery Strength: You might prefer airy, sunny aesthetics. Soft yellows, like Sherwin Williams’ chartreuse, are trending. These colors draw inspiration from nature, Art Deco, and modern vintage styles.
Light Hues: White remains a classic. However, it now evolves into sophisticated, subtle shades of gray and tan. These colors create a sun-bleached or snow-covered look. They take inspiration from mineral and stone tones.
Woven and Natural Integration: Sustainability drives this trend. You see woven cabinet fronts and natural-looking materials. This offers a unique blend of timeless elegance and individuality.
Pick a color you love. It will transform your kitchen.
First Paint Coat Application
You are ready to apply the first coat of paint. When painting cabinet doors, start by painting the backsides first. This allows you to perfect your technique on less visible areas. Professional painters often apply the first layer of finish paint to cabinet doors and drawers in a dedicated painting booth. For cabinet boxes, you apply the first coat after you thoroughly tape off the kitchen.
Follow these steps for application:
Stir the top coat thoroughly. This ensures even color and consistency.
Apply paint to inside edges or corners first. Use an angled paint brush for this. It helps you get enough paint into tight spots.
Next, paint the front surfaces.
Finally, paint the sides.
Work quickly. Apply paint in the same direction. This avoids brush marks as the paint dries. An angled paint brush helps you apply a sufficient amount of paint. It also lets you smooth it out swiftly before it dries.
Sanding Between Coats
Sanding between coats is a crucial step. It creates a smooth, professional finish. After your first coat of paint dries, lightly sand all surfaces. Use 220-grit or 300-grit sandpaper. This removes any small bumps or imperfections. It also helps the next coat adhere better. Do not sand too aggressively. You only want to scuff the surface. After sanding, wipe away all dust with a tack cloth. A clean surface is essential for the next coat.
Subsequent Paint Coats
Most cabinets need two to three coats of paint. This ensures full coverage and durability. Apply each subsequent coat just like the first. Make sure each coat is thin and even. Thick coats can lead to drips and an uneven finish. Always allow adequate drying time between coats. This prevents the paint from peeling or bubbling. Continue sanding lightly and cleaning between each coat. This process builds layers for a strong, beautiful finish.
Drying and Curing Times
Understanding drying and curing times is very important.
Drying time refers to how long it takes for the paint to feel dry to the touch. You can usually apply another coat after this time.
Curing time is when the paint fully hardens and reaches its maximum durability. This takes much longer. It can be several days or even weeks.
Always follow the manufacturer’s recommendations for both drying and curing times. Do not rush the process. Avoid heavy use of your cabinets during the curing period. This includes cleaning them or placing heavy items inside. Proper curing ensures your newly painted cabinets last for years. This careful approach to painting cabinets gives you a professional look.
Finishing Touches: Reassembly and Care
You have finished painting your cabinets. Now, you will put everything back together. This final stage brings your kitchen transformation to completion.
Optional Topcoat for Durability
Consider applying a clear topcoat. This adds an extra layer of protection. A topcoat offers many benefits for your newly painted cabinets:
It prevents chipping, scratches, and dirt accumulation.
It protects edges and frequently touched areas.
It offers resistance against heat, moisture, and grease.
It helps maintain smooth, polished cabinet surfaces.
It keeps paint color vibrant even under strong natural light.
It reduces the effort required for cleaning. A professional clear coat enhances durability. This is especially true for high-traffic kitchens. It helps preserve a “fresh-out-of-the-showroom” appearance for years.
Reinstall Hardware
Your paint is fully cured. Now, you can reinstall all hardware. Take out the hardware from your labeled bags. Attach the hinges, handles, and pulls to their correct doors and drawers. Use your screwdrivers or drills for this task. Be careful not to overtighten screws. This can damage the new paint finish.
Rehang Doors and Drawers
Next, rehang your cabinet doors and reinstall your drawers. Use the kitchen map you created earlier. This helps you match each piece to its original spot. Attach the doors to the cabinet frames. Slide the drawers back into their openings. Adjust the hinges as needed. This ensures proper alignment. Your doors should close smoothly. They should also sit evenly.
Care for Painted Cabinets
Proper care keeps your painted cabinets looking new. You should clean up spills and splatters immediately. This prevents staining. For daily cleaning, dust and wipe with a soft microfiber cloth. Spot clean stains with mild dish soap and warm water. Avoid abrasive cleaners like Magic Erasers. Always dry the cabinets immediately after cleaning. This prevents moisture damage.
For weekly cleaning, mix warm water with a few drops of mild dish soap. Wipe cabinets with a soft sponge or microfiber cloth. Rinse with a damp cloth. Then, dry thoroughly. Use pH-neutral cleaners designed for painted surfaces. Avoid harsh chemicals like ammonia, bleach, or strong vinegar solutions. These can strip paint. Always test a new cleaner on a hidden area first. Remember, painted cabinets are different from wood. Avoid products intended for wood care. These often contain waxes or oils. They are counterproductive to cleaning painted surfaces.
Common Mistakes to Avoid
You want your newly painted kitchen cabinets to look great and last. Avoid these common mistakes. They can ruin your hard work.
Skipping Preparation Steps
Preparation is the most important part of painting cabinets. If you skip cleaning, sanding, or repairing, your paint job will fail. Paint will not stick correctly to a dirty or greasy surface. Dust, grease, and grime prevent paint from adhering. This leads to an uneven finish that peels easily. Skipping sanding also causes paint to peel and chip over time. Surface imperfections like dents or scratches will show clearly after painting. If old paint is already peeling, new paint will not adhere properly. It will likely peel off too. Ignoring these steps means your painted finish will not last. It is much harder to fix a bad paint job than to do it right the first time.
Using the Wrong Primer or Paint
Choosing the correct primer and paint is vital. Using the wrong primer can cause big problems. For example, accidentally using a latex primer instead of an oil-based one on kitchen cabinets can cause major concern. This is especially true if you plan to use oil-based paint later. Such a mistake can lead to anxiety and a lot of rework on a large project. The wrong primer can cause adhesion failure, stains bleeding through, or poor topcoat performance.
Applying Thick Coats of Paint
You might think one thick coat saves time. However, applying a single thick coat of paint prevents you from getting a good finish. This method makes it hard to achieve a smooth surface. It also makes the paint job less durable. Thick coats hinder sanding between layers. Sanding helps paint layers stick strongly together. Instead, apply several thin, even coats.
Not Allowing Adequate Drying or Curing Time
Patience is key when painting cabinets. If you use your cabinets too soon, especially in humid conditions, the paint’s underlayers may never fully harden. This can lead to chipped and worn paint appearing just months after you finish. Not allowing enough drying time between coats can cause smudging and dripping. The paint might not dry to a hard, durable finish. Cabinet doors can even stick closed. This shows a curing problem that you might not notice until the project is complete. Rushing these stages leads to unsightly smudges, chips, and other signs of wear.
Rushing the Process
Rushing any part of the painting process can lead to problems. You might get drips, uneven coats, or other issues. Always take your time. Do not leave the doors on when painting. This leads to messy results and drip marks. Make sure each coat of paint dries completely before you handle it or add another coat. Wait until the paint is fully dry before reattaching cabinet hardware. This prevents smudges and fingerprints on your fresh paint.
Painting kitchen cabinets is a rewarding diy project. It dramatically updates your home’s aesthetic and value. This tutorial provided detailed steps. You can achieve a durable painted finish. By diligently following this guide, you will get a professional-looking result. Take pride in your transformed kitchen. Enjoy the results of your hard work. This diy effort makes a big difference.
FAQ
What kind of paint works best for kitchen cabinets?
You should use durable, high-quality paints. Benjamin Moore Advance Waterborne Alkyd or Sherwin Williams Urethane Trim Enamel are excellent choices. These paints resist chips and scratches. They provide a smooth, long-lasting finish.
What happens if you do not prime your cabinets?
Skipping primer causes problems. Paint will not stick well. Stains from the wood can bleed through. Your paint job will look uneven. It will also wear out quickly. Primer creates a strong base for your paint.
What is the difference between paint drying and curing?
Drying means the paint feels dry to the touch. You can apply another coat. Curing means the paint fully hardens. It reaches its maximum durability. Curing takes much longer, often days or weeks. Do not use cabinets heavily until they cure.
What should you do if you see paint drips?
You should fix paint drips immediately. Use a small brush or a clean rag to smooth them out. If the paint dries, you can lightly sand the drip. Then, apply another thin coat of paint. This keeps your finish smooth.


