
Imagine a perfect picnic, crafted just for you. Creating your own picnic basket brings immense joy and allows for true personalization. You choose every detail. This homemade experience offers deep satisfaction. Many people prefer authentic, unique items. They find a special story in homemade goods. You also save money. A DIY basket base can cost as little as $5, much less than a $150 pre-made hamper. This diy guide helps you make your perfect picnic.
Key Takeaways
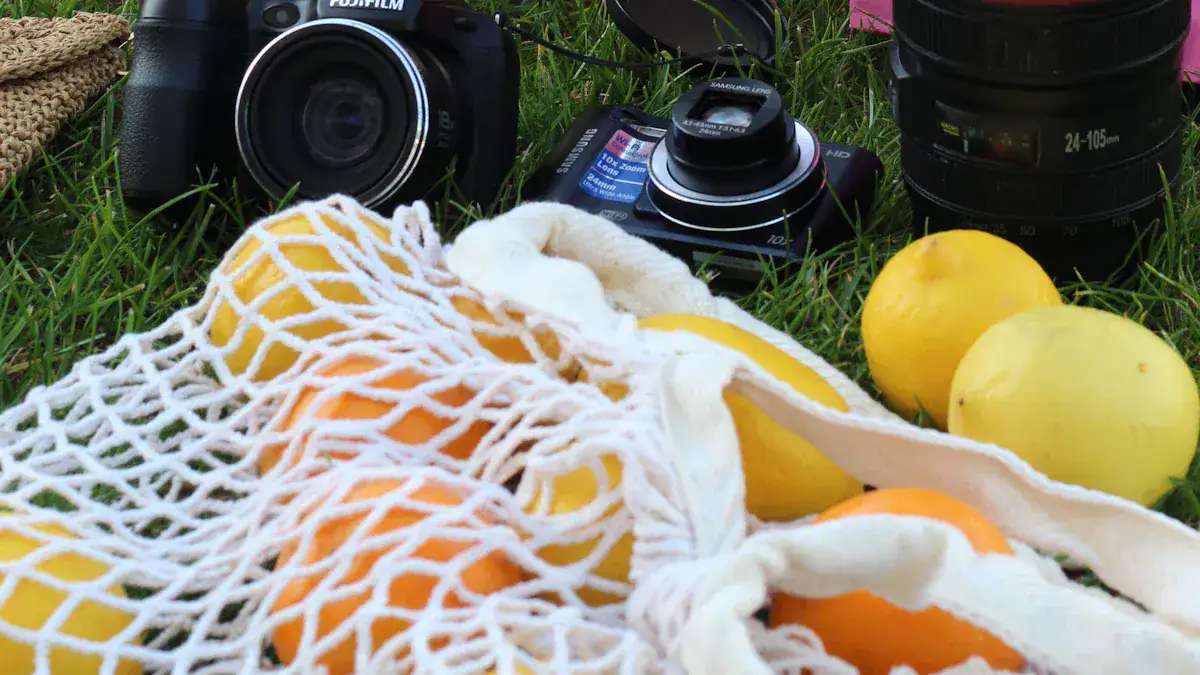
Choose the right container for your picnic. Wicker baskets look nice, but insulated bags keep food cold better.
You can build your own picnic basket. You can use wicker, wood, canvas, or even a wine crate.
Pack essential items for your picnic. Bring tableware, a blanket, and tools like a bottle opener. Also, remember comfort items like sunscreen.
Plan your picnic menu carefully. Choose foods that travel well and do not spoil easily. Keep cold foods cold and hot foods hot.
Organize your basket well. Put heavy items at the bottom. Use leak-proof containers. This keeps your food safe and tidy.
Selecting Your Perfect Picnic Basket Container
Choosing the right container is your first step to creating the perfect picnic basket. You can buy a ready-made option or build your own. Think about durability, insulation, and how it looks. Your choice sets the tone for your entire picnic experience.
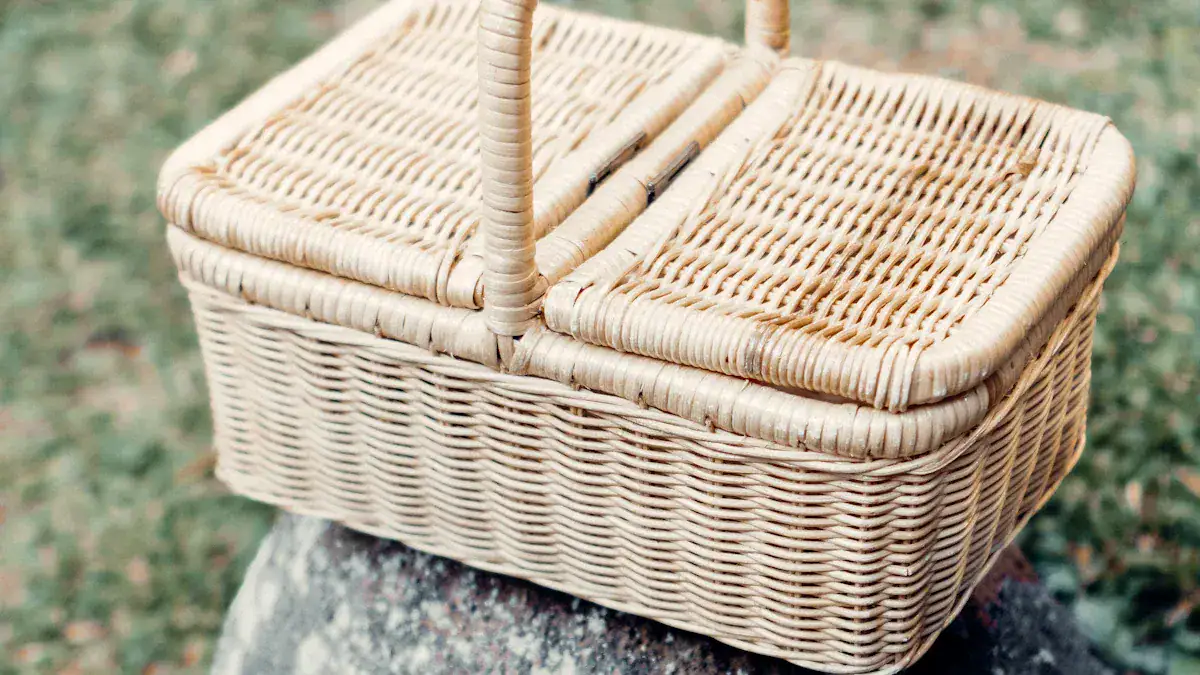
Wicker Baskets: Pros and Cons
Wicker baskets offer a classic, charming look. They bring a traditional feel to any picnic. However, they have some drawbacks. Wicker is not naturally insulated. This means your food might not stay cold for long. You will need to add an insulated liner. Wicker baskets can also be bulky. They might not be the easiest to carry.
Here are some typical dimensions and weights for popular wicker baskets:
Feature | Measurement |
|---|---|
Product Dimensions | 43.1 x 33.3 x 19.7 cm (16.97 x 13.11 x 7.76 inches) |
Item Weight | 2.33 kg (5.13 pounds) |
Weight-bearing Capacity | 10 kg (22 pounds) |
Another example:
Feature | Measurement |
|---|---|
Basket (No Handle) | 17.5 x 13.25 x 8.25 inches |
Single Pack Weight | 5 lbs |
Modern Container Alternatives
You have many modern options beyond wicker. Insulated tote bags and coolers are popular choices. They offer great practical benefits.
Insulated tote bags use a thermal lining. This lining traps cold air. Their synthetic insulation walls effectively lock in cold. A reflective aluminum interior slows heat transfer. This design keeps the inside cold even if the outside gets warm. Traditional wicker baskets, made from natural materials, breathe. They do not seal in freshness. Their porous weave lets heat and air enter. Some wicker baskets have built-in insulation. Still, their insulation is not as strong as specialized insulated tote bags.
Modern containers use smart materials to keep your food fresh.
Foam Insulation: Materials like polyurethane foam are great insulators. They reduce heat transfer. Higher-density foams can cut heat transfer by up to 70%.
Reflective Linings: Aluminum foil or special films bounce heat away. This helps a lot in direct sunlight. It can reduce heat gain by 15-20%.
Fabric Layers: Strong outer shells, often nylon or polyester, protect the insulation. They add durability.
These materials work together. They minimize heat transfer from conduction, convection, and radiation.
Consider these features for modern picnic containers:
High-quality insulation: This is key for keeping items cold for a long time.
Leak-proof seals: They prevent spills. They also help keep the inside temperature steady.
Adjustable compartments: These offer flexibility for organizing different items.
Size and Portability
Think about how many people your picnic will serve. A small basket works for two. A larger one is better for a family. Consider the weight of your container. You will carry it to your picnic spot. A heavy basket, even empty, becomes much heavier when full. Choose a size you can comfortably manage. This ensures your picnic is enjoyable from start to finish.
DIY Basket Construction Methods
You can build your own picnic basket. This diy guide shows you different ways. You can choose a method that fits your skills.
How to Make a Wicker Picnic Basket
Making a wicker basket takes patience. This step by step guide helps you. First, soak your wicker strips. This makes them flexible. Prepare a sturdy frame. For a durable picnic basket, an all-round reed construction works well. You can use a 12×14 D handle. The base and lids can have a split spoke design with half-crosses. This technique is strong.
To how to make a wicker picnic basket, you need specific tools.
Materials:
Wicker strips: These are your main material.
Rattan reed: This is flexible and durable.
Fabric or leather strips: Use these for decoration.
Glue: A strong adhesive helps with durability.
Essential Tools:
Basket Molds: These give your basket the perfect shape.
Rim Guides: They secure the rim for a smooth edge.
Chisels and Carving Tools: Use these for details.
Basket Weaving Needles: These are longer than regular needles.
Awls: They create small holes.
Next, weave the bottom of your basket. Then, weave the sides. You will create handles. Finally, line the basket if you want insulation. You can learn how to line a wicker picnic basket with fabric. This makes your how to make a wicker picnic basket project complete.
Crafting a Wooden Picnic Basket
You can build a wooden picnic basket. Acacia wood is a great choice. It is strong and resists elements. James Armstrong, a woodworking consultant, recommends Acacia. It resists water. People use it in boat-building. Acacia grows fast. This makes it eco-friendly and affordable. When sealed, it turns a rich, dark, golden-brown. If you leave it unsealed, it can discolor. You can glue laminate pieces for handles and rims. This makes them strong.
Simple Paper Picnic Baskets
For a quick option, make a paper basket. You can use design files for gift bags. Print them out. Fold and glue them together. These are great for light items. They are not for heavy use.
Canvas Basket Creation
Canvas baskets are durable. You need to measure and cut rectangular fabric pieces. For strong baskets, use mid-weight to heavyweight canvas. Heavier canvas lasts longer. Cotton duck canvas is excellent. It has a tight weave. #8 Duck Canvas (around 10 oz/sq yd) works for robust bags. #6 Duck Canvas (around 14 oz/sq yd) is for heavy-duty bags.
Duck Grade | Weight (oz/sq yd) | Durability | Typical Applications (relevant to baskets) |
|---|---|---|---|
#4 Duck Canvas | ~15 oz/sq yd | High | Industrial bags |
#6 Duck Canvas | ~14 oz/sq yd | High | Heavy-duty bags |
#8 Duck Canvas | ~10 oz/sq yd | Moderate | Robust bags, Heavy duty tote bags |
#10 Duck Canvas | ~7 oz/sq yd | Moderate | Versatile bags, Medium weight tote bags |
#12 Duck Canvas | ~5 oz/sq yd | Light | Lightweight bags, Light duty tote bags |
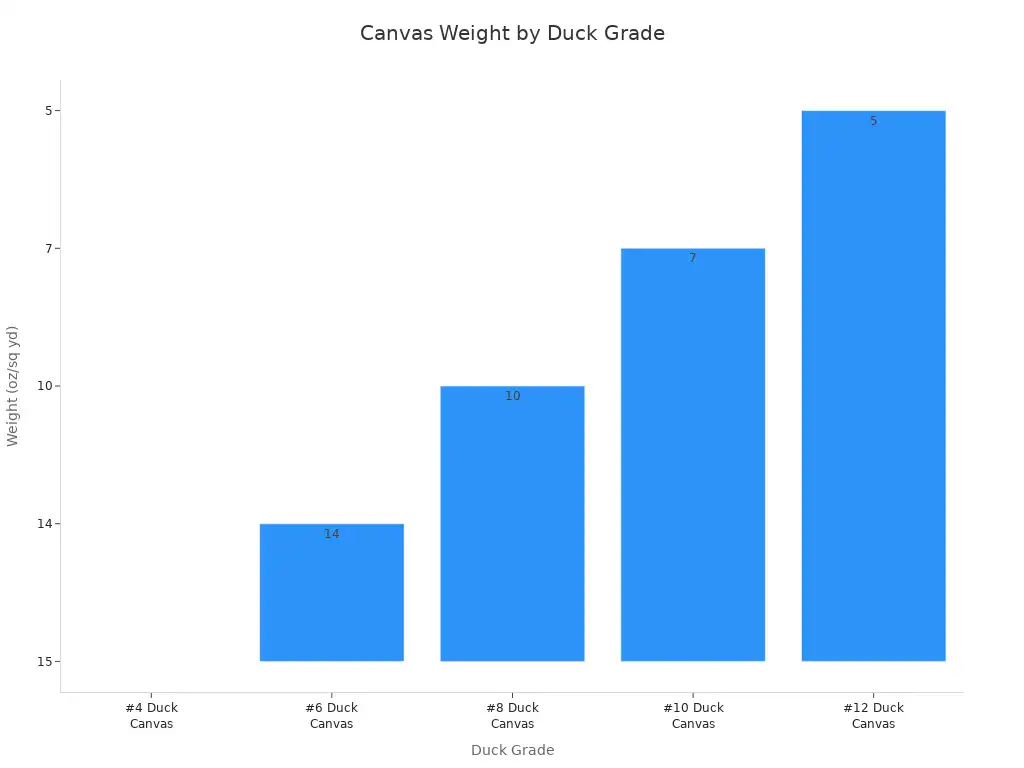
Medium weight canvas (12-15 oz) balances durability and workability. Heavy weight canvas (18-22 oz) is very durable. Its thickness helps the basket stand upright. This is a good diy guide for a sturdy basket.
Repurposing a Wine Crate
You can turn a wine crate into a picnic basket. This is a simple step by step guide. Clean the crate first. You can sand it smooth. Then, line the basket with fabric. Use Velcro to hold a tea towel in place. This makes it a double-duty basket. You can also learn how to line a wicker picnic basket with fabric for this. Just adapt the method. Let it dry completely before use.
Essential Picnic Supplies
You need the right gear to make your outdoor meal perfect. These essential items ensure comfort and convenience.
Tableware: Reusable vs. Disposable
You need tableware for your picnic. You can choose between reusable and disposable options. Reusable plates, cups, and cutlery are eco-friendly. They also save you money over time. You wash them and use them again. Disposable items offer great convenience. You simply throw them away after your picnic. This means no washing up! Consider your priorities for your outdoor meal.
Linens: Blankets and Napkins
A comfortable blanket makes your picnic much better. You need a good blanket that resists moisture. The Angemay Outdoor & Picnic Blanket uses tough polyester fabric. It is durable and cleans easily, but it is not very soft. The Little Unicorn Outdoor Blanket feels plush and soft. It has light padding, making it luxurious. Spilled drinks pool on its surface without soaking through. Crumbs do not stick, so you can wipe this blanket down easily. This makes it a very good blanket for moisture resistance. Some blankets, like the Picnic Time Blanket Tote, use polyester fleece. Crumbs and grass stick easily to this type of blanket. They are hard to brush off. The Mambe Essential All Season Blanket’s fleece felt cheap to some users. A Pendleton Roll-Up Blanket uses wool with a nylon backing. It is beautiful but expensive and needs dry-cleaning. Choose a blanket that fits your needs for your outdoor adventure. Don’t forget napkins! They keep you clean and tidy.
Practical Tools
Your picnic basket needs some practical tools. A bottle opener and a corkscrew are essential for drinks. Pack a small cutting board and a sharp knife for food prep. Don’t forget trash bags. You can clean up easily and leave no trace. Wet wipes are also very handy for quick clean-ups.
Comfort Items
Think about your comfort during the picnic. Bring small pillows for lounging on your blanket. Sunscreen protects your skin from the sun. Bug spray keeps annoying insects away. A small first-aid kit handles any minor scrapes or cuts. These items make your outdoor experience more relaxing and enjoyable. Your outing will be perfect with these thoughtful additions.
Crafting Your Picnic Menu
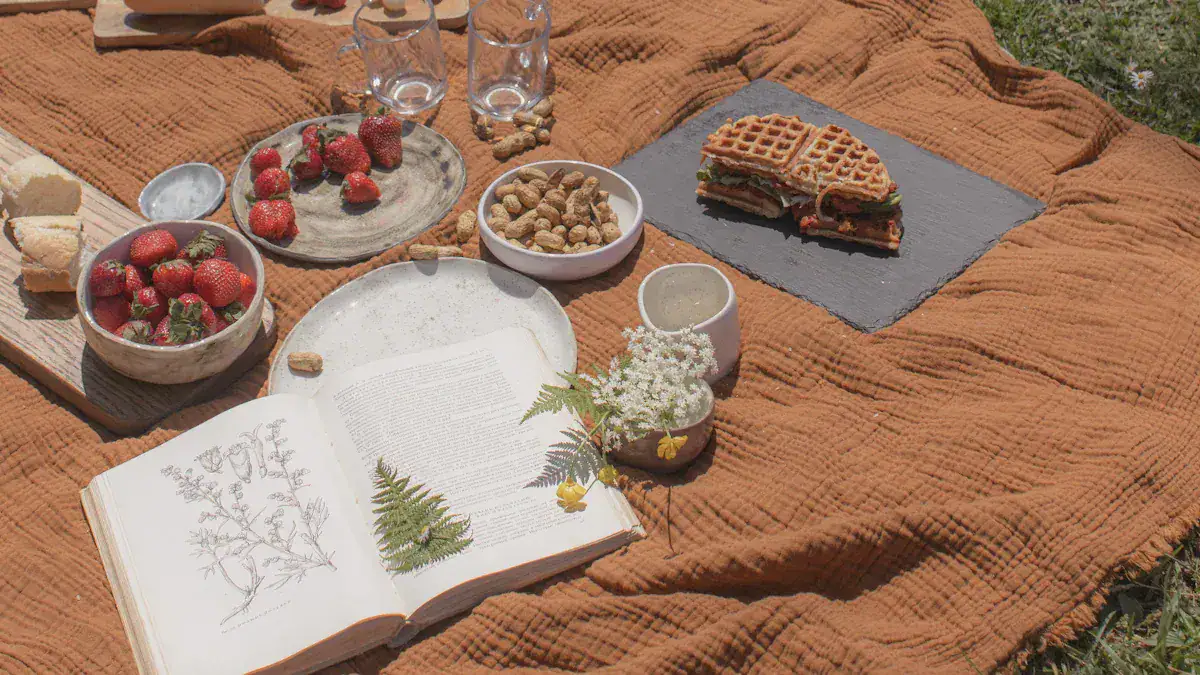
Planning your picnic menu is one of the most exciting parts! You get to choose all your favorite foods. You want dishes that taste amazing and travel well. This section helps you pick the perfect items for your outdoor feast.
Easy-to-Pack Savory Dishes
You want savory dishes that stay delicious and hold their shape. No one likes a messy meal! Think about items that keep their texture and flavor even after a little journey. You have many fantastic options for your picnic.
Consider these delicious choices:
Bacon Deviled Eggs: These are always a hit. They have a creamy filling with crunchy bacon. They come together fast and stay good in your cooler.
Garlic Dill Pickles: Crisp, tangy, and full of garlic. These pickles add a homemade touch without much fuss.
Grown Up Mac and Cheese: This baked mac and cheese, with crispy bacon and juicy tomatoes, holds up well. It tastes great even at room temperature.
Mediterranean Cucumber Tomato Salad: Fresh and bright with a tangy dressing. This salad’s flavors stay good even after a long ride to your picnic spot. It looks good too!
Baked Kale Chips: Crunchy and salty, these chips keep their crisp in a sealed bag. They are a healthy, easy snack.
Shortcut Chicken Salad: Made with canned chicken, this salad saves time. It travels well and fills you up.
Bacon Egg Salad: This creamy, salty salad with bacon adds crunch. It packs well in a cooler and works great in sandwiches or with crackers.
Tomato Quinoa Salad: Light yet filling, this salad stays tasty. It won’t wilt or get soggy before you eat it.
Buffalo Chicken Salad: Bold and creamy, this salad is great chilled. It fits perfectly in wraps or you can eat it with a fork.
Lemon Kale Salad: Zesty and crisp, this salad’s texture holds up for hours. It’s a smart, light, and flavorful option for your basket.
Chicken Taco Wraps: These wraps come together fast. They are cool and fresh, perfect for packing. Just slice, wrap, and pack them tight.
Spinach Orzo Salad: This pasta dish soaks up flavor. It travels well in any container, bringing something special to your picnic.
Russian Potato Salad (Olivier Salad): Full of colorful veggies and a creamy dressing. This salad gets better after chilling. It holds up beautifully in a cooler.
Broccoli Salad with Bacon: With crisp veggies, smoky bacon, and creamy dressing. This salad holds up great in a cooler. It brings crunch and flavor.
You could also create a simple charcuterie board. Pack some cured meats, a few types of cheese, and crackers separately. Assemble it when you arrive. This makes a sophisticated charcuterie spread for your outdoor meal.
Sweet Treats
Every picnic needs something sweet! You want treats that resist melting or spoiling, especially on a warm day. Avoid anything with delicate frosting or cream fillings that need constant refrigeration.
Here are some excellent choices for your picnic basket:
Brownies & Bars: These are dense and sturdy. Think classic fudge brownies, blondies, or fruit crumble bars (apple, berry, peach). Lemon bars also work well. Make sure they are fully cooled before you pack them. You can separate them with wax paper.
Cookies: Sturdy cookies travel best. Chocolate chip, oatmeal raisin, peanut butter, snickerdoodles, shortbread, and ginger snaps are all good options. Skip delicate cookies or those with soft, melty frostings in warm weather.
Fruit Skewers: These look appealing and are light. You can include chunks of melon, grapes, strawberries, pineapple, and kiwi. Pack an optional dip separately. This adds a fresh, healthy touch.
Mini Pies or Tarts: Individual portions are always a hit. Mini apple pies, berry tarts, or cherry hand pies are good choices. Just ensure they have sturdy, well-baked crusts. Remember to avoid cream or custard fillings that need refrigeration.
Refreshing Beverages
Keeping your drinks cold is crucial for a refreshing picnic. You want to enjoy cool sips throughout your outing.
Follow these best practices to keep your beverages perfectly chilled:
Pre-chill items: Always pre-cool your drinks. Refrigerate them overnight before you pack them. You can also add frozen ice packs to your cooler.
Use insulated bags or coolers: These are your best friends for maintaining cold temperatures. They keep drinks cold for hours. They also protect contents from outside heat. Lining your cooler with aluminum foil can boost its insulation power.
Freeze water bottles or juice boxes: These work as effective ice packs. They cool other items in your cooler. Plus, you get a cold drink later!
Keep out of direct sunlight: Always store your cooler in a shady spot. This helps maintain its cool temperature much longer.
Minimize opening the cooler: Every time you open the cooler, warm air rushes in. This makes contents heat up faster. Try to open it only when necessary.
Use a separate cooler for drinks: This is a smart move. It gives ample space for cold air to circulate around your beverages. It also means you do not need to open your main food cooler as often.
Food Safety Tips
Food safety is paramount for any picnic. You want to enjoy your meal without worrying about getting sick. Bacteria can grow quickly in certain temperatures.
Remember these critical food safety temperatures:
Cold food should stay at 40°F or below. This prevents bacterial growth.
The ‘danger zone’ for bacterial growth is between 40°F and 140°F. Perishable items should not stay out of refrigeration for more than 2 hours. If the outside temperature goes above 90°F, reduce this to just 1 hour.
Here are some safe internal temperatures for cooked foods:
Poultry (whole or ground): 165°F (74°C).
Ground meats (beef, pork, etc.): 160°F (71°C).
Steaks, chops, seafood: 145°F (63°C).
This table summarizes safe temperatures for various products:
Product | Safe internal temperature (degrees Fahrenheit) |
|---|---|
Poultry (whole birds, breast meat, legs, thighs, wings) | 165 |
Ground poultry (chicken/turkey) | 165 |
Fish | 145 |
Pork chops, roasts, ribs | 145 plus 3 minutes standing time |
Lamb chops, roasts | 145 plus 3 minutes standing time |
Beef steaks, roasts | 145 plus 3 minutes standing time |
Ground beef, pork, lamb | 160 |
Reheat leftovers | 165 |
Cold foods | Below 40°F |
Hot foods | Above 140°F |
To ensure a safe picnic:
Keep coolers below 40°F for cold perishable items.
Cook hamburgers to a minimum internal temperature of 160°F.
Cook chicken breasts and legs to at least 165°F.
Avoid the ‘danger zone’ for perishable foods. Bacteria multiply rapidly between 40°F and 140°F.
Do not leave food out for more than two hours. If the outside temperature is 90°F or above, limit this to one hour.
Organizing Your Basket
You have chosen your container and planned your delicious menu. Now, you need to pack everything inside. Good organization makes your picnic easy and enjoyable. It also keeps your food safe and looking good.
Layering Techniques
Packing your picnic basket correctly prevents food from getting squashed. You want everything to arrive in perfect condition. A smart layering strategy helps a lot.
Place heavier items at the bottom of your picnic basket. These items provide a stable base.
Position lighter food items on top of the heavier ones. This keeps them from getting crushed.
This layering strategy helps prevent food from being crushed. It also optimizes space inside your basket.
Think of it like building a pyramid. The strongest, heaviest things go at the bottom. Delicate items sit safely on top.
Containers and Jars
Leak-proof containers are your best friends for a picnic. You do not want spills ruining your food or your basket.
A Facebook post title mentions a ‘leak-proof cooking-oil container for hiking’. This shows how important leak-proof options are for any outdoor adventure.
The KORKEN series offers a classic design. These clear glass jars have an airtight seal. They are great for saving and serving food. You can easily clean them. They do not absorb colors or smells. The IKEA 365+ containers are also good. They are light and tight. They are ready for transporting homemade lunches. These types of containers keep liquids and sauces where they belong.
Maximizing Space
Fitting everything into your basket can feel like a puzzle. You want to use every bit of space wisely. Here are some smart ways to maximize your capacity:
Start with a bare tote. Sort items by shape and size. This helps you see what you have.
Use soft containers to fill odd corners. They can squeeze into small spaces.
Stack breakables between softer foods for cushioning. This protects them during travel.
Utilize resealable bags for small snacks. They prevent spills and save space.
Consider lightweight collapsible containers. They pack flat until you need them.
You can also use these clever tricks:
Use modular containers. They stack uniformly. This reduces forgotten items and makes unpacking easier.
Opt for thin, flexible gel ice packs. They conform to corners and edges. Bulky blocks take up too much room.
Freeze beverages or water bottles. They double as ice packs. They also give you chilled drinks later. This reduces your need for separate ice packs.
Employ strategic layering. Place ice packs and sturdy containers at the base. Stack square or rectangular food containers in the middle. Put soft items like napkins and fruit bags on top for easy access.
Aesthetic Touches
Your picnic basket is not just about food. It is also about creating a beautiful experience. Small aesthetic touches can make a big difference. They make your picnic feel special.
Color coordination, neat food arrangements, and even lighting choices enhance the mood. Think about string lights or lanterns for evening picnics.
Bring extra props. Flowers, games, or vintage tableware make your setup more engaging. They also look authentic.
Matching tableware and thoughtful accessories add harmony. Fresh floral touches bring in color and life. They complete the look.
Tableware should be both practical and visually consistent. Use matching plates, glasses, and cutlery. This creates a polished look.
Napkins and placemats can add layers of color and texture. Linen or cotton napkins in muted tones or fun prints enhance the setup.
Small details can elevate your table. Use elegant jars for drinks, wooden serving boards, and minimalist vases.
Choose a color palette. Earth tones or soft pastels help all pieces blend seamlessly.
Incorporate fresh flowers or greenery. They add natural beauty to your picnic. Small bouquets or sprigs in simple jars or bottles work well as centerpieces.
Picking a color scheme helps unify the entire picnic setup. Soft pastels offer a gentle, calming vibe. Bold colors create a lively, energetic feel. Neutral tones like beige, white, or earth colors work well for a timeless look.
Patterns add personality and texture. Use checks, florals, or boho prints on blankets or napkins. This makes your space feel more interesting.
Embrace a cohesive color palette. Select colors that complement each other. This creates a harmonious visual experience.
Consider using matching or complementary colored items. This includes plates, napkins, cups, and blankets.
Incorporate decorative elements in the same color family. Use floral centerpieces in coordinating hues. Add small details like ribbons or place cards.
Adding floral arrangements to your aesthetic picnic setup can elevate the ambiance. They add a touch of sophistication.
Themed Picnic Basket Ideas
You can make your picnic special with a fun theme. A themed picnic makes your outdoor meal even more memorable. You choose the food, decorations, and activities to match your chosen theme.
Romantic Picnic for Two
Create a romantic escape for two. Pack a special basket with delicious treats. A charcuterie board is a great choice. It has cheese, cured meats, bread, crackers, fruit, and nuts. An Argentinian Layer Cake Malbec goes well with the meats and balances the rich cheese. For a refreshing snack, shrimp cocktail pairs perfectly with Flat Top Hills Chardonnay.
For a truly romantic meal, consider these ideas:
Starter: Lobster bisque or a fresh crab salad.
Main Course: Filet mignon with roasted vegetables or seared scallops with garlic butter.
Dessert: Dark chocolate fondue with fresh berries.
Drink Pairings: A full-bodied Pinot Noir or a rich Chardonnay works well with seafood or filet mignon. A French 75 cocktail is a classy choice. Sparkling water with lime or pomegranate juice is a sophisticated non-alcoholic option.
Family Fun Day Picnic
Make your family picnic an adventure! Pack your basket with easy-to-eat foods and fun activities. You can bring games to keep everyone entertained.
Physically Engaging Activities: Try a Water Balloon Toss or a Three-Legged Race.
Popular Games: Play Tug-Of-War or a Potato Sack Race.
Oversized Activities: Giant Jenga or Human Bowling are always a hit.
Children’s Activities: A Craft Table or Miniature Golf keeps little ones busy.
Gourmet Cheese and Wine
Elevate your outdoor dining with a gourmet cheese and wine experience. Select fine wines and cheeses that complement each other.
Winery/Wine | Wine Description | Cheese | Cheese Description |
|---|---|---|---|
McGrail Vineyards & Winery, 2022 Kylie Ryan Rosé | Complex with raspberries, clover honey, green apple, watermelon | Sogn | Pasteurized sheep’s milk, natural rinded aged |
Pruett Farms Winery, 2023 Poulet Sautant Chardonnay | Burgundian style, Silver winner at Alameda County Fair | Karst | Pasteurized cow’s milk, aged cheddar with Alpine cultures |
Wente Vineyards, 2023 Sauvignon Blanc | Bursting with youthful exuberance | Seahive | Pasteurized cow’s milk, fresh curd cheddar rubbed with sea salt |
Page Mill Winery, 2022 GPS | Rhone blend, Gold winner at SF Chronicle | Purple Haze | Pasteurized goat’s milk, infused with fennel pollen and lavender |
Brunch Picnic
Enjoy a leisurely brunch outdoors. Pack your basket with breakfast and lunch favorites.
Store-bought wraps or pinwheels
Mini sandwiches or snack trays
Cheese cubes and grapes
Fresh bakery cookies or pastries
Chicken salad sandwiches
Chocolate-covered strawberries
Muffins
Yogurt parfaits
Fruit-Infused Water
Chill your drinks ahead of time. Pack them with ice or frozen water bottles. This keeps them cool until you are ready to eat. Use containers with tight lids. This avoids spills and keeps your cooler clean.
Making your own picnic basket brings true satisfaction. This diy guide opens up endless possibilities for you. You get to choose every detail. Experiment with different foods, fun themes, and unique styles for your next picnic. Go ahead, pack your perfect outdoor meal. Enjoy your personalized dining adventures and make lasting memories.
FAQ
What is the best type of container for a picnic?
The best container depends on your needs. Wicker offers classic charm but needs insulation. Modern insulated totes keep food cold longer. Consider size and portability for your comfort. Choose what works best for your adventure!
What are key food safety tips for a picnic?
Keep cold foods below 40°F and hot foods above 140°F. Do not leave perishable food out for more than two hours. If it’s over 90°F, limit it to one hour. Use ice packs to keep everything chilled.
What essential items should I always include in my basket?
Always pack tableware, a comfortable blanket, and napkins. Do not forget practical tools like a bottle opener and trash bags. Bring comfort items like sunscreen and wet wipes. These make your picnic smooth.
What kind of food travels best for a picnic?
Choose sturdy, easy-to-pack savory dishes like wraps or salads. For sweets, pick brownies or cookies that resist melting. Pre-chill all your beverages. Leak-proof containers are your best friends for sauces and liquids.
