

A warped floor, whether wood or laminate, can be a real headache. You might fear a complete overhaul, but many issues are fixable without full replacement. Minor damage, like slight cupping, often has a low repair cost, around $5-$8 per square foot. However, severe water damage, which causes significant buckling, can lead to restoration expenses ranging from $200 to $6,300. This guide helps you identify the cause, assess damage, and find repair solutions for both wood and laminate flooring. Understanding the root cause is key for effective repair and prevention.
Key Takeaways
Find out why your floor warped. This helps you fix it right and stop it from happening again.
Check your floor for cupping, crowning, or buckling. This helps you know how bad the damage is.
Fix moisture problems first. This is important for both wood and laminate floors.
You can fix minor warping by sanding or re-securing boards. For bad damage, replace the planks.
Keep your home’s humidity steady. Clean spills fast. Make sure your floor was installed correctly. These steps stop future warping.
Understanding Floor Warping Causes
You need to know why your floor warped. This helps you fix it right and stop it from happening again. Several factors can cause your floor to warp.
Moisture Imbalance
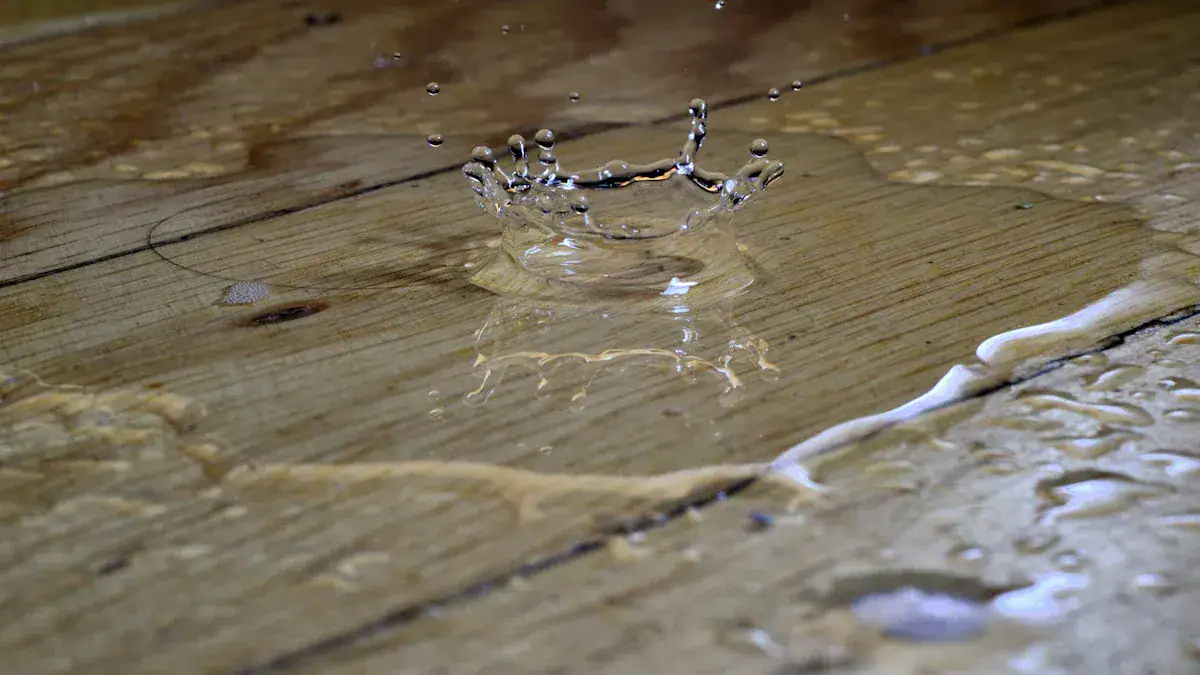
Moisture is a big problem for wood and laminate floors. Wood absorbs water. This makes it swell and change shape. High humidity can cause moisture to build up in the bottom of wood planks. This makes the underside swell. The edges then push up, causing cupping. This means the edges are higher than the center. Wood also shrinks when it loses moisture. Both too much and too little moisture cause problems.
Tip: Maintain stable indoor humidity. Aim for 30% to 50% for solid wood floors. You can use humidifiers or dehumidifiers.
Flooring materials have ideal moisture content levels for stability. For example, solid hardwood should be between 6% and 9%. Engineered hardwood is typically 6% to 8%.
Relative Humidity | Temperature | Stable Moisture Content |
|---|---|---|
20% | 70°F | 4.5% |
45% | 70°F | 8.5% |
65% | 70°F | 12% |
Improper Installation
Installation errors can lead to a warped floor. You must acclimate wood to the room’s temperature and humidity before installation. If you do not, the wood will expand or contract later. This causes gaps or warping. Floors also need enough expansion gaps. These gaps let the material expand and contract naturally. Poor subfloor preparation also causes uneven flooring. Inadequate airflow can trap moisture under the floor. This causes swelling.
Subfloor Problems
Your subfloor is the base for your flooring. If the subfloor shifts or becomes uneven, your floor coverings will warp or buckle. This affects wood, tile, carpet, or laminate. An uneven subfloor is a sign of damage. Moisture or structural weaknesses in the subfloor also contribute to warping.
Material Quality and Age
Wood is a natural material. It swells and shrinks with humidity changes. This can cause warping and cracking. Some woods resist shrinking and warping better. This is called dimensional stability. Woods with a large difference between tangential and radial movement warp more easily. For example, yellow birch warps more than Honduran mahogany. Older floors or lower quality laminate may also be more prone to these issues.
Assessing Warped Floor Damage
You need to understand the damage to your floor. This helps you decide the best way to fix it. Look closely at your floor to see what kind of warping you have.
Types of Warping: Cupping, Crowning, Buckling
Different types of warping tell you different things about the problem.
Cupping: The edges of your wood floorboards are higher than the center. This creates a concave shape, like a small boat or a spoon. When you touch it, you will feel the raised edges and a dipped middle. This often happens when the bottom of the plank has more moisture than the top.
Crowning: The center of a wood plank rises higher than its edges. This creates a convex shape, like a bump or a ridge in the middle of each board. This usually means the top of the plank has more moisture than the bottom.
Buckling: This is a more severe form of warping. Your floorboards lift significantly from the subfloor. They might even separate from each other. Buckling can happen with both wood and laminate flooring. It often points to major moisture issues or improper installation.
Severity Check: Minor vs. Major
You should check how bad the damage is. Minor warping might show as slight unevenness you can feel with your hand. You might see small gaps between planks. Major damage includes large gaps, planks that move when you walk on them, or significant buckling. If your floor feels spongy or unstable, you have major damage.
When to Call a Professional
Sometimes, you need expert help. If you see widespread damage across many planks or rooms, call a professional. If you suspect subfloor problems or structural issues, an expert can assess them. Extensive water damage, especially if it affects the subfloor or multiple layers of your floor, also requires professional attention. They can properly diagnose complex issues with your wood or laminate floor and suggest the right repair.
Fixing Warped Wood Floors: Step-by-Step
You can fix many issues with a warped floor. This section guides you through specific repair techniques for wood floors. You will learn how to address the problem and restore your floor’s appearance.
Addressing Moisture Issues
First, you must find and fix the source of moisture. If you do not, the warping will return. You need to measure the moisture levels in your wood flooring and subfloor. This helps you understand the problem.
Pin-type meter: You use this tool for moisture content readings of the flooring itself. You also use it for wood subfloors.
Hygrometer: This tool measures relative humidity (Rh) in the room. You also use it for concrete slab subfloors, often with the in situ method.
Pinless meter: You use this for taking moisture readings. You can use it with a pin-type meter or as part of a dual-function device.
Once you identify the moisture source, you must stop it. This might mean fixing a leaky pipe, improving ventilation, or using a dehumidifier. For minor water damage, you can dust the area with baby powder. Then, run a fan for a couple of weeks. If edges are buckled due to wetness, use a floor air mover. Dry the area for several days.
Repairing Cupped or Crowned Boards
You can often flatten cupped or crowned boards without replacing them. First, you must control the environment. Use a dehumidifier if humidity is high. Improve ventilation for better airflow. If moisture comes from below, seal the subfloor or use a vapor barrier.
You can also try these techniques:
Storing Lumber on Cauls: Place flat pieces of wood or metal (cauls) between boards and the floor. Also, place them between each board. This ensures even airflow. It stops one side from drying faster than the other, which causes cupping. Over time, this can help flatten already cupped boards.
Clamping Resawn Boards Together: After you resaw a board, place the two original outside faces against each other. Clamp their edges together for a day or two. This method aims to offset internal tension and moisture imbalances. It can potentially flatten the boards.
Remember to clean and maintain your floors. Use proper cleaning methods. Promptly dry spills. Regularly check areas prone to leaks, like around sinks.
Sanding and Refinishing
Sanding and refinishing is a good solution for minor wood floor warping. This works well when the edges of individual boards are only slightly higher than their centers. However, you must first stabilize the moisture levels in the environment. If you do not normalize moisture before sanding and refinishing, the floor can crown later.
You must ensure the wood’s moisture content is normalized. This means it should be between 6% and 9%. This prevents the warping from happening again. Even after you remove moisture, slight warping might remain. Professional sanding and refinishing can then restore the floor’s original state.
Board Replacement
Sometimes, you must replace a board. This is true for severe warping or significant water damage. Here is how you replace a single damaged floorboard:
Assess the Damage and Identify the Board: Look at your floor. Find the damaged board and see how bad the problem is. Decide if you need to repair or replace it. Warping often requires full board replacement.
Remove the Damaged Board Safely: Mark the edges of the board. Use a circular saw or oscillating multi-tool to cut along the seams. Make more cuts, like an ‘H’ pattern, to break it up. Gently lift out the pieces with a pry bar, flathead screwdriver, or chisel. Be careful not to disturb nearby boards or the subfloor.
Prepare the Space for a New Board: Clean the exposed area. Remove debris, old glue, or nails. Check for and fix any subfloor damage or unevenness. Make sure the area is dry and dust-free. This helps with proper adhesion.
Fit and Install the Replacement Board: Measure the opening precisely. Trim the new board to match the exact size. Adjust the tongue and groove edges for a tight fit. Apply wood glue to the edges. Position the new board, matching the grain and finish. Tap it gently into place. Secure it with finish nails, countersinking them.
Finishing Touches for a Seamless Result: Fill nail holes with wood putty that matches your floor’s color. Wipe away extra glue and let it dry. If needed, lightly sand the repair area. Apply a suitable surface finish, like lacquer or oil. This helps the new board blend with the rest of the floor.
Re-securing Loose Boards
Loose boards can cause squeaks and further damage. You can often re-secure them. If the board is loose but not warped, you can try face-nailing it. Use finish nails and a nail gun. Drive the nails through the board into the subfloor. Countersink the nail heads. Then, fill the holes with wood putty. For boards that have come unglued, you can apply wood adhesive. Lift the loose edge slightly, apply the glue, and press the board back down. You might need to weigh it down while the glue dries.
Preventative Measures for Wood
You can take steps to prevent future warping in your wood floor.
Moisture Control: Keep indoor humidity between 40-60%. Use dehumidifiers if necessary. Fix any plumbing leaks quickly.
Sealing: Apply a good sealant to the floor surface. Reseal it when needed. Seal any gaps or cracks in the flooring. This stops moisture from getting in.
Regular Maintenance: Clean floors regularly by sweeping or vacuuming. Use minimal water when mopping. Inspect floors often for early signs of damage.
Climate Regulation: Use your HVAC system to keep home temperature consistent. Avoid sudden changes. Ensure good ventilation, especially in damp areas. Open windows or use fans.
Repairing Warped Laminate Flooring: Step-by-Step
You can fix many common laminate flooring problems. This section shows you how to repair laminate flooring that has warped or buckled. You will learn specific methods to restore your floor.
Laminate Issues: Swelling, Buckling or Warping
Laminate flooring can develop issues like swelling, buckling, or warping. These problems often happen due to environmental conditions. Excess moisture is a big cause. Water can seep into the core of your laminate flooring. This makes it swell and buckle. High humidity levels, especially in summer or after storms, make this worse.
Temperature changes also cause problems. Sudden shifts in temperature, from air conditioning or heating, make planks expand and contract. This leads to buckling. The high-density fiberboard (HDF) core of laminate is very sensitive to water. Spills, leaks, or high humidity can get into the seams. The core then swells, causing bubbling. This risk is higher in places like kitchens, bathrooms, and basements. Extreme heat makes laminate expand. Cold makes it contract. Without enough expansion gaps during installation, these changes cause buckling and bubbling. You must keep your indoor climate stable to prevent these issues.
Addressing Water Damage
You must act fast if your laminate floor has water damage. Quick action can save your floor.
Stop the Water Source: Find where the water comes from. Turn off water to a leaking appliance. Fix plumbing issues. Address drainage problems outside your home.
Remove Surface Water: Use towels, mops, or a wet-dry vacuum to clean up water quickly. For a lot of water, you might rent commercial water extractors.
Assess Damage: Check for swelling, bubbling, discoloration, soft spots, or warping. This tells you how bad the water damage is.
Dry Planks and Subfloor: If you can, carefully take apart the affected section. Lift and dry individual planks. Dry the subfloor too.
Use Drying Equipment: If you cannot take apart the floor, use professional drying tools. Dehumidifiers, air movers, or special floor mats help dry the area.
Thoroughly Dry Subfloor: Make sure the subfloor is completely dry. Different subfloor materials, like plywood or concrete, need specific drying methods.
Wipe up spills right away. Use a cleaning product made for laminate flooring. Blot the spill with a towel or cloth. This prevents moisture from seeping in.
Relieving Pressure
Sometimes, buckling happens because the laminate planks have no room to expand. This creates pressure. You can relieve this pressure.
Check Expansion Gaps: Laminate floors need small gaps around the room’s edges. These are called expansion gaps. They let the floor expand and contract with temperature and humidity changes.
Adjust Gaps: If your floor is buckling, you might need to increase these gaps. Carefully remove baseboards. Use a utility knife or a multi-tool to trim a small amount from the edge of the laminate planks nearest the wall. This gives the floor more room. When you install new laminate floors or replace damaged floorboards, make sure you leave proper spacing.
Replacing Damaged Planks
You may need to replace damaged floorboards if they are severely warped or swollen. This is a common way to repair swollen laminate flooring.
Tools and Materials
You need specific tools to repair swollen laminate flooring or replace damaged planks.
Rubber Mallet: Use this with a tapping block to join laminate pieces. It helps fit them together without damage.
Pull Bar: This tool helps you join laminate pieces tightly against a wall. It has a hook shape. You strike it with a mallet or hammer.
Tape Measure and Marking Tool: You need these to measure and mark cuts. A fine white paint marker works well for dark laminate.
Combination Square: This tool gives you accurate 90- and 45-degree angles. Use it to mark square cutting lines.
Sliding T-Bevel: Use this if you need to measure and transfer angles other than 90 degrees.
Drill and Spade Bit: You need these if you fit laminate around pipes. They make large, clean holes. Drill on scrap lumber to prevent tear-out.
Circular Saw or Oscillating Multi-tool: For cutting out damaged sections.
Pry Bar or Putty Knife: For lifting pieces.
Wood Glue (for floating floors): To secure replacement planks.
Replacement Laminate Planks: Make sure they match your existing floor.
Step-by-Step Replacement
You can replace a damaged laminate plank in the middle of a room or near a wall.
Replacing a Plank in the Middle of the Room:
Remove the Old Board: Set your saw depth to the level of the attached pad. Cut along the board from corner to corner. Be careful not to cut through the underlayment. If your product has an attached pad, cut to the pad. Then score it with a razor knife. Use a pry bar or putty knife. Carefully lift each of the four pieces from the saw cuts. Angle them to the plank edges. Lift adjacent or opposite pieces carefully. Avoid damaging the locking mechanism. Clean any debris or dust.
Modify the Replacement Board: You need to prepare the new plank. Preserve the part of the plank that goes under the locking mechanism. Shave off the small portion that goes over. If you cannot separate planks at the ends of the hole, you might also need to shave off the end locking mechanism. This ensures a flush fit. Dry-fit the modified board. Make sure the underside of the locking mechanism fits snugly under the adjacent board.
Secure the Replacement Board: Apply a generous amount of floating floor tongue and groove glue. Put it on the underside of the installed adjacent board where the replacement plank will touch. You can also use small spots of CA glue, but not as the only adhesive. Carefully seat the replacement board. Press it down firmly. Hold it for about 30 seconds. Use weights along the edge until the glue cures if you cannot hold the entire board. Remove any blue tape. Inspect the seams. If you see gaps, use a matching color filler. This creates a watertight seal and a seamless look.
Replacing a Plank Near a Wall:
Remove the Baseboard: If the damaged plank is near the wall, carefully remove the baseboard. Use a pry bar.
Disassemble the Flooring: Start from the nearest wall. Carefully unlock and remove planks. Continue until you reach the damaged piece.
Replace the Damaged Plank: Insert the new plank. Make sure it clicks securely into place.
Reassemble the Flooring: Work backward. Click planks back together until you reach your starting point.
Reinstall the Baseboard: Secure it back in place. This finishes the repair.
When replacing a section, applying wood glue between pieces before driving them together with a mallet can be beneficial. This helps create a stronger bond for your repair.
Preventative Measures for Laminate
You can take steps to prevent future buckling or warping of your laminate floor.
Use Floor Mats: Place mats at entrances. Use rugs in high-traffic areas. This reduces dirt and moisture.
Wipe Spills Immediately: Clean up spills quickly with a dry cloth. This stops moisture from getting into seams.
Maintain Humidity Levels: Keep indoor humidity between 30% and 50%. This prevents warping or gapping. Use a humidifier in dry winter months. Use a dehumidifier in humid summer conditions.
Use Moisture-Resistant Underlayment: Install underlayment with built-in vapor barriers. This stops ground moisture from reaching the planks.
Ensure Expansion Gaps: Make sure installers leave 1/4 to 3/8 inch gaps around the room’s perimeter. Also leave gaps around fixed objects. This allows for natural expansion and contraction.
Use Proper Cleaning Products: Clean with products made for laminate flooring. Use a slightly damp mop. Avoid too much water or steam cleaners.
Maintain Consistent Temperatures: Keep temperatures between 60-80 °F (15-27 °C). This prevents stress from sudden changes.
Regular Inspections: Check your floor monthly for signs of water damage or warping. Pay attention near windows, doors, and water-using appliances.
General Floor Maintenance and Prevention
You can keep your floors looking great and prevent future warping. Good maintenance habits are key. These simple steps protect your investment.
Maintaining Consistent Humidity
You must maintain consistent humidity levels in your home. This prevents issues like warping, cracking, or fading. Hardwood absorbs moisture and expands when humidity is too high. Low humidity causes wood to dry out and shrink. You protect your flooring by controlling humidity. You also protect your home’s overall look and function. Use a hygrometer to measure air moisture. Aim for 30% to 50% relative humidity. Employ dehumidifiers or humidifiers as needed. For structural integrity, keep humidity between 35% and 55%. This helps both wood and laminate floors.
Promptly Cleaning Spills
You should clean spills immediately. This prevents moisture from seeping into your floor. Use a dry or slightly damp cloth to wipe up spills quickly. Avoid using excessive water for cleaning. Too much water can cause swelling, warping, or damage to both wood and laminate. Always use a damp mop, not a wet one. This stops long-term damage and stains.
Proper Installation
Proper installation is a crucial preventative measure. Ensure installers leave adequate expansion gaps around the room’s perimeter. These gaps allow your flooring to expand and contract naturally. This prevents buckling. Also, make sure your flooring material acclimates to your home’s environment before installation. This reduces the risk of future warping.
Regular Inspections
You should regularly inspect your floors. Dust mop or vacuum your floor frequently. This removes dirt and debris. These particles can scratch the floor. Use clean protective mats at entryways. They trap dirt and moisture before they reach your floors. Place rugs in high-traffic or water-prone areas. This protects against moisture and wear. Check your floors monthly for any early signs of water damage or warping. Pay attention near windows, doors, and water-using appliances.
You can resolve many warped floor issues. You have the right approach and tools for repair. Identifying the cause is crucial for effective solutions. Take proactive steps. Control moisture. Perform regular maintenance. These actions prevent future warping. You restore the beauty and longevity of your wood or laminate floors. This ensures your laminate looks great for years.
FAQ
How can you tell if your floor is cupping or crowning?
You can feel the floor’s surface. Cupping means the board edges are higher than the center. Crowning means the center of the board is higher than its edges. You can also place a straightedge across the boards. This helps you see the curve clearly.
What is the most common cause of warped floors?
Moisture imbalance is the most common cause. Too much moisture makes wood and laminate swell. Too little moisture makes wood shrink. You must control humidity levels in your home. This prevents warping.
Can you fix a warped laminate floor without replacing planks?
Yes, sometimes you can. If buckling occurs due to pressure, you can relieve it. Check and adjust the expansion gaps around the room’s edges. This gives the planks room to expand. You might need to trim the planks near the wall.
How do you prevent wood floors from warping in the future?
You should maintain consistent humidity levels in your home. Aim for 30% to 50% relative humidity. Promptly clean up spills. Ensure proper installation with adequate expansion gaps. Regularly inspect your floors for early signs of damage.
