
A well-designed photo wall display does more than just fill an empty space; it truly transforms your room! Seeing your favorite photos can trigger positive feelings and remind you of good memories. These personal touches create a sense of belonging and help you feel more connected to your space and your loved ones. You can create a stunning picture wall display. It just takes some thoughtful planning and careful execution. This makes your living area a true reflection of you and your unique story.
Plan Your Stunning Photo Wall Display
Planning is the first step to creating a stunning photo wall display. A little preparation saves you time and ensures your final photo wall display looks amazing. You will define your vision, select your pieces, and gather your supplies.
Define Your Style and Theme
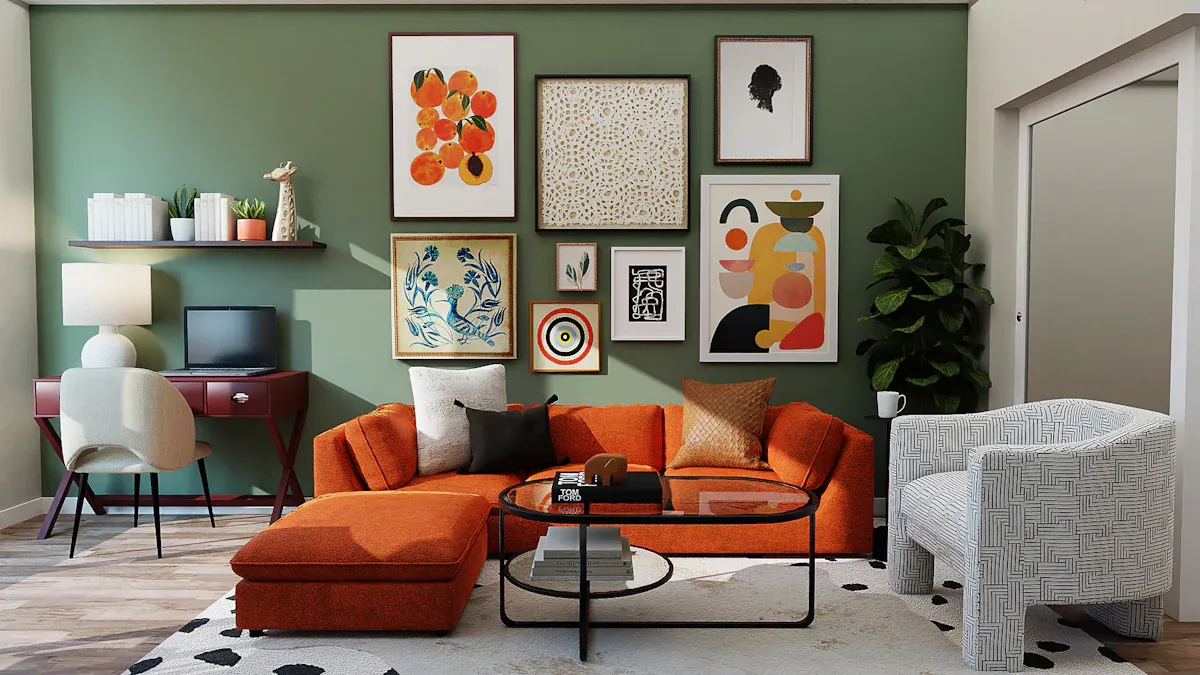
First, define your style and theme. What story do you want your photo wall display to tell? You can create a “Make a Statement Wall” with art reflecting your personality. Or, design a “Personal Gallery in Your Bedroom” that evolves with you. Consider a “family photo display” in your entryway to welcome guests. You might also “Inspire Productivity in the Office” with images that resonate with your goals. Think about “Whimsical Botanical Prints” for a calm feel, or “Bold Geometric Patterns” for energy.
Select Your Photos and Art
Next, select your photos and art. Choose pieces that hold special meaning for you. When selecting photos, consider the size of the prints. This is a primary factor for the overall impact of your display. For example, a large family photo display can anchor your arrangement. You want a good mix of sizes and orientations. Curate your collection carefully. You will use these photos to tell your story.
Choose Your Frames
Now, choose your frames. Frames protect your photos and enhance their look. You have many options for frame materials and finishes. Wood frames offer clear, satiny finishes that highlight natural grain, like maple or cherry. You can also find salvaged wood with a “distressed” look. Metal frames, especially silver shades, work well for photographs. Hand-finished hardwood frames in maple, walnut, or oak come in natural, gray, or black stains. Gold leaf frames add elegance. Welded aluminum frames offer a minimalist aesthetic with powder coat finishes. Always use acid-free mats and UV-protective glass. These materials prevent fading and deterioration of your photos. They protect your valuable photos from harmful UV rays and “mat burn.”
Gather Essential Tools
Finally, gather your essential tools. You will need a measuring tape, a pencil, a level, a hammer, and picture-hanging hooks. Having these ready makes the hanging process smooth.
Design Your Gallery Wall Layout
Now that you have your photos and frames ready, it’s time to design your gallery wall layout. This step helps you visualize your arrangement before you put any holes in your wall. You want to create a cohesive and visually appealing display.
Measure Your Display Space
First, measure your display space. You need to know the total height and width of the area where your gallery wall will go. This helps you avoid common mistakes. For example, don’t overcrowd your walls with too much art. Each piece needs at least a few inches of space around it. You also want to avoid choosing the wrong size for the space. A small piece on a large wall can look lost. An oversized piece in a small room can overwhelm it. If you hang art above furniture, a good rule of thumb is for the art to be about two-thirds the width of the furniture. Always measure before you order or hang your photos. This ensures your photo wall display design fits perfectly.
Experiment with Floor Layouts
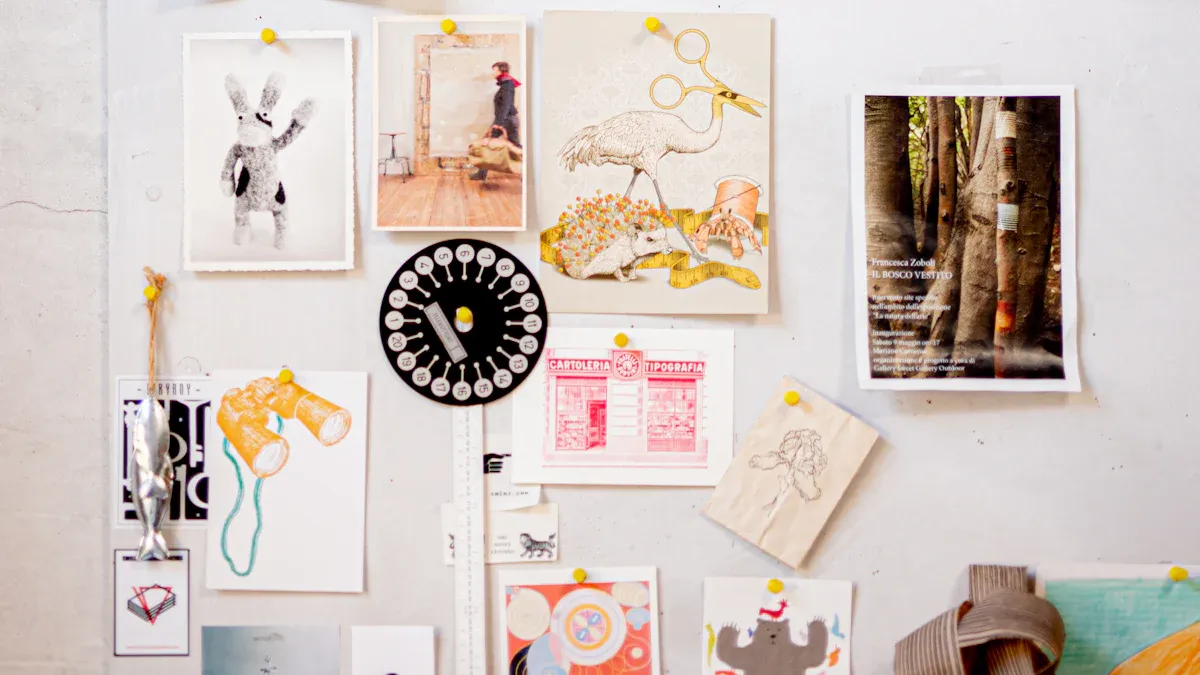
Next, experiment with floor layouts. Arrange your pictures on the floor first. This helps you visualize and plan the layout. You can shift things around until it feels perfect. Start by placing a hero piece or centerpiece in the middle of your gallery wall. Then, build around it. Take a photo of your favorite arrangements. This helps you remember what you like best.
Think about how people will view your photos. There isn’t one perfect viewing distance for a display. People often move closer for details and further back for the overall impression. This makes your collection of photos engaging for everyone.
Use Paper Templates for Placement
Using paper templates is a smart way to finalize your layout. Cut out paper templates the same size as your frames. You can even trace your frames onto newspaper or craft paper. Then, use painter’s tape to stick these templates to the wall. This lets you see your picture wall ideas before you commit. You can live with the arrangement for a day or two. This gives you time to make adjustments.
This hands-on method gives you a more accurate feel for your specific space. It’s often better than using online apps. With the templates perfectly placed and level on the wall, you can mark where each nail or screw needs to go. This simplifies the hanging process. You just hammer directly into the ‘x’ on the template. Then, you remove the template. You will find a perfectly positioned nail for your frame.
Balance Spacing and Visual Flow
Finally, balance the spacing and visual flow of your display. Maintain equal spacing between frames for a balanced gallery wall. A good distance between each piece is usually 2 to 3 inches. Some recommend 2 to 4 inches. This prevents a cluttered look. If pieces are too close, they look crowded. If they are too far apart, they feel disconnected. Consistent spacing makes your photo wall display look neat and intentional.
You also want to create visual flow. This guides the viewer’s eye through your collection.
Hierarchy of Placement: Put larger or centerpiece artworks at eye level. This draws immediate attention. Smaller pieces can then complement the central work.
Scale Variation: Mix small, medium, and large frames. This adds contrast and depth. Large pieces act as anchors. Smaller ones fill gaps and create rhythm.
Negative Space: Use the empty areas between frames. This creates breathing room and prevents visual clutter.
Cohesion: Even with different frames, you can create harmony. Use consistent design elements, like repeating frame colors. Align pieces along invisible lines. Thoughtful spacing helps too.
Hang Your Photo Wall Display with Precision
You have planned your layout. Now, it is time to hang your beautiful photo wall display. This step needs precision. You want your hard work to look perfect on your wall.
Mark Hanging Points Accurately
First, mark your hanging points with care. You want everything to be straight and even. Start by measuring your wall’s width. Find the center point. Then, decide how high you want your art. Mark these spots with a light pencil. If you hang many items, measure the space between each one. This keeps everything consistent.
You can also use modern tools. A laser level projects straight lines on your wall. This helps you hang things perfectly upright. It is great for multiple pieces. For even more precision, use painter’s tape. Professionals often use small pieces of painter’s tape to show exact hanging points. This protects your wall from pencil marks. You can also use a stud finder. It tells you what is behind your wall. This helps you avoid wires or pipes. It also ensures you hang into a stud for extra security.
Double-Check Measurements Before Hanging
Before you make any holes, double-check your measurements. This prevents common mistakes. Many people hang pictures at the wrong height. This can make your wall look off. A good rule is to center your art about 150-155 cm (about 59-61 inches) from the floor. This is eye-level for most people. If you hang art above furniture, place it 20-30 cm (about 8-12 inches) above the surface.
Another mistake is choosing the wrong size art for your space. A small picture on a big wall can get lost. A large picture in a small room can feel overwhelming. For big walls, use a large piece or a group of smaller ones. If you have a large picture, leave at least 20 cm (about 8 inches) of wall space around it. Also, watch your spacing between frames. If frames are too close, your wall looks cluttered. If they are too far apart, they look disconnected. Keep about 5-7 cm (2-3 inches) between frames. For larger frames, you can go up to 7-10 cm (3-4 inches). Always use a level before you hang anything. This makes sure your pictures are straight.
Secure Each Piece Firmly
Now, secure each piece firmly to the wall. Choosing the right hardware is very important. Always pick hardware that can hold at least double your frame’s actual weight. This accounts for movement and keeps things safe.
Here is a guide for different hardware types:
Hardware Type | Weight Capacity (lbs) | Suitable Wall Materials |
|---|---|---|
Picture-Frame Hangers & Nails | Up to 20 (angled nail) | Drywall, Plaster |
Screw-In Anchors | Up to 25 | Drywall |
Expanding Plastic Sleeves | Up to 25 | Drywall |
Molly Bolts | 10-50 | Drywall, Plaster |
Toggle Bolts | 25-50 | Drywall, Plaster, Hollow-core Concrete Blocks |
Flat-mounted hook with anchor | 25-50 | Drywall, Plaster |
Long wood screws | Heavy loads | Wall studs (for shelves, cabinets, TV mounts) |
For frames under 5 pounds, small nails or picture hanging strips usually work. Medium frames (5-15 pounds) need wall anchors, toggle bolts, or screws into studs. Heavy frames (over 15 pounds) need strong mounting systems. These often use many attachment points.
Always check your wall type first. Drywall needs anchors or stud mounting. Masonry walls (like brick or concrete) need special fasteners and drill bits. For very heavy items, always try to drill into wall studs. Studs give you the most secure hold. If you cannot find a stud, use heavy-duty anchors like toggle or molly bolts. These help drywall hold more weight. For very valuable or heavy art, you might want to ask a professional. They can confirm your wall can safely hold the weight.
Make Final Adjustments for Alignment
You have hung your pictures. Now, make any final adjustments for perfect alignment. Sometimes, a frame might look straight from one angle but tilted from another.
Here are some ways to fine-tune your display:
The Round-Object Method: Place a small, smooth, round object on top of your frame. If it rolls, gently adjust the frame’s tilt. Keep adjusting until the object stays still. This tells you the frame is level. You might need to make small changes at the hanging points.
Visual Confirmation: Step back from your wall. Look at your frames from different spots in the room. Notice how light, shadows, and other decorations affect how they look. Make small shifts to get the best visual alignment.
Incremental Adjustments: Sometimes, you just need to move a frame a tiny bit. Shift it slightly left or right. Raise or lower it a little. Even small changes can make a big difference in how straight and balanced your display looks.
Enhance and Maintain Your Stunning Picture Wall
You have created a beautiful display. Now, let’s make it even better and keep it looking great. A stunning picture wall display is a living part of your home. It can grow and change with you.
Incorporate Other Decorative Elements
Don’t limit your wall to just framed photos. You can mix in other items to add depth and interest. Think about adding mirrors, like vintage or geometric ones. You can also include oversized artwork or unique art pieces. Floating shelves are great for displaying small sculptures or souvenirs from your travels. You might even use accent colors, like a moody blue, as a backdrop. This helps tie everything together. Coordinated color schemes, such as black and white or muted natural hues, also create a cohesive look.
Consider Lighting for Impact
Good lighting makes your photo wall display truly shine. You can use layered lighting. This means combining general room light with accent lights. Accent lights highlight specific artworks. Adjustable lighting fixtures are very useful. They let you control the direction and intensity of light. Track lighting or adjustable recessed lights can aim light at your favorite photos. Wall sconces provide intimate accent lighting. They create a focal point without being distracting.
💡 LED Lighting Benefits:
Enhanced Safety: LEDs produce less heat and UV rays, protecting your photos.
Discreet Design: Small LED fixtures keep the focus on your art.
Superior Light Quality: Colors look accurate and vivid.
Energy Efficiency: LEDs use much less power.
Art Preservation: Less UV and IR radiation prevents fading and damage.
Regular Cleaning and Dusting
Keep your display looking fresh with regular cleaning. Dust can build up on frames and glass. For framed art with glass, gently remove it from the wall. Lay it flat. Spray glass cleaner onto a soft, lint-free cloth. Never spray directly onto the glass. Then, wipe the glass and dry it with another clean cloth. If you have plexiglass, use an ammonia-free cleaner. Ammonia can cloud plexiglass. Always spray the cleaner onto the cloth first. You should also protect your photos from dust and environmental damage. Store valuable photos in cool, dry places. Use archival-quality enclosures.
Evolve Your Display Over Time
Your tastes change, and so can your stunning picture wall display. You might want to refresh a room or add seasonal flair. Sometimes, you just rediscover forgotten photos. Changing your display reflects personal growth and new milestones. You can change a frame or add a matboard to refresh an artwork’s look. If a piece feels too small, enlarge the matboard. You can also paint frames to match new decor. Displaying art on shallow shelves lets you rearrange easily. This means no new holes in the wall! Evolving your display keeps it exciting and prevents “habituation,” where you stop noticing things you see every day.
You now know how to create a stunning picture wall display! Careful planning, thoughtful design, and precise execution are crucial steps. You selected your favorite photos and arranged them perfectly. This guide helped you build a beautiful photo wall display. Embrace your creativity; your finished stunning picture wall display will reflect your unique memories and aesthetic. It transforms your living space into a captivating and personal gallery of your cherished photos.
FAQ
What is the best height to hang pictures?
You should center your art about 150-155 cm (59-61 inches) from the floor. This puts it at eye-level for most people. If you hang art above furniture, place it 20-30 cm (8-12 inches) above the surface. This creates a balanced look.
What kind of frames should I use for a cohesive look?
You can mix frame styles, but try to keep a consistent element. For example, use all black frames for a modern feel. Or, choose frames with similar wood tones for a natural look. You can also use a consistent mat color. This helps tie everything together.
What is the ideal spacing between frames?
Aim for 2 to 3 inches (5-7 cm) between frames. This prevents your display from looking too cluttered or too disconnected. For larger frames, you can go up to 3-4 inches (7-10 cm). Consistent spacing makes your wall look neat and intentional.
What if I don’t want to make holes in my wall?
You have options! You can use adhesive picture hanging strips. These stick to your wall and frames without nails. Another idea is to display frames on shallow shelves. This lets you rearrange them easily without making any holes.


