You’re about to build an Outsunny greenhouse and you’ll want to move stepwise so nothing gets missed. Start by unpacking and checking parts, then pick and level a sunny spot with good drainage.
Lay out the base rails, assemble them square and tight, and stand up the posts with corner braces. Fit rafters and the ridge, seat roof panels and sliding door tracks, add vents and seals, then anchor and caulk the frame. Take your time, use help whilst lifting, and keep hardware labeled so you’re set for the next stage.
Unpack and Inventory All Parts
Go ahead and open the box carefully so nothing inside gets bent or scratched. You’ll feel better whenever pieces are laid out.
Start with a packing checklist and cross off each item as you go. Lay parts beside size and shape so nothing gets lost.
Use the part labeling system on the manual and put matching stickers on tubes and panels. Call a friend should a piece looks wrong. You’ll want clear photos for support calls.
Keep small hardware in separate bags and label those too. Move boxes into the same workspace so you don’t trip over them.
As you sort, notice which pieces pair together. This makes the next step faster and keeps everyone included in the work.
Choose and Prepare the Site
Before you pick a spot, envision using the greenhouse every day so you’ll choose a place that makes work feel easy and joyful.
You want a flat, level area that feels welcoming to you and anyone who’ll help.
Check sun exposure through the day and mark where shade falls in morning and afternoon.
Next, do soil testing to learn drainage and nutrients whether you plan in-ground beds.
In the event soil drains poorly, raise beds or use containers.
Make paths wide enough for two people and tools so you’ll enjoy moving around together.
Clear roots, rocks, and debris, and keep utilities accessible without blocking light.
These steps link practical needs with comfort so assembling and tending the greenhouse feels like joining a friendly routine.
Lay Out the Base Frame Components
Now you’ll place the base rails in their planned positions, making sure each rail sits flat and follows the outline you prepared.
As you set them, align the corner brackets so the rails meet at true right angles and the frame stays square.
Should something looks off, stop and adjust gently now so the rest of the assembly goes smoothly and you don’t have to redo work later.
Position Base Rails
Taking a moment to set out the base rails carefully will save you time and frustration later, and you’ll feel more confident as the frame comes together. Lay each rail where it will sit, keeping shared goals in mind so everyone feels included. Check for level and spacing, and note where ground screws will anchor the frame. Allow for thermal expansion by leaving the recommended tiny gap at joins.
| Rail Part | Action |
|---|---|
| Long rail | Place along foundation edge |
| Short rail | Match corner locations |
| Connector strip | Lay near join points |
You’ll work steadily with others, handing parts and confirming placement. Use soft language and patience whenever you ask for help. This makes the task smoother and keeps the group feeling capable and connected.
Align Corner Brackets
You’ve already placed the base rails, so it helps to contemplate of the corner brackets as the frame’s hands that hold everything steady.
Now you’ll align each bracket with care so the base fits without strain.
Check corner tolerances through laying brackets against rails and looking for even gaps.
Should a bracket sit high or low, loosen nearby screws, nudge the rail, then tighten slowly.
You’ll work with your hands and patience.
Watch for bracket corrosion on older parts and swap any that show rust to keep the greenhouse sturdy.
As you align one corner, move to the next and compare measurements so the frame stays square.
This teamwork between you and the parts builds confidence and makes the process feel friendly and shared.
Assemble the Base Frame
Now that you’ve laid out the parts, you’ll start upon leveling the foundation so the frame sits straight and won’t wobble.
Next you’ll connect the base rails, fitting and fastening each piece so the frame locks together smoothly and stays square.
As you work, check alignment often and adjust the level so the rails mate cleanly and your greenhouse will stand steady for years.
Leveling the Foundation
Before you bolt the base frame together, take a moment to get the ground right so the greenhouse sits steady and straight. You’ll feel better aware your space welcomes growth.
Initially, clear vegetation and roots, then compact the soil gently to prevent future settling. Test for level with a long board and spirit level, adjusting by adding or removing soil in small amounts. Also dig shallow drainage channels around the perimeter so water won’t pool under your structure.
As you work, invite a friend or neighbor to help; two sets of hands make measurements easier and the task more fun. Move slowly, check often, and keep communication open so the base will stay true and your greenhouse will feel like it belongs.
Connecting Base Rails
Once you place the base rails, take it slow and steady so the frame will sit square and true; consider of this step as laying the greenhouse’s foundation for everything that follows.
You and your helpers will feel proud as pieces click together.
Check each rail coupling for fit and keep rails aligned so the frame won’t twist.
Watch for any signs of rail corrosion and clean or replace parts before assembly.
Work with someone who cares, and talk through steps so everyone stays confident.
- Align rails on level foundation and set temporary clamps.
- Insert rail coupling fully and tap gently until flush.
- Bolt couplings securely while checking for squareness.
- Inspect for rail corrosion and treat or swap affected rails.
Install Vertical Posts and Corner Braces
Stand the initial vertical post upright and feel that small burst of satisfaction, because this is where your greenhouse begins to take shape.
You check post stability initially by pressing gently at various heights. Should it wobbles, tighten the base bolts and confirm the ground plate sits flat.
Invite a friend to steady one side while you fasten the opposite connectors.
Next, position corner braces so they sit flush against both verticals. Use a level to confirm brace alignment before tightening each screw.
Work methodically around the frame, alternating sides so the structure grows evenly.
You’ll notice rhythm in the steps and trust will build between you and the frame. Small adjustments now prevent big problems later and keep everyone feeling capable.
Attach Roof Rafters and Ridge Beam
Now that your vertical posts and corner braces feel solid and steady, you can move up to the roof where the rafters and ridge beam start to shape the greenhouse crown. You’ll feel proud as you work with friends or family, and you’ll want neat ridge alignment and steady rafter bracing to keep the structure true.
- Lift the ridge beam with one person at each end while another checks ridge alignment from both sides.
- Slide rafters into their slots and tap them gently so they seat squarely against the ridge.
- Fasten rafter bracing at midspan to prevent wobble and keep panels flush.
- Recheck every connection, tighten bolts, and celebrate the teamwork that built this shelter.
Secure Door Frame and Hinges
Fit the door frame into the opening with steady hands and a calm pace so you don’t feel rushed or fumble the hinges. You’ll align the frame, check level, and hold it while a friend fastens corners. Use hinge lubrication lightly so the door swings smooth and stays quiet. Attach hinges snugly, test swing, and tighten as needed. Consider installing a security sensor near the top to keep your shared garden safe and signal should the door open unexpectedly. You belong here and your work matters, so take satisfaction in neat screws and tidy seals.
| Task | Tip |
|---|---|
| Align frame | Use a level |
| Fasten corners | Start loosely |
| Lubricate hinges | Small amount |
| Add sensor | Mount high for best range |
Fit Side Panels and Sliding Panels
Now you’ll align the panel tracks so the side and sliding panels sit straight and glide smoothly.
As you secure the hinge connections, check each screw and bracket so nothing wiggles and the door stays true.
Then test the sliding movement gently, listen for catches, and make small adjustments until it opens and closes with an easy, confident feel.
Align Panel Tracks
Start checking the tracks so they sit level and straight, because a misaligned track makes every panel harder to slide and can dent the frame.
You want smooth movement and a sense of teamwork as you work on track alignment and panel adjustment together.
- Inspect both side rails for gaps or twists and gently tap high spots so the track lies flat.
- Loosen nearby screws slightly to allow small panel adjustment, then slide panels back and forth to feel resistance.
- Use a spirit level and a soft mallet to nudge rails until the door slides freely without catching.
- Tighten fasteners evenly while rechecking movement, and ask a friend to hold panels steady so you both share the success.
Secure Hinge Connections
Handle the hinge connections with care so the side panels and sliding panels work smoothly and feel solid.
You’ll line up each hinge pin and fastener, then hand-tighten bolts so nothing binds.
Should a hinge feel stiff, apply a little hinge lubrication to free movement and protect metal.
Were you to find bent or worn hardware, consider hinge replacement before you finish fitting panels.
Work with a friend so one of you steadies panels while the other secures hinges, which builds trust and makes the job easier.
After every few hinges, recheck alignment so the sliding panels sit true in their tracks.
These small steps keep the greenhouse doors reliable and help you feel proud of the space you built together.
Test Sliding Movement
Slide each side and sliding panel into place and gently glide them to check the movement and fit. You’ll want to feel confident together as you test each track. Use a finger to sense any Track obstruction and listen for scraping. In case you notice stiffness, apply light Sliding lubrication and try again.
- Inspect tracks for dirt or stones and clear debris so panels run smooth.
- Wiggle frames gently to confirm alignment and that seals meet evenly.
- Add a small amount of silicone or graphite Sliding lubrication where metal meets metal, then wipe away excess.
- Recheck movement, noting any rough spots and dealing with them as a team.
These steps help you trust the build and enjoy your greenhouse with neighbors and friends.
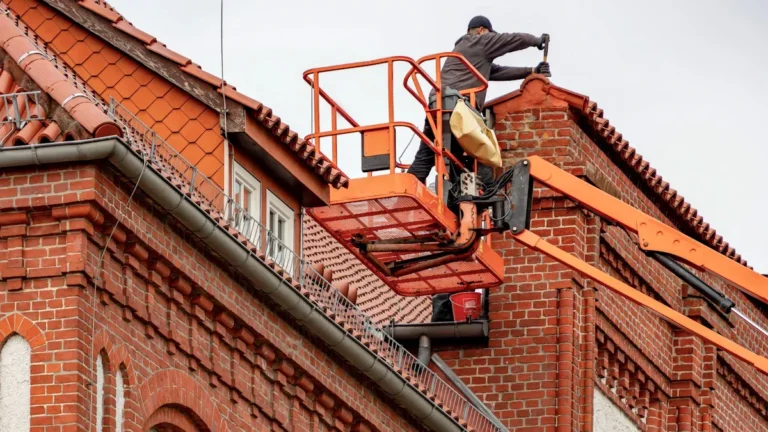
Install Roof Panels and Sealing Strips
Now you’ll fit the roof panels and sealing strips, a step that makes your greenhouse weather-tight and comfy for plants.
You’ll lift each panel with a friend, slide it into the top rails, and align edges before fastening.
Pay attention to light diffusion as you place panels so plants get even brightness.
Leave small gaps per instructions to allow for thermal expansion and prevent buckling.
Next, press sealing strips into seams, working from one end to the other so the seal stays neat.
Check that strips lie flat and overlap where needed.
As you work, talk through each step with your helper to stay coordinated.
You’ll finish feeling proud and secure appreciating your greenhouse will shelter plants and welcome you.
Add Ventilation and Window Hardware
You finished fitting the roof panels and sealing strips, so the greenhouse will hold heat and keep rain out, and that makes adding vents and window hardware the next friendly step. You’ll feel proud as you equip vents, attach window latches, and set up small automation should you choose. These parts help plants breathe and keep your space cozy.
- Fit vents into the pre-cut frames, aligning hinges so vents open smoothly and sit square.
- Install window latches, testing each one so you and your neighbors know it’s secure and simple to use.
- Mount ventilation sensors where airflow is steady, so they read temperature and trigger vent action.
- Check moving parts daily at the outset, greasing pivots lightly and tightening fasteners to keep the team of parts working together.
Seal Joints and Weatherproof Edges
Because the seams where panels meet are where drafts and water like to sneak in, take time to seal joints and weatherproof edges so your greenhouse stays cozy and dry. You’ll feel proud doing this work together.
Initially, clean the frame and panel edges with a damp cloth so adhesives bond well. Next, run thermal tape along inside seams for insulation and a neat finish. Then apply silicone caulk to exterior corners and gaps that tape can’t reach. Smooth caulk with a wet finger or tool so it looks clean and holds tight. Check doors and vents, adding small beads where panels meet moving parts. Let everything cure per product directions.
As you go, pause to admire progress and remind yourself you’re building a safer, warmer space.
Anchor the Greenhouse to the Ground
Whenever strong winds hit or heavy rain soaks the ground, your greenhouse needs a firm hold to keep everything inside safe, and anchoring it well gives you that peace of mind. You and your neighbors will feel proud once it stands steady.
Start by choosing between ground anchors for soft soil or concrete footings for permanent security. Ground anchors screw in quickly and let you adjust, while concrete footings take more work but lock the frame in place.
- Assess soil and pick anchors that match your site.
- Place anchors at each corner and midpoints for even hold.
- Bolt frame to anchors or embed base plates in concrete footings.
- Check tightness after storms and tighten as needed.
Final Inspection and First Planting Setup
Now that the frame sits secure and anchored, take a slow walk around the greenhouse to spot any loose bolts, gaps in the panels, or uneven seals before you bring in plants. You’ll feel relief as you tighten fasteners and realign panels. Do soil testing together with a friend to know pH and nutrients; that helps choose plants and amendments.
| Task | Why it matters |
|---|---|
| Tighten bolts | Prevent leaks |
| Seal gaps | Keep pests out |
| Soil testing | Match plants |
| Irrigation layout | Save water |
| Test run | Fix issues |
Plan your irrigation layout now so hoses and drip lines won’t tangle later. Place raised beds or containers, lay hoses, then test water flow. Invite a neighbor to help carry trays and share a laugh while you position seedlings. You belong here and this space will grow with you. Trust small checks now for smooth, hopeful days ahead.