
You want a beautiful home without a hefty price tag, right? You can make big transformations with smart, budget-friendly home upgrades. These updates enhance your home’s interior style and add curb appeal. A small budget still delivers amazing results. Many home updates offer great returns on your investment, too!

How can you achieve a fresh, updated look for your home without draining your savings? We will show you 10 actionable solutions for the 10 best home updates.
Budget-Friendly Curb Appeal Boosts

You want your home to look great from the street. These exterior updates significantly add curb appeal without major spending. They create an immediate visual impact.
Add Curb Appeal with a Front Door Refresh
Your front door is the focal point of your home’s exterior. It makes a first impression. You can make a maximum difference with a simple refresh. You can paint the front door a bold, welcoming color. This inexpensive update instantly transforms your home’s look.
Consider the material if you need to replace your front door. Different materials offer varying costs and features:
Material | Cost-Effectiveness | Key Features |
|---|---|---|
Steel | More affordable | Secure, clean/modern look, highest cost recovery |
Fiberglass | Slightly pricier | Durable, energy-efficient, customizable appearance (can mimic wood), less maintenance |
Steel doors are often the most affordable choice. They are strong and secure. You can paint a steel front door any color you like. However, they can dent easily and might not have the same charm as wood or fiberglass. Upgrading your front door hardware, like the doorknob or knocker, also adds a fresh touch.
Instant Impact with Power Washing
Dirt, mold, and grime build up on your home’s exterior over time. Power washing removes these unsightly elements. It makes your home look attractive and stand out. This simple task offers huge benefits:
Improved appeal: It removes dirt, mold, and mildew. Your home looks clean and inviting.
Damage prevention: It extends the life of siding, decks, and driveways. It removes harmful substances that cause wear.
Improved health and safety: It eliminates mold and algae. These can pose health risks and create slippery surfaces.
Real estate experts say good curb appeal can add 5% to 11% to your home’s value. A clean exterior shows you care for your property. You can power wash many surfaces:
Siding and Exterior Walls
Driveways and Walkways
Decks and Patios
Fences
Roofs (use caution here!)
You can rent a pressure washer from a home center. It typically costs between $40 and $100 for a single day. This is a small price for such a big impact.
Simple Landscaping Updates
You do not need a green thumb or a huge budget for beautiful landscaping. Simple landscaping updates can make a big difference. You can plant inexpensive perennials like black-eyed Susans or lavender. These plants offer long-term value.
Consider these low-maintenance plants for easy care and vibrant color:
Nitty Gritty™ Pink Rose: A durable, fuss-free rose with bright pink blooms. It resists disease well.
Darkstar® Purple Leaf Sand Cherry: This compact plant has dark foliage and white-pink flowers.
Chateau® de Versailles Rose of Sharon: It boasts large, showy blue-violet flowers.
Little Darling® Lilac: This fragrant lilac blooms twice a year and tolerates drought.
Other great low-maintenance options include crape myrtle, Indian hawthorn, and abelia.
Here are more budget-friendly curb appeal ideas:
Add painted trellises in bright colors. They support climbing plants and add visual interest.
Use container gardens. Mix plants with different heights and textures.
Install string lights. Weather-resistant LED or solar-powered options transform your yard’s atmosphere.
Use gravel for low-cost hardscaping. It creates paths or defines garden borders.
Refresh old outdoor furniture with exterior-grade paint.
These low-cost updates create a welcoming outdoor space.
Upgrade Outdoor Lighting
New light fixtures enhance your home’s safety and appeal. They also highlight architectural features. You have many affordable upgrades for outdoor lighting.
Solar lighting is popular. It uses sunlight and does not affect your electricity bill. It works well for garden paths and patios. LED lighting is another excellent choice. It saves energy and lasts a long time. You can find LED lights in many styles.
Consider these energy-efficient options:
LED Floodlights: They are energy-efficient and last a long time. Some are solar-powered and have motion sensors for security.
Smart Lighting: This growing trend offers advanced features and saves energy.
Ambient LED Lighting: LED wall lamps or landscape lighting create a warm glow. Choose LEDs with a warmer color temperature for this effect.
Motion sensors also save energy. They turn lights on only when you need them.
Modernize House Numbers and Mailbox
Old, faded house numbers or a rusty mailbox detract from your home’s appeal. Modernizing these small details makes a big impact. You can find sleek, contemporary designs for house numbers. Floating numbers create cool shadows and a modern look.
These numbers come in durable materials like:
Cast aluminum
Brass
Stainless steel
They have weather-resistant finishes. These finishes are rust-proof and fade-resistant. You can find modern house numbers at affordable prices. Some start as low as $24.50. They often come with installation templates for easy DIY.
While the text focuses on house numbers, you can also find modern mailbox designs. Look for materials like aluminum or steel. A fresh, updated mailbox complements your new house numbers. These small home improvements add a polished finish to your exterior.
Interior Style Upgrades on a Budget
You can make your home feel luxurious without spending a lot. Small changes can truly elevate your home’s aesthetic. These interior updates prove that.
Transform with Fresh Paint
A fresh coat of paint is one of the most impactful and budget-friendly ways to update any room. It instantly changes the mood and look of your space. You can make a room feel brand new.
Consider these popular interior paint colors for increasing home value in 2025:
Soft Greige (Gray + Beige): This color appeals to almost everyone. It makes rooms feel fresh and cozy. It also hides small flaws. Sherwin-Williams “Agreeable Gray” or Benjamin Moore “Revere Pewter” are great choices.
Warm White: This color creates a clean, spacious feeling. It makes natural light brighter. It also provides a simple background for decorating. Benjamin Moore “White Dove” or Sherwin-Williams “Alabaster” are top picks.
Earthy Green Tones: These colors connect your home to nature. They look beautiful with plants. They are unique but still subtle. Behr “Eucalyptus Wreath” or Farrow & Ball “Sap Green” are good examples.
Muted Navy: This color makes a room look sophisticated. It pairs well with brass, gold, or wood. Many upscale homes use it. Sherwin-Williams “Naval” or Benjamin Moore “Hale Navy” are popular.
Blush Taupe or Clay Rose: This color is unique but not too bold. It adds warmth and personality. It feels modern and trendy. Farrow & Ball “Setting Plaster” or Behr “Perfect Penny” are excellent options.
You should also know which colors to avoid. Some colors can actually lower your home’s value:
Dark brown or burgundy feels heavy and old-fashioned.
Bright red or orange is too intense for most buyers.
Neon or super bright colors are trendy but not for everyone.
Flat builder beige often looks boring and cheap.
Think about the feeling you want to create. Different colors have different effects:
Color Type | Psychological Effect |
|---|---|
Warm neutrals | Comfort, cleanliness, calm |
Cool grays/blues | Sophistication, peace, trustworthiness |
Earth tones | Natural, healthy, serene |
Bold colors | Energy, creativity (can be risky) |
Painting a room yourself is very affordable. Here is what you can expect to spend on materials for a standard 12×12 room:
Category | Estimated Cost Range |
|---|---|
Paint (1-2 gallons for 12×12 room) | $15 – $100 |
Tools (brushes, rollers, tape, drop cloths, primer) | $50 – $150 |
Additional Supplies (sandpaper, spackle, ladder, cleaning) | $20 – $50 |
Total Estimated DIY Cost (Materials Only) | $70 – $200 |
A fresh coat of paint in neutral tones can truly transform your space. It gives your home a clean, updated look.
Update Cabinet and Door Hardware
You can easily upgrade your kitchen or bathroom cabinets and doors with new hardware. This small change makes a big difference in how your rooms feel. It is one of the most affordable upgrades you can make.
Current trends for 2025 show exciting options:
Popular Finishes: Brushed brass and matte black are top choices. They are versatile and last a long time.
Mixing Hardware: You can mix different knobs, pulls, and finishes. Just make sure the colors match for a consistent look.
Brass Hardware: Brass is still popular. Look for softer, brushed, or unlacquered finishes instead of shiny ones.
Coordinating Hardware: Your cabinet hardware does not need to perfectly match your faucets or lights. Choose similar tones to create harmony. Mixing metals adds personality without looking too perfect.
You also have other stylish choices:
Two-tone hardware: Brass and bronze together offer a subtle contrast.
Hardware for Light Cabinets: Gold, champagne bronze, or brushed nickel add warmth and quiet elegance.
Hardware for Dark Cabinets: Polished chrome and satin brass create a strong contrast and add brightness.
Smart Features: Soft-close mechanisms, hidden pulls, and integrated grip designs are becoming common.
Sustainable Materials: You can find hardware made from recycled metals and wood.
Overall Trends: Show your personality with larger pulls, softer metals, matte finishes, and mixed metals. This creates an elegant, lived-in feel.
Replacing cabinet hardware in a kitchen costs around $300 on average. However, the price can range from $100 to $10,000. This depends on the quality and design of the hardware. Ornate designs cost more. The size of your kitchen and how many cabinets you update also affect the final price.
If you hire a professional to install new cabinet hardware in an average-sized kitchen, expect to pay between $120 and $2,400. Individual pieces like hinges and handles usually cost $2 to $50 each. A 200-square-foot kitchen typically needs 20 to 40 pieces of hardware for an upgrade.
Refresh Kitchen or Bathroom Backsplash
A new backsplash can completely change the look of your kitchen or bath. You do not need a full renovation to make a big impact.
You have many budget-friendly options for backsplash updates:
Peel-and-stick tiles
Adhesive panels
Painted designs
If you cannot do a full renovation, try painting the walls and cabinets around your existing backsplash. Choose a color that matches. This can soften the look of old tiles and make the space feel more continuous. Marble or zellige-inspired peel-and-stick tiles offer an affordable and less permanent update.
You can even create your own mosaic backsplash. Use materials from old projects or clearance items. You can reuse old tiles or slabs instead of buying new, expensive ones. These are truly inexpensive updates.
You can also refresh your bathroom backsplash with DIY techniques:
Clean and Tape: Clean the backsplash well. Tape off nearby areas to protect them from paint.
Apply First Coat: Use a foam roller for a thin first coat of paint. Let it dry for 30-45 minutes.
Apply More Coats: Apply a second and third coat. Make each coat a little thicker. Let it dry completely between coats.
Seal with Lacquer: Apply two thin coats of glossy lacquer with a flat brush. Allow enough drying time between coats.
Add Stencil Pattern: Make stencils to fit your tiles. Use a foam roller to apply a thin coat of a different color paint. Apply a second coat if needed. Remove the stencil and repeat for other tiles.
Final Seal: After all paint and stenciling are dry, apply one more coat of glossy lacquer.
Reglazing bathroom tile is another DIY-friendly process. You apply a new, durable finish (usually epoxy-based) to existing tiles. This is great for tiles that are strong but look old. It is a cost-effective way to refresh your bath without a big renovation.
Reglazing offers many advantages:
Cost-effective: It is much cheaper than replacing tiles.
Customizable: You can choose from many colors.
Eco-friendly: You reduce waste by reusing materials.
Less messy: It avoids the dust and debris of tile removal.
Time-saving: It takes only a few days, not weeks.
Elevate with New Faucets and Grout
Small details like faucets and grout can make a huge difference in your kitchen and bath. Upgrading them can give your rooms a fresh, modern look.
Consider these popular faucet finishes for a modern style:
Matte Black: This finish offers a crisp, modern edge. It works well in contemporary and transitional bathrooms. It also hides water spots and fingerprints.
Brushed Nickel: This is a classic choice. It pairs well with neutral colors and wood cabinets. Many modern luxury bathrooms use it for its timeless design.
Polished Chrome: This finish is sleek and shiny. It makes light brighter. It is perfect for modern vanities and small bathroom remodels.
Brushed nickel gives a warm, soft look. It is a quieter option than chrome. It fits well with modern or transitional styles. It also hides fingerprints and water spots. Matte black is bold and dramatic, yet neutral. Minimalist and industrial designs favor it for its strong contrast and ability to hide smudges. Chrome has a high gloss and reflective surface. It looks clean and sleek. It complements many bathroom styles, including modern ones.
Hiring a professional to replace a bathroom faucet usually costs between $130 and $350. The cost changes based on the faucet’s finish, material, and type. Labor and extra features also affect the price.
Here are average cost ranges for different faucet types:
Faucet Type | Average Cost Range |
|---|---|
Single handle | $50–$550 |
Center-set | $50–$250 |
Widespread | $70–$600 |
Vessel | $75–$600 |
Wall mounted | $100–$400 |
Touchless or Touch activated | $200–$600 |
Traditional knob | $30–$300 |
Cross sink | $70–$600 |
Lever | $30–$600 |
Joystick | $300–$1,000 |
Push Button | $70–$125 |
Faucet finishes also have different costs:
Faucet Finish | Average Cost |
|---|---|
Brushed nickel | $50–$125 |
Bronzed gold | $200–$500 |
Chrome | $50–$175 |
Matte black | $100–$250 |
And faucet materials vary in price:
Faucet Material | Average Cost |
|---|---|
Stainless steel | $50–$200 |
Brass | $200–$600 |
Zinc | $20–$50 |
Plastic | $15–$30 |
The labor cost for replacing a faucet is typically $130 to $350. This might include taking away your old faucet. Replacing a kitchen faucet involves many of the same steps as a bathroom faucet. As of October 2025, replacing a bathroom faucet starts at $505 to $710 per faucet.
You can also refresh old grout. Clean and restore it to make your tiles look new again.
Prepare the Grout: Make sure grout lines are clean and dry. Clean with a solution and water. Scrub tough stains if needed. Let it dry.
Apply the Grout Renew: Shake the bottle well. Use a small artist brush to paint Grout Renew onto clean grout lines. Work in small sections. Try to keep it only on the grout.
Wipe Off the Excess: Immediately wipe any extra Grout Renew from the tiles with a damp cloth or paper towels. The product should only stay in the grout lines.
Let it Dry: Allow 24 hours for the Grout Renew to dry. Make sure the area has good airflow.
Touch Up and Clean Up Missed Areas: After drying, check for even color. Apply a second coat where the color is not even or stains are still visible. Repeat the process.
Polyblend Grout Renew is a very effective solution for old grout. It is a special grout colorant that acts like paint. It brings back the color of the grout. It also includes a sealer to protect against future stains. This product can make dark, dirty grout much lighter. It works on different tile types, like slate. It is a cost-effective choice compared to professional cleaning, regrouting, or replacing floors.
You can also clean grout with common household items:
Baking Soda Paste:
Mix baking soda and water to make a paste.
Apply it directly to grout lines with an old toothbrush.
Scrub in circles.
Rinse well with clean water and dry with a clean towel.
Vinegar Solution (For Non-Natural Stone Tile):
Mix equal parts white vinegar and warm water in a spray bottle.
Spray onto grout lines. Let it sit for 5-10 minutes.
Scrub with a stiff brush and rinse well.
Important: Do not use this on natural stone tiles like marble or travertine. It can damage them.
Hydrogen Peroxide:
Apply 3% hydrogen peroxide directly to grout lines.
Let it sit for 10 minutes.
Scrub with a brush and rinse with clean water.
This works well for white or light-colored grout with stains.
Oxygen Bleach:
Mix oxygen bleach (like OxiClean) in warm water as directed.
Apply to grout lines with a brush or spray bottle. Let it work for 15 minutes.
Scrub grout lines and rinse well with clean water.
Use this for tough stains on white or light grout. Avoid it on colored grout.
Sometimes, you need to regrout your tiles. Here are effective techniques for regrouting bathroom tiles:
Prepare your Rotary Tool for Regrouting: Remove the Dremel Nose Cap. Insert the right Grout Removal Bit (569 or 570) for your groove width. Tighten it. Fit the Angled Cutting Guide over the bit and screw it on. Adjust the Cutting Guide to set the correct depth for grout removal. Use the tile thickness as a guide.
Remove the Old Grout: Wear a dust mask, safety glasses, ear protection, and gloves. Start the tool at 20,000 RPM. Sink it into the grout. Use a pulling motion to remove it. Hold the tool with both hands. Keep a 30-degree angle with the Cutting Guide for control and clean cuts. Continue until all old grout is gone.
Get Rid of Any Dust: Clean away all dust so new grout sticks properly. First, swipe along grout lines with a hand brush to loosen particles. Second, use a vacuum cleaner to suck up dust and debris.
Mix the New Grout: Choose your grout color. Measure the recommended amount of water into a bucket. Add the grout powder. Stir with a putty knife until all powder is mixed and smooth. Let the grout ‘slake’ or rest for 5 to 10 minutes.
Apply the Grout: Use a grout float. Scoop grout onto the rubber side of the float with a putty knife. Swipe diagonally across the wall. Spread and press the grout into the grooves. Go over the same area from different directions to fill all grooves well. Swipe up any extra grout from the tiles.
Clean the Tiles: After the grout hardens (check manufacturer’s time), dampen a grout sponge lightly. Wipe the grout residue off in circles. Rinse the sponge in warm water if it gets dirty. Avoid rinsing under the tap or pouring muddy water down the drain to prevent clogs. Let the grout dry fully.
Remove the Grout Haze: Once the grout is completely dry, buff the tiles with a dry, dust-free cloth (like microfiber) to remove any remaining grout haze.
High-Impact Interior Details
You can make a big difference in your home’s look with just a few key pieces. These are the kinds of high-impact interior updates that truly stand out.
Statement Mirrors for Style
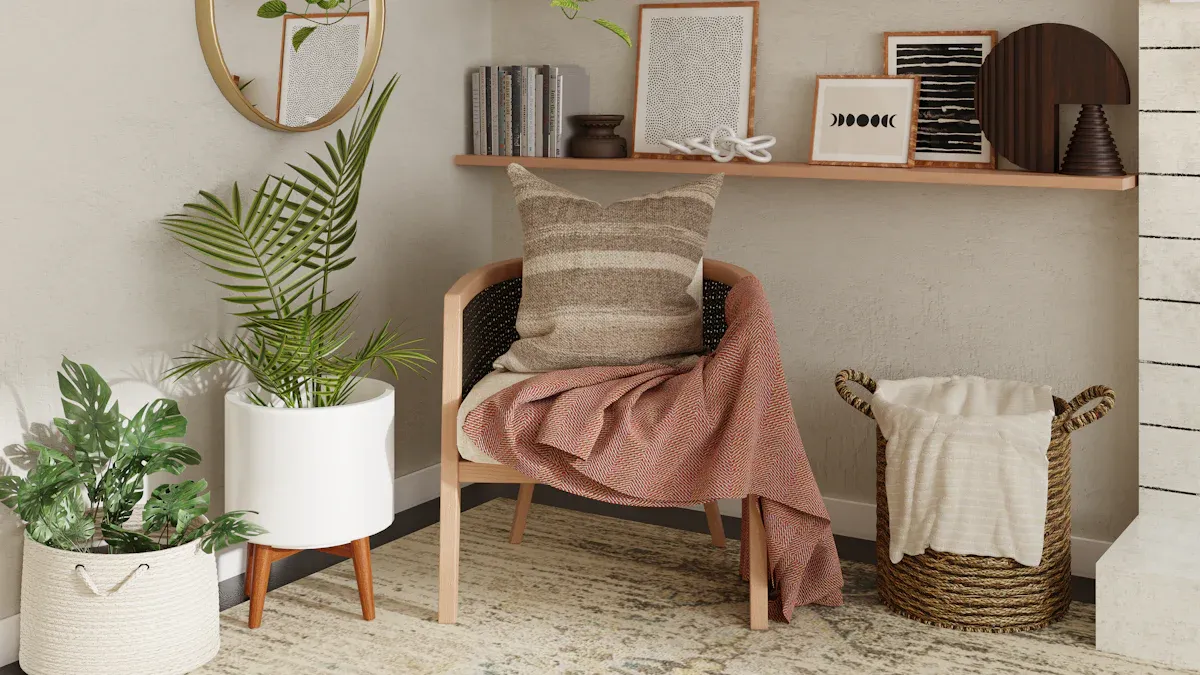
Statement mirrors are not just for checking your reflection. They are powerful design tools. They can completely change how a room feels. These mirrors go beyond simple reflection. They become bold design elements. They add personality, style, and a sense of space to your home. These versatile tools can open up small areas. They highlight architectural features. They also introduce an artistic touch. Their size, frame, shape, and finish all add to the room’s atmosphere. They are as much about beauty as they are about being useful.
Think about all the ways a statement mirror can help your space:
Illusion of Space: They make smaller rooms look bigger. They do this by reflecting light and making the area seem to stretch out.
Enhanced Lighting: Place them well, and they brighten dark spots. They bounce natural and artificial light around the room.
Aesthetic Appeal: Mirrors come in many different styles. They can match any interior theme you have.
Functional Art: They are decorative pieces. They are also practical items. They blend usefulness with beauty.
Expanding Small Spaces: A large wall mirror can make a small room feel much more open.
Brightening Dark Areas: Put mirrors across from windows or near lights. This helps spread light evenly.
Adding Depth to a Room: Layer mirrors behind furniture or other decorations. This creates a rich, deep look.
Creating a Dramatic Effect: An ornate or uniquely shaped mirror can be like a piece of art. It makes your room look more elegant.
You might think these mirrors are expensive. But you can find large, decorative mirrors without spending a lot. Places like Hobby Lobby and IKEA offer great choices. For example, Hobby Lobby has:
Baroque Arch Wood Wall Mirror: $42.49 (originally $84.99)
Wavy Wood Wall Mirror: $54.99 (originally $109.99)
Black Modern Metal Mantel Mirror: $69.99 (originally $139.99)
Gold Ornate Oval Metal Wall Mirror: $20.49 (originally $40.99)
IKEA also has many options. The HOVET Mirror (black, 30 3/4×77 1/8 “) is available for $169.99. These affordable upgrades can make a big difference.
When you hang a statement mirror, avoid some common mistakes. You want your mirror to look great and be safe.
Choose the right spot: Do not hang mirrors where direct sunlight causes glare.
Use the right hardware: Mirrors can be heavy. Do not guess the weight. Use proper anchors or brackets for the mirror’s weight.
Hang it at the right height: The center of the mirror should be at eye level. This is usually 57 to 65 inches from the floor.
Know your wall type: Different walls need different ways to hang things. Drywall, concrete, or studs all need specific tools and methods.
Think about safety: Always wear protective gear. Make sure the mirror is secure. You can even use safety film to prevent shattering.
If you hang a mirror over a fireplace, use strong hardware. Use drywall anchors for heavy mirrors on drywall without studs. Use 3-inch screws if you hit a stud. Use special wall anchors for brick. Mirrors on a mantel must also be secured at the top. Most decorative wall mirrors can handle fireplace heat. But be careful with modern fireplaces that do not have mantels. Hot air can rise straight up. This could damage your mirror or create a safety issue.
You don’t need a huge budget for amazing home transformations. These 10 best home updates prove that! They offer big returns for your home’s style and curb appeal. You can achieve a fresh look without draining your savings. These are some of the best home renovations you can do. Consider these 10 best home updates for instant impact. Start with just one or two projects. You’ll love the satisfaction of smart spending and DIY success. Ready to transform your home? Enjoy your refreshed space! ✨
FAQ
How much money do I need for these home updates?
You can start small! Many updates cost under $100. Power washing or painting your front door are great, affordable options. You control your budget with DIY projects.
Can I really improve curb appeal without spending a lot?
Absolutely! Painting your front door, power washing, or simple landscaping changes make a huge difference. Upgrading house numbers or outdoor lights also adds instant charm.
What’s the easiest interior update for a big change?
Fresh paint is your best friend! A new color instantly transforms a room. Updating cabinet hardware also gives your kitchen or bathroom a fresh, modern look without much effort.
Should I DIY these projects or hire a professional?
Many of these updates are perfect for DIY. You save money and gain satisfaction. For bigger tasks like regrouting or complex electrical, consider a pro. Always prioritize safety.


