
You want to create an amazing play space for your kids without spending a fortune. A magical playhouse transformation is absolutely within reach! You can achieve a fantastic DIY Playhouse Makeover using creativity, repurposing, and simple DIY techniques. We will show you how to leverage existing materials and community resources. This will help you achieve a vibrant, imaginative kids playhouse. You can bring these budget-friendly ideas to life for your playhouse.
Your DIY Playhouse Makeover: Assessment & Free Resources
Identify Improvement Areas
Start your playhouse makeover by thoroughly inspecting your existing diy outdoor playhouse. Look for structural, aesthetic, and safety improvements. Check for missing or broken parts. You should also look for sharp edges or protruding bolts. Rust, chipped paint, or peeling surfaces need attention. Visible cracks in the structure are important to note. Make sure the playhouse is stable and does not wobble. Inspect the roof for leaks. Check windows for cracks and floors for splinters or rot. Hard surfaces like concrete or grass under the playhouse do not absorb impact well. Ensure you have at least 6 feet of free space around the playhouse. This initial assessment is crucial for a successful makeover. Addressing these issues prevents accidents and ensures durability for your playhouse.
Scavenge for Materials at Home
Before you buy anything, look around your home and yard. You might find old paint cans with enough paint for a fresh coat. Fabric scraps from old clothes or sheets can become curtains. Fallen branches make great natural decor. Even discarded furniture, like an old wooden spool, can become a small table. Old coffee mugs can turn into cute planters. You might also have old window shutters you can repurpose for decorative elements. This diy approach saves money and gives new life to old items.
Utilize Community Freebies
Next, tap into your community for free resources. Freecycle groups and neighborhood giveaways are fantastic. Check online marketplaces for free items. The Buy Nothing Project is a great example. It connects neighbors who want to give away items they no longer need. This global network helps reduce waste and build community. You can find anything from leftover craft supplies to small furniture pieces for your playhouse makeover. This helps you achieve a budget-friendly diy playhouse makeover.
Exterior Playhouse Makeover: Zero Cost Ideas

You can give your playhouse a fresh new look without spending any money. You just need to use what you already have. This part of your playhouse makeover focuses on the outside. You will see how simple changes make a big difference.
Leftover Paint Power
Do you have old paint cans in your garage? You can use them! Leftover paint is perfect for a fresh coat on your playhouse. You can paint the whole structure one color. Or, you can add accent walls. You can even paint fun patterns. A budget-friendly playhouse makeover often starts with just paint and a little effort.
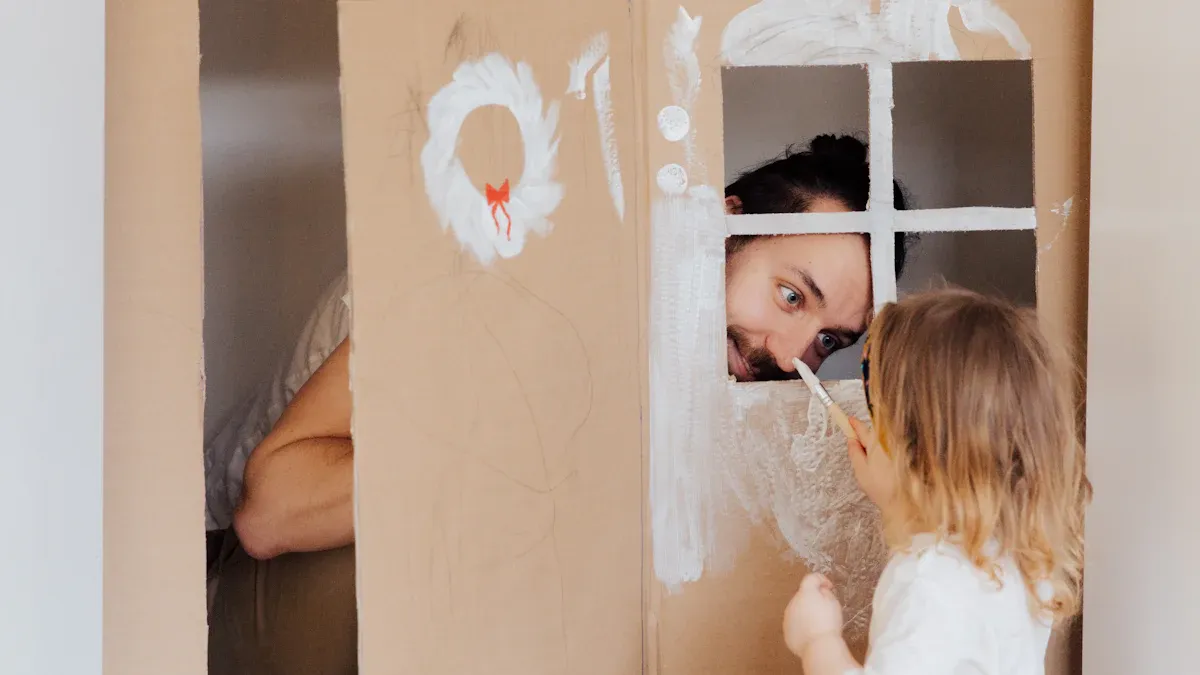
If you have a plastic playhouse, you can transform it into a stunning cottage. You will use spray paint. First, take the playhouse apart. This helps you paint each piece well. Next, clean the plastic thoroughly. This makes sure the paint sticks. Lay each dry piece on a canvas drop cloth. Do not use plastic tarps. Spray paint can peel off plastic tarps. Use spray paint made for plastic. Rustoleum’s 2X line works well. It says ‘PLASTIC’ on the can. If your door is very slick, prime it first. Let the primer dry. Then, spray your chosen colors. After 24 hours, apply two coats of spray sealant. This makes the paint last longer. Put four coats on high-traffic areas like doors. Be patient. A makeover is not a one-day project. Let the paint dry completely between coats. This makes it durable.
Natural Decor Elements
Look around your yard for free decorations. Branches, stones, and leaves can add rustic charm. You can use small branches to make a mini fence. You can arrange stones to create a path. Leaves can become part of a natural collage on the walls.
Consider using reclaimed wood for small accents. It looks natural and is sustainable. You might find small pieces of bamboo. Bamboo is strong and grows fast. You can use it for decorative elements. Think about a small bamboo wind chime or a decorative screen. These natural ideas make your outdoor playhouse feel special.
Repurposed Details
You can find many things around your home to repurpose. Old plastic containers can become window boxes. Plant some colorful flowers in them. You can use old sheets to make curtains for the windows. Just cut them to size and hang them. A scrap piece of fabric can become a welcome mat.
You can add more fun details. Hang a small wreath on the door. Use a zip tie and a Command hook. You can even add a decorative sconce. Just ignore the electrical parts if it’s only for show. You can put snap-together wood flooring underneath the playhouse. This creates a platform. It looks like hardwood floors.
Paint the playhouse and its hardware. Use outdoor spray paint. A contrasting color for the doorknob makes it stand out. Add a fun mailbox. You can find these at stores. Personalize it with your child’s name. Use stencils. Make a hanging sign. Roll chalkboard paint over a small piece of wood. Add ribbon. You can also buy a premade chalkboard. Use inexpensive pavers to create a walkway. You can even use leftover plank flooring to make a small patio. These diy ideas add so much character to your playhouse.
Interior Playhouse Transformation: Budget-Friendly Decor
You can make the inside of your playhouse just as magical as the outside. This part of your playhouse makeover focuses on creating a fun and organized space for your kids.
Declutter & Organize
First, you need to maximize space and create a clean canvas. This means decluttering. It is a great idea to talk with your kids about decluttering. You can teach them how to decide what to keep and what to let go of. Be an example for them. Show them how you organize your own things.
Remember, less is more. Kids often enjoy their playhouse more when there are fewer toys. This makes toys easier to find. The space also feels less cluttered. Try to declutter at least twice a year. This helps keep things tidy as your children’s interests change.
When you start decluttering, make the first pass alone. You can quickly remove broken, dirty, or unused items without your children’s input. This saves time and avoids long discussions. After that, create zones. Group similar items together. For example, put all arts and crafts supplies in one area. Keep games in another. This makes it easier for children to find what they need. It also helps them put things away.
You can purchase the right furniture and install it. Make sure it is useful and looks good. Think about unique storage challenges. Stuffed animals or train tracks need special spots. Put everything in its new home. Use clear bins to inspire creative play. Keep categories separate. Less is more in each bin. This helps promote independent play.
Consider the toys’ accessibility. Store toys at your children’s eye level. Put baby toys on bottom shelves. Place older children’s items higher up. Add labels to every bin and bag. Labels help you quickly identify contents. This makes cleanup and toy retrieval more efficient for everyone. You can also try a toy rotation system. Put some toys away and bring them out later. This keeps children stimulated. It makes old toys feel new and exciting.
Define Imaginative Play Zones
Now, let’s define play areas. You can use existing toys, blankets, and pillows to create different zones. These zones encourage imaginative play.
Consider a cozy reading nook. You can use a soft blanket and some pillows. A play tent is also a great idea. You can find simple ones or even make one from an old sheet. These are perfect for pretend play. You can set up a “Farmer’s Market” or a “Diner.”
You can also create a “Mailbox for the Classroom.” This encourages role-playing as a postman. An “Imagination Playstand” inspires dramatic play and puppet shows. Think about a small table and chairs. These can become a kitchen, a doctor’s office, or a school.
An art and collage area is wonderful. You can split this into smaller spaces. Have a box construction space with recycled materials. Set up a table for creations. Provide various art materials like glue, tape, scissors, crayons, and paper. You can even use a collage trolley for sensory play.
A tinkering area is another great option. Here, kids can develop fine motor skills. They can use real tools or dismantle old household items. They can work with nuts and bolts or construction toys. This involves imaginative problem-solving.
Craft Free DIY Decor
You can craft free diy decor using materials you already have. This adds personality to your playhouse.
Use leftover plywood or paneling from remodels. You can turn these into small shelves or decorative accents. If you have existing paint or craft supplies, use them! You can create a painted buffalo check floor with paint you already own.
Repurpose materials. Small kitchen cabinets or other salvaged bits can become unique playhouse decor. Visit local charity shops with your children. You can find unique furniture pieces there.
Encourage your children to create their own artwork. Display their drawings on the walls. You can even hang them on a washing line inside the playhouse. This makes the space truly personal.
Add comfort with soft furnishings. Use fluffy cushions, colorful blankets, and squishy bean bags. You can make these from old clothes or fabric scraps. Fairy lights add a soft glow and a whimsical atmosphere. You might have some from holidays.
Incorporate shelving units and treasure chests for organization. These also display special items. You can use different window decals for seasonal decorations.
Consider some fun DIY projects. You can make personalized bookmarks from magazines and photos. A crayon meltdown canvas uses old crayons and a hair dryer. Upcycle old buttons with a basic sewing kit. Create rose stamps with a plastic baggie of water and paint. Make T-shirt yarn bracelets by cutting old T-shirts into strips. You can also make magazine ‘ransom’ notes by cutting letters from magazines. Paper mache uses white glue and newspapers. You can even make plastic off-brand Shrinky Dinks from recycled plastic containers. A diy playhouse makeover can truly be a playhouse transformation with these creative touches.
Free Playful & Functional Playhouse Additions
You can make your playhouse even more exciting with free additions. These ideas add fun and function. They encourage more imaginative play for your kids.
Sensory Play Integration
Think about adding sensory elements to your playhouse. If your playhouse location allows, you can incorporate natural items like sand, water, or mud. These offer great tactile experiences. You can also create a sensory wall. Consider panels like a Rock-N-Ring Panel or a KaleidoSpin Panel. These engage different senses. Musical instruments, like Rhapsody Musical Instruments, can also be part of the fun. You can even add Talk Tubes for communication. These elements make your kids playhouse a rich sensory environment.
Role-Play Props from Discards
Give your kids tools for amazing role-play. You can find many items around your home to repurpose. Old clothes can become costumes. Kitchen utensils can be part of a pretend kitchen. Cardboard boxes are incredibly versatile. They can turn into anything from a car to a spaceship. Think about plastic bottles, lids, or cardboard tubes. These make great building blocks or craft supplies. An old sheet can become a fort. Aluminum foil can create sculptures. Even old kitchen equipment, like an old keyboard or phone, can become props. These discarded items fuel endless imagination in your diy playhouse.
Simple Outdoor Seating
Every playhouse needs a comfy spot to rest. You can create simple seating from tree stumps. Repurposed crates also make great benches. If you have space, consider a DIY sandbox kit. This can create a “beachy oasis” theme right next to your diy outdoor playhouse. You can also add shade with curtains or an awning. An awning can be very cheap to make. A collapsible table is another functional addition. Your kids can use it for coloring or pretend play. You can fold it away to save space. Upgrade the door with paint and a unique doorknob. Add plants, real or fake, to bring in greenery. Macrame plant hangers look great. You can also upgrade the windows with simple trims or curtains. These small additions make your playhouse more inviting.
Safety First: Your Playhouse Makeover
You want your children to play safely in their newly transformed space. Safety is always the top priority for any playhouse makeover. Before your kids start enjoying their new play area, you must perform some crucial safety checks.
Structural & Stability Checks
First, you need to ensure your playhouse is sturdy and secure. Check for any loose boards, screws, or unstable parts. All hardware, like bolts and screws, must be rust-resistant and securely fastened. Make sure no sharp or protruding edges exist. You should also sand all surfaces smooth and free of splinters. This protects little hands.
Your playhouse must be firmly anchored to the ground. This prevents tipping or shifting, especially in windy areas. Place it on level ground or a padded play area. Consider a concrete base or paving slabs for a stable foundation. After severe weather, always check for shifts in the foundation. Even a slight tilt can mean a weakened structure. Regularly inspect the playhouse for wear and tear. Look for rust, fading finishes, or any insect damage.
Non-Toxic Material Use
When you choose materials for your playhouse, always pick non-toxic options. Use non-toxic, durable materials like cedar. Cedar resists decay, insects, and splintering. Avoid harmful chemicals. Opt for environmentally friendly stains. For paints, look for labels like “low-VOC,” “zero-VOC,” or “non-toxic.” Certifications like GreenGuard Gold mean high safety standards. Non-toxic water-based paints are a safe choice. You can also use all-natural milk paint or non-toxic acrylic paints. These options protect your children’s developing lungs.
Clear Pathways & Access
You must maintain a safe, spacious area around your playhouse. Keep this zone free of hazards. Consider rubber mulch or playground-safe wood mulch for added protection. Ensure a minimum clear floor space of 30 inches by 48 inches around the playhouse. This allows easy movement. If your playhouse has elevated components, you need a maneuvering space for wheelchairs. This space should be at least a 60-inch turning circle. Make sure no objects protrude into these spaces below 80 inches from the ground. All ground surfaces along accessible routes must meet safety standards for accessibility and impact absorption.
You just proved a stunning diy playhouse makeover doesn’t need a big budget. Remember these key takeaways for your playhouse makeover:
Creativity
Repurposing
Simple DIY These are your most powerful tools! Embrace this fun challenge. You will enjoy creating a unique and engaging space for your kids. A personalized playhouse brings so much joy and sparks endless imaginative play for your kids playhouse.
FAQ
What kind of paint should you use for a playhouse?
You should use non-toxic, outdoor-grade paint. Look for “low-VOC” or “zero-VOC” labels. Water-based acrylics or milk paint are safe choices. For plastic playhouses, use spray paint specifically for plastic. Always choose durable options that can handle weather.
What free items can you use for playhouse decorations?
You can use many free items! Look for fallen branches, smooth stones, and leaves from your yard. Old fabric scraps become curtains. Repurpose plastic containers as window boxes. Cardboard boxes turn into amazing props. Even old clothes make fun costumes. 🎨
What is the best way to organize toys inside the playhouse?
First, declutter with your kids. Group similar toys together in clear bins. Label everything clearly. Store toys at your children’s eye level for easy access. Consider a toy rotation system to keep things fresh and exciting. Less clutter means more fun!
What are the most important safety checks for a playhouse makeover?
You must check for structural stability first. Make sure all parts are secure and anchored. Use only non-toxic materials, especially paints and stains. Keep pathways clear around and inside the playhouse. Regularly inspect for wear, tear, or sharp edges.
