
Imagine the satisfaction of building your own dresser. You save money, create a piece that perfectly fits your style, and feel proud of your handmade work. DIY furniture projects often save you a lot of money. Many people save 70% to 90% compared to store prices. This guide offers free plans and creative ideas to help you build a dresser. You will find projects for all skill levels. This guide provides the inspiration and resources you need to start your DIY dresser plans today. You can easily build a beautiful dresser.
Key Takeaways
Building your own dresser saves money and lets you create a custom piece. You can design it to fit your style and space perfectly.
Gather essential tools like saws, drills, and safety gear before you start. Choose materials like plywood or solid wood for your dresser.
Many free dresser plans are available online for all skill levels. Beginner plans use simple methods like pocket hole joinery.
Plan carefully and measure everything twice for accuracy. Take your time with finishing steps to ensure a durable dresser.
Online communities offer support and advice for your DIY projects. You do not have to build your dresser alone.
Why DIY Your Dresser

Cost Savings
You save a lot of money when you build your own furniture. Store-bought dressers can be expensive. When you choose to build, you buy only the materials you need. This often costs much less than buying a finished piece. You get a high-quality dresser without the high price tag.
Customization Options
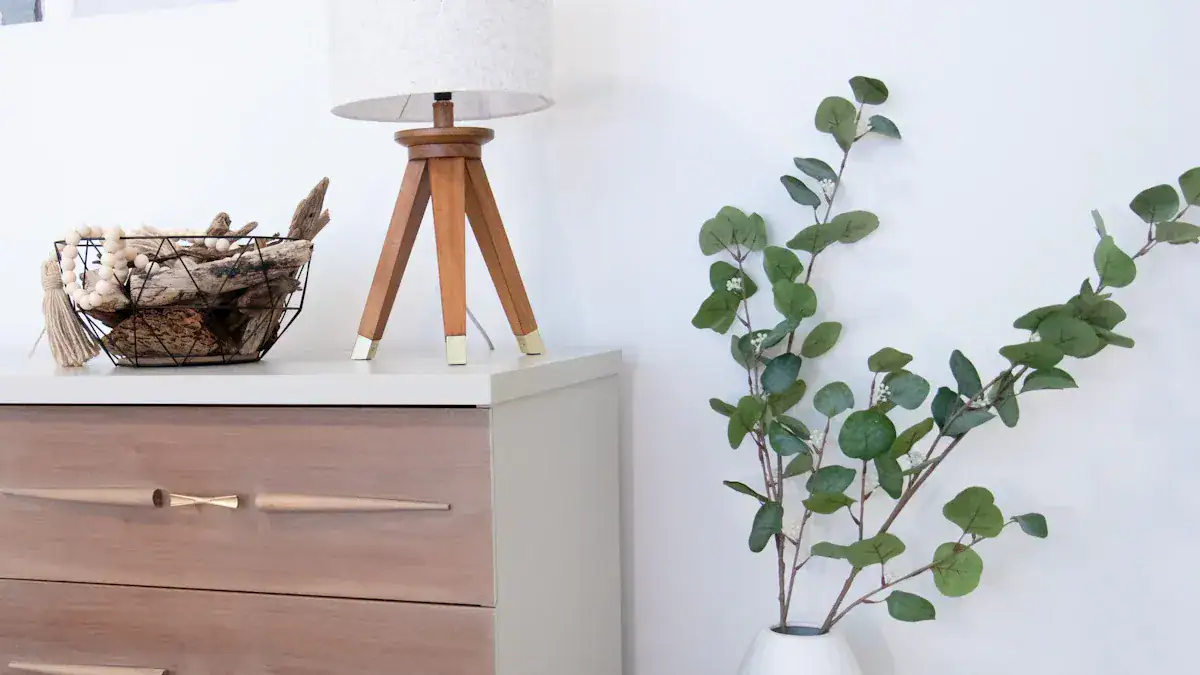
Building your own dresser means you get exactly what you want. You are not limited by what stores sell. You can design a dresser that fits your space perfectly. You can add multi-functional storage with shelves and hidden spots. You can use reclaimed wood for a rustic look. You can put chevron patterns on drawer fronts. You can make unique drawer fronts. You can add wheels for easy movement. You can paint each drawer a different color. You can even combine a dresser with a changing table for a nursery. Your imagination sets the limits for your custom dresser.
The Reward of Creation
Finishing a handmade project gives you a great feeling. Building helps you focus and stay present. This reduces stress and worry. You feel a strong sense of accomplishment when you see your finished work. This boosts your self-esteem. You can express your feelings through your work. Creating something with your own hands brings a unique joy.
Sustainable Choices
Choosing to build your own furniture helps the planet. You reduce waste. You can reuse materials from local places or old furniture. This keeps items out of landfills. The Environmental Protection Agency (EPA) reports that Americans create a lot of construction waste each year. By reusing materials, you help reduce this waste. You also help the circular economy by giving old things new life. This saves resources and reduces the demand for new products.
Essential Tools and Materials
Building your own furniture requires the right tools and materials. You need to gather these items before you start. Having them ready makes your project smoother and more enjoyable.
Basic Hand Tools
You will use many hand tools for your project. You need screwdrivers, a claw hammer, and pliers. A tape measure is essential for accurate cuts. Hand saws are crucial; different blades cut with or across the wood grain. A hand plane helps you smooth surfaces. You use a chisel and mallet for shaping wood. A nail set drives nail heads flush. A sliding bevel helps you mark angles. A layout square ensures square cuts. A utility knife is useful for various tasks. You also need clamps to hold pieces together.
Power Tool Essentials
Power tools make your work faster and more precise. A table saw is a workhorse for long, straight cuts. A miter saw helps you make accurate angled cuts. A router shapes edges and cuts grooves. You need a cordless drill/driver for drilling holes and driving screws. A circular saw cuts wood quickly. A random orbital sander smooths surfaces efficiently. A jigsaw cuts curves and intricate shapes. A compound miter saw makes precise angled cuts. A power drill press ensures accurate drilling.
Common Materials
Choosing the right materials is important for your new dresser. For the exterior, you can use 3/4-inch plywood or solid wood. For drawer boxes, 1/2-inch and 1/4-inch apple ply or Baltic birch plywood are strong choices. You can also use cabinet grade plywood, which has hardwood veneers. Sanded plywood is a good option for painted projects. MDF (Medium-Density Fiberboard) is smooth for painting but heavy. Hardboard is strong and stable. Particle board is cheaper but less durable.
Safety Gear
Safety is always first when you work with tools. You must protect yourself from harm. Wear safety glasses to shield your eyes. Gloves protect your hands from cuts and splinters. Masks or respirators keep sawdust out of your lungs. Earplugs or earmuffs protect your hearing from loud tools. For bigger projects, you might also need hard hats and safety boots.
Free DIY Dresser Plans
You can find many free DIY dresser plans online. These plans help you build a beautiful dresser for your home. They come with detailed instructions and often include build videos. You can choose plans based on your skill level. Websites like Kreg Tool and Ana White offer many free plans. Kreg Tool provides 19 free DIY dresser plans. Ana White offers dozens of free dresser plans. These resources give you everything you need to start your next DIY project.
Beginner Dresser Builds
If you are new to woodworking, beginner dresser builds are perfect for you. These plans focus on simple construction methods. They use fewer parts and require less complex measuring. This makes them ideal for your very first project.
You will often use pocket hole joinery for these projects. A Kreg Jig makes this process easy. You drill angled holes and join pieces with screws. This method is simple and strong. For example, you can attach sides to the top piece using pocket hole screws. You can build the frame with 2″ x 2″ pieces. You can also assemble the drawers this way. Many novice builders find the Kreg Jig easy to use. You set it at 3/4″ for 1 1/4″ screws. You set it at 1 1/2″ for 2 1/2″ screws. This tool helps you build a sturdy dresser without advanced skills.
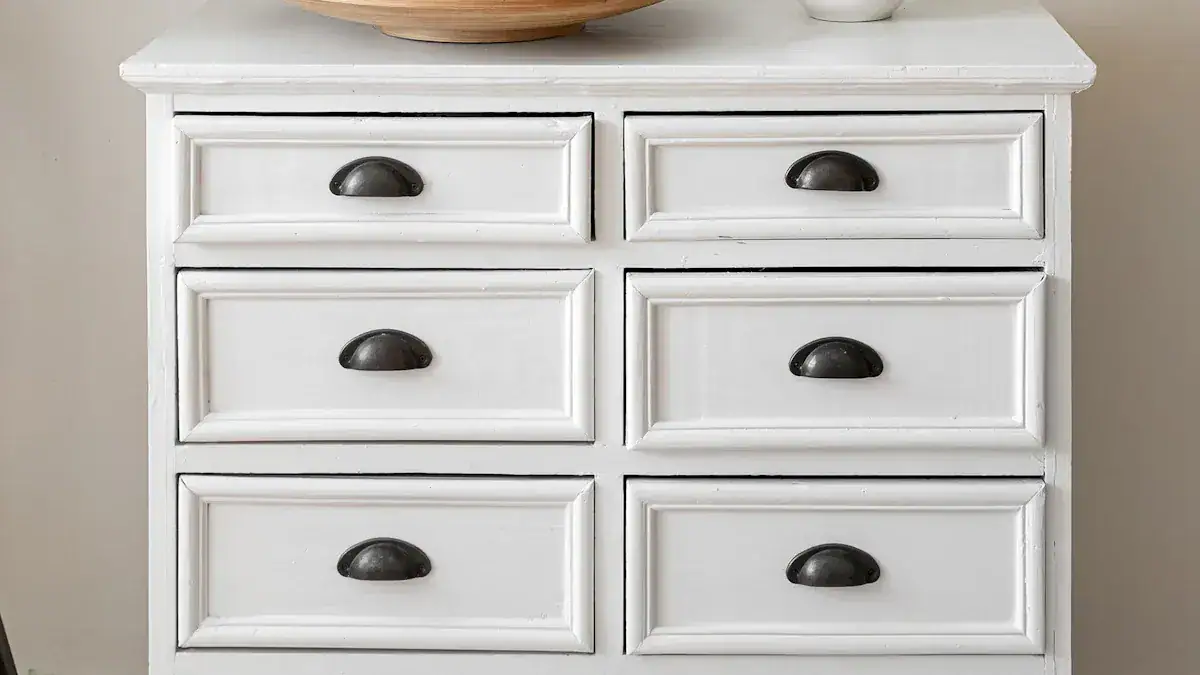
Some beginner plans you might find include simple 6 drawer dresser designs. These plans teach you basic cutting and assembly. You learn how to make a functional dresser.
Intermediate Dresser Projects
Intermediate dresser projects require a bit more skill. These plans involve more parts and pieces. They demand careful measuring. You will learn new techniques and refine your existing ones.
You will need to cut plywood sheets accurately. You will continue to use a pocket hole jig for strong joints. Building and installing drawers becomes more involved. You might learn to apply iron-on edge banding for a clean finish. You also practice finishing raw wood furniture. These skills help you create a more polished dresser.
Intermediate plans often include designs for a 6 drawer dresser or an 8-drawer dresser. For example, Kreg Tool offers a Vintage Inspired Pine Dresser and a Modern Farmhouse Style Dresser. Ana White has plans like the Mid Height Dresser with 5 Drawers and the Charlie Dresser Plans. These projects challenge you to expand your woodworking abilities.
Advanced Chest of Drawers
Advanced chest of drawers plans are for experienced woodworkers. These projects involve complex designs and advanced techniques. You will create furniture with high-end finishes and intricate details.
You will learn techniques like frame & panel construction. You might build a web frame, also known as a dust frame. You will learn how to make and use story sticks for precise measurements. Creating curved templates and cutting curves are also common. You might use a flush trim router jig. Sliding dovetails and reinforced dovetail drawers add strength and beauty. You can explore alternative leg designs.
Advanced plans often involve specific drawer construction and fitting. You might use custom dowels. You can build drawer boxes with plywood bottoms secured without glue. This allows for future replacement. You can address “drawer rattle” with hot glue. You will work with specialized hardware like Blum for drawer rails. This ensures precise fitting and accommodates wood movement. Fitting drawer fronts involves custom ordering wider material. You will match grain and fit each front individually. Shaping drawer fronts includes cutting bevels with a table saw. You use rasps and sanding. For curved fronts, you use a band saw and power carving. You then clean up the shape. Installing drawer fronts uses shims for centering. You secure the front through drawer pull mounting holes.
For advanced projects, you consider high-quality materials. Solid wood and steel offer superior longevity. Durable construction features like dovetail drawer construction and Kenlin metal drawer glides contribute to durability. Premium materials resist damage like peeling or denting. They maintain their appearance and function. Solid wood bedroom furniture is known for its durability and beauty. Its natural grain adds warmth.
You can find plans for an 8-drawer dresser, a 9-drawer dresser, or even an 11-drawer dresser. Kreg Tool offers advanced plans like a 10-Drawer Red Oak Dresser, a Modern Dresser with Cane Drawers, and a Built-In Dresser with Cubbies. These diy dresser plans push your skills to the next level. You build a truly exceptional piece of furniture.
Dresser Construction Principles
Planning and Measuring
You begin your dresser project with careful planning. Accurate measurements are crucial. Use a marking knife for precise lines. Its sharp edge cuts wood fibers. This creates a clear guide. Establish a primary 12-inch steel rule. Calibrate all other measuring devices against it. This includes tape measures and saw fences. Verify your squares. Draw two lines from opposite sides of a straight edge. Parallel lines mean a true square. Use a 5H lead pencil for fine, accurate lines. Reserve carpenter’s pencils for rougher marks. Always measure from consistent reference edges. Double-check measurements. Sight directly down on the ruler when marking. This avoids parallax errors. Draw a ‘V’ shape from the ruler to mark a dimension. This ensures clarity. Make only one pass with a pencil or knife. This prevents widening the line.
Cutting and Assembly
Next, you move to cutting and assembly. Ensure your lumber is straight, flat, and square. Do this before any layout or cutting. Regularly tune and sharpen all your tools. This includes table saws, chisels, and hand planes. Sharp tools ensure optimal performance. Batch similar pieces together for cutting. This ensures identical lengths. You avoid repeatedly adjusting tools. Employ jigs and stop blocks. They achieve repeatable cuts. This reduces reliance on constant measuring. Use actual workpieces for layout. Do not always measure. This is especially true for fitting components. Leave a small amount of extra material on initial cuts. Then, fine-tune to final dimensions. Use micro-adjustments or hand tools. Create test pieces or prototypes. Use inexpensive material. This refines cuts and identifies issues. Do this before working with expensive wood. This step-by-step building approach saves time and materials.
Drawer Building
Building drawers requires strong joints. Dovetail joinery offers exceptional strength. It uses interlocking wedge-shaped pins and tails. These are on the front and back corners. This method often does not need fasteners. Adhesives add protection. Mortise and tenon joints are also very strong. They have a simple design. A protruding tenon fits into a mortise. Adhesives secure it. Butt joints are the most basic. Two pieces of wood connect flush. They rely on adhesives or fasteners. They are less durable. Corner blocks provide crucial support. These triangular blocks are often plywood. You glue or screw them into the four corners. They prevent sagging.
Finishing Touches
The final step is applying finishing touches to your dresser. Many options exist. Oil-based finishes enhance natural wood grain. They are easy to apply. Varnish finishes offer durability. They protect against moisture and abrasion. Shellac dries fast. It works as a good sealer. Lacquer provides a high build and is durable. Water-based finishes have low VOCs. They dry quickly. Wax finishes are easy to apply and repair. Stains enhance wood color. Dyes penetrate deeply. Paint offers opaque coverage. Epoxy resin is extremely durable. It is waterproof. Choose a finish that matches your desired look and protection needs for your dresser.
Tips for Dresser Building Success
Building a dresser requires attention to detail. These tips help you achieve great results. You will create a piece you love.
Accuracy is Key
Precision makes a difference in woodworking. You must measure and cut carefully. Even small errors can cause problems.
His ability to measure error seems to have exceeded his ability to adjust for it. A problem I have had myself recently. Frankly, this is probably more common than any of us are willing to admit.
Sometimes, people try for too much accuracy. This can be a mistake.
You might strive for impractical accuracy. You cannot adjust for it later.
You might keep adjusting. This only makes the error worse. Or it gives very little improvement.
You might not understand precision limits. This is true for magnified errors. For example, the 5-cut method can magnify errors.
Always double-check your measurements. Cut slowly and carefully. This helps you avoid mistakes.
Pre-Assembly Checks
Before you glue or screw parts together, check everything. This saves you time and frustration.
Perform a full parts inventory. Lay out all pieces. Compare them to your manual’s list. Verify nothing is missing or damaged.
Ensure the main frame is square. Before attaching the back panel, measure diagonally. Measure from top-left to bottom-right. Then measure top-right to bottom-left. The measurements must be identical.
Verify drawer slide components. Check for markings like L, R, DF, CF. Confirm the correct orientation. The wheel goes at the back of the frame piece. It goes at the front of the drawer piece. Use the specified pre-drilled holes.
Properly seat drawer bottom panels. Ensure the bottom panel slides completely into its groove. Do this before securing the final side of the drawer box.
These checks prevent issues later in your dresser build.
Patience with Finishing
Finishing your dresser takes time. Do not rush this step. Proper drying ensures a durable finish.
Cure Times (Ideal Conditions: 70°F, 70% humidity):
Water-based finishes: Approximately 21 days.
Oil-based finishes: Approximately 30 days.
Light use is possible after about 7 days. But be careful. Curing continues for 2-3 more weeks.
Factors Influencing Dry Time:
Temperature and Humidity: Cooler temperatures and high humidity extend dry times by 8-10 hours.
Product Type: Water-based products cure faster than oil-based products.
Layering Different Bases: Wait 72 hours when applying oil-based over water-based. Wait 24 hours when applying water-based over oil-based.
Starting Surface: Raw wood surfaces dry faster than existing finishes.
Application Method: Painting needs longer dry times. Wiping or spraying is faster.
Testing Dryness:
Oil-based: It is dry when no longer tacky and odorless.
Water-based: It is dry when not cool to the touch. You can sand it to a powder.
Recoat Time for Waterborne Stains: General Finishes recommends a minimum of 2 hours between coats.
General Guideline: Waiting a few hours is usually enough. Waiting a full day is always safer.
Community Support
You do not have to build alone. Many online communities offer help.
Furniture Talk Forum – DIY Furniture Repair, Woodworking & Upholstery Tips: This forum focuses on DIY furniture repair. It covers woodworking and upholstery tips. You can find general discussion, introductions, and a registry to show your builds. They also have a Furniture Facebook Group.
WOODWEB’s Furniture Making Forum: This forum is specifically for furniture making. It offers a project gallery and a knowledge base. You can find forums on adhesives, cabinetmaking, and finishing.
DIY Home Improvement Forum: This community is for DIY enthusiasts. It has discussions on tools, projects, and builds. It has over 3.4 million messages and 353,000 members. This shows an active and supportive environment.
These groups provide valuable advice and encouragement for your DIY projects.
You now see the benefits of building your own dresser. You get personalization, save money, and feel the joy of creation.
Do not hesitate to start your own diy dresser plans. Many free designs and ideas are available for all skill levels.
Begin your diy project today. Transform your living space with a handmade dresser. These building endeavors are rewarding.
FAQ
What wood should you use for a DIY dresser?
You can use various woods. Plywood, like Baltic birch or cabinet grade, offers stability. Solid wood, such as pine or oak, provides durability and beauty. MDF is smooth for painting. Choose wood based on your budget and desired finish.
What basic tools do you need for a beginner dresser?
You need a tape measure, hand saw, and a drill. A Kreg Jig helps create strong pocket holes. A sander prepares surfaces for finishing. Clamps hold pieces together during assembly.
What is pocket hole joinery?
Pocket hole joinery creates strong, hidden joints. You drill an angled hole into one wood piece. Then, you join it to another piece with a screw. A Kreg Jig makes this process simple and accurate for you.
What are the main benefits of building your own dresser?
You save money compared to buying a new dresser. You can customize the design to fit your exact needs and style. You also gain satisfaction from creating something with your own hands. It is a sustainable choice.
