

Limited workshop space creates challenges. You need versatile work surfaces. A DIY folding sawhorse offers great solutions. This design is space-saving and portable. It is also sturdy and cost-effective. You get a multi-functional and compact tool. These diy folding sawhorse plans will guide you. You will build practical, collapsible saw horses. This foldable design is perfect for many projects. Even beginners can build this useful sawhorse. Embark on this rewarding diy project. Enhance your workspace today.
Key Takeaways
Build a DIY folding sawhorse to save space and have a portable work stand.
Gather 2×4 lumber, plywood, hinges, and screws. Use basic tools like a saw and drill.
Always wear safety glasses and ear protection when working with tools.
Assemble the frame with screws and wood glue for a strong sawhorse.
Customize your sawhorse with paint, extra features, or stronger materials like metal.
Your DIY Project: Materials and Tools
Building your own collapsible work stand starts with gathering the right items. You need to know what materials to buy and what tools you will use. Safety is also very important. These diy folding sawhorse plans guide you through each step.
Essential Supplies
You need some basic materials for your diy project. These items are easy to find at any hardware store.
Lumber: Get 2x4s. These are strong and common.
Plywood: You will use plywood for the top surface. A piece around 24×31 inches or 30×48 inches works well. This gives you a good work area.
Hinges: Inexpensive hinges are perfect for the folding parts. You need several of them.
Fasteners: Screws and wood glue will hold everything together.
Optional Materials: You can also use leftover materials. For example, you might have some extra steel and wood. This helps you create a sturdy steel and wood sawhorse without spending much money.
Required Tools
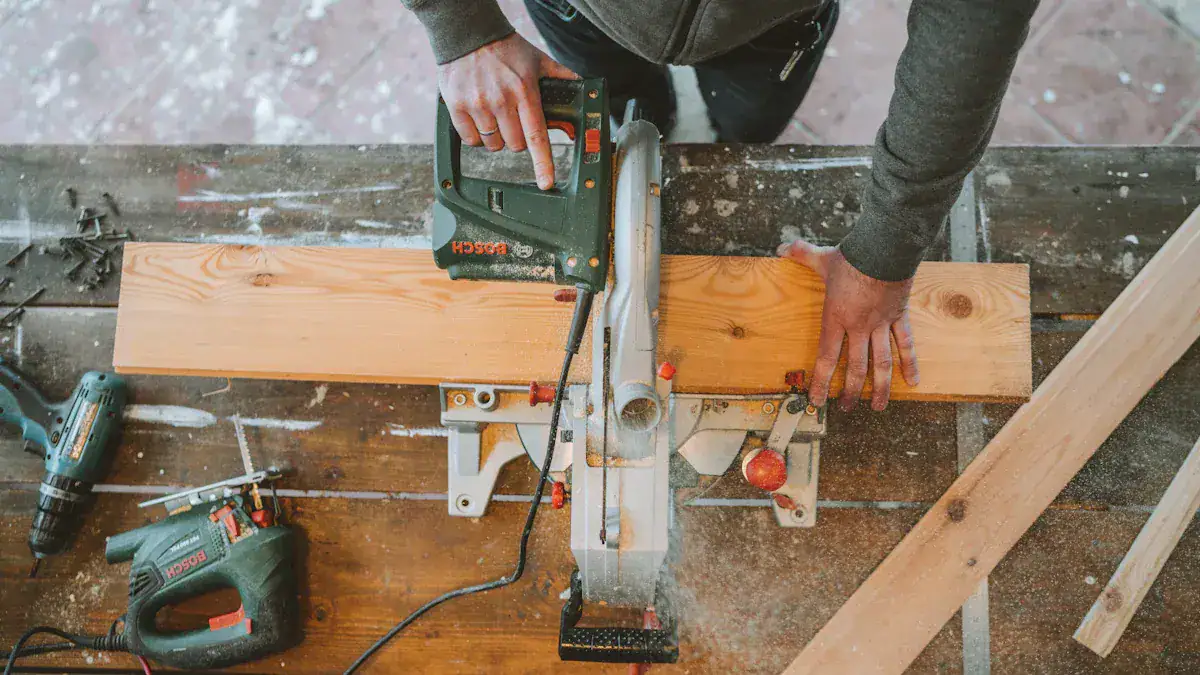
You do not need many fancy items for this project. Basic woodworking required tools are enough. These tools help you cut, measure, and assemble your sawhorse.
Hand Saw, Circular Saw, or Power Miter-Saw
Framing square or Speed-Square
Tape measure, yardstick, or ruler
Screwdriver or power Drill/Driver (with a #2-Phillips tip)
About 18 inches of cord or light chain
A sharp Pencil with an eraser
Basic protective gear (Glasses, gloves, ear-plugs, Band-Aids)
Safety First
Working with tools always requires caution. You must protect yourself from harm. When you build your foldable work stand, keep safety in mind.
Always wear safety glasses with side protection. Flying debris can cause serious eye injuries. These glasses can prevent up to 90% of severe eye injuries.
Power tools can create loud noises. This noise can damage your hearing over time. Wear appropriate ear protection like earplugs or earmuffs. This protects your ears from noise-induced hearing loss.
Be aware of common hazards when you use power tools.
Kickback: Your tool can snag or bind. It might forcefully twist back towards you. This often happens with saws.
Loss of Control: You might lose control of a powerful tool. This can happen if the blade is dull or you are tired.
Electrical Hazards: Check your cords and plugs. Do not use tools in wet conditions.
Dust and Fumes: Power tools can create dust. Ensure good ventilation. Wear a mask if needed.
Always use the right tool for the job. Keep your workspace clean and organized. This helps prevent accidents. Regular maintenance on your tools also keeps them safe to use. You build strong sawhorses when you work safely.
The Complete Build: Step-by-Step
Now, you will begin the complete build of your folding sawhorse. Follow these steps carefully. You will create a strong and useful work stand.
Wood Preparation
First, you need to prepare your wood. Measure each piece accurately. Use a tape measure and a pencil. Mark your cutting lines clearly. Cut your 2x4s to the correct lengths. If your plans include full-size diagrams, use them. They help you ensure precise cuts. Accurate cuts make assembly much easier. You want all pieces to fit together well.
Frame Assembly
Next, you will assemble the frame. This is the main structure of your sawhorse. You will join the wood pieces together. For strong joints, use screws and wood glue. Wood glue provides real strength. It makes your joints very durable. Polyurethane glue or construction adhesive works best. It creates a very strong bond. Even if your cuts are not perfect, this glue helps.
You can use different fasteners.
Wood Screws: Use 1 1/4, 2, or 2 1/2-inch screws. They hold pieces together firmly.
Bolts, Nuts, and Washers: For an adjustable design, use carriage bolts. You might use 4 1/2 x 1/4-inch or 3 1/2 x 1/4-inch bolts. Fender washers (1/4 x 1 1/4-inch) and 1/4-inch nuts secure them. These are good for structural connections.
Attach the top rail to the braces. Use three screws per brace. Then, attach the legs to the top rail. Use three screws for each leg. Also, attach the legs to the braces. Use two screws per leg. Remember, glue adds significant strength to your sawhorse build.
Folding Mechanism
Now, you will add the folding mechanism. This makes your sawhorse collapsible. You will attach hinges to the legs. Place the hinges carefully. They allow the legs to swing inward. This makes the sawhorse flat for storage. Ensure the hinges operate smoothly. Test the movement of the legs. You are making foldable legs for easy transport. This is a key part of your foldable design.
Work Surface Attachment
Finally, attach the work surface. This is the plywood top. You can secure it permanently. Use screws to attach it to the top rails. Or, you can make it removable. This gives you more flexibility. A removable top allows you to use the frame for other purposes. You can even place a larger sheet of plywood on top. This creates a bigger work table. Your diy folding sawhorse plans are almost complete. You now have versatile collapsible saw horses.
Customizing Your DIY Folding Sawhorse
You can make your new work stand even better. Think about how you use it. You can change its strength and look. You can also add new features.
Enhancing Durability
You want your sawhorse to last a long time. You can make it stronger. Use thicker lumber for the legs and frame. Add metal corner brackets to the joints. These brackets give extra support. You can also use larger bolts instead of screws for key connections. Consider a design that incorporates metal. A steel and wood sawhorse combines the best of both materials. This makes it very sturdy for heavy projects.
Personalizing Finish
Give your sawhorse a unique look. You can paint it any color. Choose a color that matches your workshop. You can also stain the wood. This brings out the natural wood grain. Apply a clear sealant or varnish. This protects the wood from moisture and wear. A good finish makes your sawhorse last longer. It also looks great.
Adding Features
Your diy folding sawhorse plans offer a great starting point. You can add many useful features. Make it more compact. You can design it to fold down to just 23 inches tall. This saves even more space. Add hooks or small shelves for tools. You can attach a power strip to the side. This gives you easy access to electricity. Consider making the top modular. You can swap out different tops for different tasks. This makes your diy project truly versatile. Your foldable sawhorse becomes a custom workstation.
Use and Care
Setup and Stability
You must set up your sawhorse correctly. This ensures both stability and safety. Always place your sawhorses parallel to each other. Maintain an appropriate distance between them. Do not place them too far apart. Also, do not place them too close together. Verify your sawhorses rest on steady ground. Confirm your sawhorses are not wobbly before you start work. Position your sawhorses to support the ends of your material. Do not place them so close that the material could topple off. Proper setup prevents accidents. It also makes your work much easier and safer.
Versatile Applications
Your new work stand offers many uses. You can use it for cutting wood. It supports long boards easily. You can also use it as a temporary workbench. Simply place a sheet of plywood on top. This creates a large surface for assembly tasks. These collapsible saw horses are perfect for painting projects. They hold items off the ground. This allows for easy access to all sides. You can also use them for sanding. They provide a stable base for your projects. This versatility makes your sawhorse a valuable tool.
Storage and Maintenance
Proper storage extends the life of your sawhorse. It also keeps your workspace tidy. Folding sawhorses are designed to fold flat. This allows for quick storage and easy transport. This compact design lets you store them against a wall. You can also store them under a bench. They fit in narrow gaps between shelving units and tool cabinets. This maximizes space efficiency in your workshop or garage. Their thin profile makes them easy to transport. You can store them in tight vehicle compartments or overhead racks. Keep your sawhorse clean. Wipe off dust and debris after each use. Check screws and hinges regularly. Tighten them if they become loose. This simple care keeps your foldable sawhorse ready for your next project.
You completed your own diy folding sawhorse plans! Feel the satisfaction of building a useful tool. This diy project gives you an enhanced workspace. It offers great portability, durability, and multi-functionality. Your new sawhorse is a valuable addition to your workshop. Share your completed projects with us. Show off any modifications you made. Join our community for more exciting DIY adventures!
FAQ
What type of wood works best for this project?
You should use 2×4 lumber. It is strong and readily available. Plywood works well for the top surface. These materials provide good stability for your projects.
How much weight can my DIY sawhorse support?
Your sawhorse can support a lot of weight. The strength depends on your construction. Using wood glue with screws makes joints very strong. Heavy-duty construction with thicker wood increases capacity.
Can I adjust the height of the sawhorse?
Yes, you can adjust the height. Cut the legs to your desired length. You can also add adjustable feet. This allows you to customize the sawhorse for your comfort.
How long will it take to build this folding sawhorse?
Building time varies. Most beginners can finish it in a few hours. Experienced builders might complete it faster. Accurate cuts and careful assembly save time. ⏱️
