
A custom mantel shelf can truly transform your living space. A DIY project offers significant cost savings and immense personal satisfaction. This guide provides free, actionable DIY fireplace mantel plans. You will find ideas for your next fireplace mantel project. Consider this your complete guide to building a fireplace mantel. A DIY fireplace project allows you to customize your space. Start your DIY project today and build a stunning mantel.
Key Takeaways
Building your own fireplace mantel saves money and lets you customize the design. You can choose materials and styles that fit your home.
Floating mantels offer a modern look. They need hidden supports attached to wall studs for safety and strength.
Reclaimed wood mantels add history and character. You must clean and properly mount them, especially if they are heavy.
Always measure carefully and use safety gear when building. Securely attach your mantel to wall studs for stability and follow fire safety rules.
Finishing your mantel with sanding, staining, or painting makes it look professional. This protects the wood and enhances its beauty.
Why DIY Fireplace Mantel Plans?
Building your own mantel offers many advantages. You gain control over the design. You also save money. A DIY project brings great personal reward.
Cost Savings
Choosing DIY fireplace mantel plans saves you money. Store-bought mantels can be expensive. Custom-built options from professionals cost even more. When you build it yourself, you pay only for materials. You can often find materials at lower prices. This makes your fireplace mantel project much more affordable. You keep more money in your pocket.
Customization Options
DIY gives you endless design choices. You can match your home’s style perfectly. Consider adding storage slots for remotes or magazines. You can use corbels for a unique shelf look. Or, you can omit them for a sleek design. Apply crackle paint for a distressed finish. Add trim pieces and shiplap for a farmhouse style. You can even use brick or rock instead of shiplap. Repurpose old barn beams for a rustic mantel. Use rich wood that contrasts with your existing tile. You can even create a diy faux fireplace and mantel. This allows you to build a mantel where no fireplace exists.
DIY Project Satisfaction
Completing a DIY project brings great pride. You built something beautiful with your own hands. Every time you look at your new mantel, you will feel accomplished. This personal touch makes your home unique. You create a focal point that reflects your style. This project enhances your living space.
Tools and Materials for Mantel Shelves
You need the right tools and materials for your mantel project. This ensures a smooth building process. It also helps you create a durable and beautiful mantel.
Required Tools
You will use several tools to build your mantel. A miter saw or circular saw helps you make precise cuts. A brad nailer secures pieces together quickly. A Kreg Jig creates strong pocket-hole joints. A palm sander smooths your wood surfaces. You also need a drill for pilot holes and screws. For more advanced work, consider an 18-gauge pneumatic nailer. A table saw or a router table with tongue and groove bits can also be useful.
Common Materials
Choosing the right wood is important for your mantel. Walnut offers a rich, deep brown color. It is easy to work with. Oak, either red or white, is durable and resists warping. It has an attractive grain. Hickory is strong with warm tones. It suits rustic styles. Cherry wood has a beautiful red tone. It darkens over time. Poplar is versatile and good for painted mantels. You can also use reclaimed wood like barn wood. It gives a distinct, aged look. Hand-hewn wood shows excellent craftsmanship. Cedar is adaptable with a unique grain and pleasant smell. Oak is a long-lasting and strong option. Besides wood, you will need wood glue, screws, and sandpaper.
Safety Gear
Safety is very important when you work on any diy project. Always wear safety glasses. They protect your eyes from flying debris and dust. Use a dust mask or respirator. This keeps harmful dust out of your lungs. Hearing protection, like earplugs or earmuffs, prevents damage from loud tools. Wear gloves to protect your hands from splinters. However, do not wear gloves when using certain power tools like table saws. They could get caught. Always wear sturdy footwear. Closed-toe shoes protect your feet from falling objects.
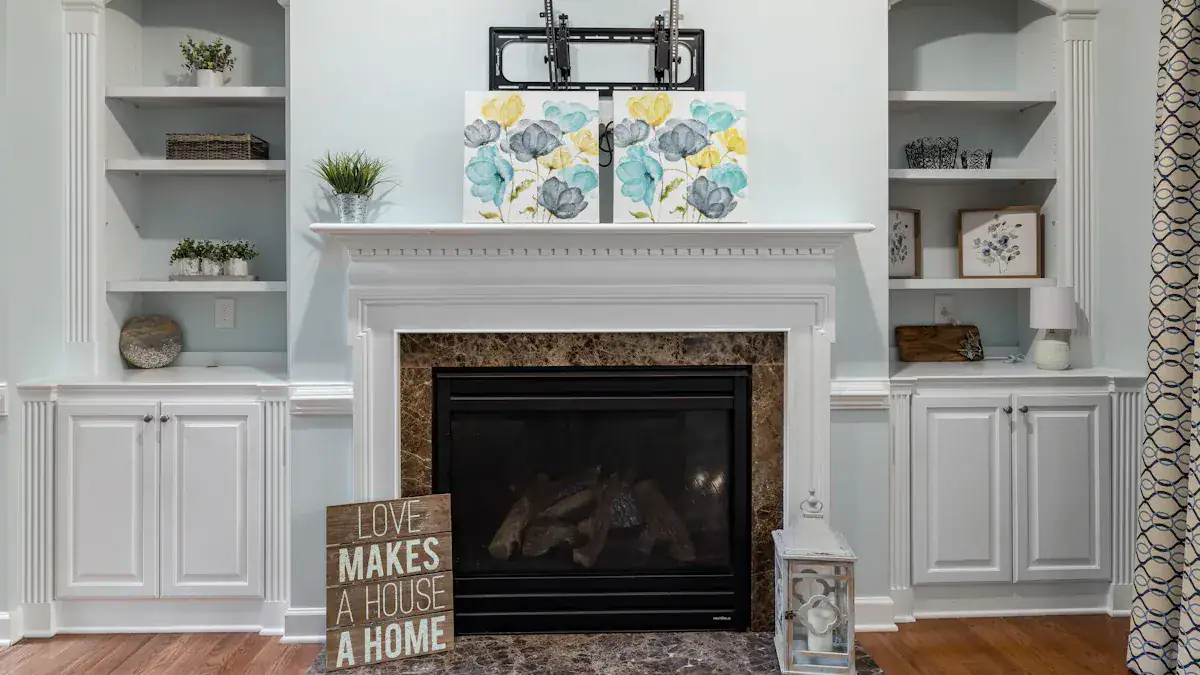
Floating Mantel Shelf Idea
A floating wood mantel offers a sleek, modern look. It appears to extend directly from the wall without visible supports. This style creates a clean line in your living space. You can build this type of mantel yourself.
Floating Mantel Concept
A floating mantel design relies on hidden supports. These supports attach directly to your wall studs. This method ensures stability and strength. You first build a sturdy frame. This frame acts as the core support. You cut 2x4s to the desired length and depth for your shelf. Make sure shorter pieces avoid stud locations. Pre-drill holes before you screw pieces together. This prevents the wood from cracking. Then, you securely screw this assembled frame into the wall studs. Use a level to ensure it is straight.
The shelf must attach to wall studs. This is essential for supporting weight. Do not attach shelves to just drywall. This prevents damage and ensures stability. Support rods or brackets are crucial. These rods install inside the shelf. They hold the shelf’s weight and any items you place on it. The choice of bracket depends on the shelf’s depth, thickness, and desired weight capacity. A floating shelf can hold 45–50 lbs for every wall stud the bracket attaches to. This capacity changes based on the installation method, the quality of the shelf and bracket, and the shelf’s dimensions. Deeper shelves or those supporting heavier items, like a TV, need larger, stronger brackets. These brackets leverage the strength of wall studs for greater depth and support. This design is great for filling empty space, like under a TV.
Floating Mantel Materials
You need specific materials for a lightweight yet sturdy floating wood mantel. The right wood ensures durability and a beautiful finish.
Material | Key Properties for Lightweight & Sturdy | Pros | Cons |
|---|---|---|---|
Maple Wood | High density (denser than oak), great resistance to splitting, can withstand heavy loads, durable, scratch-resistant. | Durable, affordable, natural feel, scratch-resistant. | Low weather resistance, susceptibility to staining. |
Teak Wood | Strong, durable, high resistance to termite damage, hardness rating higher than oak and maple. | Beauty, long-lasting, weatherproof, strong and durable. | Costly, challenging to work with due to hardness and oiliness. |
Glass | Tempered glass is thick and incredibly shatter-resistant. | Sophisticated, airy look, shatter-resistant. | Potential fears of fracture or damage (though tempered glass is strong). |
You will also need wood glue, screws, and finishing materials like stain or paint.
Floating Mantel Installation
Installing a floating mantel involves several key steps. You will create a strong, hidden support system.
Prepare the Cleat: Measure and cut a 2×4 cleat to the desired mantel length. Subtract the thickness of the mantel wood on each side. This ensures the cleat fits inside the outer shell.
Attach the Cleat to the Wall:
Use a stud finder to locate wall studs for maximum stability.
Mark the stud locations accurately.
Securely attach the 2×4 cleat to wall studs using screws. Ensure it fills the entire internal space of the shelf for stability. Make sure the cleat is level and securely fastened.
Consider using a combination of 3/4-inch poplar and 3/4-inch plywood for a solid backing. This provides extra support and holds the weight.
Assemble the Outer Shell:
Choose straight boards to avoid a ‘janky’ appearance. Determine the desired length and cut boards accordingly. Cut two 6×6 inch squares for side caps. Prioritize boards with attractive grain for the mantel face.
Miter all edges at a 45-degree angle for a seamless, solid beam look. Miter the top and bottom boards on one long edge and both ends. Miter the front-facing board on both side edges and both ends. Miter the end caps on three edges, leaving one straight for the fireplace wall. (Butt joints are an alternative if a miter or table saw is unavailable).
Use painter’s tape to hold the three main pieces together. Apply a thin line of wood glue along mitered edges. Fold the boards to meet the mitered edges and nail them together. Repeat for other mitered edges and attach end caps with glue and nails. Wipe off any excess wood glue immediately to prevent splotchy staining.
Mount the Shell: Slide the outer shell over the cleat. Secure it with screws or adhesive.
Finish the Mantel: Finish your new mantel with sanding, staining, or painting. This final step completes your project. You can even create a diy faux fireplace and mantel or an easy wood mantel for brick fireplace using this method. This also works for a diy faux farmhouse fireplace and mantel.
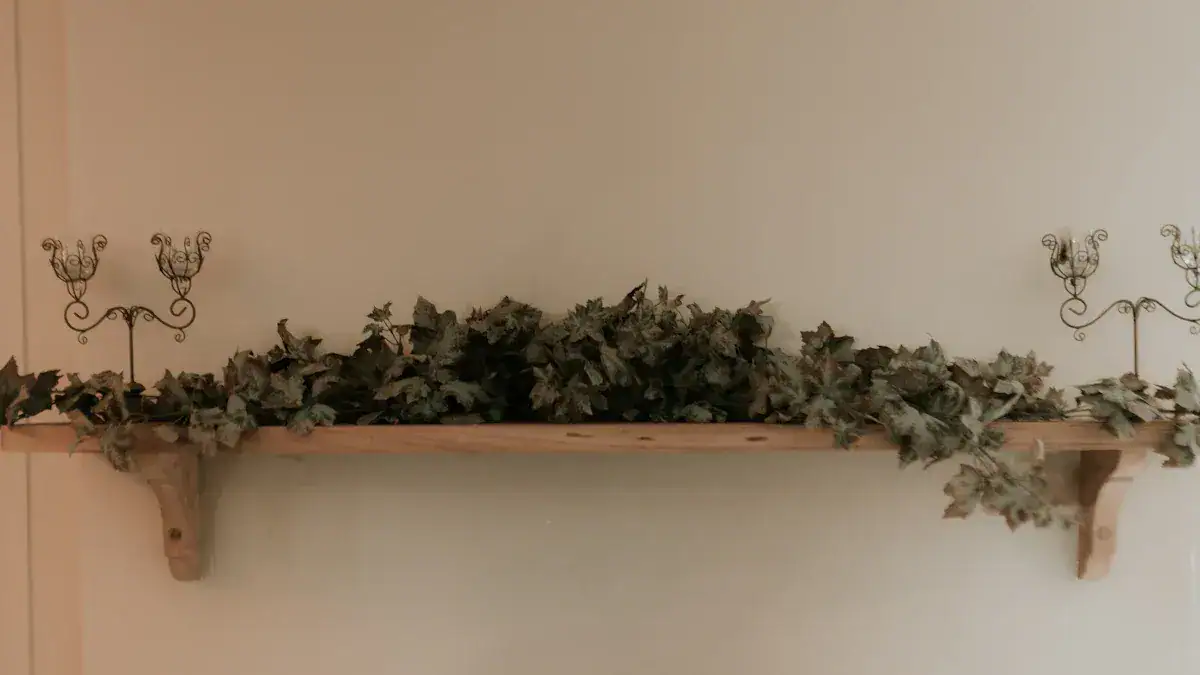
Rustic Reclaimed Mantel Shelf
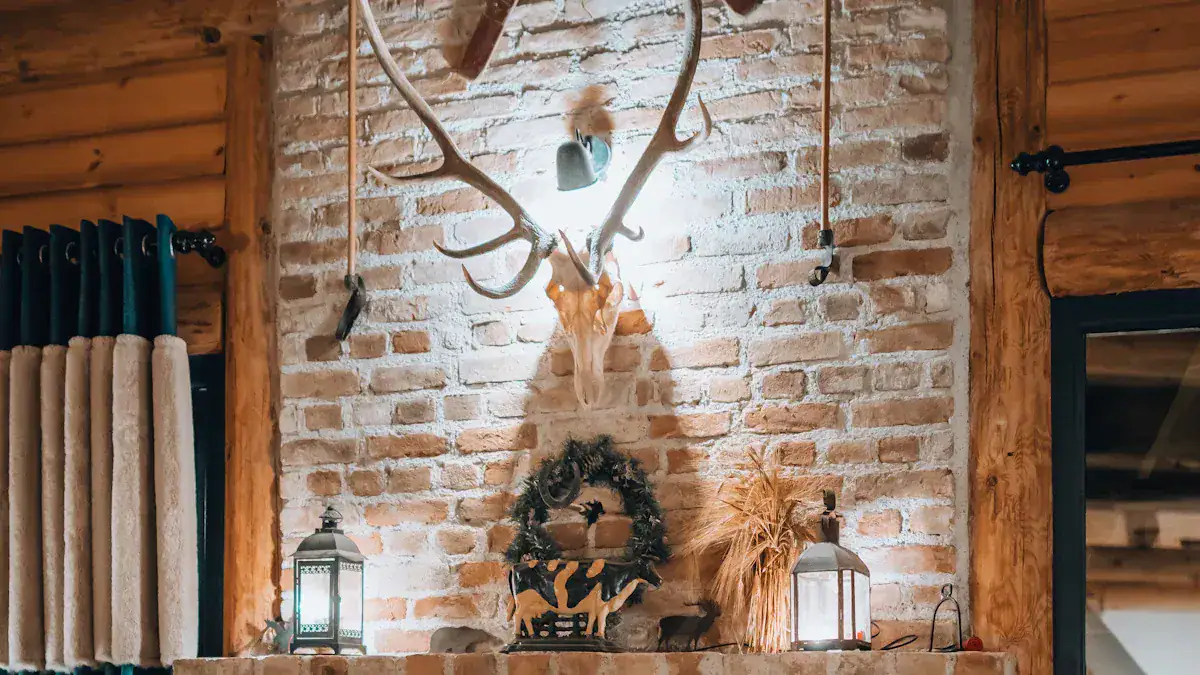
A rustic reclaimed mantel shelf brings history and character into your home. Each piece of wood tells a unique story. You can create a warm and inviting focal point with this type of mantel.
Reclaimed Wood Aesthetic
Reclaimed wood mantels offer a distinctive look. They possess original marks and signs of age. You will see wear and a beautiful patina. These features are inherent to reclaimed wood. Rough sawn wood mantels often show circular saw marks. These marks add interest and movement. They showcase the wood’s past. Hand-hewn wood mantels have axe marks. These marks come from original craftsmanship. They create a more rustic appearance. The surface will feel slightly irregular.
Reclaimed timber beams have unique characteristics. You will find checks, which are cracks from drying. Nail holes are also common. Mortise and tenon joints appear in both hand-hewn and rough-sawn beams. These joints add to their historical character. Rough cut circle saw marks define rough sawn beams. They offer a slightly more polished look than hand-hewn beams. Reclaimed wood is distinctive and full of character. It has unique raw features. You will notice a rugged texture. This texture includes notches or dimensional lines and mortises. These are especially visible in hand-hewn beams. Live edge mantels have natural irregular borders. These include wormholes and insect trails. They occur naturally beneath the bark. An attractive grayish patina often develops over time. This original surface texture comes from environmental factors. It looks balanced and unblemished.
Sourcing Reclaimed Wood
Finding the right reclaimed wood is an important step. You can find authentic reclaimed wood mantels from specialized suppliers. Companies like Modern Timbercraft offer handcrafted and unique pieces. Each beam carries a story. It becomes a part of your home. They salvage their mantels from old barns and houses. Reclaimed Creations LLC also builds reclaimed fireplace mantels. They use old-growth beams from barns and mills. They offer custom sizing, styles, and stains. They serve the Hudson Valley and deliver nationwide. Their mantels feature one-of-a-kind elements. These include nail holes, knots, and tool marks. They kiln-dry and surface-wash the wood for stability and cleanliness. You can choose hand-hewn mantels with distinctive axe marks. These were shaped by hand centuries ago. Rough sawn mantels retain original saw blade marks. They offer an industrial yet rustic aesthetic. All their products are Made in the USA. Reclaimed DesignWorks is another trusted provider. They offer reclaimed wood products, including fireplace mantels. You can contact them at 1-800-243-4030.
Once you get your salvaged wood, you need to prepare it. Cleaning, sanding, and treating are essential steps. Pressure washing is the fastest, easiest, and safest way to clean mildew. Use a gentle pressure washer tip. This prevents removing the natural patina. First, sweep away dust and cobwebs. Then, scrub the wood with warm water and dish detergent or mild soap. You can also use a mixture of bleach and water. Wear gloves and safety glasses if you use bleach. White vinegar and water work for light cleaning. A steam cleaner is also a perfect cleaning tool. It gets very hot. This heat can help with bugs and larvae. For small pieces, you can bake them in an oven at 225°F. This ensures larvae are killed. After cleaning and drying, lightly sand the wood. Use an orbital sander on both sides and cut edges. This further preps the wood. Simple reclaimed wood mantels can be built quickly. Sometimes you can finish them in under an hour. This makes it a rewarding diy project.
Mounting Heavy Shelves
Mounting a heavy reclaimed wood mantel requires a secure method. You need to ensure stability. This is especially true for walls with studs.
Anchor Rebar: Anchor two pieces of rebar directly into the studs above your fireplace.
Measure and Mark: Precisely measure the distance between the rebar pieces.
Drill Holes: Mark and drill pilot holes into the back of the mantel. Then, drill larger 3/4 inch holes. Ensure these holes align perfectly with the rebar.
Slide Mantel: Carefully slide the mantel onto the rebar. It should fit snugly. This method provides significant support. You often do not need additional securing. You can add a screw angled from the mantel into the wall for extra security. This method works well for an easy wood mantel for brick fireplace.
Rustic Finishing
Finishing your rustic reclaimed mantel enhances its beauty. It also protects the wood. You can apply wax, oil, or sealant.
Penetrating Oil Finishes: These finishes go deep into the wood. They enhance its natural texture. They provide a robust protective layer. Examples include Linseed Oil, Tung Oil, Danish Oil, and Cedar Oil. They darken the wood. They can change to a yellowish amber over time. This gives a warm, rich, and natural look. They are easy to apply and repair. You may need frequent reapplication. WOCA products are natural oil finishes. They maintain reclaimed wood quality in a healthy way. WOCA oils are VOC-free. They penetrate and harden the wood. This strengthens and protects it. They are environmentally friendly and vegetable-based. They have a natural smell and touch. There is no out-gassing. Cleanup is easy. Touch-ups are simple. The oils resist damage from wear, nicks, and cuts. They do not chip or peel. They absorb into the wood. This enhances its natural beauty. It creates a patina that ages with the wood. WOCA Diamond Oil provides extra protection. It creates a harder surface for heavy traffic areas.
Water-Based Finishes: These offer a robust shield against moisture and chemicals. They preserve the wood’s natural hue. They dry faster. They have a subtle scent and minimal odor. Cleanup is easy. They provide a translucent finish. This finish resists yellowing. It is ideal for lighter woods.
Polyurethane: This finish is robust against moisture, heat, and daily wear. It comes in water-based and oil-based variants. It ranges from satin to gloss sheen. It enhances wood’s natural beauty. It provides strong protection.
Wax: Options like beeswax or carnauba wax give wood a soft touch. They create a delicate sheen. This results in a natural, low-luster look. Wax is easy to apply. You can rejuvenate it by buffing. It is ideal for items with minimal wear. You can also use it as a protective layer over other finishes.
Feature | Penetrating Hardening Oil | Wax or Oil Finish | Water-Based Urethane | Oil Modified Urethanes | Moisture-Cured Urethane | Polymerized Tung Oil |
|---|---|---|---|---|---|---|
Durability | Excellent | Good | Very Good | Very Good | Excellent | Good |
Odor | Mild | Mild to Strong | Mild | Moderate | Very Strong | Strong |
Color | Slight Amber, Some Tints | Slight Amber | Clear to Amber | Amber | Clear to Amber | Clear to Amber |
Dry Time | 24 Hours | Varies | Fast | Slow | Slow to Fast | Moderate |
Combustible | NO (with care) | YES (with care) | NO (with care) | YES (with care) | YES | YES |
Finish Look | Wax Luster | Wax Luster | Satin to Gloss | Satin to Gloss | Satin to Gloss | Wax Luster |
Water Spots | Removable | Water Spots | Water Spots | Water Spots | Water Spots | Water Spots |
Maintenance | Low | Moderate | Low | Low | N/A | Low |
You can use these finishing techniques for a diy faux fireplace and mantel. They also work for a diy faux farmhouse fireplace and mantel.
Success Tips and Safety
You can achieve a professional-looking result for your diy mantel project. Follow these tips and prioritize safety.
Measuring and Cutting
Always measure twice before you cut once. This simple rule prevents costly mistakes. You can also create a sample piece. This helps you ensure the desired look before you make final cuts on your actual mantel material. This step saves time and resources.
Secure Wall Mounting
Properly mounting your mantel is crucial for safety and stability. You must secure it to the wall studs.
For brick, stone, or faux veneer walls:
Locate studs behind the masonry.
Drive 1/2-inch lag screws through each stud. Ensure they penetrate about two-thirds of the mantel’s depth. Cut off the lag screw heads.
Mark and drill corresponding holes in the back of the mantel. Then, test fit it.
Apply construction adhesive into the holes and optionally to the wall and mantel back.
Slide the mantel into place.
For thick masonry (4 inches plus):
Drill holes using a hammer drill.
Tap in a lead masonry anchor.
Follow steps 2-5 of the ‘Slide Over Bolts Method’. Ensure the masonry is strong enough for the mantel’s depth.
Using a backer board:
Cut a backer board to match the masonry depth, mantel height, and mantel width.
Attach the backer board to as many studs as possible. Use two lag bolts per stud, pre-drilling countersink holes.
Clamp the mantel to the backer board. Pre-drill screw holes. Screw lag bolts through the backer board into the mantel. Ensure bolts are long enough.
Complete the fireplace installation and masonry.
Using corbels:
Start with corbels sized appropriately (2 inches + stud width + masonry width + mantel depth – 1 to 2 inches).
Carefully cut a tight notch in the corbel for the stud.
Run bolts through the corbel and stud. Then, fasten them together.
Complete the rest of the fireplace and masonry installation.
Apply adhesive on top of the corbels. Position the mantel and clamp until dry.
For traditional brick or stone fireplaces: Use a stud finder to locate wall studs. Make pilot holes at the desired height and align the shelf. Use long screws for firm attachment (wood screws for wood mantels, masonry screws for stone mantels). If attaching to masonry directly, use French cleats instead of screws.
For drywall or plasterboard fireplaces: The process is the same as for traditional fireplaces, using wood screws to affix the mantel.
Weight and Fire Safety
Consider both weight capacity and fire safety clearances.
Mantel Type | Weight per Linear Foot (approx.) |
|---|---|
Solid Wood | 20-30 pounds |
Hollow Box | 5-15 pounds |
Stone or Concrete | Exceeds 40 pounds |

Always factor in additional weight from items you place on the mantel. This includes heavy objects like large mirrors, artwork, or holiday decorations. Bracket product specifications often list their weight capacities. For example, the Albany Mantel Corbel safely supports up to 150 pounds when properly installed. Custom bracket solutions are available for extra weight capacity. You can use these for unusually heavy mantels or special applications.
Observe fire safety clearance requirements from the firebox opening.
Material Type | Distance from Opening | Maximum Projection |
|---|---|---|
Combustible Mantel | 12 inches (minimum) | Not specified, but typically sits at 12 inches above the opening |
Combustible Trim | 6 inches (minimum) | 1/8 inch for every inch above the opening (e.g., 3/4-inch thick at 6 inches, tapering to 1 1/2 inches at 12 inches) |
Noncombustible Materials | Can be closer | Not specified, as they are an alternative for closer placement |
These clearance allowances are consistent with section R1001.11 of the International Residential Code. You can also use synthetic stones for mantels. They offer benefits in price, weight, and aesthetic considerations.
Professional Finishing
A thorough sanding often separates ‘acceptable’ results from ‘professional-looking’ results. Do the initial sanding with medium fine paper. Finish with one or more of the finer grades. Be sure you sand the whole surface with the same grit paper. If you miss a spot, the stain will be darker on the rougher areas.
Sanding Process:
On most raw woods, start sanding in the direction of the grain. Use #120-150 grit paper before staining. Work up to #220 grit paper.
For softwoods (e.g., pine and alder): start with #120. Finish with no finer than #220 (for water-based stains) and #180 grit for oil-based stains.
For hardwoods (e.g., maple and oak): start with #120. Finish-sand no finer than #180 (for water-based stains) and #150 grit for oil-based stains.
Do not over-sand. This can seal the wood and prevent it from accepting a finish.
Give end-grain areas an additional sanding. This controls stain absorption.
Do NOT use steel wool when preparing wood for water-based finishes. Steel particles may cause rust spots.
Preparation:
All surfaces should be clean and free from all dirt and oils.
Remove dust with an air hose, damp cloth, or ‘oil-free’ tack cloths. Do not use tack cloths containing linseed oil when using water-based finishes.
You can pre-wet the wood when using water-based finishes. On certain woods like oak and ash, pre-wet the wood with a damp cloth to raise the grain before final sanding. Allow the dampened wood to dry for 30 minutes before the final sanding. This achieves a smoother final finish.
Use crack filler to fill voids, nail holes, and other imperfections. Sand until the filler remains only in the void.
Remove excess glue on the surface. If wet, wash away with clean water. If dry, cut away with a sharp chisel or knife. Sand away any remaining spots. Areas contaminated by glue will not accept stain.
Staining:
Stir the contents of the can thoroughly every time you open it. Pigments and dyes settle. It may take several minutes to ensure consistent color.
You can mix stains together. This creates custom wood tones or colors. Be sure to mix enough to complete the entire project.
The open time with water-based products is shorter than oil. So, stain one surface at a time.
Apply water-based products liberally. Keep the surface wet with product until you are ready to wipe that section off.
As you stain each area, remove excess stain. Wipe thoroughly and consistently in the direction of the grain. This gets an evenly stained surface.
A second coat, applied after the first one is dry, will give a darker and deeper color.
Look for ways to disassemble furniture to make staining easier. For example, remove screws to access parts.
You have explored the benefits of building your own custom shelf. This includes significant cost savings and endless customization. You also gain immense personal satisfaction from a DIY project. Now, use these free diy fireplace mantel plans. You can build a mantel that perfectly suits your home. Start your own project today. Transform your living space with a beautiful, custom piece.
FAQ
What is the best wood for a DIY mantel?
You can choose many woods. Maple offers durability and a natural feel. Oak is strong and resists warping. Poplar works well if you plan to paint your mantel. Reclaimed wood adds unique character and history. Select wood that matches your home’s style and your budget.
How do you ensure a floating mantel is secure?
You must attach the mantel to wall studs. Use a 2×4 cleat or strong support rods. These hidden supports bear the weight. Never attach a floating mantel to drywall alone. This prevents damage and ensures stability. Proper installation keeps your mantel safe and secure.
What are the essential tools for building a mantel?
You will need a miter saw or circular saw for cuts. A drill helps with pilot holes and screws. A sander smooths surfaces. A brad nailer secures pieces. Always wear safety glasses and a dust mask. These tools help you build your mantel safely and effectively.
How do you finish reclaimed wood for a rustic look?
You can apply wax, oil, or sealant. Penetrating oils enhance the wood’s natural texture and provide protection. Water-based finishes offer a robust shield and preserve the wood’s hue. Wax gives a soft touch and a delicate sheen. Choose a finish that highlights the wood’s character.


