

You can introduce your children to the joy of creating. Woodworking is not just for adults. It is a fantastic activity for kids. This post guides you through simple, fun, and safe woodworking projects for kids. These projects foster creativity, practical skills, and confidence in children. You will make lasting memories. Children learn valuable lessons through hands-on woodworking. Start building together!
Key Takeaways
Woodworking helps kids learn important skills. These include fine motor skills, problem-solving, and patience. It also builds their confidence.
Always put safety first when kids do woodworking. Adults must watch them closely. Kids should use tools that fit their hands. Everyone must wear safety glasses.
Start with simple tools and materials. Good choices are soft wood, small hammers, and wood glue. Non-toxic finishes are important for safety.
Easy projects like birdhouses or pencil caddies are great for beginners. These projects teach basic building skills. They also let kids be creative.
Let children lead their projects. Celebrate their efforts and creations. This helps them learn and grow. It also makes woodworking fun.
Benefits of Woodworking for Kids
Woodworking offers many benefits for kids. Engaging in these projects helps children develop crucial skills. It also boosts their self-esteem through successful creation. You will see many developmental advantages for your children.
Fine Motor Skills and Coordination
Woodworking activities significantly improve fine motor skills. You use your hands with care and accuracy. Sanding, cutting, and assembling parts help develop these skills.
Handling small nails or screws teaches kids precision. These activities strengthen dexterity and hand-eye coordination. For example, threading beads enhances fine motor skills, requiring precision and coordination. Similarly, woodworking projects improve fine motor skills and boost imagination.
Problem-Solving and Creativity
Woodworking is a powerful tool for developing your creative and critical thinking. You find countless opportunities to solve complex problems. You express your limitless imagination. Woodworking inherently enhances problem-solving abilities.
You make choices and learn through trial and error. This process allows your creative thinking and confidence in problem-solving to flourish. You encounter and resolve your own challenges. Woodworking helps children develop measuring skills. It combines creative expression with critical thinking. You learn practical mathematical concepts like fractions. This sparks imagination and creativity. You develop problem-solving skills and critical thinking in a woodshop setting. This fosters creativity with functionality.
Patience and Perseverance
Woodworking projects cultivate perseverance in young builders. You learn through trial and error. This directly contributes to developing grit and perseverance.
Connecting wood pieces firmly in place represents the accomplishment of persistence and hard work for children. Woodworking requires learning patience. You often need to wait for assistance. This allows you to pause, think, and observe. Complex woodworking projects often take multiple days to complete. This fosters planning skills and persistence in kids.
Building Confidence
Completing a woodworking project gives you a deep sense of satisfaction. This contributes to finding fulfillment. Woodworking classes help students build self-confidence.
They learn responsibility. The woodshop environment promotes social and emotional growth. You are encouraged to change your mindset from “I can’t do that” to “I can’t do that yet.” This directly helps build confidence. The satisfaction of crafting something with your hands instills confidence and self-esteem. This boosts self-confidence. Woodworking fosters practical life skills. It leaves an indelible mark on a student’s journey of self-discovery.
Safety First for Young Woodworkers
Safety is paramount when you introduce children to woodworking. You must always prioritize safety. These safety tips for kids in woodworking help you create a secure environment.
Adult Supervision
You must always provide constant adult supervision. This is essential for children using woodworking tools. Always model safe woodworking procedures. You must follow safety rules yourself. This effectively supervises children. You should match the child to the tool. Also, match the tool to the child.
Consider individual capabilities. Provide age-appropriate tools and work surfaces. Explain and demonstrate safe handling techniques for all tools. Use positive phrasing for safety rules. Emphasize the cutting power of tools.
Always supervise. Set aside your own work to watch children. This is especially important when they learn new tools. Stand behind them to avoid distraction. Gently correct faulty techniques verbally. Maintain constant observation until a child shows proficiency. They must know safety routines with a tool. Establish rules. For example, always ask permission before using tools. Wear safety gear. Clean up after projects. This encourages responsibility and safety awareness.
Kid-Friendly Tools
Select appropriate tools designed for small hands. These are age-appropriate tools. Real, quality tools are not toys. They ensure a productive woodworking experience for children. You can use safety glasses, a portable workbench vise, or a coping saw.
A hand drill with bits, a Surform pocket plane, and a combination square are also good choices. A 6-foot tape measure and a small hammer are useful. Titebond wood glue and rubber bands for clamps work well. Assorted grits of sandpaper are also necessary. These tools work effectively without modification. They require minimal skill. They fit small hands. This helps you teach tool safety basics.
Eye Protection
You must wear safety glasses. This protects your eyes from flying debris. Wooden projectiles often cause severe eye injuries. These can lead to permanent disability. They require lifelong follow-up. Children under 17 years old account for 22% of these patients. Injuries range from mild superficial trauma to open globe trauma.
Type of Injury/Outcome | Percentage/Count |
|---|---|
Children under 17 years | 22% of patients |
Mild superficial trauma | 54% |
Blunt ocular trauma | 37% |
Airborne sawdust also poses a risk. It can cause respiratory problems or allergic reactions. This is especially true for children with asthma.
Understanding Wood
Educate children about different wood types. Teach them how to avoid splinters. Improper tool carrying can cause injuries. Children may poke themselves or others. Teach them to carry tools with points aimed down.
They should be parallel to the leg. Hammering hazards include flying wood or nails. Hitting fingers is common. A kid-friendly workspace helps prevent accidents. Ensure your woodshop for kids has enough space. The workbench should be at a suitable height.
Getting Started: Tools and Materials
You need the right equipment to begin your woodworking journey. This section provides a practical guide. You will learn about necessary tools, common materials, and safe finishing supplies. Gathering these items helps you start your projects with confidence.
Essential Kid-Friendly Tools
Choosing the right tools makes woodworking safe and fun for children. You should select basic, safe, and easy-to-handle tools. These are real tools, not toys. They help children learn proper techniques.
Clamps: You need clamps to secure your wood. ‘C’ clamps are a basic type. They hold your project firmly to a workbench. This frees your hands for other tasks. Clamps are essential for safety.
Shaping Tools: Sandpaper is an excellent tool for young children. You can change the wood’s shape with sandpaper. You explore different textures. Sandpaper comes in various grits.
Attachment Tools:
Hammers: You use hammers to join materials, often wood. Smaller hammers are best for children. You can use a clothespin to hold nails. This keeps your fingers safe.
Screwdrivers: You use screwdrivers for attaching wood with screws. This requires pushing, turning, and steadying. You can practice with Styrofoam before using wood.
Prepping Tools:
Drills: You use drills to create holes. Hand drills, like the ‘egg-beater’ style, are good for young children. Power drills are too strong. Always use sharp drill bits. Handle them carefully.
Cutting Tools:
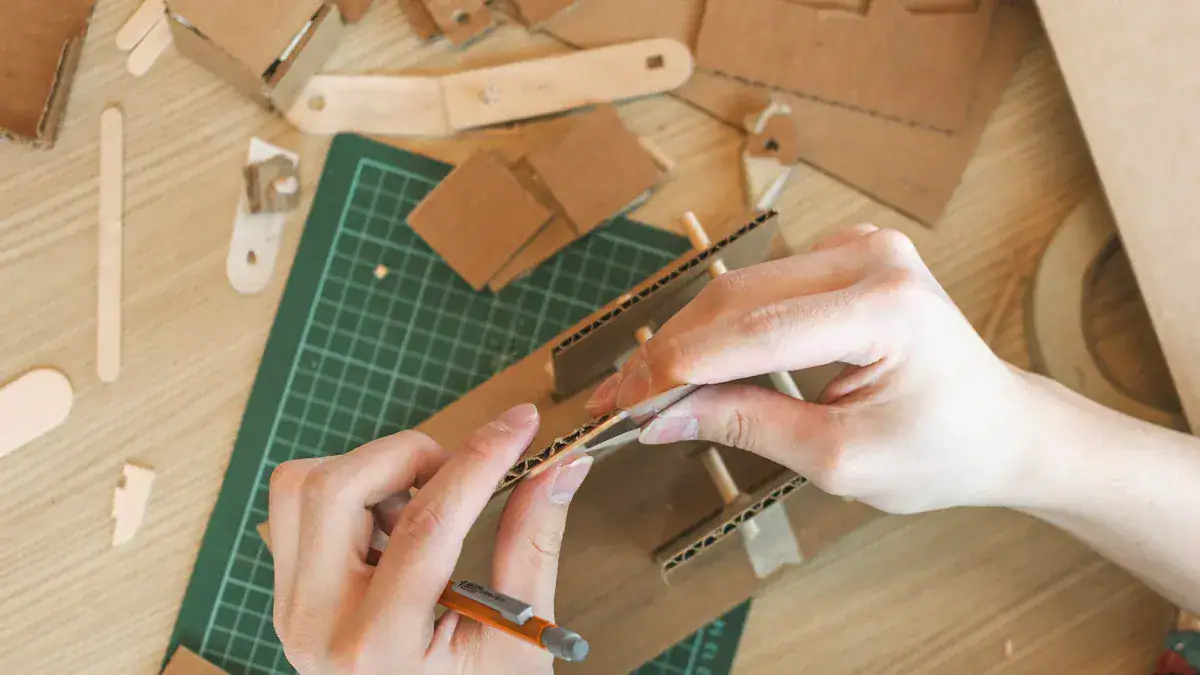
Saws: Saws are important tools. They require strict supervision. A small coping saw is suitable for children. Always clamp your wood securely. Use thin, soft wood for practice.
Common Project Materials
You need suitable materials for your woodworking projects. These materials are often affordable and easy to find.
Wood: Softwoods work best for children. White pine, cedar, fir, and redwood are good choices. You can often get wood scraps from lumber companies or hardware stores. These are perfect for small projects.
Nails: Use nails with large heads. Roofer nails are a good example. Make sure your nails are not longer than the wood thickness. This prevents them from sticking out.
Additional Materials for Variety: You can add many other items to your projects. Consider rug scraps, pre-cut craft wood shapes, and dowels. Metal juice can lids, tongue depressors, and leather scraps add texture. Fabric or yarn can decorate your creations. Glue is always useful. Doorknobs can become interesting features. Markers, chalk, or pencils help with design. Blueprint paper helps you plan.
Finishing Supplies
You want to protect and decorate your finished projects. Always choose non-toxic finishing supplies. These are safe for children.
Natural Penetrating Oils: Linseed Oil and Tung Oil are durable options. They are food-safe. Pure Tung Oil from The Real Milk Company provides a durable finish. You can use these on items that might touch food.
Natural Wax Finish: You have several choices for wax finishes. Carnauba wax is GRAS certified. You can mix it with walnut oil. Linseed and beeswax finishes, like those from Tried and True, are also good. Hemp oil and beeswax finishes, such as Fusion, are another option. These are safe for food contact.
Danish Soap Finish: This is a non-toxic process. It uses pure soap. It is food-contact safe. This finish offers a flat, invisible look. However, it requires more maintenance.
Non-Toxic Synthetic Sealants: You can find toy-safe or food-contact safe acrylic, polyurethane, or polyacrylic finishes. ECOS Paints and AFM Safecoat Acriglaze are Certified Toy Safe. This is a European standard, EN-71. They are also zero-VOC after curing.
You should understand safety certifications. The FDA provides a Food-Safe Designation. This assesses products for safety if ingested. The European Toy Safe Certification (EN-71) simulates ingestion. It ensures products are safe if children chew on them. This certification means products are free from harmful elements. These elements include aluminum, lead, mercury, and cadmium. You can create a safe woodshop for kids with these choices.
Easy Woodworking Projects for Kids
You can introduce your children to the rewarding world of woodworking with these simple projects. These woodworking projects are perfect for young builders. They teach fundamental skills and spark imagination. You will find these projects easy to construct, safe, and engaging. They draw from popular and useful ideas.
Simple Birdhouse
A birdhouse is a classic woodworking project. It offers basic assembly practice and encourages nature appreciation. This is an easy project for kids.
Materials:
Pre-cut wood pieces (or a clean, dry carton)
Wood glue
Small nails (if using wood)
Paint
Twine or rope for hanging
A straight stick for a perch
Popsicle sticks (for a carton roof)
Glitter (optional)
Steps:
Prepare the Base: If you use a carton, clean and dry it. Remove any stickers. If you use wood, ensure pieces are smooth.
Create the Entry Hole: Cut a circular opening on the front of your birdhouse. Place it near the top.
Add a Perch Hole: Punch a small hole below the circular opening. This is for your perch stick.
Paint and Decorate: Take your birdhouse outside. Lay down a drop cloth. Spray paint it your favorite color. You can sprinkle glitter on the wet paint. Let it dry completely.
Install Hanging String: Punch a hole at the top of the birdhouse. Insert twine or rope. Tie a knot to secure it. This allows you to hang your creation.
Attach the Roof: If you use a carton, paint about 20-24 popsicle sticks. Use a glue gun to attach them side-by-side on the top. This forms a roof.
Insert the Perch: Find a straight stick. Insert it snugly into the small perch hole. Add glue to the end. Push it into the birdhouse. This secures it to the inside panel. Add more glue around the front hole for extra security.
Final Touches: Add more decorations. You can use glitter pens or other creative items. You now have a finished birdhouse.
Wooden Pencil Caddy
You can craft a functional item like a wooden pencil caddy. This project helps organize art supplies. It focuses on joining pieces. This is a great beginner-friendly project for kids around 10 years old. It involves plenty of hammering.
Materials:
Scrap wood (e.g., 1″ x 5″ scraps, about 15″ total length)
Hardboard or 1/4″ Plywood (for the bottom)
Wood glue
1 1/2 inch low-profile finishing nails
Sandpaper
Paint or decorations
Jars or cans (for holding supplies)
Steps:
Measure and Cut Panels: An adult can help you cut your wood pieces. You need four side panels and one bottom panel.
Glue Side Panels: Apply wood glue to the edges of two side panels. Join them to form an ‘L’ shape. Ensure the edges align. Clamp them and let them dry for at least an hour.
Attach End Pieces: Un-clamp your ‘L’ shape. Glue the two end pieces into place. Clamp these ends. Let them dry for at least an hour.
Complete the Box: Un-clamp the assembly. Glue on the last side piece. Ensure all touching edges have glue. Re-clamp the entire box. Let it dry overnight.
Attach the Bottom: Apply glue to the bottom edges of your assembled box. Place the hardboard or plywood bottom onto it. Secure it with small nails.
Sand and Decorate: Sand all surfaces smooth. Paint or decorate your pencil caddy. You can use jars or cans inside to hold different supplies. This project combines creativity with functionality.
DIY Picture Frame
You can create a personalized gift or room decor with a DIY picture frame. This project focuses on precise cuts and joining.
Materials:
Thin wood strips (or cardboard pieces)
Wood glue
Small clamps (if using wood)
Paint or decorations
Art paper
Drawing tools (markers, paint sticks)
Flexible wire and beads (optional, for a handle)
Steps:
Prepare Frame Pieces: An adult can cut two matching pieces for the frame. One piece forms the back. The other forms the front. Cut out the center of the front piece. This creates the frame opening. Trim art paper to fit between these pieces.
Create Your Artwork: Draw and paint your picture. Use paint sticks or markers.
Decorate the Frame: Decorate the frame pieces. Add patterns or colors around the edges.
Assemble the Frame: Glue the three layers together. Start with the back piece. Add your artwork. Then, place the decorated frame front. You can use a hot glue gun for quick drying.
Add a Handle (Optional): Punch two holes at the top of the back piece. Thread flexible wire through one hole. Secure it. String beads onto the wire. Secure the other end of the wire through the second hole.
Basic Wooden Box
A basic wooden box is a fundamental project. It teaches construction and assembly skills. This is one of many useful woodworking projects.
Materials:
Small wood panels
Wood glue
Small nails or screws
Sandpaper
Wood filler (optional)
Stain or paint
Steps:
Prepare Panels: Ensure all wood panels are cut to size. Sand any rough edges.
Assemble Sides: Apply wood glue to the edges of two panels. Join them to form a corner. Secure them with small nails or screws. Repeat this for all four sides. You will create a rectangular or square shape.
Attach the Bottom: Apply wood glue to the bottom edges of your assembled sides. Place a bottom panel onto it. Secure it with nails or screws.
Reinforce and Finish: Reinforce the entire exterior with a nail gun if you have one. Fill any visible holes with wood filler. Sand it down smooth. Apply a finish like stain or paint. This completes your basic box.
Small Step Stool
You can build a small step stool. This is a useful project. It teaches stability and stronger joinery. This woodworking project is practical for kids.
Materials:
Thicker wood pieces (for legs and top)
Wood glue
Screws
Sandpaper
Paint or decorations
Steps:
Cut Pieces: An adult can help you cut the wood pieces. You need four legs and one top piece. You might also need pieces for cross-braces.
Assemble Legs: Attach the legs to the front and back pieces using screws. Use three screws per leg for reinforcement.
Attach the Top: Apply wood glue to the top edges of the legs. Place the top piece onto them. Secure it with screws. Ensure it is stable.
Sand and Decorate: Sand all surfaces smooth. Paint or decorate your step stool. You now have a sturdy and useful item.
Tips for Success and Creativity
You can best support your young woodworkers with a few key approaches. These tips help foster their growth and enjoyment in woodworking.
Let Children Lead
You empower children when you let them take the lead in their woodworking projects. This approach fosters their creativity and imagination. Children explore their interests and express themselves uniquely. They develop problem-solving skills as they find their own solutions. This cultivates autonomy and choice. It allows children to make decisions and take ownership. You will see increased engagement and motivation.
This builds a strong sense of ownership and pride in their creations. Encourage observation, memory, and imagination. Ask open-ended questions. For example, “What do you think might happen if…?” or “How could we tackle this issue?” This promotes independent thinking. You guide children with probing questions. You do not provide direct answers. This helps them find solutions independently. This process of designing and building helps young kids learn.
Embrace Imperfections
You empower young builders to learn from mistakes. View “mistakes” as learning opportunities. This helps them turn problems into opportunities. Praise their effort over results. This prevents a fixed mindset.
Children avoid challenges to maintain perceived perfection. Instead, focus on comments like: “You kept trying until you got it. I love how you kept going when things got hard!” or “Wow! You worked really hard on that!” Encourage mistakes. Model them as learning opportunities. Remember, “mistakes help me learn and grow.” Provide a supportive environment. Actively listen to their concerns. Validate their feelings without judgment. This helps children build confidence.
Celebrate Creations
You should celebrate every finished project. Acknowledge their efforts. Value their originality. This encourages creativity. It boosts their self-esteem. Focus on what they learned from solving a problem. Discuss what worked. Talk about what they could do differently. This is more important than just the outcome.
Expand and Decorate
You can personalize and expand on their creations. Suggest ways to add unique touches. Use paint, markers, or other craft supplies. Encourage them to think about how they can make their project even better. This fosters continued engagement in woodworking.
You see immense benefits from woodworking for children. These simple DIY woodworking projects spark creativity. They build essential skills. You create cherished family memories. Children gain confidence and build confidence through these activities. Encourage your children to embark on these fun adventures. The woodworking process and shared experience are valuable. They are as important as the finished projects. Start building and exploring the world of woodworking together with your kids.
