
Limited space often challenges your home office setup. A DIY wood floating corner desk offers an elegant and practical solution. This DIY floating corner desk maximizes unused corner areas. It creates a dedicated, clutter-free workspace. This desk serves as a mini office or homework station. You can transform your small space into a functional and stylish area. This beginner-friendly DIY project helps you build a custom floating corner desk. This floating design saves space.
Benefits of a DIY Floating Corner Desk
Building your own desk offers many advantages. This specific DIY project is ideal for you. It helps you create a perfect workspace.
Space-Saving Advantages
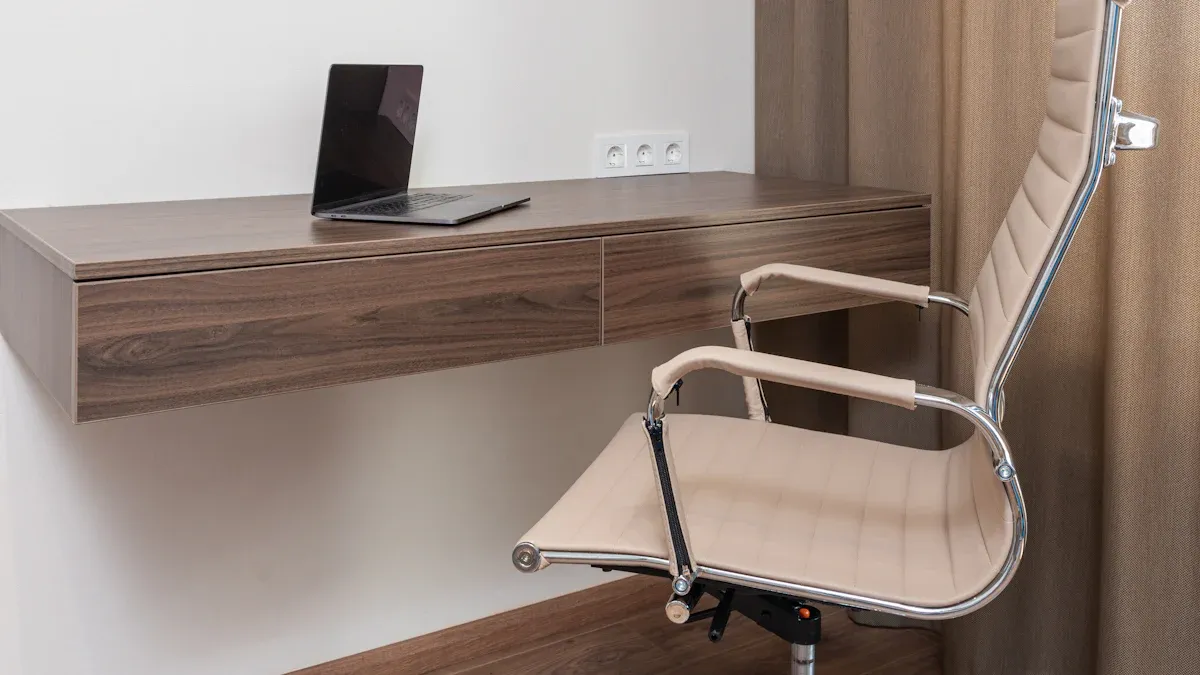
A diy wood floating corner desk is excellent for small areas. It uses space that often goes unused. Floating desks are very effective space-saving items. They take up only a small part of the space a traditional desk would. This makes them great for rooms with limited floor space. A primary benefit of a floating corner desk is its ability to save space. It mounts directly to the wall. This frees up floor space because it has no legs. You only need enough room for a chair. Corner floating desks fit snugly into unused corners. They often include built-in storage. This maximizes your space. Installing a floating corner desk can save a lot of space. It can free up to 40% of your floor space. This typically saves about 12 square feet of floor space.
Modern Aesthetics and Design
Floating desks offer a clean, modern look. They make your room feel more open. Clean lines, refined materials, and careful proportion are key to this modern style. You can combine warm woods with matte metals for a nice contrast. This adds to the modern aesthetic. The layout, lighting, and flow of your room also contribute to the overall design. A floating desk helps keep your space looking neat and uncluttered. This modern design makes your home office stylish.
Customization for Personal Needs
You can customize your desk to fit your exact needs. This is a big benefit of a diy project. You can build the desk to the perfect height and depth for you. Consider your body proportions. Taller individuals may need a deeper desk for comfortable legroom. Shorter individuals might prefer a shallower depth. The desk height should always be comfortable for you. You can add monitor arms to save desk space. These help you position your screen perfectly. An ergonomic posture is important for comfort. A diy floating corner desk allows you to create a compact desk that fits you perfectly.
Planning Your DIY Floating Corner Desk Design
You need a good plan before you start building. This initial design phase helps you create a functional and beautiful desk. Careful planning makes your DIY project easier.
Measuring Your Corner Space
First, measure your corner space. Use a tape measure. Measure the length of each wall where your desk will sit. Write down these measurements. Also, measure the depth you want for your desk. Consider how much room you need for your computer and other items. Think about the height you want your desk. This ensures comfortable use. Look for any wall outlets or windows. These items affect your design.
Sketching Your Desk Layout
Next, sketch your desk layout. You can use graph paper or a simple drawing app. Draw the shape of your corner desk. Place your monitor, keyboard, and mouse on the sketch. This helps you visualize the workspace. Consider adding shelves or cubbies. These provide extra storage. A good sketch helps you refine your design. You can find many printable floating corner desk building plans online for inspiration. This step is crucial for your diy desk.
Selecting Wood Types and Finishes
Now, choose your wood type and finish. Plywood is a popular choice. It is strong and affordable. Solid wood offers a premium look. Consider the wood’s color and grain. Think about how it matches your room. You can stain the wood for a natural look. You can also paint it to match your decor. Apply a sealant for protection. This protects your floating desk from spills and wear. This planning ensures your diy wood floating corner desk looks great and lasts long. You will build a desk that fits your needs perfectly.
Materials and Tools for Your DIY Floating Desk
This project often requires basic tools and affordable materials. You can build a great desk without breaking the bank. Gathering everything before you start makes the process smoother.
Essential Woodworking Tools
You will need some essential woodworking tools. These help you cut, shape, and assemble your desk. You can often find these at local hardware stores.
Miter Saw: This helps you make accurate cuts for your wood pieces.
Drill: You will use this with various size drill bits to create holes.
Orbital Sander: This smooths your wood surfaces. Use 80, 150, and 220 grit sandpaper.
Pocket Hole Jig: This tool helps you create strong joints for your desk.
Clamps: You will need 90° Pony and 12″ bar clamps to hold pieces together.
Wood Glue: This adds strength to your joints.
Level: Use this to ensure your desk is perfectly straight.
Tape Measure and Pencil: These are for accurate marking and measuring.
Stud Finder: This helps you locate wall studs for secure mounting.
Recommended Lumber and Hardware
For your diy floating desk, you need the right materials. Plywood is a good choice because it is less prone to splitting than solid wood. You can also use 2x4s, 1x4s, and project panels for the frame and desktop. Poplar wood is recommended for a smooth surface if you plan to paint your desk. If you prefer a natural wood look, consider Oak or Maple for staining. For strength, especially if your desk will hold heavy items, use hardwood or thick plywood.
You will also need specific hardware:
Kreg Pocket Hole Screws (1 1/4 inch)
Wood Screws (2 1/2 inch)
Brad Nails (1 1/4 inch)
Wood Glue
Safety Gear Checklist
Safety is very important when you build. Always protect yourself when working with tools and wood.
Protective Eyewear: Wear safety glasses to guard against wood chips and dust.
Hearing Protection: Use earplugs or earmuffs to protect your ears from loud tools.
Respiratory Masks: Wear an N95 mask or a higher-rated respirator to avoid breathing in fine wood dust.
Gloves: Protect your hands from splinters and cuts.
Protective Clothing: Wear fitted, durable clothes. Avoid loose clothing that can get caught in machinery.
First Aid Kit: Keep a fully stocked first aid kit nearby for quick response to any minor injuries.
Build Your DIY Floating Corner Desk: Step-by-Step
Now, you will build your diy wood floating corner desk. This section guides you through the core construction. You will build a diy floating desk that fits your space perfectly. This process helps you build a sturdy and functional desk.
Cutting Wood to Size
Accurate cuts are important for a strong desk. You need precise tools for this step. Use a sharpened #2 pencil or a .07 mechanical pencil for clear lines. Avoid flat carpenter pencils. For measuring, use a flat tape measure. A 12 or 16-foot tape measure with detailed measurements (1/16, 1/8) works best. Essential squares include a 12-inch metal ruler, a combination square for 90 and 45-degree lines, and an engineer’s square for exact 90-degree lines.
When you mark your wood, use a ‘V’ mark. The base of the ‘V’ shows the exact cutting line. A single line can be confusing. Always establish a ‘reference surface’ on your wood. Use this surface for all measurements on that piece. This ensures uniformity. If you make many identical parts, like chair legs, stack them. Mark all pieces at once using a square. This saves time. It also reduces errors.
You must understand how wood moves. Wood expands and contracts with moisture changes. Consider the wood species you chose. Think about the grain direction. Allow for expansion gaps in your design. Acclimate the wood to your home’s environment. A pro-grade moisture meter helps you check moisture content.
Use the right marking tools. Sharp pencils make fine lines. Markers create bold lines on rough surfaces. Marking knives offer high accuracy for joints. They slice wood fibers for exact references. Awls mark points or scribe lines for rough cuts. Chalk lines create long, straight lines on large panels.
Remember the rule: “Measure twice, cut once.” Take your time when measuring and marking. Account for the saw’s kerf. This is the width of the cut. Mark which side of the line your blade should be on. This ensures a precise cut. Jigs and templates are also helpful. They ensure accuracy and repeatability. First, decide your task. Then, build your jig or template. Test it on scrap wood. Adjust it as needed.
Assembling the Support Frame
The support frame holds your desk. It must be strong. Follow these steps to build a sturdy frame:
Plan and Design: First, plan your desk frame. Take all necessary measurements.
Cut Batons: Cut all required lengths of wood batons for the frame.
Drill Pilot Holes: Drill pilot holes. Countersink them. This prevents wood splitting. It also ensures screws sit flush.
Assemble Frame: Assemble the frame. Use 100mm screws for maximum sturdiness.
Mark Wall Position: Mark the frame’s position on the wall. Use a level to ensure it is straight.
Drill Frame Holes: Drill pilot holes on the frame for wall mounting. Countersink these holes.
Mark Wall: Mark the wall through the frame’s pilot holes.
Drill Wall Holes: Drill holes in the wall. Use a masonry bit. Insert wall plugs into these holes.
Secure Frame: Securely fix the frame to the wall. Use 100mm screws. Tighten them methodically.
This process creates a strong foundation for your floating desk.
Attaching the Desktop Surface
Now, you will attach the desktop surface to the frame. You have several options for fasteners and adhesives. Light-curable adhesives (LCAs) are a good choice. They cure fast. You can control their placement precisely. They offer strong bonds. They can join different materials like glass, plastic, and metal.
Other effective options include various 3M products.
3M™ VHB™ Tapes: These are double-sided acrylic foam tapes. They create strong, long-lasting bonds. They work on low surface energy materials without primer. They offer high bond strength and resist extreme temperatures. They also resist UV light, moisture, and solvents. These tapes are good for building components.
3M™ Scotch-Weld™ Structural Adhesives: These are strong adhesives. They bond many materials.
Adhesive Transfer Tapes and Double Coated Tapes: These tapes offer high adhesion. They work on various materials. They perform well in harsh conditions.
Spray Adhesives: These are easy to apply.
Foam Tapes: These provide cushioning and bonding.
Hot Melt Adhesives: These cure quickly.
For attaching your desktop, consider specific 3M products. 3M™ Double Coated Tapes with 3M™ Adhesive 300MP offer high adhesion. They work on low surface energy plastics and foams. They resist UV and humidity. 3M™ High-Strength Acrylic Adhesive 300LSE bonds hard-to-stick materials. It provides good anti-lifting properties. It allows design freedom without mechanical fasteners. 3M™ Scotch-Weld™ Structural Plastic Adhesives DP8010/DP8010NS bond many low surface energy plastics. You do not need special surface preparation. They replace screws and rivets. They resist chemicals, water, and corrosion. These adhesives are great for multi-material assemblies.
Choose the method that best suits your materials and desired strength.
Installing and Finishing Your DIY Desk
You have built the core of your desk. Now, you will install it and give it a finished look. This step ensures your desk is secure, stable, and beautiful. You can personalize your desk to fit your style.
Mounting the Desk to the Wall
Mounting your desk securely to the wall is crucial. This step ensures safety and stability. You need to find the wall studs. A stud finder helps you locate these wooden supports behind your drywall. Mark their positions clearly.
For maximum weight capacity, consider several factors. Space your brackets 24 inches apart or less. This supports up to 50 pounds per linear foot, evenly distributed. You can space them up to 32 inches apart, but closer is better for heavier loads. Use more brackets for increased weight capacity. For heavy items, like a fully loaded bookshelf, place brackets 24 inches apart or closer. The bracket material also matters. Brackets custom-fabricated from 1.5-inch wide American steel channel are very sturdy. They can hold over 500 pounds.
The way you mount brackets to the wall directly impacts load capacity. Different wall constructions need different anchors. Always mount brackets to the wall in multiple locations. For example, use three locations for a single bracket. Floating desks are not truly “floating.” They mount securely to studs or solid backing. They use hidden brackets or cleats. When you secure your desk directly into studs, it holds significantly more weight. This is much better than anchoring into drywall alone. Stud-mounted installations can support 30 to 100 pounds or more. This depends on the desk’s length and the hardware you use. Commercial-grade steel brackets are better than low-grade metal brackets for heavier loads. Drywall-only installations are riskier. Avoid them for heavy items without reinforcement.
Ensuring Stability and Leveling
A stable and level desk provides a comfortable workspace. Follow these steps to ensure your desk is perfectly installed:
Find Studs: Prioritize screwing brackets into studs. This provides long-term stability and longevity. You might sacrifice perfect symmetry, but stability is more important.
Pre-drill Holes: Always pre-drill holes for screws. This makes insertion easier. It also prevents wood from splitting.
Leveling Brackets: Install the first screw in the center hole of your bracket. Then, use a level to ensure the bracket is straight. Secure the remaining screws once it is level.
Account for Material Height: When you measure for bracket placement, consider the thickness of your desk material. For example, a butcher block top has significant thickness. This ensures your desk sits at the desired final height.
Secure Desk to Brackets: Place the desk onto the brackets. Re-check for levelness. Pre-drill slightly beneath the wood or through the brackets. This helps you screw the desk to the brackets.
Always use a level during installation. This ensures a straight and even result. You will have a stable and functional diy floating desk.
Staining, Painting, and Sealing
Finishing your desk protects the wood and enhances its appearance. You have several options: staining, painting, or sealing. Each has advantages and disadvantages.
Feature | Paint | Stain |
|---|---|---|
Durability | Superior durability; excellent protection from wear and tear; resists moisture damage; retains color over time | Less durable; fades over time; requires more frequent reapplication |
Color Selection | Much greater range of colors; easy to repaint without stripping old layers | Limited color selection |
Maintenance | Requires regular cleaning and touch-ups; offers more protection from elements | Requires more frequent maintenance due to fading from UV rays; spills need quick cleanup |
Environmental Impact | Generally more hazardous due to higher VOC levels (50-100 g/L for conventional paints); eco-friendly low/zero-VOC options available | Usually contains fewer VOCs than paint; still has environmental impact from petrochemicals and solvents; oil-based stains produce more fumes |
Consider other finish types as well:
Finish Type | Pros | Cons |
|---|---|---|
Wood Dyes | Vibrant, consistent color; wide range of effects | Challenging to apply; requires protective topcoat |
Paint | Excellent coverage; wide range of color options; durable protection | Obscures natural wood beauty; extensive surface preparation |
Epoxy Resin | Crystal-clear, high-gloss finish; very durable against moisture and scratches | Challenging to apply; may require special equipment; more expensive |
Tung Oil | Easy to apply; good water resistance; beautiful, natural finish | Takes longer to dry; may require multiple coats |
Polyurethane Varnish | Highly durable; water-resistant; available in various sheens | More difficult to apply; may yellow over time; can look like plastic |
Spar Varnish | Water- and UV-resistant; accommodates wood movement | More difficult to apply; longer drying time |
Shellac | Easy to apply; dries quickly; available in various shades | Limited protection against moisture and scratches; sensitive to heat and alcohol |
Lacquer | Dries quickly; high-gloss finish; resistant to moisture and scratches | Challenging to apply; requires special equipment (spray gun) |
Water-based Polyurethane | Low odor; dries quickly; clear, non-yellowing finish | Lacks durability of oil-based polyurethane; may raise wood grain |
Water-based Acrylic | Easy to apply; dries quickly; clear, non-yellowing finish | Less durable than other finishes; may require multiple coats |
Choose a finish that matches your aesthetic and functional needs. A good finish protects your desk for years.
Adding Integrated Features
You can enhance your desk’s functionality by adding integrated features. These features help keep your workspace organized and efficient.
Under-Desk Cable Management Trays: These trays keep cables off the floor and desk surface. They reduce tripping hazards. They prevent dust buildup. Some models include surge protection and built-in USB ports for easy charging.
Under-Desk Drawers: These provide hidden storage for office supplies and documents. They free up desktop space. They help maintain a clutter-free workspace. They come in various sizes and styles. You can find sliding and lockable models. They can also have multi-compartment organizers.
Integrated drawer systems often feature soft-close mechanisms and full-extension slides. This allows easy access to contents. They include a combination of deep and shallow compartments. Adjustable dividers offer customized storage. High-quality materials ensure smooth operation and stability. Modern desks also incorporate smart technology. This includes built-in USB charging ports and power outlets. Dedicated cable management channels and grommets help organize power and data connections. Adding these features makes your build a diy floating corner desk even more practical.
You now understand the many benefits of a diy wood floating corner desk. This project saves valuable space, offers great function, and looks stylish. You gain a custom desk perfectly suited for your needs. Building your own desk brings a great sense of accomplishment. You can confidently build this beautiful and practical home office solution. Even beginners can achieve this with careful planning and execution.
FAQ
How much weight can my DIY floating desk hold?
Your floating desk holds a lot of weight. You must mount it into wall studs. This provides the best support. A properly installed desk can hold 30 to 100 pounds. This depends on the hardware you use. Use strong brackets for heavier items on your desk.
Can a beginner build this floating desk?
Yes, you can build this desk. This project is beginner-friendly. You need careful planning and basic tools. Follow the steps closely. You will create a functional and stylish desk. You will feel proud of your new workspace.
What is the best wood for a DIY floating desk?
Plywood is a great choice. It is strong and affordable. It does not split easily. Solid wood like oak or maple offers a premium look. You can choose wood that matches your style. This helps you build a beautiful desk.
How do I clean and maintain my floating desk?
Clean your desk regularly. Use a soft cloth and mild cleaner. Avoid harsh chemicals. Reapply sealant every few years. This protects the wood. It keeps your desk looking new. This simple care extends your desk’s life.


