
You often need more storage space. Your walls are frequently underutilized. DIY storage bracket shelving offers a simple, cost-effective, and customizable solution for any room. This diy storage project transforms empty walls into valuable organization areas. We provide an easy storage solution for your home. We will guide you through this diy process. You will create functional and attractive storage. This is a perfect solution for everyone, regardless of skill level.
Why DIY Storage Shelves?
Creating your own diy storage shelves offers great satisfaction and practicality. You gain control over your home organization. These shelves can hold books, display decor, or even support a flat-panel TV. You build exactly what you need.
Cost-Effective Storage
Building your own shelves is often much more affordable than buying pre-made units. You save money on labor and design costs. You choose materials that fit your budget. This makes DIY a smart financial solution for your home.
Customization for Any Space
DIY shelving allows for complete customization. You can design shelves to fit any awkward nook or wall. This means you get a perfect fit every time. You choose the exact dimensions, style, and finish. This makes your storage truly customizable. You can match your home’s decor perfectly.
Beginner-Friendly Project
You might think building shelves is hard, but many DIY projects are very beginner-friendly. For example, stacked plank and block shelving is easy to assemble. You just cut wood blocks and stack them. An industrial metal pipes shelf is also quick. You only need one plank and a few pipe fittings. These projects have high success rates. You can easily create functional storage with basic tools. This makes diy shelving an accessible project for anyone.
Versatility for Every Room
DIY shelves provide a versatile solution for every room in your house. In your garage, you can store sports equipment, tools, or yard supplies. Kitchen shelves keep small appliances handy. They also help you track food inventory. In living rooms, shelves give each item a dedicated spot. This protects free space and reduces clutter. You can organize items like books, games, or decorative pieces.
Planning Your DIY Storage
Careful planning makes your DIY storage project successful. You need to think about what you want to store and where you want to put it. This step saves you time and effort later.
Assess Needs and Location
First, consider the specific items you plan to store. This helps you decide the shelf depth and height. For example, books need less depth than large storage bins. Think about the room where you will build your shelves. Different areas have different needs.
Closet Type | Standard Width Range (inches) |
|---|---|
Bedroom Closet | 24 to 48 (up to 60 in larger) |
Linen Closet | 18 to 30 |
Pantry Closet | 12 to 36 |
Utility Closet | 30 to 60 |
Walk-in Closet | 36 to 48 |
Reach-in Closet | 24 to 36 |
Side Wall Shelving | 12 to 18 |
Corner Shelves | 12 to 18 |
You also need to think about the items you will store. Clothing needs 24-36 inches of width. Shoes require 24-48 inches. Towels and linens usually fit well on shelves around 30 inches wide.
Measure and Sketch Layout
Measure your wall space accurately. Sketch different layouts. You can draw options for traditional shelves or modern floating shelves. Consider box-style shelves using plywood for a different look. Sketching helps you visualize the final product. It also helps you catch any potential problems before you start building.
Determine Weight Capacity
The weight of your items affects your shelf design. Heavy items need stronger brackets and thicker shelf material. For example, a garage storing tools requires heavy-duty brackets. Lighter items, like decorative pieces, need less support. Always choose materials and brackets that can safely hold your intended load. This ensures your diy storage is safe and lasts a long time.
Consider Corner Shelves
Corner shelves use often-wasted space. They free up floor space and provide vertical storage. This is very helpful in small rooms. Corner shelves also make a room feel larger by drawing your eye up. You can use them to display decor or organize household items.
Tip: Corner shelves add aesthetic value. You can choose materials like wood or metal to match your home’s style.
When designing corner shelves, think about the materials. Solid hardwoods like White Oak or Maple offer durability and unique looks. You also decide how the two shelf surfaces connect. A straight corner design, where two shelves meet at a 90-degree angle, offers strength. It also simplifies customization. A 45-degree angled connection creates a continuous surface. However, it is weaker and harder to install perfectly.
Materials and Tools for Your Wall-Mounted Shelf
You need the right materials and tools for a successful DIY shelving project. Choosing these items carefully ensures your shelves are strong, safe, and look good. This section guides you through selecting everything you need.
Choosing Brackets
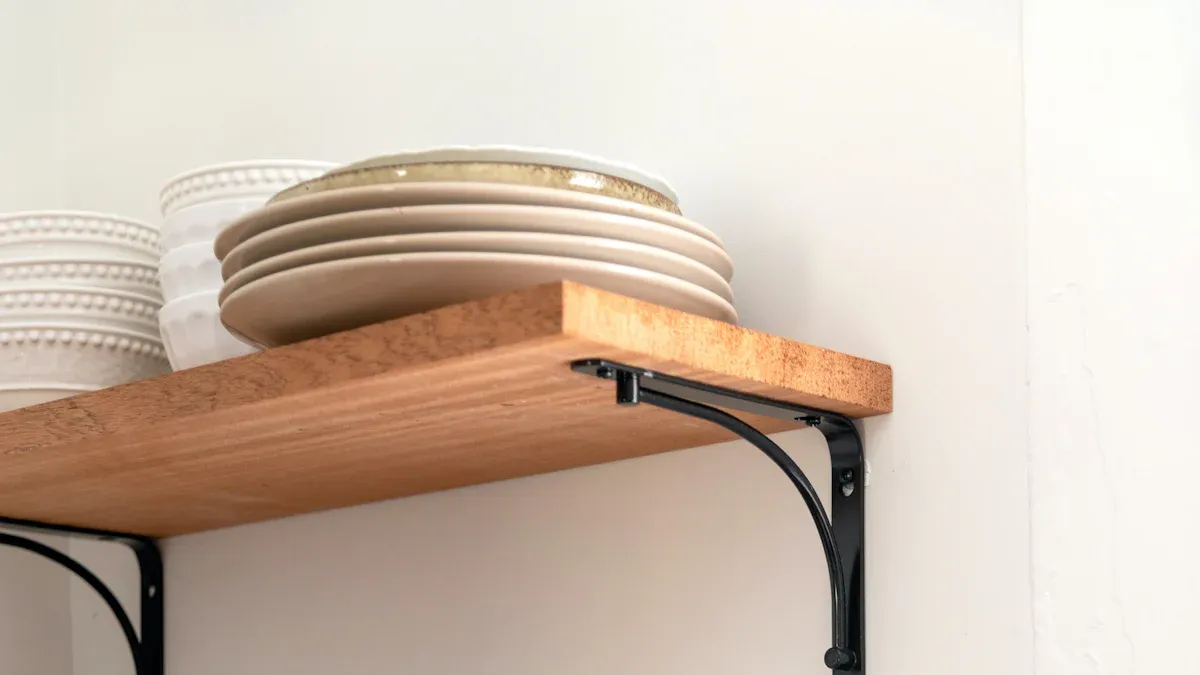
Brackets provide the support for your shelves. You have many options. L-brackets are common and offer good support. Heavy-duty 24-inch brackets work well for deeper shelves or heavier loads, especially in garages. Decorative brackets add style to your living spaces. For a sleek, minimalist look, consider blind floating shelf brackets. These brackets hide inside the shelf, making it appear to float. When you mount them directly into wall studs, blind floating shelf brackets can hold up to 100 lbs. You can also use alternative materials like Kee Klamp fittings and pipes for an industrial aesthetic.
Selecting Shelf Material
The material you choose for your shelves impacts both strength and appearance. You can select from wood, MDF, plywood, or wire. Each material has unique characteristics.
Material | Pros | Cons |
|---|---|---|
MDF | Smooth, even surface (ideal for painting); relatively cheap; dense and heavy structure. | Vulnerable to moisture; creates a lot of sawdust when cut; warps easily; likely to sag with heavy weights. |
Plywood | Strong, durable, attractive; more water-resistant than MDF; less likely to expand or warp due to moisture; can look like solid wood; lighter than real wood; flexible; unlikely to warp, expand, or shrink. | More expensive than MDF; requires surface preparation for painting (loses natural look); may require reinforcements for heavy shelving. |
Wood | Incredibly versatile (countless types); can be painted or stained; durable; sturdy wooden closets can hold a lot of weight without bending or warping. | Can get expensive quickly depending on the type; MDF may sag (not for heavy items); plywood may require reinforcements for shelving. |
Wire | Very lightweight (easy to reorganize); generally less expensive than wood and melamine; simplicity gives a clean look; gaps allow visibility of contents. | Gaps can be spacious, allowing smaller items to slip through. |
Consider the weight of the items you plan to store and the desired look when making your choice.
Fasteners and Anchors
Proper fasteners and anchors are crucial for securing your shelves to the wall. The type you use depends on your wall material.
Wall Type | Recommended Fasteners/Anchors |
|---|---|
Drywall | Molly Bolts / Hollow Wall Anchors, Plastic Anchors (ribbed, tubular, conical), Mungo® Nylon Plug Anchors, Conical / EZ Plastic Anchors (lightweight, easy-to-install) |
Plaster | Molly Bolts / Hollow Wall Anchors, Plastic Anchors (ribbed, tubular, conical), Mungo® Nylon Plug Anchors |
Concrete | Commercial Concrete Screws (Blue Finish), Tapking® Premium SD Screws, Commercial Wedge Anchors (Zinc CR+3), Ultrawedge®+ (Zinc CR+3), 304 & 316 Stainless Ultrawedge® Anchors, Hot-Dipped Galvanized (HDG) Wedge Anchors, Hammer Drive Anchors, Split-Fast Anchors, Pin Drive Expansion Anchors, Sleeve Anchors |
Masonry (general) | Concrete Screw Anchors, Shield & Expansion Anchors (Single & Double Expansion Shields, Lag Screw Expansion Shields), Hammer Drive & Pin Anchors, Sleeve Anchors |
For drywall, plastic anchors work for lightweight items like pictures. For heavier items, such as a wall-mounted shelf, metal and toggle anchors offer more support.
Molly Bolts: These metal sleeves expand behind the plaster. They are sturdy and reliable for holding significant weight. You can find them in various sizes.
Toggle Bolts: These consist of a metal toggle and a screw. The toggle expands behind the plaster for strong support. They also come in different sizes.
Plastic Wall Anchors: These sturdy plastic anchors expand when you tighten a screw. This creates a strong grip. TripleGrip plastic wall anchors are often provided with hanging display systems and work well on plaster walls.
The choice of wall anchor also depends on its weight capacity. Plastic anchors are best for lightweight items. Zinc or metal anchors are ideal for heavier items. Specific anchors like Snap Skru, Zinc Drywall, and Snap Toggle anchors have specified weight ratings. Other anchors indicate suitable applications. For example, white and blue plastic anchors are for lightweight items. Lead anchors are for medium-duty applications.
Essential Tools
You need a few basic tools to install your shelves. These tools help you work accurately and safely.
Stud finder
Cordless drill
4-foot level
Awl
Hammer
Phillips screwdriver
Tape measure
1/8-inch drill bit
Pencil
Gathering these tools before you start will make the installation process much smoother.
Installing Your Wall-Mounted Shelf
Installing your new wall-mounted shelf requires careful steps. You want your shelves to be strong and safe. Follow these diy shelf instructions closely for the best results.
Locate Wall Studs
Finding wall studs is the most important step for secure mounting. Studs provide solid wood for your screws. This prevents your shelves from falling.
Use a Stud Finder: These devices help you find studs quickly. They sense nails, screws, or wall density.
Locate Outlets and Switches: Electrical boxes are often attached to a stud. You can knock on the wall to find which side the stud is on.
Follow the 16-Inch Rule: Studs are usually 16 inches apart. Measure from a corner and use the knock test to confirm.
Use a Strong Magnet: A strong magnet can find nails inside the stud.
Here are the steps to find and confirm your stud locations:
Choose Your Tool: Decide if you will use a stud finder or the knocking method.
Start from a Corner: Walls usually have a stud at the corner.
Measure from an Electrical Outlet: Outlets are often next to a stud. Measure in 16 or 24-inch steps from there.
Mark the Stud Locations: Use a pencil to mark the edges of the stud.
Verify with Multiple Methods: Confirm locations using both a stud finder and the knocking technique.
Be Aware of False Positives: Double-check your findings. Do not mistake pipes or other fixtures for studs.
Mark Bracket Placement
After you find the studs, you need to mark where your brackets will go. This ensures your shelves are straight and even.
Apply Blue Painter’s Tape: Put a strip of blue painter’s tape on the wall. Place it at the height you want your shelf. Use a bubble or laser level to make sure the tape is perfectly straight. This tape protects your wall and gives you a surface to mark on.
Mark Bracket Placement on Tape: Measure and mark the exact spots for your brackets directly onto the tape. If you are installing shelves in a closet, space the brackets evenly. For heavy items in a garage, add more brackets. Try to align your markings with the wall studs. If you cannot hit a stud, plan to use wall anchors.
You will need these tools for marking:
Blue Painter’s Tape
Pencil (for marking the tape)
Stud Finder
Level
Measuring Tape
Visualize your shelf layout after you find the structural support. Mark the bracket locations on the wall. Use a level or laser guide to keep everything straight and even.
Pre-Drill Pilot Holes
You must pre-drill pilot holes before you drive screws into the wall or studs. Pilot holes prevent wood from splitting. They also make it easier to insert screws. Choose the correct drill bit size for your screws.
Screw Size | Hard Wood (Tapered Bit) | Hard Wood (Straight Bit) | Soft Wood (Tapered Bit) | Soft Wood (Straight Bit) | Countersink Size |
|---|---|---|---|---|---|
#2 | 3/32″ | 1/16″ | 5/64″ | 1/16″ | 1/4″ |
#3 | 7/64″ | 5/64″ | 3/32″ | 1/16″ | 1/4″ |
#4 | 7/64″ | 5/64″ | 3/32″ | 1/16″ | 1/4″ |
#5 | 1/8″ | 3/32″ | 7/64″ | 5/64″ | 5/16″ |
#6 | 9/64″ | 7/64″ | 1/8″ | 3/32″ | 5/16″ |
#7 | 5/32″ | 7/64″ | 9/64″ | 3/32″ | 5/16″ |
#8 | 11/64″ | 1/8″ | 5/32″ | 7/64″ | 3/8″ |
#9 | 3/16″ | 9/64″ | 11/64″ | 1/8″ | 3/8″ |
#10 | 13/64″ | 9/64″ | 3/16″ | 1/8″ | 7/16″ |
#12 | 7/32″ | 5/32″ | 13/64″ | 9/64″ | 7/16″ |
#14 | 1/4″ | 11/64″ | 15/64″ | 5/32″ | 1/2″ |
#16 | 9/32″ | 3/16″ | 17/64″ | 11/64″ | 9/16″ |
Secure Brackets to Wall
The way you secure your brackets depends on your wall type. Use the right anchors for a strong hold.
For Drywall (using Snap Toggle Bolts for heavy objects):
Drill a 1/2-inch pilot hole.
Insert the metal part of the toggle bolt into the hole.
Pull the plastic strap to make sure the metal is tight against the back of the drywall.
Pull the plastic strap until it is flush with the wall.
Snap off the extra plastic.
Insert the screw into the wall.
For Plaster Walls (using self-drilling metal anchors):
Use self-drilling metal anchors. These anchors easily go through tough plaster. Install them like any other wall anchor.
For Brick Walls:
Use a hammer drill and masonry bits to make a pilot hole. A regular drill will not be strong enough.
Use steel anchor screws. These screws have self-tapping threads that grip the brick or exterior block wall. You do not need a separate anchor.
General Drywall Anchor Installation (for lighter items):
Use a stud finder to confirm there is no stud behind the wall.
Use a pilot bit to make a hole. The hole should be about the same width as the plastic anchor’s tip.
Insert the anchor’s tip into the wall.
Use a screwdriver to push the anchor flush with the wall.
Use a screwdriver to twist in the screw. You will hear a click. This means the anchor has split to grip the wall.
Prepare Shelf Boards
Before you attach your shelf boards, make sure they are ready. This might mean cutting them to the right length. You might also want to paint, stain, or seal them. This protects the wood and makes your shelves look good.
Fasten Shelves to Brackets
Now you will attach your shelf boards to the brackets. This step makes your shelves stable and ready for use.
Install Brackets Securely: Attach your brackets using the right screws. Make sure at least one screw goes into a wall stud for maximum support. Use a low-speed drill to avoid damage. Check that each bracket is level.
Secure Shelving Material: Once the brackets are in place, attach the shelf board to them. Follow the manufacturer’s instructions for your specific brackets. Double-check that the shelf is level.
Choose the Right Brackets: Select brackets that match the weight and size of your shelf. Always follow the manufacturer’s weight limits and installation guides.
Double-Check Work: Before you finish, measure and align your markings for drilling. Use a level to ensure your shelves are straight. After installation, gently shake the shelf. This confirms it is secure.
Use Shims for Uneven Walls: If your walls are not perfectly straight, use shims behind the brackets. This creates a level surface. It makes your shelves look better and more reliable.
Regularly Inspect and Tighten: Check your brackets often for any looseness. This can happen due to weight changes or wear. Tighten screws or anchors as needed. This keeps your shelves safe and stable.
Tips for Success and Creative DIY Storage Shelves
You have built your shelves. Now, ensure they serve you well and look great. Follow these tips for success.
Ensure Shelves are Level
Always double-check that your shelves are perfectly level. Uneven shelves cause problems. For example, uneven load distribution puts concentrated pressure on your floor. This can cause cracks or structural damage over time. Misaligned shelves also cause equipment damage. Forklifts or pallet jacks can scrape them. This leads to wear and tear or bent forks. You might also lose or misplace inventory. This happens when shelf installation does not match your management system.
Distribute Weight Evenly
Proper weight distribution keeps your shelves safe. Respect the beam capacity your manufacturer provides. They should give you a permanent mark and a weight label. Ensure you place beams correctly. Do not change or remove beams without asking the manufacturer. Maintain specific spacing. Leave at least 75 mm between a load and the beam above it. Pallets should overhang both the front and back beam by 50 to 100 mm. Regularly inspect all parts. Look for deformations, loosening, or corrosion. Stack goods to maintain stability. Train workers in safe handling. Avoid stacking heavy loads against walls unless they can withstand the pressure.
Use Correct Anchors
Using the right wall anchors is critical. Incorrect anchors can fail. This happens if the hole is too big or you overload the anchor. Using the wrong anchor type, like plastic anchors for heavy items, also causes failure. Weak drywall or overtightened screws can also compromise anchors. Incorrect anchors lead to falling shelves. They can damage your walls or cause personal injury. Substandard hardware compromises your shelving’s structural integrity.
Finishing Touches
Finishing your shelves adds durability and beauty. You can choose a clear satin finish. This enhances the wood’s natural look. Painted finishes, like black or white, offer a modern style. Stains come in many varieties. Try Mahogany, nutmeg, espresso, or hatch grey. You can even find ‘rough cuts’ for a rustic feel. Unfinished options let you custom paint or stain them.
Creative Uses
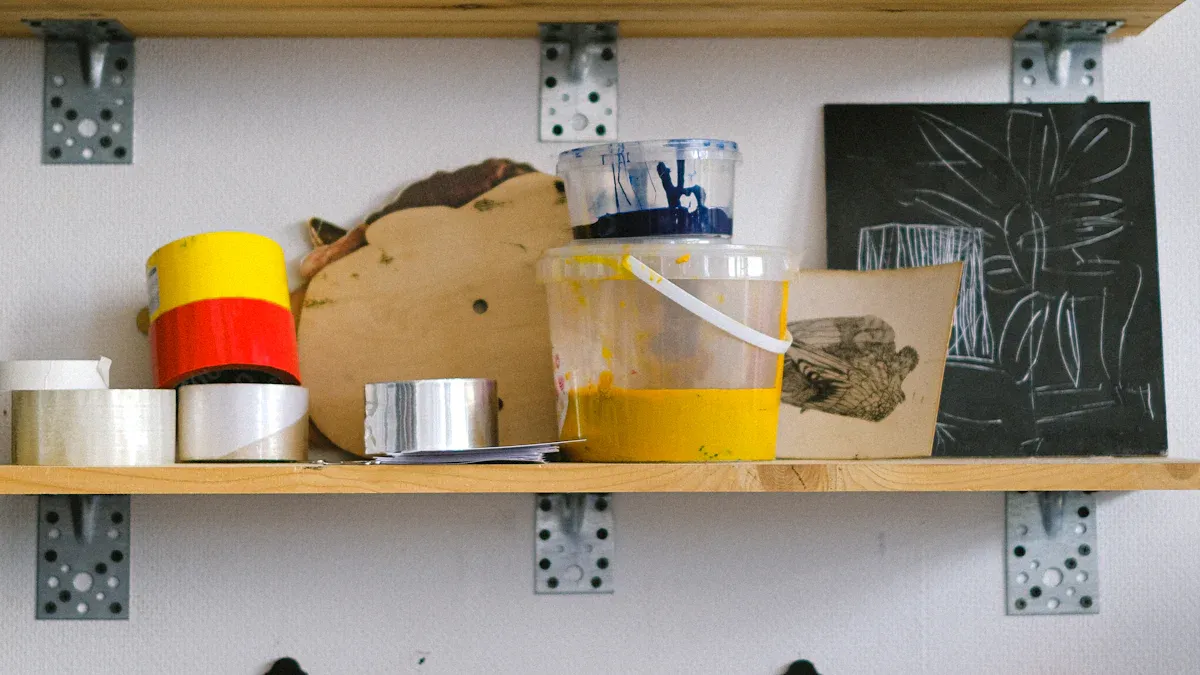
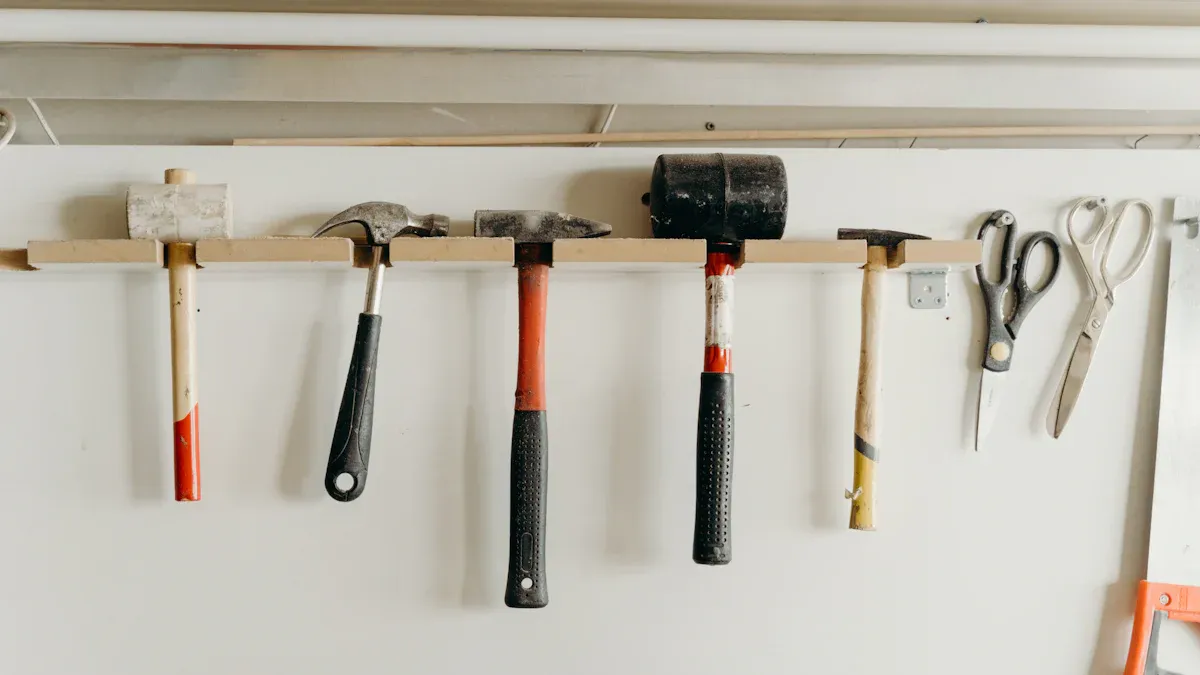
Your diy shelves offer many creative uses. In the kitchen, install heavy-duty floating wood shelves on a tiled backsplash for plates. Reclaimed wood shelves with polished nickel brackets create decorative displays. Multipurpose metal shelving units work well for food and dishes. These kitchen storage shelves expand your space. In a bonus room, use skinny custom-sized floating shelves for books. For your garage, build heavy-duty shelves from 2x4s and plywood. These hold storage bins, tools, and yard equipment. A built-in bookshelf at the foot of a kid’s bed maximizes space. This storage solution can even include a hidden nook.
You now see the great benefits of diy storage bracket shelving. You achieve enhanced organization, maximized space, and personal satisfaction. This project is easy and effective when you follow the steps. We encourage you to tackle your own shelving project. You will enjoy a clutter-free and functional space. This simple diy solution transforms your home. It offers a perfect storage solution for your needs. This wall-mounted storage is a great solution. You will love this new storage.
FAQ
How much weight can my DIY shelves hold?
The weight your shelves hold depends on several factors. These include bracket type, shelf material, and anchor type. Always check the manufacturer’s weight limits for brackets and anchors. You must also secure them into wall studs for maximum support.
Can I install shelves if I cannot find a wall stud?
Yes, you can install shelves without finding a wall stud. You need to use appropriate wall anchors. For example, toggle bolts or heavy-duty drywall anchors work well. These anchors provide strong support in drywall. Always match the anchor to the weight you plan to put on the shelf.
What is the best way to clean my wooden DIY shelves?
You can clean wooden DIY shelves easily. Use a soft, damp cloth to wipe them down. Avoid harsh chemicals. These chemicals can damage the wood finish. For stained or painted shelves, use a mild wood cleaner. Always dry the shelves completely after cleaning.
How do I prevent my shelves from sagging over time?
You can prevent shelves from sagging. First, choose a strong shelf material. Plywood or solid wood works best. Second, add enough brackets. Space them closer together for heavier items. Third, do not overload your shelves. Distribute weight evenly across the shelf surface.


