
Your home reflects your personality. You often need effective storage. DIY shelves offer a unique solution. They combine functionality and aesthetic appeal. You gain custom storage for any decor style. Building your own shelf is rewarding. This guide helps you create easy to assemble shelves. You can transform your space with handmade shelves.
Benefits of DIY Storage Shelves
Cost Savings and Customization
You gain many advantages when you choose DIY storage shelves. First, you save a lot of money. Building your own shelves costs significantly less than buying pre-made units from a store. For instance, you can save 50% to 70% on garage shelving projects. One DIY storage shelf project had a total material cost of approximately $55. Another set of DIY garage shelves was constructed for just under $50, including glue and screws. These savings are substantial, making DIY a budget-friendly option.
Beyond cost, you achieve unparalleled customization. You decide the exact size, shape, and finish of your shelves. This means your diy shelves will perfectly fit your specific space and needs. You can create a unique look that complements your home’s decor. Store-bought options rarely offer this level of personalization. You control every detail, from the materials you use to the final color or stain.
Personal Expression and Space Optimization
DIY projects also allow for great personal expression. You can infuse your creativity into every design choice. This makes your home truly unique. Your handmade shelves reflect your individual style. This adds character and warmth to your living space.
Furthermore, you can efficiently optimize your space. DIY shelves are ideal for small or unusual spaces where standard furniture simply does not fit.
Think about areas with sloped ceilings, like attics or lofts.
Consider tight hallways or the often-unused space under stairs.
Awkward corners in bedrooms, living rooms, or small landings also benefit greatly.
You can build a tailored shelf specifically for these tricky spots. This transforms wasted space into valuable storage. You can create extra-slim units or integrated doorway shelves. This maximizes every inch of your home. You get practical storage that looks great and fits perfectly, making your home more organized and functional.
Planning Your DIY Shelves
Planning is crucial for successful DIY projects. You need to think about what you want to achieve. This ensures your new shelves meet your needs.
Assessing Needs and Measuring Space
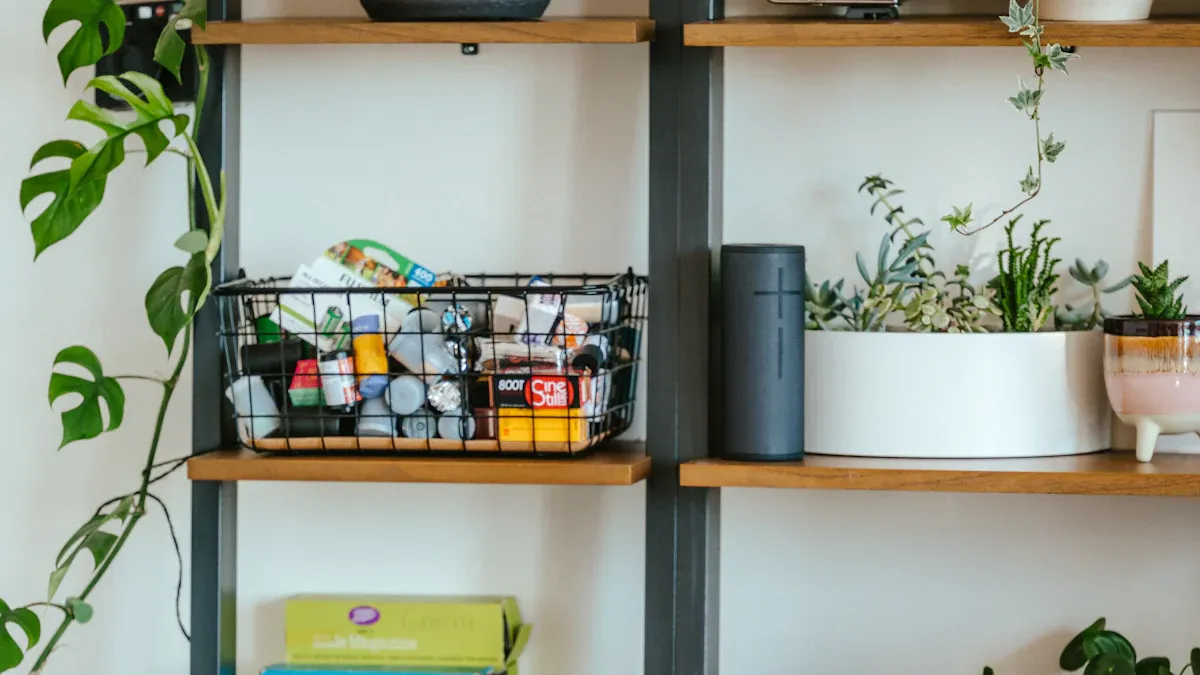
First, you assess your storage needs. Look for areas in your home that collect clutter. These “clutter hotspots” show where you need more storage. Consider shelves, side tables, or window sills that often accumulate miscellaneous objects. This indicates specific storage needs. You also evaluate available space. Think about both floor space and vertical space. Wall-mounted shelves can significantly increase your storage potential.
Next, you assess the items you plan to store. This includes household goods, books, decorations, and seasonal items. This assessment helps you determine the required capacity. It also helps you decide how to divide the storage space. You measure the exact dimensions of your chosen area. This ensures your DIY shelves fit perfectly.
Choosing Your Decor Style
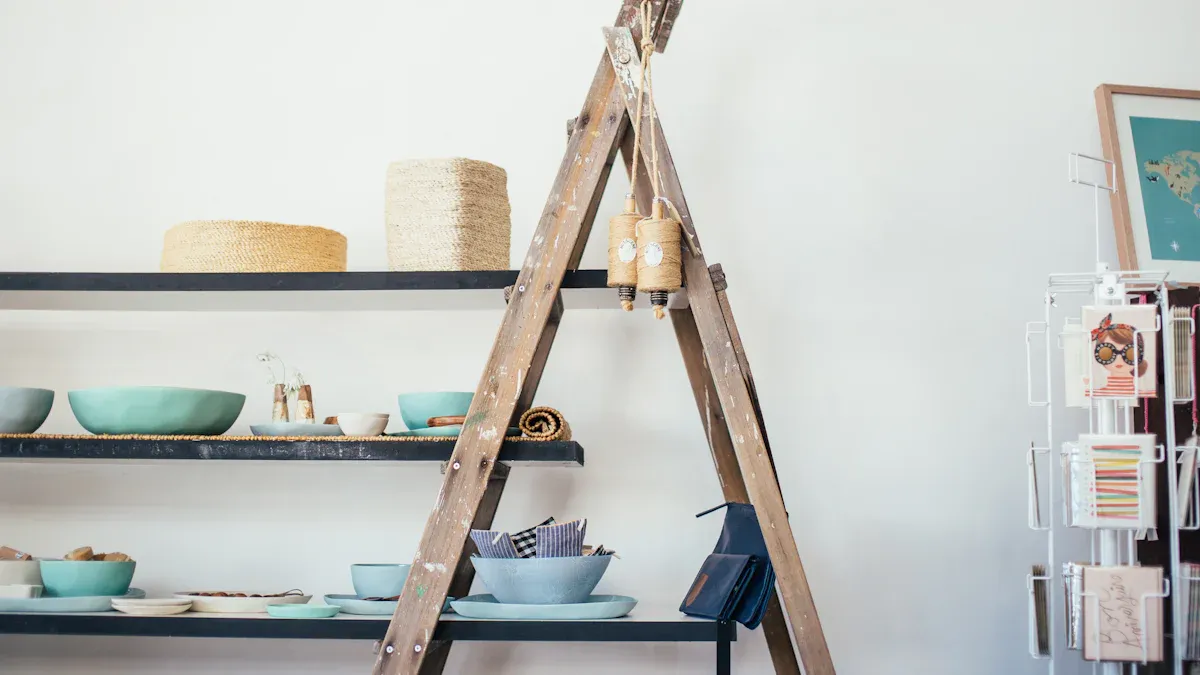
You choose a decor style that complements your home. Your shelves should enhance the overall look of the room. For example, a modern minimalist style focuses on simplicity. It includes only essential elements to promote calmness. This style uses clean lines and geometric shapes. It creates order and visual harmony. A neutral color palette, like whites, grays, and earth tones, provides a calming backdrop. Furniture is functional and aesthetically pleasing. Spaces remain decluttered. This enhances the environment. You keep spaces free of unnecessary items. This “less is more” principle guides your design choices.
Designing Your Custom Shelves
Now, you design your custom shelves. You consider several design principles. Choose materials that match your home’s aesthetic. Select dimensions that fit the space and functional needs. Think about the installation type. How will you mount the shelf? Ensure the shelf complements your existing decor. This could be minimalist, industrial, rustic, or contemporary.
You create contrast and cohesion. Use a balanced mix of light and dark tones. This adds depth and character. It makes your display a focal point. Embrace negative space. Intentionally leave areas open. This creates breathing room. It allows each piece to stand out. For floating shelves, prioritize balance and minimalism. Treat them as a place for a few carefully chosen pieces. Do not fill every inch. You balance heights by mixing tall and short objects. This creates visual rhythm. You layer textures with wood, glass, ceramics, and greenery. This brings your shelves to life. Curate, do not clutter. Leave negative space. This allows your shelves to breathe. Individual items shine. Anchor with function. Integrate practical items with decorative ones. This makes the space feel lived-in and styled. Ensure perfect proportions. Balance open space and storage capacity. Consider premium finishes. They elevate your decor naturally. Custom sizing ensures your custom shelving fits seamlessly. It avoids awkward gaps or wasted space.
Materials and Tools for DIY Shelves
Building your own shelves requires the right materials and tools. You make smart choices to ensure your shelf is strong and looks good.
Selecting Shelf Materials and Supports
You choose materials based on what you plan to store. Different materials offer varying strengths. For example, plywood is a popular choice for diy shelves. Its load capacity changes with thickness:
Plywood Thickness | Maximum Span (inches) | Load Capacity (PSF) |
|---|---|---|
1/4″ (6mm) | 12 | 10 – 15 |
3/8″ (9mm) | 16 | 20 – 25 |
1/2″ (12mm) | 24 | 30 – 40 |
5/8″ (15mm) | 32 | 40 – 50 |
3/4″ (18mm) | 48 | 50 – 60 |
1″ (25mm) | 60 | 80 – 100 |
You can see that 3/4″ plywood supports 50-60 lbs per square foot. This makes it good for general storage. You also consider other wood types like pine or oak. These offer different aesthetics and strengths. You select supports like brackets or cleats. These must match your chosen material and the weight your shelf will hold.
Essential Tools for Construction
You need specific tools for diy construction. These tools help you cut, fasten, and finish your shelves.
Drills, Drivers & Impacts: You use these for making holes and driving screws.
Saws: Circular, Track, Miter, Table, and Band Saws help you cut wood precisely.
Routers: You use a router for shaping edges or making decorative cuts.
Joining Systems: These help you connect pieces of wood securely.
You can rent some of these tools if you do not own them. This saves you money on your diy project.
Sourcing Inexpensive or Upcycled Materials
You can save even more money by finding inexpensive or upcycled materials. This is a smart way to build your diy shelves.
Leftover or spare wood: You might have pieces from other projects.
Old painted canvases: You can repurpose these into unique
shelfsurfaces.Large tiles: These offer a durable and decorative option.
Skirting board: Its depth and detailing make it suitable for small
shelves.Shelves from old kitchen cabinets: You can remove and reuse these.
You look for these items at salvage yards, thrift stores, or even online marketplaces. This approach makes your diy project more sustainable and unique.
Building Your DIY Shelves: Step-by-Step
You are ready to build your diy shelves. First, you prepare your materials. Accurate cuts are very important for strong, good-looking shelves.
Preparation and Assembly
You choose the right woodcutting techniques. Consider the wood type. Hardness, grain, and density matter. Think about your project size. Large projects might use different tools than small, precise ones. Decide on your desired outcome. Do you want visible joints or clean edges?
You need essential wood cutting tools. A circular saw offers versatility. A table saw gives precise rip cuts. A miter saw makes accurate angled cuts. Hand saws provide control and finesse.
Master common types of wood cuts. Crosscuts go straight across the wood grain. You use them to create specific lengths. Rip cuts transform large boards into narrower sections efficiently.
Always prioritize safety when cutting wood. Wear Personal Protective Equipment (PPE). This includes safety glasses, hearing protection, and dust masks. Make sure your cutting tools are set up and operated correctly.
Accuracy in measuring and marking is key. Use specialized marking tools:
Marking knives give high accuracy and clean lines.
Awls mark points or rough cuts.
Chalk lines help you draw long, straight lines on big surfaces.
Master transferring measurements:
Use tick marks for precise positioning.
Story sticks help with repetitive measurements.
Direct transfer works for irregular shapes or exact fits.
Always remember the rule: “Measure twice, cut once.” Double-check all your measurements. Align the saw blade on the correct side of your marked line. Account for the saw’s kerf (the width of the cut).
Utilize jigs and templates. Decide which jig or template you need. Examples include a dovetail jig or a tenoning jig. Build it with precise dimensions. Reinforce its connections. Test it on scrap material before you use it on your actual shelf pieces.
Be comfortable with fractional and decimal measurements. You should convert between them easily. Understand potential rounding errors. Know common woodworking increments.
Develop a system for marking and labeling. Use standard symbols. Color-coding, numbering, or labels help. This ensures clear communication for mating parts throughout your project.
Calibrate your measuring tools regularly. Check them to maintain accuracy. Make sure they are in optimal working condition.
After cutting, you sand your wood pieces. Start with a coarser grit sandpaper. This removes saw marks and imperfections. Then, move to finer grits. This creates a smooth surface. A smooth surface helps finishes look better.
Finishing and Installation
Now, you apply the finishing touches to your diy shelves. This makes them look great and protects them.
You can paint, stain, seal, or distress your shelf. Staining is a popular choice for wood.
First, prepare and clean the wood surface. This prevents blotchy stain application. Sand down the top layers of wood for an even surface. Start with 60 or 80 grit sandpaper. For fine pine, start with 120 grit. Finish with 220 grit by hand. Wipe down the raw wood with mineral spirits or a pre-stain conditioner before staining.
Next, stir the wood stain gently with a paint stirrer. This mixes pigments and avoids bubbles. If the wood looks blotchy after the first pass, wipe off the stain. Apply a wood conditioner. Use water- or oil-based conditioner, depending on your stain. Wait 15 minutes, then reapply the stain.
Apply the stain using a foam roller. Use slow, long strokes. Apply thin coats. Let the entire stained piece dry overnight. Apply more stain if you want a deeper color.
After the stain dries, apply a polyurethane finish. This protects the wood. It also enhances its appearance. Allow the wood to dry for at least 24 hours after staining. Preferably, let it dry for 48 hours. In humid climates, extend this drying time up to 72 hours. Ensure the stained wood dries in a well-ventilated area.
Consider the type of stain you use:
Feature | Oil-Based Stains | Water-Based Stains |
|---|---|---|
Drying Time | Slower drying, allowing more time to wipe excess. | Faster drying. |
Penetration | Penetrate deeper into wood, resulting in richer, more vivid color. | Do not penetrate as deeply. |
Durability | Extremely durable with excellent surface adhesion, resisting peeling. Lasts a long time. | Less protective as they don’t penetrate as deeply. |
Ease of Application | Easier to apply, especially on larger pieces, due to slower drying. | Slightly more difficult to use as they raise the wood grain. |
Refreshing | Easier to refresh. | |
Cleanup/Thinning | Thinned and cleaned with mineral spirits. | Thinned and cleaned with water. |
Compatibility | Use with water-based finishes; do not mix with oil-based finishes. | |
Fumes/Odor | Do not emit VOCs, making them more environmentally friendly. | |
Mold/Mildew | More permeable, allowing air flow to prevent water trapping and decay. | |
Fixing Blotches | Easier to fix; clean with water and apply a fresh coat. |
Finally, you install your shelves. Safety is very important here.
Mounting Shelves to Masonry Walls
Select a Location: Choose your preferred location. Measure and mark with a pencil. Use a level to ensure balance.
Pre-Drill Holes: Use an electric or hammer drill. Use a masonry bit. Pre-drill straight holes deep enough for anchors. Clear any debris.
Insert Anchors: Place concrete anchors into the holes. Tap gently until they are flush. Refer to your shelving bracket instructions for anchor selection.
Install Bracket: Attach the bracket using appropriate fasteners through the anchors. This ensures stability. Use a level to make sure it is horizontal.
Install Shelving: Place the shelf onto the bracket. Secure it with screws if needed. Ensure it is tight and stable.
Mounting Shelves to Drywall and Plaster Walls
Select a Location: Mark the initial placement of the brackets on the wall with a pencil.
Find Wall Studs: Use a stud finder to locate vertical beams. They are typically 16-24 inches apart. This gives maximum stability.
Pre-Drill Holes: Drill holes into marked spots on studs. This allows for smooth screw insertion. For sections without studs, use drywall anchors or toggle bolts. These require drilling larger holes.
Install Bracket: Attach the bracket with appropriate screws. Ensure at least one screw goes into a stud. Use a low-speed drill setting to prevent damage. Check with a level.
Install Shelving: Secure the shelf material onto the bracket. Follow the manufacturer’s instructions. Confirm it is level.
Remember these general tips for installing your shelves:
Choose the right brackets. Select brackets that match the weight capacity and dimensions of your shelf. Follow manufacturer guidelines.
Double-check your work. Before drilling, measure and align your markings. Use a level to ensure straightness. After installation, gently shake the shelf to confirm it is secure.
Use shims for uneven walls. If your walls are not straight, use small wedges (shims) behind brackets. This compensates for unevenness. It ensures a level shelf.
Regularly inspect and tighten brackets. Periodically check brackets for looseness. This can happen due to weight fluctuations or wear. Tighten screws or anchors as needed.
For heavy-duty shelving, always prioritize safety.
Secure your heavy-duty industrial shelving during installation.
Invest in heavy-duty industrial shelving designed for stability.
Consider securing your shelving to the wall with brackets. This prevents it from falling.
This step-by-step guide helps you build and install your custom diy shelf safely and effectively.
Styling Your DIY Shelves

You have built your diy shelves. Now, you make them fit your home decor. Styling your shelves transforms them from simple storage into a focal point.
Integrating with Home Decor Styles
You can integrate your shelves with many style options. Each style has unique characteristics.
Farmhouse Chic: This
styleblends rustic charm with modern comfort. You use distressed wood and rustic brackets. However, current trends move away from faux-distressed furniture. Instead, you incorporate intact wood antiques. These pieces offer genuine character. You can mix authentically distressed wood, like an old mantel, with contemporary items. This creates visual depth. You achieve a refreshed farmhouse look.Modern Minimalist: This
stylefocuses on clean lines and simplicity. You often usefloating shelves. Thesefloating shelvescreate an uncluttered look.You choose finishes like glossy for a polished appearance. Matte finishes offer a subtle, sophisticated touch. Natural wood adds warmth. Reclaimed wood provides character. Painted
shelvesallow forcustomcolors.You can select eco-friendly materials. Bamboo, reclaimed wood, and recycled metal are sustainable choices. They add unique charm.
You balance open space. Avoid overcrowding your
shelf. Group decorative items in odd numbers. Mix heights, textures, and shapes. Leave negative space for an airy, organized look.You incorporate greenery. Use small potted plants or cascading vines. Pothos, succulents, or ferns work well. Choose pots that match your room’s color scheme.
You can add lighting. Integrate LED strip lights, puck lights, or wall sconces. These highlight your items. Backlit
shelvescreate ambient light. Under-shelflighting improves visibility and addsstyle.
Bohemian Rhapsody: This
styleembraces natural elements and global influences. You use macrame hangers and natural wood. You add plants, textiles, and unique finds.Industrial Edge: This
stylefeatures raw, utilitarian elements. You combine metal pipes with reclaimed wood. Exposed brick or concrete walls complement thisstyle.Coastal Calm: This
stylebrings the serenity of the beach indoors. You use light woods and white finishes. You add nautical accents and natural textures.
Creative Shelf Ideas and Maintenance
You can go beyond basic shelf designs. Many creative ideas exist.
Corner Shelves: These are excellent for small spaces. They use the often-overlooked space where walls meet.
Floating Corner Shelves: These offer a clean, modern look. They do not clutter the room. You can choose minimalist designs with clean lines. Geometric shapes like hexagons or triangles add visual interest.
Corner Ladder Shelves: These use vertical space. They lean against the wall. They fit into tight corners. You can find slim units for narrow areas. Rustic or modern styles match your room’s aesthetic.
Multi-Tiered Storage Solutions: These maximize vertical space. They hold books, plants, and small items. They often have adjustable heights for versatility.
Corner Shelving with Cabinets: This provides hidden
storage. It keeps clutter out of sight. This offers a tidy appearance. It increasesstoragecapacity.Decorative Corner Display Shelves: You design these to showcase meaningful items or collectibles. They help organize while adding personality. You can incorporate plants and greenery. This brings life into small spaces.
DIY Corner Shelf Projects: You can use repurposed materials. Old crates or pallets make unique, cost-effective
shelves. You can create customizable designs from scratch. These fit specific needs andstyles. For example, you can creatediy open shelves for kitchencorners.
Ladder Shelves: These lean against a wall. They offer a casual, versatile look. You can move them easily.
Wooden Bookcases: You can build these to fit an entire wall. They provide extensive
storagefor books and decor.
You also need to maintain your shelves. Regularly dust your shelves. Wipe them with a damp cloth. Avoid harsh chemicals. These can damage finishes. Check brackets and fasteners periodically. Tighten them if they become loose. This ensures your shelves remain safe and stable.
You now understand the great benefits of DIY shelves. They offer customization, save you money, and let you express yourself. Embrace your creativity! Start your own shelving projects today. It is an achievable and rewarding endeavor. This post gave you guidance for planning, building, and styling your custom shelf for any home decor. Share your DIY shelf creations and enjoy your new organized spaces.
FAQ
What materials are best for DIY shelves?
You can use plywood, pine, or MDF. Plywood offers strength and versatility. Pine is easy to work with. MDF provides a smooth finish for painting. Choose materials based on the weight your shelves will hold.
What tools do I need for basic shelf building?
You need a drill, a saw, and a tape measure. A level ensures straight installation. Sandpaper smooths edges. Safety glasses protect your eyes. These tools help you build a sturdy shelf.
What is the best way to secure shelves to a wall?
You should always find wall studs. Use a stud finder for this. Attach brackets directly to studs for maximum support. If no studs are available, use heavy-duty drywall anchors. This ensures your shelves are safe.
What are some common mistakes to avoid when building shelves?
Do not skip measuring twice. Always check your measurements. Avoid overloading your shelves. Use the right anchors for your wall type. Proper planning prevents many issues.


