

Rat infestations are a common, frustrating problem. Did you know 37% of American homeowners dealt with a rodent infestation last year? Around 14.8 million housing units reported seeing rodents. You need effective methods for control. This guide explores diy rat trap plans. You can choose humane options for capture and release or killer traps for eradication. Building your own diy rodent traps empowers you. It also saves money. Quantifying the full monetary loss from rodent impacts is challenging. Global efforts to control rat populations cost an estimated US$500 million annually. Choose the right trap for your situation. Consider ethical factors when you build a diy rat trap.
Key Takeaways
Building your own rat traps saves money. You can customize them for your home. This helps you control pests yourself.
You can make humane traps to catch rats alive. Release them far from your home. This keeps them safe.
For serious rat problems, you can build killer traps. Modify snap traps or use electric traps. Always be very careful with these.
Always use safe practices with traps and baits. Protect children and pets. Place traps where they cannot reach them.
If you have many rats, get help from experts. DIY methods might not be enough for big problems. Professionals can solve severe infestations.
Benefits of DIY Rodent Traps
Cost-Effective Solutions
Building your own rat traps offers significant savings. Commercial traps often come with a higher price tag. Professional pest control services are even more expensive. You can construct effective diy rodent traps using common household items. These might include old buckets, plastic bottles, or cardboard tubes. This approach drastically reduces your overall cost for rat control. For instance, a simple bucket trap costs almost nothing to build. You can create several homemade traps for the price of just one store-bought option. This method helps you manage your budget while effectively dealing with a rat problem. It makes pest management accessible to everyone.
Customization and Reusability
DIY solutions provide unmatched flexibility. You can design your traps to perfectly fit specific areas in your home. Do you have a tight crawl space? You can build a small, custom trap that fits. Do you need a very strong trap for a large, persistent rat? You can reinforce it. This level of customization is simply not possible with standard store-bought traps. Moreover, you can reuse these homemade items many times. This benefits the environment by reducing waste. You avoid throwing away plastic traps after just one use. Reusable rodent traps also mean you save money over time. You simply clean, re-bait, and reset them.
Empowerment in Pest Control
Taking charge of your pest problem gives you a strong sense of accomplishment. You gain valuable practical skills. You learn how to effectively deal with a rat infestation directly. This direct involvement gives you better control over the entire situation. You understand the methods, and you can adapt them as needed for your specific environment. You become the expert in your own home’s rodent management. Building your own diy rodent traps gives you this power. It provides a practical solution and boosts your confidence in handling household challenges independently.
Humane DIY Rat Trap Plans
You can manage rat problems without harming the animals. Humane diy rat trap plans offer effective solutions. These traps allow you to catch rats alive. You can then release them far from your home. This section details various humane traps. You will learn how to build them. These diy rodent traps provide a compassionate approach to pest control.
Bucket Trap Designs
Bucket traps are popular for humane rat capture. They are simple to make. You can use common household items.
Flipping Tube Method: You need a 5-gallon bucket. Place a long cardboard tube or PVC pipe across the top. One end of the tube rests on the bucket rim. The other end extends over the bucket’s center. Bait the end over the center. When a rat walks onto the tube, its weight makes the tube flip. The rat falls into the bucket. You can add a few inches of water or bedding to the bottom. This makes the fall softer.
Stairway to Heaven: This is another bucket rat trap variant. You build a ramp leading up to the bucket’s rim. Place bait on a platform that extends over the bucket. The rat climbs the ramp. It reaches for the bait. The platform then tips, dropping the rat into the bucket.
Bucket Traps with a Rotating Can: To make a bucket rat trap, you can use a rotating can. Drill holes through a soda can. Thread a wire through the holes. Suspend the wire across the top of a 5-gallon bucket. The can should spin freely. Spread peanut butter or another bait on the can. A ramp leads to the bucket’s rim. The rat walks onto the spinning can to reach the bait. It loses its footing and falls into the bucket. This design is very effective. You can catch multiple rats with one setup.
These traps are humane. They allow you to catch the rodent without injury.
Tube and Bottle Traps
You can also use tubes and bottles to create effective diy traps. These methods are simple and use readily available materials.
Cardboard Tube Traps: Take a toilet paper or paper towel roll. Flatten one end slightly. Place bait inside. Position the tube on a counter or shelf. One end should hang over the edge. Place a trash can or deep container directly below. The rat enters the tube for the bait. Its weight causes the tube to tip. The rat falls into the container below.
Bottle Traps: You can make a simple bottle trap. Use a 2-liter plastic bottle. Cut the top third off. Invert the cut top. Place it into the bottom section. This creates a funnel. Secure the edges with tape or staples. Place bait inside the bottle. The rat enters through the funnel. It cannot climb back out. Rectangular bottles also work well. Their flat sides allow rats to sit undisturbed inside. Plastic Coke bottles are also suitable. Their shape makes it hard for the rat to escape. You can make several of these diy bottle traps.
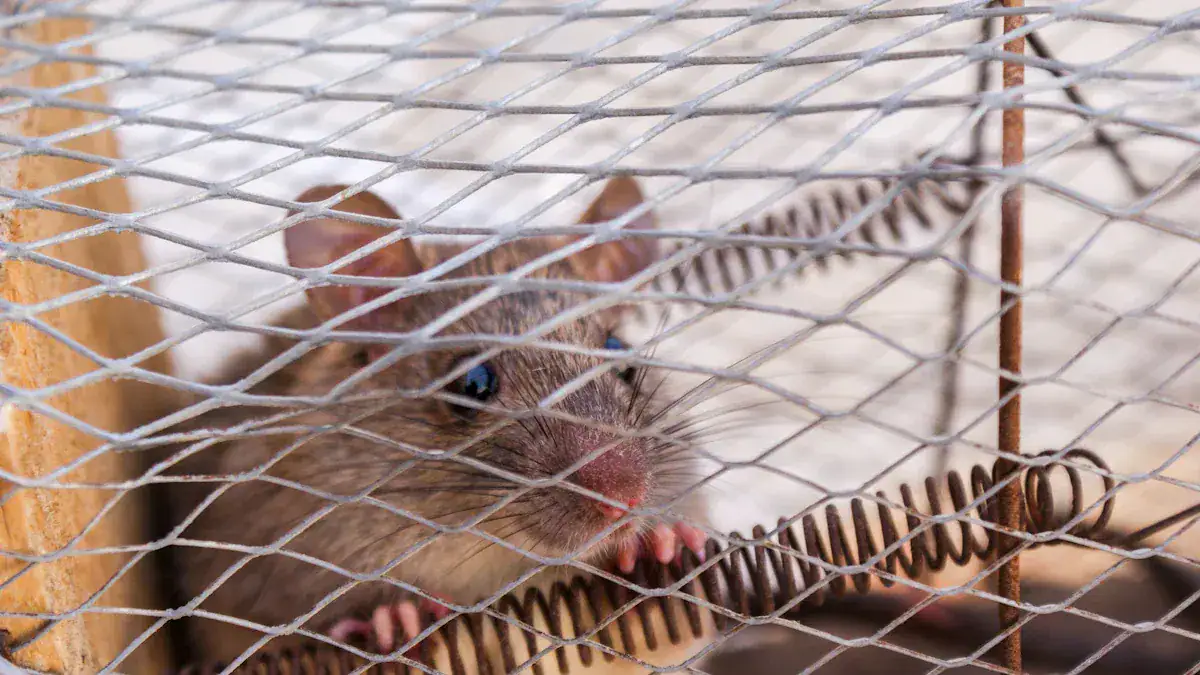
No-Kill Cage Traps
No-kill cage traps are commercially available. You can also build simple versions. These traps are usually wire cages. They have a spring-loaded door. The door closes once the rat enters. Bait is placed at the back of the cage. When the rat steps on a trigger plate, the door snaps shut. These traps are very humane. They keep the rat safe inside until you can release it. You can catch a single rat at a time with these traps.
Safe Rat Release
After you catch a rat, you must release it properly. This ensures its survival. It also prevents its return. You should release the rat at least two miles away from your home. Some experts suggest a minimum of two miles. This significantly reduces the chance of the rat returning. Releasing the rat 5 miles away is ideal. This virtually eliminates any chance of the rat returning.
Consider the release environment carefully. Look for areas with natural food sources. Fields or wooded areas are good choices. Ensure water access is available. Streams or ponds are suitable. The area should also offer shelter. Dense vegetation, logs, or rocks provide protection from predators. Avoid releasing rats near other homes. You do not want to create a problem for your neighbors. Also, do not release them near farms or barns. Relocated rats can damage crops. A water barrier, like a river or creek, between the release site and your home can also help.
Killer DIY Traps for Rats
Sometimes, you need a more aggressive approach to control a severe rat problem. This section covers designs for lethal traps. These methods aim to quickly and effectively eliminate rats. You will learn about modifying existing traps, understanding electrocution concepts, and creating safe poison bait stations.
Modified Snap Traps
Standard snap traps can be effective, but you can make them even more lethal. You can increase their effectiveness with a few simple modifications.
First, consider adding a plastic shroud to the front of the trap. This shroud covers the trigger. It directs the rat’s approach. The rat must then approach the bait from a specific angle. This ensures a consistent and accurate cranial strike. This means the trap hits the rat’s head, which is a more humane and effective kill.
Next, you can modify the treadle trigger. This is the flat plate where you place the bait. You can change it to a pull trigger. This means the rat must pull the bait to activate the trap. This often results in a stronger, more direct strike.
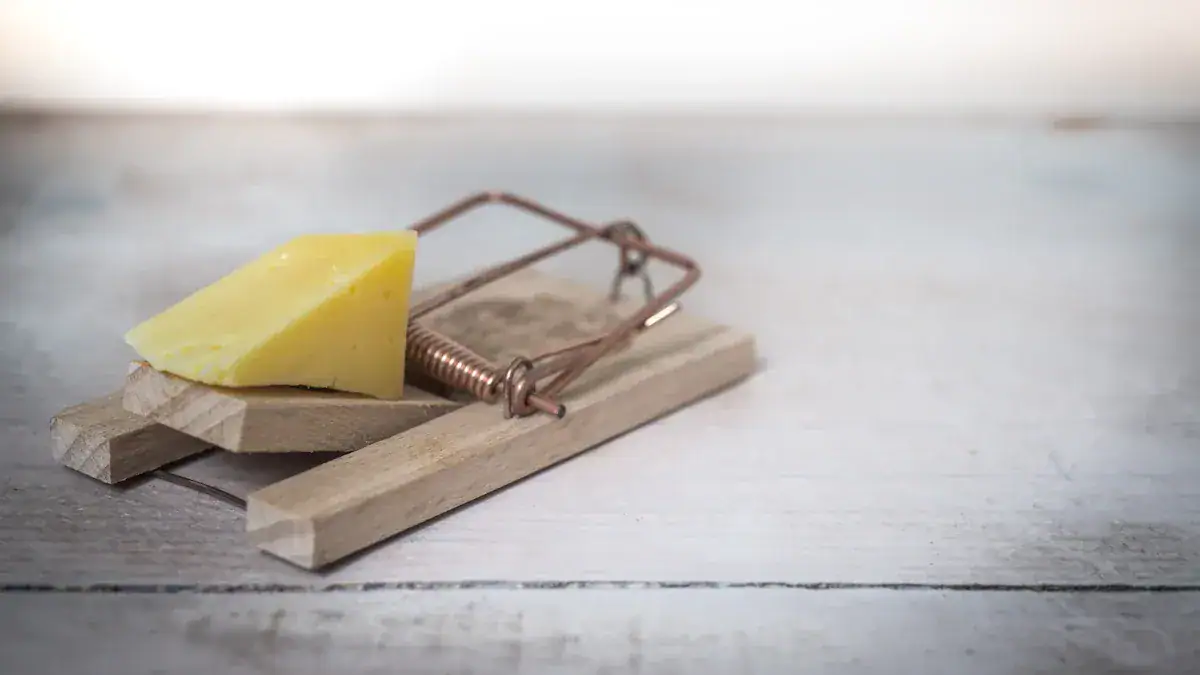
When you bait your modified snap trap, use firm, non-slippery bait. This bait should adhere tightly to the trigger plate. For example, you can apply a thin layer of peanut butter or softened cheese. You can also mix powdered bait with water to form a paste. Secure solid bait with adhesive gel. You can also seal bait in a cup with waxed paper or a silicone disc.
Choose bait that will not activate the spring mechanism too early. Apply moist, soft foods sparingly. This prevents seepage into the trigger plate. Hard, dry items like seeds or nuts are more stable. Use minimal bait. You can also use a barrier like waxed paper. Center the bait away from the edge. Always test the trap after baiting.
You can combine different baits for better appeal. Combine scent and texture. For example, use peanut butter with powdered oats. You can also use sunflower seed paste with shredded wheat. Cheese cubes coated in gelatin also work well. The texture influences how quickly a mouse can manipulate the bait. Resistance encourages prolonged handling. This increases trigger activation. Position bait directly on the trigger surface. Use a pea-sized amount. This ensures the mouse contacts the mechanism while feeding.
Electrocution Trap Concepts
Electrocution traps offer a quick and humane way to eliminate rodent pests. These devices deliver a high-voltage shock. For example, some traps deliver 8,000 Volts of electricity. This ensures a fast and humane elimination.
Safety is paramount when you use electric diy traps. You must keep them away from children and pets. Install them in unreachable areas. These include behind appliances, under cabinets, or on elevated surfaces at least 1.5 meters above the floor. Place the trap on a stable, non-slipping surface. This prevents tipping. Conceal or route power cords through a cord cover. Use a wall-mounted safety bracket if you install the trap at height.
Regularly inspect the housing for cracks or wear. This prevents exposure to electrified components. Store spare batteries and the trap’s manual out of reach of children and animals. Install physical barriers like pet gates or locked cabinet doors if pets show interest in the device.
Always disconnect the power source before any handling, inspection, or cleaning. Allow the unit to cool for at least five minutes after activation. Wear disposable gloves when you handle the trap and captured rodents. Grasp the housing firmly. Avoid direct contact with the metal grid. Lift the trap straight upward. This keeps the capture chamber sealed when you move it. Turn off and unplug the device. Wait for the cooling period. Wear insulated gloves before you open the capture compartment.
Dispose of captured rodents in a sealed bag. Follow local regulations. Clean the exterior with a dry cloth. Never submerge the trap in water. Restore power only after the unit is fully reassembled and inspected. Install the trap away from water sources, moisture-prone areas, and conductive surfaces. Secure the trap to a stable surface. Avoid flimsy or movable structures. Inspect the power cord for damage. Check battery charge. Clean contact plates regularly. Replace frayed wires, cracked housings, or malfunctioning components immediately. If the trap malfunctions, disconnect power and cease use. Contact the manufacturer or a qualified electrician for repair or replacement.
Poison Bait Stations
Using poison can be an effective way to control rats. However, you must use extreme caution. You should never attempt to create your own poison. Instead, focus on creating safe bait stations for commercially available rodenticides.
Most commercial rodenticides contain active ingredients like warfarin-type anticoagulants or long-acting brodifacoum products. Brodifacoum is very common in the US. It is 100 times more potent than warfarin. These chemicals prevent blood clotting. This leads to death from excessive bleeding. Other active ingredients include bromethalin, a neurotoxin, and cholecalciferol (Vitamin D3). Zinc phosphide releases toxic phosphine gas in the stomach.
These poisons pose significant risks. They can cause severe, life-threatening hemorrhages. These include nosebleeds, blood in urine, and internal bleeding. Intracranial bleeds have a high mortality rate. Bromethalin can cause altered mental status and cerebral edema. Zinc phosphide can lead to multi-system organ failure. These poisons are also dangerous to children and pets. They can harm non-target wildlife that eats poisoned rodents.
You must use tamper-resistant bait stations. These stations house the bait securely. They are typically made from durable plastic or metal. They are designed to protect children, pets, and non-target animals. The design includes small entry points. These allow rats to enter. They prevent access to larger animals or accidental human contact. Inside, the rodenticide bait is secured. This reduces spillage. It ensures rats consume it directly within the station. This minimizes contamination. Some models include locking mechanisms for enhanced safety.
A safe bait station must meet several criteria:
It must resist destruction or weakening by weather.
It must be strong enough to prohibit entry or destruction by dogs and children under 6 years old.
It must be capable of being locked or sealed.
It needs rodent entrances that allow target animals access but deny access to larger animals and birds.
It must be capable of being anchored. You must anchor it when you use it.
It needs internal structures for containing baits. This minimizes spillage and tracking of bait.
It should not be attractive to children in design or color.
It must display precautionary statements in a prominent location.
Manufacturers meet these safety criteria. They construct bait stations from sturdy plastic. Some designs feature two chambers. Rodents must make a 90° turn to reach the bait. Other manufacturers use baffles or distance to restrict access. You must secure tamper-resistant stations to the floor, a heavy patio stone, or a wall. This prevents bait removal by shaking. Metal covers are available for stations at risk of damage from livestock, wildlife, or vehicle traffic.
If you prefer to build your own bait stations, they must meet federally mandated standards of “tamper resistance.” This is especially true if you place them where children or non-target animals have access. Where children and livestock are present, the station should prevent unauthorized access and removal of the toxicant. Locks or concealed latches are recommended. Use sturdy materials to prevent damage. Clearly label all bait stations with “POISON,” “RODENT BAIT - DO NOT TOUCH,” or a similar warning.
Proper Disposal Methods
After you successfully eliminate a rat, proper disposal is crucial. This prevents disease transmission and protects your environment. Always wear personal protective equipment (PPE). This includes disposable gloves, masks (like N95 respirators), and eye protection (safety goggles). This prevents direct contact with pathogens. It also prevents inhalation of harmful particles.
Wash your hands thoroughly with soap and water before and after handling dead pests. Use hand sanitizer if soap is unavailable. Avoid direct contact with the deceased rat. Use tools like tongs. Work in a well-ventilated area. This is especially important if pests are decomposing. It helps you avoid inhaling odors and airborne pathogens. Consider wearing coveralls or gowns for larger infestations. Safely remove and discard all PPE after use.
You have several options for disposing of deceased rats:
Burial: Bury dead pests deep in the ground. At least two feet is recommended. This prevents scavengers. It allows natural decomposition. Ensure the burial site is away from water sources. This prevents contamination. This method is suitable for personal gardens. Local regulations may restrict it in urban areas.
Incineration: Burn carcasses at high temperatures. This eliminates pathogens. It reduces them to ash. This method is effective for disease control. It requires proper facilities. You must comply with air quality regulations.
Bagging for Trash Disposal: Seal dead pests in a plastic bag. This prevents leakage. Then, place the bag in a secure trash receptacle. Always follow local guidelines for waste disposal.
Always consult and adhere to local regulations and guidelines for pest disposal. Neglecting these regulations can lead to fines. It can also pose health risks to the community. Local laws dictate appropriate methods. These include burial site restrictions or incineration requirements. They protect public health and the environment.
Effective Trapping Strategies
You can make your rat control efforts more successful. Focus on smart bait choices and strategic trap placement. Regular monitoring and maintenance are also key. These steps optimize the effectiveness of your diy rat trap plans.
Bait Selection for Rats
Choosing the right bait is crucial for attracting rats. Rats often prefer high-fat and high-protein foods. Peanut butter is a top choice. Its strong aroma attracts them. Its sticky texture makes it hard for them to remove without triggering the trap. You can also use sweet foods. Chocolate, especially dark chocolate, is very appealing. Dried fruits like raisins also work well. Savory options like cooked bacon or soft cheese are irresistible. Their strong smells and fat content draw rats in. For bucket traps, black sunflower seeds are effective. Heinz Mixed Cereal Baby Food (HMCBF) was a preferred food for laboratory rats. You can also use meat and fish, like salmon oil, to attract them.
Optimal Trap Placement
Strategic placement increases your chances to catch a rat. Place traps where rats feel safe eating. These are often sheltered areas. Use rodent detector cards first. They show you where rats have nibbled. This helps you find ideal trapping spots. Place traps in hidden areas. Look inside cabinets or drawers. Put them behind appliances. Position traps against walls. The trigger end should be flush with the wall. This protects the rodent. It also prevents accidental triggering. Rats often travel along walls.
Monitoring and Maintenance
You must regularly check your traps. Inspect them daily. This ensures they are working. It also helps you remove any caught rodents quickly. Clean your traps after each catch. Re-bait them with fresh food. This keeps them attractive to other rats. Regular maintenance makes your diy traps more effective over time.
Preventing Future Infestations
After you control the current problem, prevent future ones. Rats can enter through small gaps. Roof rats can use holes as small as a half-inch. Inspect your home for vulnerabilities. Look for cracks in walls or foundations. Check around utility pipes and vents. Seal these with caulk or foam sealant. For larger gaps, use metal sheeting or cement. Ensure doors and windows close tightly. Add weather stripping or door sweeps. Cover vents with metal screening. Repair damaged roofing or fascia boards. Trim tree branches away from your house. This removes pathways for rodents. These diy efforts help keep your home free from future rat problems.
Safety and Ethical Pest Management
Safe Handling Practices
You must prioritize safety when you handle rat traps and baits. Always use personal protective equipment (PPE). Wear gloves and goggles, especially when you work with pesticide mixtures. You also need them in areas with rodent droppings. If you work in enclosed spaces or for a long time, use an NIOSH-approved respirator. Wear protective clothing too. Always be careful with killer traps.
Protecting Children and Pets
You must protect children and pets from rodent traps and poisons. Store poisons in places they cannot reach. Use locked utility cabinets or garden sheds. Never store poisons near food, including pet food. Always use rodent bait inside a bait station. This is a lockable container for the poison. The EPA requires new rat and mouse poisons for homes to be in these stations. Place all traps and baits where children and pets cannot get to them.
Ethical Considerations
Consider the ethical side of pest control. Some people focus on animal welfare. They want to minimize suffering. Rodents can feel pain and stress. Methods like glue traps cause long agony. Many people find these unacceptable. However, lethal methods are sometimes necessary. Rats carry diseases like Hantavirus. They can contaminate food. They also damage property. They chew electrical wiring, which can cause fires. If you use lethal methods, choose ones that cause instant death. Snap traps or electric traps are better than slow-acting poisons. This minimizes suffering. For humane trapping, follow animal welfare guidelines. Euthanasia should minimize animal stress. Do it out of sight of other animals. Handle them gently. Cover traps. Use calm vocal tones. Confirm death by checking for no breathing or heartbeat. These steps ensure you manage rat problems responsibly.
When to Seek Professional Help
Signs of Severe Infestation
Sometimes, your rat problem is too big for you to handle alone. You need to know when to call for help. Look for specific signs of a severe rat infestation. You might see many droppings. These are small and pointed for mice, or larger and blunt for rats. You will also notice gnaw marks on furniture, wires, or food packages. Rodent teeth grow constantly, so they chew a lot. Finding nests made of shredded paper or insulation in hidden spots is another bad sign. You might also see tracks or greasy rub marks along walls where rodents travel often. Listen for strange noises like scratching or scurrying inside walls, especially at night. A strong, musty smell from urine or a decaying smell from a dead rat also means trouble. These signs mean your diy efforts might not be enough.
Limitations of DIY Methods
While your diy methods can work for small issues, they often fall short for large infestations. You might find that your homemade solutions are not enough when there is widespread damage. This includes chewed wiring, insulation, or structural parts of your home. If you see many signs of nesting, your methods may not be strong enough. Keeping up with monitoring and maintenance is also hard for you to do constantly. Professionals offer regular checks and treatments to prevent rats from coming back. Complex problems, like rats in hard-to-reach areas, need special tools and knowledge that you probably do not have. Natural deterrents are helpful for minor issues, but they are not a main solution for a big rat problem.
Professional Intervention
When your problem is severe, professional pest control services offer many benefits. They start with a thorough inspection to find all entry points and infested areas. They use high-quality snap traps, electronic traps, and even carbon dioxide devices for quick elimination in burrows. Professionals also use advanced technology like smart traps that send real-time notifications. They can seal entry points with professional-grade materials. They also clean up and repair damage caused by rodents. For very large infestations, they might even use fumigation. They use an Integrated Pest Management (IPM) approach. This combines different methods to get rid of rats and stop them from returning.
You have explored the benefits of building your own diy rat trap plans. You can choose humane options or killer traps. Effective rodent control protects your health and safety. Select the method that fits your situation and ethical views. DIY solutions empower you in managing rodent issues. Remember when professional help is best for severe rat problems. These diy rodent traps offer great management.
FAQ
What is the best bait for rats?
You should use high-fat and high-protein foods. Peanut butter works very well. You can also use chocolate or bacon. For bucket traps, black sunflower seeds are effective.
How far should I release a humanely caught rat?
You should release the rat at least two miles from your home. Five miles is ideal. Choose an area with natural food, water, and shelter. Avoid releasing near other homes.
Are DIY killer traps safe for children and pets?
No, they are not inherently safe. You must use extreme caution. Place all traps and baits in tamper-resistant stations. Secure them where children and pets cannot reach them.
How can I prevent future rat infestations?
You should seal all entry points in your home. Use caulk or metal sheeting for gaps. Ensure doors and windows close tightly. Trim tree branches away from your house. This removes access for any rodent.
