
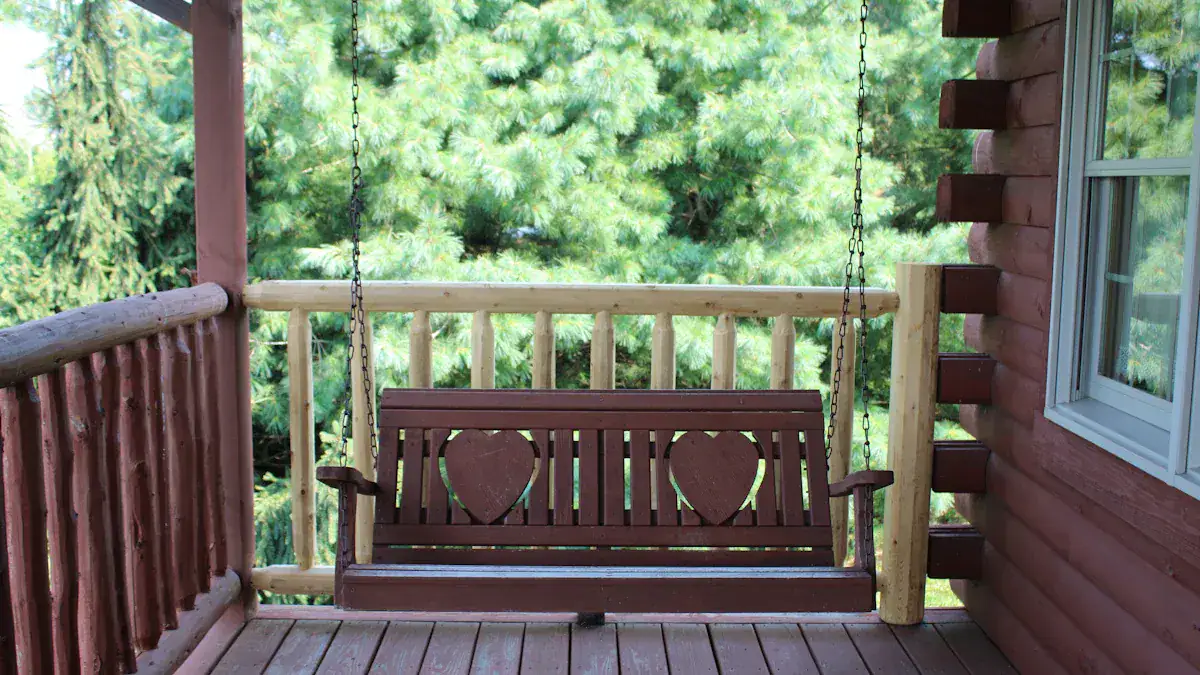
Imagine relaxing on your own handmade outdoor swing. Building a DIY porch swing adds charm to any space. This is an achievable and rewarding project. You can find free DIY porch swing plans readily available. These plans will guide you. Building a DIY porch swing brings great satisfaction. You also save money. Your new DIY porch swing will be perfect for you. Enjoy your custom swing. This swing will last.
Key Takeaways
Building your own porch swing saves money. You can customize it to fit your style. This project gives you a sense of pride.
Choose strong wood like pressure-treated pine or cedar. Use rust-proof hardware for hanging. Finish the wood to protect it from weather.
Find free plans online from sites like Shanty 2 Chic or Ana White. Look for plans with clear diagrams and step-by-step guides. You can change plans to match your taste.
Cut wood carefully for a strong swing. Assemble the frame with good joints. Sand the wood smooth. Apply a protective finish.
Hang your swing safely. Make sure your porch ceiling is strong. Use proper anchoring techniques. Check hardware often for wear.
Why Build a DIY Porch Swing
Building your own diy porch swing offers many rewards. You gain more than just a place to sit. You create something special for your home.
Cost Savings
Buying a pre-made porch swing can be expensive. When you build your own, you save money. You only pay for materials. This often costs much less than a store-bought swing. You can choose affordable wood and hardware. This makes your project budget-friendly.
Customization Options
A DIY approach lets you design your perfect swing. You are not limited to standard sizes or styles. You can make it truly unique. For example, you can customize the seat. Many people use a standard crib mattress for a deep, comfortable seat. You can choose how to fasten parts. A pocket hole jig hides screws for a clean look. You can also decide on the rope holes. A 1-inch drill bit for eight holes gives a rustic farmhouse style. You can select the perfect stain and finish. A coat or two of polyurethane protects the wood. It also gives your diy porch swing the exact look you want. Add a sturdy crib sheet and pillows for extra comfort and style. You can pick outdoor pillows or lumbar pillows. You can even choose a specific mattress cover.
Personal Satisfaction
Completing a simple diy project like a diy porch swing brings great satisfaction. You feel proud of your work. This type of project boosts your confidence. It gives you a sense of accomplishment. Focusing on the task helps reduce stress and anxiety. It promotes mindfulness. You learn new skills. You create a lasting item that reflects your personality. This handmade swing becomes a cherished part of your home. It reminds you of your abilities every time you use it.
Essential Tools and Materials
You need the right tools and materials for your diy porch swing project. Gathering these items first makes building easier. This section tells you what you need.
Basic Woodworking Tools
You will use common woodworking tools. A measuring tape helps you get accurate cuts. A saw cuts your lumber. A drill makes holes for screws and bolts. You need clamps to hold pieces together. Safety glasses protect your eyes. These tools are essential for building your swing.
Wood Selection
Choosing the right wood is important. It affects how long your swing lasts. Pressure-treated pine is a good choice. It resists weather and is strong. Cedar is another excellent option. Cedar naturally resists decay and insects. It has natural oils that repel bugs. Cedar also offers a rustic look. It needs low maintenance.
Feature | Cedar Fence | Pressure Treated Fence |
|---|---|---|
Durability | Naturally durable but best in dry climates | Durable, especially in wet climates |
Insect Resistance | Naturally insect-resistant | Treated to resist insects |
Maintenance | Needs regular staining or sealing to keep color | Lower maintenance; benefits from occasional sealing |
Ground Contact | Doesn’t handle ground contact as well | More resistant to rot and moisture for ground contact |
Pressure-treated pine can last a long time. It can last 20 years or more. This wood is infused with preservatives. These preservatives resist decay, rot, and insect damage. Other good woods include teak, hickory, and oak.
Hardware for Hanging
You need strong hardware to hang your swing safely. All parts must be rust-proof metal. They should have a high-quality paint coating for protection. You need two swing hangers. You also need two 1/2″ x 4″ spring snaps. Four M12x80MM lag screws with M12 washers secure the hangers. Hanging chains connect the swing to the hangers. Comfort springs provide smooth swinging. They prevent wobbling. Ceiling hooks should have buffering neoprene washers. These washers stop noise. Your hanging hardware needs a good weight capacity. A 600-pound capacity is standard. Some kits offer 700 pounds. The Swing-Mate Deluxe Porch Swing Hanger has a 1500-pound certified weight rating. Each spring in that kit holds 600 pounds.
Finishing Supplies
Finishing protects your diy porch swing from weather. It also makes it look good. Spar Urethane Varnish is a good choice. It protects against UV rays and water. It is easy to apply. Waterlox products are also highly praised. General Finishes 450 is a water-based exterior product. It has UV inhibitors. It is easy to apply and dries fast. Heritage Finishes use natural oils and beeswax. These finishes protect your swing for many years.
Finding Your Free Porch Swing Plans
You want to build a diy porch swing. Finding the right plans is your next step. Many great resources offer diy porch swing plans for free. These plans guide you through the building process.
Top Online Resources for Plans
Many websites offer excellent plans. Shanty 2 Chic is a reputable online platform. They feature a section called ‘DIY Porch Swing Plans’. You can find various project types there. Ana White also provides many free woodworking plans. Instructables offers user-submitted projects with detailed steps. Pinterest is a great place to find visual inspiration and links to plans. Rockler provides plans for various woodworking projects. Woodworking forums are also helpful. You can find advice and plans from other builders there. These platforms give you a good starting point for your swing project.
What to Look for in Plans
Good plans make your project easier. Look for plans with detailed diagrams. Color photos help you see each step clearly. A shopping list tells you exactly what materials to buy. A cut list shows you the size of each wood piece. Many sites offer free PDF downloads of their plans. Step-by-step instructions are crucial. They guide you from start to finish. Safety notes are also important. They help you work safely. Some free porch swing plans use templates. These templates simplify complex cuts. Strong-Tie offers a DIY guide on how to build a porch swing. This guide includes diagrams and cut lists. Pine and Poplar provides printable plans. These plans include a cut list and 3D renderings. Their premium plans offer even more. They have detailed shopping lists and visual cut lists. You might even get a bonus SketchUp file. Real Cedar also provides free DIY project plans for a porch swing chair. These come as PDF instructions. They include diagrams and a cut list.
Adapting Plans to Your Style
You can change plans to fit your taste. A diy porch swing is personal. You can blend different materials. Combine wood and metal for a modern look. Add metallic accents for an urban edge. You can turn a corner into a cozy swing alcove. Just add cushions and a blanket. Think about sustainable resources. Use salvaged timber or reclaimed steel. String lights create a captivating ambiance. Try warm white festoon lights or solar-powered LEDs. Bring the beach to your porch. Use gentle blues and whites for a maritime theme. Add macramé adornments and lively fabrics for eclectic flair.
If you have a small space, choose streamlined swing designs. For more seating, build a double swing. A hammock-style swing offers extra comfort. Use rope instead of chains for rustic charm. Repurpose an antique barn door for a retro feel. Keep it simple for a refined look. Use clean lines and soft colors. Add vibrant cushions and pillows for a splash of color. You can even build a suspended daybed swing for ultimate relaxation. You can also make structural changes. Use 2x4s for all frame parts. This allows for bolting a mounting board for the rope. Add a top board on the back. This supports pillows better. It also gives more security when you lean back. Add an extra parallel support board for more strength. Change the trim on the side edges. An overhang with a 3/4″ chamfer looks better. Use knotty pine instead of clear pine. This saves money, especially if you plan to paint your diy porch swing.
Exploring Specific Plan Types
Different plans suit different needs. An outdoor pallet swing plan uses recycled pallets. This is a budget-friendly option. Pallets are easy to find. You can create a unique swing with them. A diy garden swing plan often focuses on a freestanding structure. This lets you place your swing anywhere in your yard. These plans might include building an A-frame stand. You can also find plans for specific styles. Some plans focus on a classic slatted design. Others might show you how to build a more modern bench-style swing. An outdoor pallet swing plan is great for a rustic look. A diy garden swing plan gives you flexibility in placement.
Step-by-Step Construction
Building your own diy porch swing involves several key stages. You will move from raw lumber to a finished, beautiful piece. This section gives you a general overview of the building process. Detailed instructions often cover specific assembly steps. They also explain how to attach arms, make and cut slats, and install them. You can even incorporate features like cup holders if you wish.
Cutting Lumber
Accurate cuts are crucial for a sturdy swing. You need precise measurements and careful marking. To avoid confusion, especially with many similar boards, write the intended length on each board before you cut it. This labeling prevents errors later.
Here are some common board dimensions you might need:
2 x 4 boards: You will need two at 65 inches, five at 24 inches, four at 25 1/2 inches, two at 11 3/4 inches, and two at 52 1/2 inches.
1 x 4 boards: You will need two at 22 3/4 inches, two at 24 1/2 inches, two at 25 3/4 inches, two at 26 3/4 inches, two at 27 1/2 inches, and four at 28 inches.
1 x 2 boards: You will need ten at 58 1/2 inches.
You can maximize wood usage by marking cuts carefully. Use a pencil, measuring tape, and carpenter’s square for accuracy.
For complex shapes, like curves on swing seat support boards, follow these steps:
Trace one of your 24-inch 2×4 swing seat support boards onto kraft paper.
Draw your desired seat support curve and the angled cut for the back of the board on the paper. Use a diagram as a guide.
Cut out this paper template with scissors.
Trace this curve and angle onto each of your five 2x4s.
Use a jigsaw to precisely cut along the traced curve and angled line on each of the five swing seat support boards.
After cutting, ensure accuracy and a uniform finish.
Line up the swing seat support boards using their tip and bottom back edge.
Clamp the five swing support boards together at the back (angled section). Use two thin scraps of wood and a C-clamp to prevent marks.
Use a random orbital sander to sand the swing seat support board curve. Continue until you achieve a uniform curve across all five boards.
Move the clamp to the middle section. Sand the back angled edge of the 2x4s smooth.
Number the boards 1-5 from one end to the other before removing the clamp. This order ensures the most even seat during assembly.
To cut angled vertical back support boards:
Take two 25 1/2-inch 2×4 boards.
From one end of the board, measure and mark 25 1/16 inches along one edge.
From the same end, but on the opposite edge of the 2×4, measure and mark 24 1/8 inches.
Use a carpenter’s square to draw a straight line connecting these two marks. This creates an angled line across the board.
Repeat this marking process on the second 2×4.
Use a circular saw to carefully cut along this angled line on both boards. Then sand the cut ends smooth for a precise finish.
Assembling the Frame
You need strong joinery techniques for a sturdy swing frame. Half-lap joints are excellent for strength and a tidy appearance. You set your saw depth to half the material’s overall depth. Then you remove half the material at the connection point on both boards. This method is better than face screwing for both looks and strength.
Always use waterproof wood glue for all joints in an outdoor project. This ensures durability and weather resistance. Use three outdoor-rated screws per connection. For enhanced strength, you can use two bolts per location as an upgrade. Gussets are small but important additions. You place them on the inside of the frame to prevent racking. Racking is movement from side to side. Gussets significantly add rigidity to your simple to build porch swing.
Crafting the Seat and Back
Comfort is key when you how to make a porch swing seat. Subtle contouring of seat boards makes a big difference. Adjustable seat back angles allow for personalized comfort. Master carpenter Norm Abram advises you to “test-drive a swing before you buy.” This highlights that comfort is a key consideration.
Pocket-hole joinery provides both strength and a clean finish. This contributes to durability. You can use store-bought softwood like pine or cedar. These woods can be stained or painted. They offer a durable and customizable construction material for your swing.
Sanding and Finishing
Proper sanding prepares your diy porch swing for a beautiful finish. Always start with a coarser grit and work up to finer grits.
Start with 80-grit sandpaper to remove rough spots and even out the surface.
Move to 120-grit sandpaper to smooth out any remaining roughness.
Finish with 180-220-grit sandpaper to prepare the wood for stain, paint, or oil.
Here are some pro sanding techniques:
Sand with the grain to avoid scratches.
Apply light pressure. Let the sandpaper do the work.
Keep the sander flat to prevent gouges.
Use a pencil guide: scribble on the surface and sand until the marks disappear. This ensures even sanding.
Most DIY woodworking projects begin with 80 or 120 grit. Then you progress to 180 or 220 grit. This depends on your desired final finish. For staining, 180 grit is usually enough. Painted surfaces may benefit from a final sanding at 220 grit.
Grit Range | Primary Use |
|---|---|
40-60 | Stripping paint or shaping rough wood |
80-120 | Smoothing freshly cut or planed boards |
150-180 | Final sanding before stain or paint |
220+ | Between coats of finish for ultra-smooth |
Attaching Hanging Hardware
Securely attaching your hanging hardware is vital for safety. You need to mark the spots for hardware attachment with a pencil. Ensure these marks are centered on the joist to prevent wood splitting. Double-check the directionality and hanger alignment.
Drill pilot holes at the marked spots. This avoids wood splitting. If you added structural support, ensure one hanger bolt on each side of the diy porch swing attaches to a joist for stability. Attach the hanging hardware using a power drill and the appropriate attachment. Bolt the hanger to the center of the joist. If you use eye screws, you can attach them by hand or with a hook attachment on the drill.
For screw-eyes on unfinished porch ceilings:
Install two screw eyes. Then loop the porch swing rope or chain through them.
Turn the eye-screw into the hole as far as it goes. Then pass a screwdriver through the eye-screw circle. This ensures the central point is directly below the hole.
Push the screwdriver against the eye screw to jam it tightly into the hole. Use both hands on the screwdriver.
Install another screw-eye in a different joist or beam. Maintain a distance roughly equivalent to the porch swing‘s length.
For eyebolts on furnished ceilings, you need a slightly different approach to how to make a porch swing seat safely:
Cut away a section of the roof above the simple to build porch swing. Predrill a hole through the joist. Ensure the drill tip comes straight through the ceiling.
Slide an eyebolt up through the porch ceiling. Have someone secure it with a nut on the porch roof.
Install another eyebolt in a different joist or beam. Maintain a distance roughly equivalent to the porch swing’s length. Then repair the roof.
Safe Installation and Maintenance
You must ensure your diy porch swing is safe and lasts a long time. Proper installation and regular care are very important.
Ensuring Structural Support
Your porch ceiling or beam must be strong enough. It needs to hold the weight of your swing and the people using it. A sistered 2×6 beam is strong enough to support a porch swing. This means you need a load-bearing beam or ceiling joist. It should be a 2×6 or 2×8. This beam needs good support on both ends.
Proper Anchoring Techniques
Secure hanging points are crucial.
First, use a stud finder. Locate the ceiling joists and mark these areas.
Next, measure and trace where your brackets will go. Include pilot hole spots.
Drill 3/16” pilot holes. Do this for all eight 2 ½” lag bolts.
Place washers on the lag bolts. Hold the brackets in place. Secure them by screwing the lag bolts into the pre-drilled holes. Use a socket wrench. Mounting hardware includes hanging brackets, 2.5” hex lag bolts, and washers. Some swings come with zinc-coated galvanized steel chain kits. These kits have 5-foot chain sections, eye bolts, and quick link chain connectors.
Regular Cleaning and Protection
Clean your diy porch swing often. This prevents mildew. Promptly remove water and grease stains. You can try DIY stain removal. Use toothpaste and baking soda. Be careful with these methods. Light sanding can also remove stains. For hardware, dry it, wipe it, and apply a little grease. This prevents rusting. You should re-seal or re-paint your swing regularly. A redwood swing set might need staining every other year at first. After 4-5 years, you might stain it annually. Power wash and stain your diy porch swing at least once every three years.
Hardware Inspection
Inspect your swing hardware often. Look for signs of wear or damage.
Check for rust on metal parts.
Look for rot in wood parts.
See if wicker material is unraveling.
Inspect hooks, chains, and supports for any wear or damage. This helps keep your swing safe for everyone.
Building a classic diy porch swing offers great personal satisfaction. You save money. You get full customization. You now have the free diy porch swing plans and guidance. These diy porch swing plans help you start. You can create a beautiful diy porch swing. This swing will be a functional addition. Your outdoor space will look great. You have all the information needed for your own classic diy porch swing. Begin your project today. Enjoy your new swing for many years. This swing will bring joy.
FAQ
What basic tools do I need to build a DIY porch swing?
You need a measuring tape, a saw, and a drill. Clamps hold pieces together. Safety glasses protect your eyes. These tools help you build a sturdy swing. You can complete your swing project with these essentials.
What kind of wood works best for an outdoor swing?
Pressure-treated pine or cedar are excellent choices. Pressure-treated pine resists rot and insects. Cedar naturally resists decay and bugs. Both woods ensure your outdoor swing lasts many years. They provide durability for your swing.
What if I have limited woodworking experience?
Many free plans cater to beginners. Look for plans with clear diagrams and step-by-step instructions. Start with a simpler swing design. You can build a beautiful swing with patience and careful work. It is a rewarding project.
What is the safest way to hang my porch swing?
Always attach your swing to strong structural supports. Use heavy-duty eye bolts, chains, and carabiners. Ensure your ceiling joists are load-bearing. Inspect all hardware regularly. This keeps your swing safe for everyone.