
Do you love giving unique gifts? Handmade touches make gifts truly special. A global survey shows 93% of consumers prefer handmade products. They love their distinctiveness! Seven out of ten millennials even seek out customization. This DIY leaf print wrapping paper project lets you create personalized gifts. You’ll craft beautiful, botanical designs. These leaf prints transform simple paper into stunning, natural gift wrap. It’s an easy, eco-friendly way to present your botanical gifts.
Benefits of DIY Leaf Print Wrapping Paper:
Personalization and Uniqueness
When you create your own leaf print wrapping paper, you give your gifts a truly personal touch. Each sheet becomes a unique piece of art. Your friends and family will see the extra effort you put into their gifts. This shows them how much you care. No two wrapped gifts will look exactly alike, making every present feel extra special.
Sustainable and Eco-Friendly Gifting
Choosing DIY wrapping is a big step towards being more sustainable. Traditional wrapping paper often harms our planet. Did you know that 2.3 million pounds of wrapping paper go to landfills every year? Making just one kilogram of wrapping paper creates 3.5 kilograms of CO2 emissions. It also uses about 1.5 kilograms of coal for power. Many papers cannot be recycled because of dyes, laminations, or glitter. These materials contaminate recycling streams. By using recycled paper for your leaf print wrapping paper, you help reduce waste. This makes your gifts truly eco-friendly. You can also explore fabric wrapping methods like furoshiki for a reusable, sustainable option. Furoshiki is a beautiful, traditional Japanese way to wrap gifts. It is very sustainable.
Cost-Effective Crafting
Making your own gift wrap saves you money. Wrapping a standard paperback book with simple brown paper and twine costs about 5¢. Buying cheap store-bought paper for the same book costs 12¢. That is a 7¢ saving! Reusing gift bags costs nothing, which is even better. Over five years, using fabric wraps instead of paper can save you around $270. These craft projects are budget-friendly. You can use recycled materials you already have. This makes your gifts look great without breaking the bank.
Connecting with Nature
Engaging in nature-based activities can bring you joy. Creating leaf print wrapping paper connects you directly with nature. You collect leaves and observe their unique patterns. This simple act can be calming. While some studies show longer nature programs have bigger mood benefits, even short creative sessions can offer a peaceful break. You get to appreciate the beauty of the natural world. This makes your gift-giving process more mindful and sustainable. You create beautiful gifts while enjoying a moment of calm.
Essential Supplies for Leaf Printing:
To start your leaf printing adventure, you need a few key items. Gathering your supplies is the first exciting step in creating your unique gift wrap.
Paper and Leaf Selection
Choosing the right paper sets the stage for your beautiful prints. You have many options! Consider using recycled paper, like brown parcel paper, or even old book pages for a vintage feel. Recycled kraft paper works wonderfully and gives your prints a rustic, natural look. Don’t throw away leftover drawing paper or even packaging paper from recent deliveries; you can reuse it for this project. The goal is to find paper that absorbs paint well and provides a good surface for your designs.
Next, you need to find your leaves. Look for leaves with interesting shapes and prominent veins. These veins will create clear, detailed patterns in your prints. Fresh leaves work best because they are still pliable and hold their shape well. Avoid leaves that are too dry or brittle, as they might crumble when you apply paint. Experiment with different types of leaves from your garden or local park to see what unique designs you can create!
Paints and Inks
The right paint or ink makes all the difference for vibrant, eco-friendly prints. You want options that are non-toxic and safe for paper. Many sustainable choices are available today.
Soy-based printing ink is a fantastic option. It is non-toxic, biodegradable, and breaks down much faster than petroleum-based inks. Plus, it gives you really vibrant colors!
Water-based inks are another excellent choice. They use water as their main solvent, which is much better for the environment.
You can even find algae-based ink. This ink is super eco-friendly because it comes from algae waste cells. It is carbon-negative and available in both water- and soy-based versions.
These sustainable inks use non-petroleum ingredients, which helps reduce their environmental impact. When you choose these options, you make your craft projects even more eco-conscious.
Tools for Printing
You need a few simple tools to apply paint and transfer your leaf designs. These tools help you get crisp, clear prints every time.
Brushes: You can use various paintbrushes to apply ink to your leaves. Inexpensive 1-inch or 2-inch flat foam brushes are great for quickly covering the surface of your leaves. Stenciling brushes, with their short, stiff bristles, help you push paint into smaller areas, perfect for detailed leaf veins.
Brayers (Rollers): A brayer, also called a roller, is a very important tool. It helps you spread ink evenly onto your printing surface or directly onto your leaves. Brayers are usually made of hard rubber. They are fundamental for getting a thin, even layer of paint, which is key for clear prints.
Sponges: Sponges can also help you dab paint onto your leaves, especially if you want a textured look.
Work Surface Protection: Always protect your work area! Lay down old newspapers, a plastic tablecloth, or even some of your recycled paper to catch any spills. This makes cleanup much easier.
Creating Your Leaf Prints:
Now you are ready to bring your vision to life! This is where the magic happens. You will transform simple paper into beautiful, nature-inspired art.
Preparing Leaves for Printing
Before you start printing, you need to prepare your leaves. First, gently clean your chosen leaves. You can wipe them with a damp cloth to remove any dirt or dust. This ensures a clean surface for printing. Next, make sure your leaves are dry. Any moisture can make the paint smudge. If your leaves are a bit curled, you can press them gently under a heavy book for a short time. This will flatten them slightly. Flat leaves give you clearer prints.
Applying Paint or Ink
Applying paint or ink to your leaves needs a careful touch. You want an even coat without too much paint. This helps you get crisp details.
Start with a small amount of ink on your brayer.
Roll the brayer on a glass slab or a smooth, non-absorbent surface. This spreads the ink evenly across the roller. You will hear a slight “hiss” when the ink has the right consistency.
Apply a smooth, even coat of ink to one side of your leaf. Use light pressure with the brayer. This helps you get good coverage without oversaturating the leaf.
If the ink looks too thick or shiny, gently blot it with newsprint. This thins the ink and reduces shine.
You can also use digital grounds. These help secure the ink on the leaf surface. They prevent the ink from bleeding through. This keeps the ink on the surface for better coverage. This works for both porous paper and fabrics.
The Printing Process
Now you will transfer your inked leaf to the paper. This step requires steady hands and gentle pressure.
Place the inked side of your leaf face down on your paper.
Gently cover the leaf with a piece of scrap paper or a paper towel. This protects your hands and helps distribute pressure.
Hold the paper firmly. Use a rubber brayer or a rolling pin. You can also use the felted side of a baren.
Apply firm, consistent pressure. Roll and press the leaf onto the paper. Move in a circular motion for about 10 seconds. This ensures even ink application. It also prevents smears or overly dark areas. Maintaining consistent pressure stops the leaf from shifting. This gives you more even impressions and greater detail. It works better than just using your fingers.
Carefully lift the scrap paper. Then, peel off the leaf. You will see your beautiful leaf prints!
Drying Your Masterpiece
After printing, your paper needs time to dry. Gently lift your newly printed paper. Lay it flat on a clean, dry surface. You can use a drying rack or a clean table. Make sure there is good air circulation. This helps the ink dry faster. Avoid stacking the papers until they are completely dry. This prevents smudging. Drying time can vary. It depends on the type of paint or ink you used. It also depends on the humidity in your room. Once dry, your unique, nature-inspired wrapping paper is ready to use!
Creative Leaf Print Gift Wrap Ideas:
You’ve made beautiful leaf prints. Now, let’s make your gifts even more special! You can turn your unique leaf print wrapping paper into stunning presentations.
Embellishing Your Wraps
You can add extra touches to your wrapped gifts. Think about layering and textures. Combine your botanical leaf prints with natural elements. You can tie a simple piece of yarn or twine around your package. This adds a rustic charm. You can also add small natural embellishments. Try tucking in a few dried berries, a tiny twig, a sprig of lavender, or a small hydrangea bloom. These little details make your gifts truly memorable.
Matching Gift Tags
You can create matching gift tags to go with your beautiful leaf prints. This adds a cohesive look to your gifts. Here are a couple of creative ways to make them:
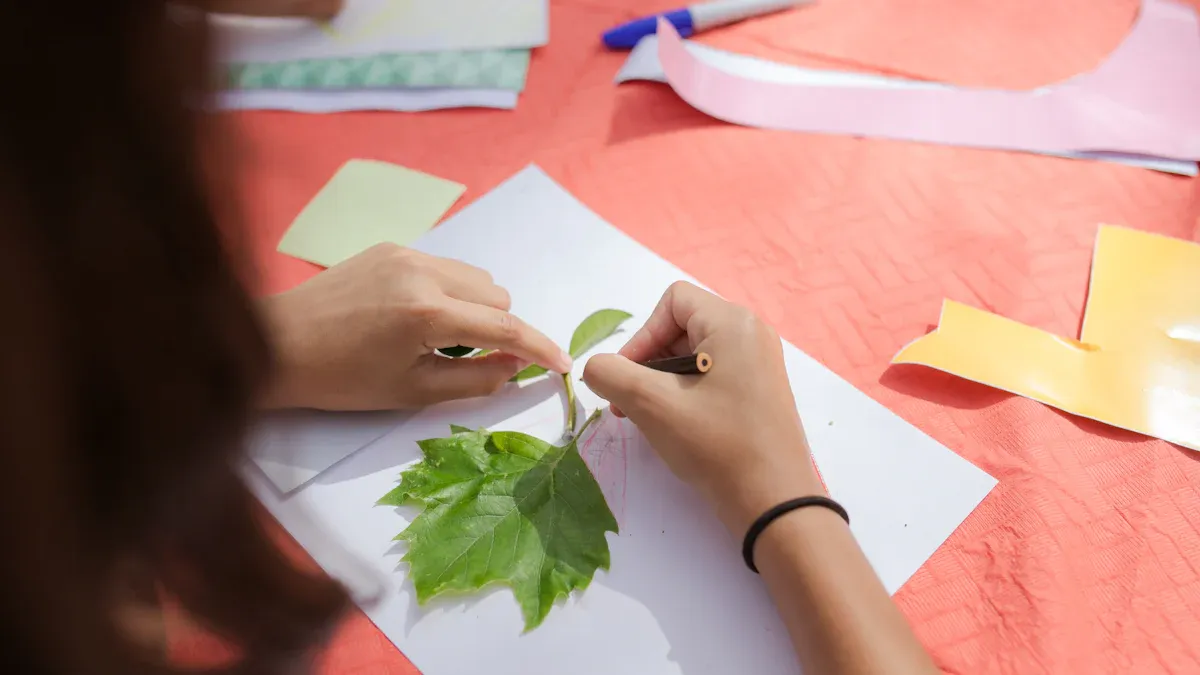
Collect fresh, pretty leaves.
Write messages on the leaves using waterproof pens.
After the ink dries, apply gloss varnish to both sides of the leaves.
Allow the leaves to dry completely.
Punch holes in the dried, varnished leaves.
Attach twine to complete the gift tags.
Another fun method uses crayon rubbings:
Place a piece of paper on top of a fresh-cut leaf.
Gently rub a crayon across the paper until the leaf design appears.
Continue rubbing to achieve the desired look.
Cut out the leaf designs to use as tags.
Seasonal and Themed Designs
You can adapt your botanical leaf print designs for different seasons and occasions.
Autumn: Use natural leaves. You can even spray paint some with metallic colors. Pair them with kraft paper and twine for a cozy fall feel.
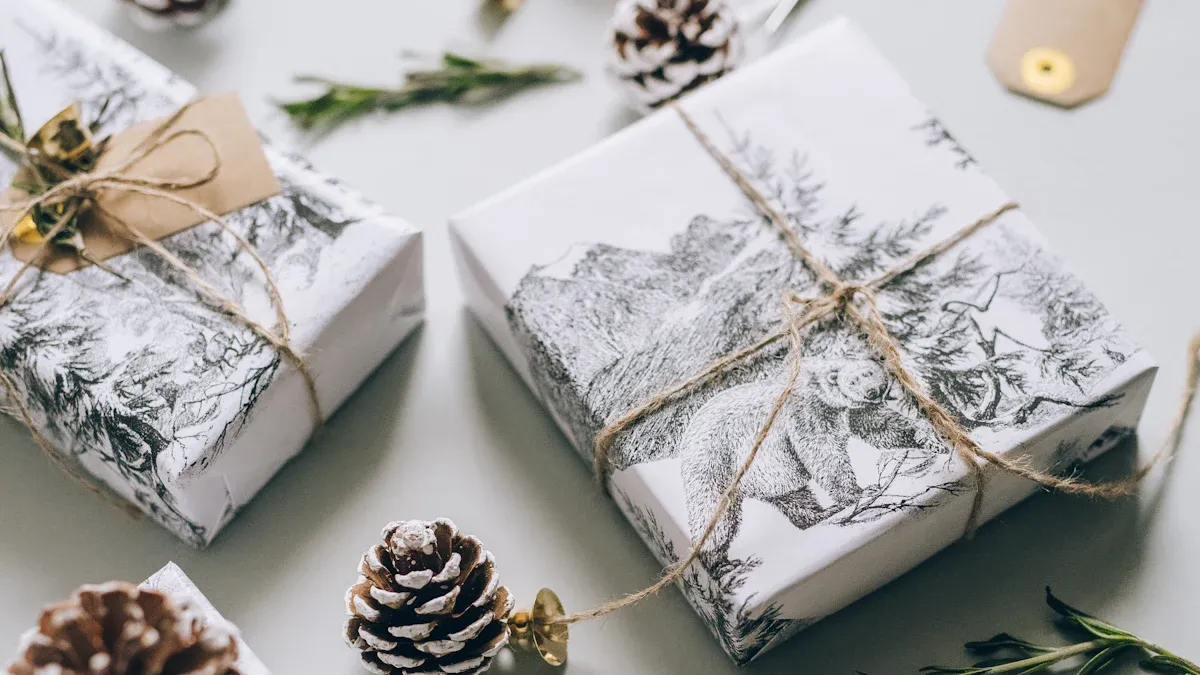
Rustic, Natural Christmas: Transition from autumn by adding evergreens like rosemary and mini pine cones to your leaf-decorated wrap. This creates a lovely holiday gift wrapping theme.
Scandinavian Flair Christmas: Try silver spray-painted leaves. Combine them with faux moss sheeting, baker’s twine, and a cute tomte ornament for a distinct look.
“Autumn Leaves Fall Colorful Seasonal Leaf Art” is a popular theme. You can use it for many seasonal gifts.
Tips for Perfect Leaf Prints:
You want your handmade wrapping paper to look amazing, right? Here are some tips to help you get the best results every time.
Avoiding Smudges
Smudges can happen, but you can easily prevent them. First, make sure you don’t use too much paint. A thin, even layer is always better. After you apply paint to your leaf, gently blot any excess with a paper towel. This removes extra moisture that could cause smudges. When you press the leaf onto the paper, use firm, even pressure. Don’t let the leaf slide around. Lift the leaf straight up after pressing. This helps keep your prints clean and clear.
Achieving Crisp Details
You can make your leaf prints really stand out with sharp details. Choose leaves with prominent veining. These veins will show up beautifully in your prints. Apply paint lightly to the back of the leaf. Make sure you avoid putting on too much paint. This prevents smudging. Use a brayer to roll over the leaf. This ensures even pressure for a clear print. You can also select broader, flatter leaves like spinach, maple, or oak. They are easier to handle. For even clearer prints, especially on fabric, you can pre-soak leaves. This helps reduce bleeding and makes vein lines crisper.
Experimenting with Designs
Don’t be afraid to try new things! Experiment with a range of similar colors on your leaves before printing. You can arrange prints next to each other or slightly overlap them for cool designs. Each painted leaf can give you 2-3 prints. Sometimes, the later prints look the best as the paint thins out. Collect diverse leaves with unique shapes, colors, and textures. This gives you more creative options. You can also try leaf rubbings. Place a leaf vein-side up under thin paper. Then, rub a crayon or colored pencil over it. This reveals the leaf’s intricate structure.
Storing Handmade Paper
You’ve created beautiful paper, so store it well! Keep your paper in a cool, dry place. Avoid direct sunlight. This prevents fading and curling. Use acid-free containers or sleeves. These protect your paper over time. They also maintain its quality. Keep sheets separated with tissue paper or glassine. This stops them from sticking together. It also prevents material transfer. Try to maintain stable humidity levels, around 50-60%. This prevents brittleness or too much moisture absorption. Store your loose sheets flat in files or portfolios. This stops curling and creases.
You feel joy creating personalized, nature-inspired leaf print wrapping paper. This sustainable and creative approach makes your gifts truly special. Embrace this sustainable way to present your gifts. It is very sustainable. Your botanical designs are unique. This is an eco-friendly choice for your gifts. Share your beautiful botanical leaf print wrapping paper creations. Inspire others with your sustainable gifts. This makes all your gifts more meaningful.
FAQ
What kind of leaves work best for printing? 🤔
You should pick fresh leaves with clear veins. Maple, oak, or fern leaves are fantastic choices! Try to avoid leaves that feel dry or brittle. They might crumble when you press them.
What type of paint should I use? 🎨
Use non-toxic, water-based craft paints or soy-based inks. They are safe for you and the environment. Acrylic paints also work really well on paper. You will get vibrant colors!
How can I stop my leaf prints from smudging? 🚫
Do not use too much paint. Gently blot any extra paint from your leaf. Press down firmly and lift the leaf straight up. This helps keep your prints clean and clear.
Can I store my handmade wrapping paper for later? 📦
Yes, you definitely can! Store your dry paper flat in a cool, dry place. Keep it away from direct sunlight. This stops fading and curling. You can use it for your next gift!
