

Over 62% of U.S. adults consider their garage the most cluttered space. You likely face this challenge. DIY ladder hoists offer a practical answer. This cost-effective storage solution frees up floor space. You utilize vertical storage with a custom-built system. Building a DIY ladder hoist is a rewarding project. This guide shows you how to build a safe, effective DIY ladder hoist. You can choose a manual or motor-driven option.
Key Takeaways
Building a DIY ladder hoist helps you use your garage space better. It frees up floor space by using the ceiling for storage.
Making your own hoist saves money compared to buying one. You only pay for materials, not expensive commercial systems or installation.
You can design your hoist to fit your needs. You choose the size, add hooks, or even make it motorized.
Always plan your hoist carefully and put safety first. Make sure your ceiling is strong enough and never lift more weight than your hoist can handle.
Regularly check your hoist for wear and tear. This keeps it safe and working well for a long time.
Why Build a DIY Hoist
Building your own garage hoist system offers many advantages. You gain significant control over your garage organization. Consider the many benefits of diy ladder hoist systems.
Maximize Garage Space
You can dramatically increase your garage’s storage capacity. A DIY ladder hoist uses vertical space. This frees up floor and wall areas. You can park your car inside or set up a workshop. Overhead storage, like a hoist, utilizes ceiling space. This is perfect for items you do not access often. Think about holiday decorations or camping gear. This strategy helps maintain a clean and organized garage. You will find items easily without sifting through clutter.
Cost-Effective Storage
A DIY ladder hoist saves you money. Commercial hoist systems can be expensive. Look at the typical price ranges:
Model Type | Price Range |
|---|---|
Basic Models | $200 – $500 |
Mid-Range Models | $500 – $1,500 |
High-End Models | $1,500 – $4,000 or more |
You avoid professional installation costs. These can range from $300 to $1,500. Building a diy ladder hoist yourself means your only cost is materials. This makes it a very budget-friendly option.
Customization Options
You design your system to fit your specific needs. This is a major benefit of DIY ladder hoists. You can adjust shelf height for different-sized items. Add hooks for bikes, tools, or sports equipment. You can even motorize the lift for extra convenience. These ladder hoist ideas allow you to create a perfect storage solution.
Easy Item Access
A hoist system makes accessing stored items simple. You no longer struggle to reach things on high shelves. You lower the platform to retrieve items. Then you raise it back up. This provides easy access to your belongings. It also keeps your garage tidy.
Tools and Materials for Your DIY Ladder Hoist
Building your own storage system requires the right tools and materials. You need to gather these items before you start. This ensures a smooth building process for your diy ladder hoist.
Essential Tools
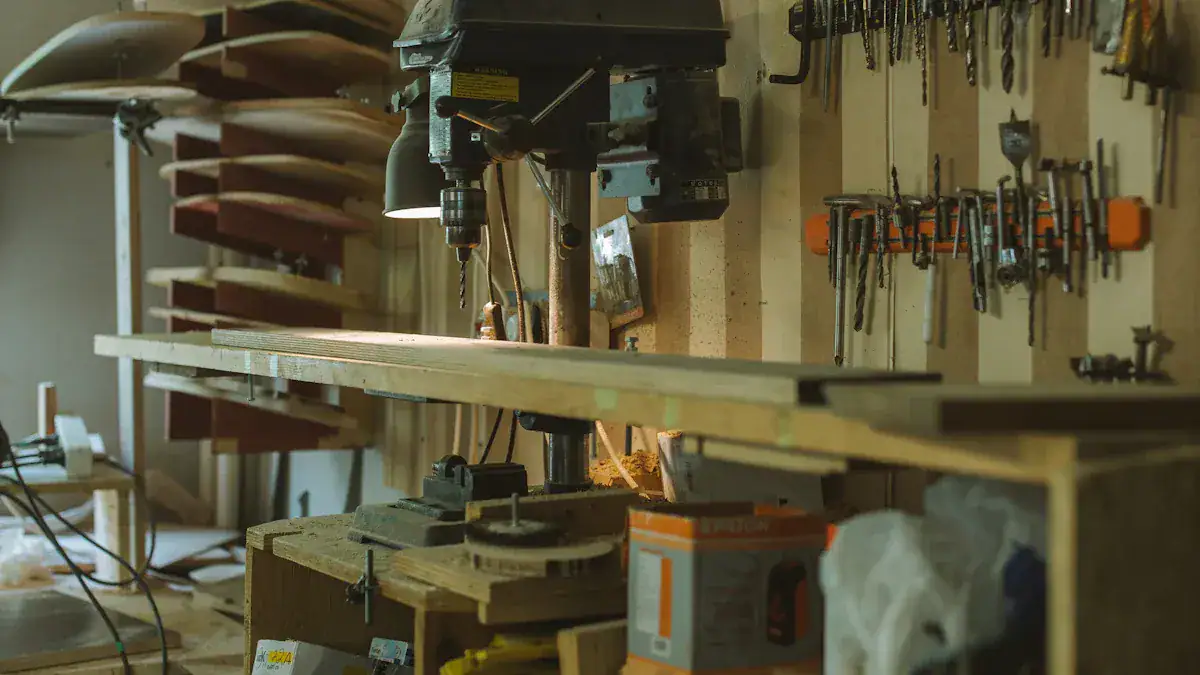
You will need several basic tools for this project. A drill helps you make holes and drive screws. A saw cuts lumber to the correct size. Use a measuring tape for accurate measurements. A stud finder locates ceiling joists. You will need a wrench for tightening bolts. Always wear safety glasses to protect your eyes.
Key Materials
You need strong materials for your hoist. Choose plywood or sturdy lumber for the lifting platform. Heavy-duty pulleys are essential. You also need rope rated for the weight you plan to lift. Hooks or straps will secure your items. Eye bolts create attachment points. A cleat helps you tie off the rope. You will use screws and bolts for assembly. Consider an electric hoist winch for an easier lift. Steel can provide extra strength for heavy-duty construction. Brackets offer additional support.
Choosing Pulleys and Rope
Selecting the right pulleys and rope is crucial for safety. Pulleys need to handle the weight you lift.
Characteristic | Value |
|---|---|
Maximum working load (lb) | 200 lb |
Minimum working load (lb) | 75 lb |
Hoist distance (ft) | 10 ft |
Mechanical Advantage | 8:1 |
A good system uses stainless steel hardware and double-braid rope. These materials offer strength and durability. For the rope, consider these features:
Strength: The rope’s size, grade, and construction determine its strength. It must handle your maximum weight.
Wear Resistance: The rope needs to resist bending fatigue. This prevents tiny fractures.
Abrasion Resistance: Larger wires in the rope offer more resistance to wear.
Withstanding Abuse: The rope should resist damage from improper use. This prevents kinks and structural failures.
High-quality carbon steel is a good choice for rope material. It offers high tensile strength and toughness.
Fasteners and Hardware
You need strong fasteners to secure your homemade ladder hoist. Use screws to attach components. Construction glue adds extra strength. When reinforcing ceiling joists, use screws to connect metal joists to wood. If you add plywood for strength, use lots of staples with glue and fasteners. This ensures your platform is secure.
Planning Your Hoist System
You must plan your hoist system carefully. This phase ensures your system works well and remains safe. You consider your garage space, what you lift, and how you want the system to operate. Good planning prevents problems later.
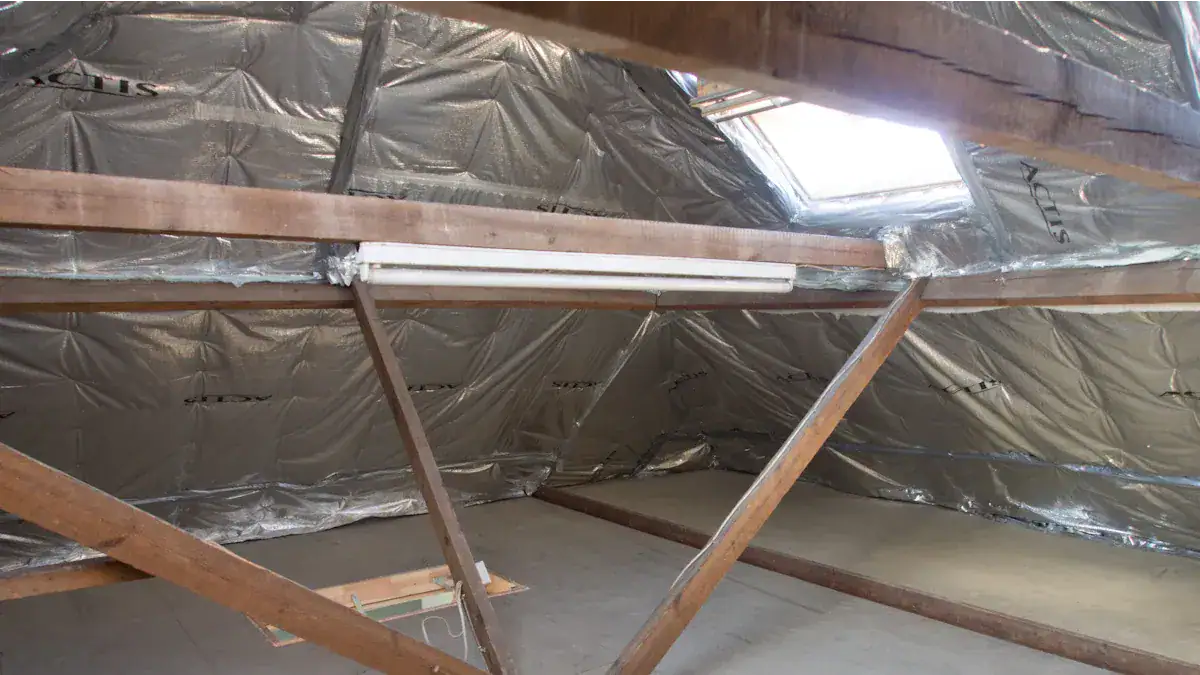
Garage Space Assessment
You start by looking at your garage. Measure the ceiling height. Locate the ceiling joists. You need to know where you can attach your hoist. Also, check available wall space for controls or rope cleats.
The primary concern is your garage ceiling’s structural integrity. It must support the hoist and the maximum weight you plan to lift. You must assess the load-bearing capacity. If you have any doubts, consult a structural engineer. This ensures your ceiling can handle the combined weight.
You have several mounting options:
Existing Ceiling Joists: You can use these if they are strong enough. You might need to reinforce them with extra lumber.
I-Beams: These are ideal mounting points if your garage has them.
Custom-Built Support Structure: You will need this if your existing ceiling is unsuitable. Builders typically construct these from steel or wood.
Remember, drywall is not strong enough. It cannot support an electric hoist. You must mount your system to a structural member.
Weight Capacity Planning
You need to know what you will lift. This determines your hoist’s required weight capacity. Will you lift ladders, bikes, storage bins, or even rooftop tents? Make a list of the heaviest items. Then, add a safety margin. Always over-engineer for weight. This means you design your system to hold more than you think you need. This ensures safety.
Design Considerations
You have choices for your hoist design. You can use a single pulley or multiple pulleys. Multiple pulleys offer more mechanical advantage. This makes lifting easier.
You also choose between a manual or an electric/winch system.
Manual Overhead Hoists (Chain Hoists):
They use a chain and pulley for mechanical advantage.
Hand power provides the sole power.
They do not need connections to compressed air or electricity.
You often use them for lighter objects.
These are among the first hoist designs. People also call them chain block hoists or hand chain hoists.
Electric Overhead Crane Hoists:
An electric motor powers them.
They are often self-contained. They only need suspension and electrical power.
Their design makes them preferable to pneumatic versions. They offer quick setup.
They can lift heavier loads than earlier manual versions.
You can permanently mount them or hang them from a hook.
Here is a comparison of manual and electric hoists:
Feature | Manual Hoists | Electric Hoists |
|---|---|---|
Power Source | Operator (gear system) | Electricity (powerful motors) |
Operation | Simple gear system, operator-powered | Motor-driven, automated lifting |
Overheating | Not prone to overheating | Prone to heating, requires consideration of usage |
Power Source Dependency | No external power source needed | Requires proximity to an electrical power source |
Usage Frequency | Operator fatigue is the main limitation | Frequency limited by motor heating and duty cycle |
Complexity | Very simple design | More complex due to motor and electrical components |
Typical Use Cases | Farmers, home mechanics, small businesses | Construction, manufacturing plants |
Consider the attachment points for your items. Will you use hooks, straps, or a custom platform? Your diy ladder hoist plans should include these details. Think about how you will secure the platform when it is in the raised position. These ladder hoist ideas help you create a functional system.
Safety in Design
You must prioritize safety. Always over-engineer for weight. This means you build your system stronger than you think you need. Use appropriate hardware. This includes heavy-duty pulleys, strong rope, and secure fasteners. Regularly inspect all components. This ensures your diy ladder hoist remains safe and reliable.
Building Your Hoist System
You are ready to build your hoist system. This section guides you through each step. You will create a functional and safe storage solution.
Mounting Surface Preparation
You must prepare your garage ceiling for mounting. This ensures your hoist remains secure. Follow these steps for proper preparation:
Identify and Mark Installation Points: You locate suitable points in your garage ceiling. These points must bear the hoist’s weight and its loads. Mark these points precisely. Consider consulting a structural engineer if you are unsure about structural integrity.
Install Ceiling Brackets: You mount the brackets according to the manufacturer’s guidelines. Drill holes and fasten them with appropriate bolts and screws. Ensure they are level and aligned.
Attach Mounting Hardware Securely: You fasten all bolts and screws tightly to the brackets. Double-check their strength and position. This prevents movement.
Verify Strength and Stability: You apply a gradual load to the support system. This tests its firmness. Ensure it can safely handle full load conditions without strain or shifts.
Installing Ceiling Pulleys
You need to install ceiling pulleys securely. This distributes the load effectively. Here are recommended methods:
You span multiple joists with lumber. Use materials like 4x4s or doubled 2x4s. Glue and screw these pieces together. Install them on edge to maximize strength. This method distributes the load well.
You tie several joists together at their panel points. Use vertical 2x6s nailed together. Trusses are strongest at these points.
You use through-bolting for hardware. Add a fender washer or a flat piece of metal. Simpson strong-tie pieces work well. This is more secure than lag screws, especially for heavier loads.
You bridge between two joists. Use 2×6 pieces with metal hangers screwed in. Stand these pieces on their edge for better support. This works even for loads around 150 lbs.
Constructing the Lifting Platform
You construct the lifting platform next. This platform holds your items. You can use plywood or sturdy lumber for the base. Cut the material to your desired size. This size depends on what you plan to store. Reinforce the platform edges with additional wood. This adds strength. Attach hooks or straps to the platform. These secure your items. Ensure the platform is balanced. This prevents tilting when you lift it. A well-built platform is essential for your homemade ladder hoist. This platform will serve as the main carrier for your stored goods. You want a robust platform. The stability of your platform is key.
Rope and Item Attachment
You attach the rope to the lifting platform. You also secure your items to the platform. Use strong knots for the rope. Here are some secure knot-tying techniques:
Half Hitch and Double Fisherman’s Knot: You use these for connecting two ropes. They are easy to untie after bearing weight. Connect main and auxiliary ropes or two safety harnesses with these.
Double Fisherman’s Knot: This knot is ideal for connecting loops or ropes. Do not use it if you need to untie it frequently. It is difficult to untie after bearing weight. Use it for connecting safety harnesses or fixing anchor points.
Double Clove Hitch: This knot is easy to adjust. It suits setting up fixed points. Use it for fixing ropes or building anchor points.
Prusik Knot: This knot can slide along the rope. You use it for ascending and descending. It helps with self-rescue, rescue, or securing loads.
Italian Hitch: This knot is easy to operate. You often use it for belaying. Use it for protecting climbers or rescue.
Water Knot: This knot is strong and durable. It is difficult to untie. Use it for fixing the end of a rope or making a rope loop.
Figure-Eight Follow-Through: This knot is safe and reliable. It is a common safety knot. Use it for connecting safety harnesses or fixing anchor points.
Wall Cleat or Winch Installation
You install a wall cleat for manual systems. This holds the rope when the hoist is up. Mount it at a convenient height. For a motorized system, you install a winch. Follow the manufacturer’s instructions carefully. Ensure the winch is securely fastened to a wall stud. This provides a safe anchor point for your lifting mechanism.
Integrating a Garage Attic Electric Hoist
You can integrate a garage attic electric hoist for easier lifting. This involves specific electrical requirements and safety considerations.
Power Requirements: You assess your single-phase versus three-phase electric supply.
Control System Compatibility: Consider manual pendant controls, wireless remotes, or automated PLC integration.
Safety Features: Look for overload protection, emergency shut-off switches, and thermal cutouts.
Overload Prevention: Most electric chain hoists include an advanced limit switch. This interrupts operation if you exceed the rated capacity.
Thermal Overload Protection: This additional safety feature prevents overheating.
Emergency Stop Controls: These are essential for rapid response to malfunctions.
You must also follow strict safety protocols for overhead lifting:
Operator Training: You ensure operators complete formal instruction. They must be certified according to local and national standards. This includes familiarization with all hoist components, load capacity charts, and manufacturer’s guidelines.
Warning Labels and Manuals: Operators must review all warning labels and manuals. This helps them understand specific risks and emergency protocols.
Emergency Controls: You locate and understand emergency shut-off switches and other critical safety controls. Do this before activating the hoist.
Pre-use Inspection: You conduct a pre-use inspection. Cover key components and safety devices. Check the hook, load-bearing cable/chain for defects, and wire rope for structural damage.
Controlled Tests: You perform short, controlled tests of hoist controls, electrical wiring, and connectors. Do this before live load lifting.
Load Securing: You secure all loads with appropriate attachments. Never exceed the hoist’s rated capacity.
Load Alignment: You maintain a direct, straight-line alignment between the load, hook, and suspension point.
Clear Area: You ensure the area under suspended loads is clear of personnel.
Load Placement: You clear the load placement area. Set the load down slowly and steadily. Use support blocks or cradles.
Tension Release: You gradually release tension from the hoist chain or wire rope. Do this when setting down a load.
Hook Positioning: You position the hook, chain, or wire rope at least seven or eight feet above the ground. Keep it away from high-traffic areas after use.
For your garage attic electric hoist, consider the beam system. The support beam must withstand the combined weight of the hoist, trolley, and maximum load. I-beams, wide-flange beams, and patented track beams are common choices. Always verify the rated capacity. This defines the maximum weight the hoist can safely handle. The Working Load Limit (WLL) is the maximum mass the hoist can consistently and safely lift. This considers safety factors, operator competency, usage frequency, and environmental conditions. Choose a hoist with an appropriate duty cycle for your application. This describes how long the hoist can run within a specified time frame. Ensure clear compliance with OSHA hoist regulations. Implement regular preventive maintenance schedules.
Common types of electric hoists suitable for attic installation include:
Brands: Versa Lift, SpaceLift, Auxx-Lift, Majic Lift, The Attic Lift.
Types: Platform Lifts, Attic Elevator Lifts, Universal Lifters, Hardtop Hoists.
Here is a comparison of two popular brands for your attic storage needs:
Feature | Versa Lift | SpaceLift |
|---|---|---|
Design | Two-cable with basket and overhead frame | 4-point lifting with high-strength belts |
Operation | Corded, Wall Switches, Wireless Remote | Hardwired Switches |
Lifting Capacity | 200 or 250 pounds | Up to 200 pounds |
Platform Sizes | Model 24 (15.3 cu. ft.), Model 32 (35 cu. ft.) | 5222-S (18″ x 41″), 5228-S (24″ x 41″) |
Installation | Mounts to attic floor | Mounts between joists or trusses |
Starting Price | $2,795 | $1,895 |
This comparison helps you choose the right system for your attic. The process of building and installing such a system requires careful planning. You must install the electric hoist correctly for safety and efficiency. This ladder hoist build will greatly enhance your attic storage.
System Testing
You must test your system before full use. Start with a light load. Slowly raise and lower the platform. Check all connections. Listen for unusual noises. Gradually increase the weight. Ensure everything operates smoothly. This final check guarantees your hoist is safe and ready.
Safety and Maintenance
You must prioritize safety and maintenance for your DIY hoist system. This ensures its longevity and safe operation.
Regular Inspections
You must regularly inspect your hoist system. This ensures its safety and longevity. A thorough checklist helps you. You need a torque wrench for anchor bolts. Use shop rags and degreaser for hydraulic components. Non-detergent hydraulic oil (ISO 32) is important. White lithium or silicone grease lubricates moving parts. A grease gun helps with this. Use a steel brush for debris on ramps. A flashlight helps inspect hidden components. A straight edge or level verifies lift alignment. A paint marker tracks maintenance dates. Consider environmental factors. Frequent use, outdoor conditions, or dusty environments affect wear. Always follow manufacturer guidelines for your specific model.
Adhering to Weight Limits
Never exceed your hoist’s weight limit. You designed your system for a specific capacity. Overloading causes failure. This creates a dangerous situation. Always know the weight of your items. Add a safety margin to your calculations.
Proper Lifting Techniques
You must use proper lifting techniques. This ensures safe operation. Ensure your hoist and equipment match the load’s weight. Read the owner’s manual. Understand all specifications. Hoist operators must follow guidelines. Inspect the hoist before each use. Check operating mechanisms and limit devices. Look at hooks, latches, and lifting media. Report any damage immediately. Remove the hoist from service if damaged. Get training from an experienced person. Follow all manufacturer safety precautions. Maintain firm footing. Check brake function before each lift. Confirm limit switches work. Take up slack carefully. Ensure the load is balanced and stable. Use hook latches. Avoid swinging the load. Confirm hook travel direction. Warn personnel about approaching loads. These proper precautions prevent accidents.
Securing Stored Items
You must secure items on the lifting platform. This prevents them from falling. Use straps or bungee cords. Distribute the weight evenly on the platform. This maintains balance. An unbalanced load can shift. This creates a hazard. Always double-check your securing methods.
Routine Maintenance
Routine maintenance extends your hoist’s life. Clean components regularly. Lubricate moving parts. Check for loose fasteners. Replace worn ropes or pulleys. These simple steps prevent major issues.
Potential Upgrades
You can upgrade your hoist system. This enhances safety or functionality.
Overload Device: This protects equipment and operators from dangerous overloads.
Motor Thermal Protection: This prevents motor damage from heavy use.
Trolley Travel Limit Switches: These stop powered trolleys at the end of their travel.
Wireless Remote Radio: This enhances operator safety by allowing control from a distance.
Variable Frequency Drive (VFD): This offers precise speed control for electric hoists.
Motorizing the lift adds convenience. Regular maintenance is crucial for longevity. Customization improves efficiency.
DIY ladder hoists significantly improve garage organization. You utilize your space efficiently. Building your own system, whether manual or motorized, offers great satisfaction and practicality. This project demands careful planning. You need correct materials, including heavy-duty options. Adherence to safety is always crucial. Embark on this rewarding project. You will transform your garage. Reclaim your space and enhance storage capacity with your new diy ladder hoist.
FAQ
What is the average cost to build a DIY hoist?
You can build a basic manual hoist for $100 to $300. This includes lumber, pulleys, and rope. An electric winch adds $150 to $500. Your total cost depends on material quality and system complexity.
What types of items can I lift with a DIY hoist?
You can lift many items. Common examples include ladders, bicycles, storage bins, and seasonal decorations. You can also lift kayaks or rooftop tents. Always check your hoist’s weight capacity before lifting.
What are the most important safety precautions for my hoist?
You must always adhere to weight limits. Regularly inspect all components for wear. Use proper lifting techniques. Secure all items on the platform. Never stand under a suspended load.
What is the main difference between a manual and an electric hoist?
A manual hoist uses your physical effort with a rope and pulley system. An electric hoist uses a motor to lift items. Electric hoists offer more convenience. Manual hoists are simpler and cost less.
What materials are best for the lifting platform?
You should use sturdy plywood or solid lumber for the lifting platform. These materials provide strength and stability. Reinforce the edges for added durability. Ensure the platform is balanced for safe lifting.
