
Is your home office plagued by a drab, outdated file cabinet? You can easily transform an old file cabinet into a stylish piece! This DIY file cabinet makeover uses contact paper, an incredibly versatile and affordable material. This easy DIY project lets you elevate the look of your space. You will achieve a stunning, personalized outcome. This contact paper makeover is accessible to everyone. You can apply contact paper for a fresh, new look.
Why Contact Paper for Your DIY File Cabinet Makeover
You want to update your space without breaking the bank, right? Contact paper is an awesome choice for your next DIY project. It offers a budget-friendly and renter-friendly solution for updating old furniture. Think of it as peel and stick wallpaper for your cabinets! This material makes a stunning transformation easy.
Cost-Effective Transformation
Buying a new file cabinet can be expensive. Painting takes time and can get messy. Contact paper offers a super affordable alternative. You get a fresh, new look for a fraction of the cost. This makes your diy file cabinet makeover a smart financial move. It is perfect for anyone on a budget.
Wide Variety of Styles
You can find contact paper in so many designs! This means you can easily match your personal style. You can choose from popular patterns and textures like:
Marble
Wood grain
Tile
Floral
Geometric
Metallic
Solid-color
You also find specific looks such as Matte Gold, Grey and White Marble, or Brushed Copper. Do you like the feel of natural materials? You can even find contact paper that mimics granite, wood, or various metals. This wide selection helps you achieve any look you desire for your furniture. It is just like using peel and stick wallpaper to change a room’s vibe.
Easy Application and Removal
Applying contact paper is straightforward. You do not need special tools or skills. If you make a mistake, you can often peel it back and reapply it. This makes your makeover less stressful. If you ever want a new look, removing contact paper is also simple. It usually comes off without damaging the surface underneath. This makes it a great option for renters or those who like to change their decor often.
Surface Protection
Contact paper does more than just look good. It also protects your file cabinet’s original surface. It acts as a barrier against scratches, spills, and everyday wear and tear. This helps keep your cabinet in better condition. Your DIY project gives you both beauty and practicality.
Supplies and Cabinet Preparation for Your Makeover

Before you dive into your exciting diy file cabinet makeover, you need to gather your tools and get your cabinet ready. Proper preparation makes all the difference for a smooth and lasting finish. Think of it as laying the groundwork for a beautiful transformation.
Essential Tools and Materials
You will need a few basic items to start your project. Grab a screwdriver to remove hardware. You also need a good pair of scissors and a pencil for marking. A box cutter or craft knife helps you get clean cuts. Don’t forget a smoothing tool! This is super important for getting rid of air bubbles. You can use a plastic smoother, which is simple and inexpensive. A squeegee with a felt edge works great too. One side has a hard plastic edge. This helps you guide the contact paper into corners. The other side has a soft felt surface. This smooths out air bubbles without damaging your new surface. For delicate materials, you might even use a smoothing brush with soft bristles.
You also need your star material: contact paper! Measure the width and length of your cabinet drawers and sides. Then, buy a little extra contact paper. It is always better to have too much than too little. This ensures you have enough for any mistakes or tricky spots.
Thorough Cleaning and Degreasing
A clean surface is a must for contact paper to stick well. You want to remove all dirt, dust, and especially grease. Grease can stop the contact paper from adhering properly. Start by wiping down your entire file cabinet with a damp cloth. Then, you need to degrease it.
For heavy degreasing, you have some great options. Orange-Aid Industrial Citrus Cleaner Degreaser is a versatile choice. It is water-based and removes dirt, oil, and grease effectively. It is also non-toxic and non-flammable. You can dilute it 1:1 with water for tough jobs. Another powerful option is NCL-1025CT NEXT STEP HEAVY DUTY DEGREASER CLEANER. This concentrated cleaner emulsifies severe grease. It also has corrosion inhibitors. This makes it safe for ferrous metals like your file cabinet. Just dilute it 1:10 for most tasks. Remember, do not use it on soft metals like aluminum. Dawn Professional Heavy Duty Liquid Degreaser is also excellent. It removes grease, oil, and soil. It is safe for metal surfaces and is caustic-free. Choose the cleaner that works best for you. After cleaning, let the cabinet dry completely.
Sanding and Repairing Surfaces
Most file cabinets have a smooth metal surface. You might not need to sand it. However, if your cabinet has very rough spots, rust, or chipped paint, a quick sanding helps. This creates a better surface for the contact paper to grip. Use 220 or 320-grit sandpaper. This fine grit smooths the surface. It helps the contact paper stick better. Just a light sanding is enough. You are not trying to remove all the paint. You are just creating a little texture. If you have any dents or deep scratches, you can fill them with metal-specific putty. Let it dry and then sand it smooth. This step ensures your makeover looks professional.
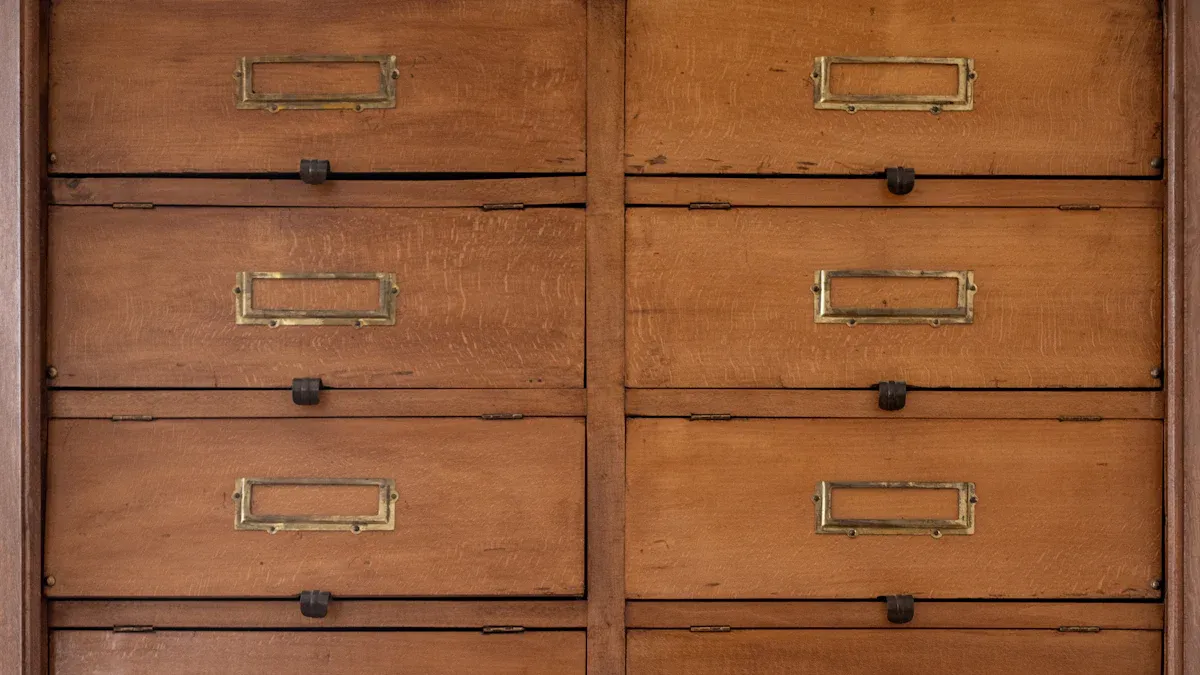
Removing Hardware
For a truly seamless filing cabinet makeover, you should remove all hardware. This includes drawer pulls, handles, and any labels or tags. Use your screwdriver to take off the handles. If your drawers come out easily, remove them too. This makes applying the contact paper much simpler. You can wrap the contact paper around the edges of the drawers. This gives you a cleaner finish. You can always reattach the old hardware later. Or, you can upgrade to new, stylish pulls for an even fresher look. This diy project gives you many choices. You can make your cabinet look like new. It will not look like a simple peel and stick wallpaper job.
Essential Steps for Your Filing Cabinet Makeover
You have gathered your supplies and prepped your cabinet. Now comes the fun part: applying the contact paper! This tutorial will guide you through each step. Remember, patience is your best friend here. Working slowly helps you avoid bubbles and wrinkles. Getting perfect alignment can be challenging, but you can do it.
Accurate Measuring and Cutting
Precise measurements are crucial for a professional-looking makeover. You need to measure every surface you plan to cover. This includes the top, sides, and each drawer face. Use a measuring tape to get the exact width and length.
For example, a common flat file cabinet drawer might have these dimensions:
Cabinet Type | Width | Depth | Height |
|---|---|---|---|
Safco Flat File 5 Drawer | 50″ | 38″ | 2″ |
You also need to consider the drawer’s internal structure. Hanging file folders are about 12 3/4″ overall. The centers of rails for hanging files are 12 1/4″ apart. The top of the rails sits about 10″ from the bottom of the drawer. It is about 1″ from the top of the drawer.
Always cut your contact paper a little larger than your measurements. Add an extra inch or two on each side. This gives you room for error. You can trim the excess later for a perfect fit.
Starting with Flat Surfaces
Begin your contact paper application with the largest, flattest surfaces. The top and sides of your file cabinet are good starting points. This helps you get a feel for the material.
Peel back about 2-3 inches of the backing paper from one edge of your cut contact paper piece.
Align this exposed sticky edge with the edge of your cabinet surface. Make sure it is perfectly straight. This initial alignment is very important.
Press the sticky edge down firmly.
The Peel, Align, and Smooth Method
This method is key to a smooth, bubble-free finish.
Peel: Slowly peel away more of the backing paper with one hand. Do this in small sections, about 4-6 inches at a time.
Align: As you peel, gently lay the contact paper onto the cabinet surface. Keep it aligned with the edges.
Smooth: Use your smoothing tool (a squeegee or even a credit card works) to press the contact paper down. Start from the center of the applied section. Work your way outwards to the edges. This pushes out any air bubbles. Overlap your strokes slightly. Continue this process, peeling and smoothing, until you cover the entire surface.
Tip: If you see a bubble, gently lift the contact paper back to that point. Then re-smooth it down. Work slowly. This prevents creases.
Mastering Corners and Edges
Corners and edges can be tricky. You can achieve a clean look with a little technique.
For outside corners, you can wrap the contact paper around. For inside corners, you might need to make a small cut. This allows the paper to lay flat.
When you join pieces of contact paper, you want a seamless look. Overlapping seams for contact paper often results in a better appearance. For some films, like Bodaq, you should overlap new sheets with previously applied ones by 0.25 inches (1 cm). This helps hide seams and creates a seamless lineup. However, some patterns might still show a slight seam. When you work around tricky areas like sinks or stoves, it is best to line up the seams instead of overlapping them. You can also heat the seams slightly with a hairdryer. Then press them together. This helps them bond.
Trimming for Clean Lines
Once you have applied the contact paper, you will have some excess material. Trimming this excess gives your diy file cabinet makeover a polished, professional finish.
Use a sharp utility knife or a box cutter. An exacto knife is also excellent for precision.
Hold the knife at a slight angle. Run it along the edge of the cabinet. This creates a clean, straight cut.
A smoother is essential for preparing the surface before trimming. Use it to press the contact paper firmly into the edges. This helps you get a crisp line.
For very tight corners, small scissors can be more effective. They let you make detailed cuts where a utility knife might be difficult to maneuver.
A utility knife with break-off blades is ideal for precise cuts. Always use a fresh, sharp blade. This prevents tearing the contact paper.
Your filing cabinet makeover is almost complete! You have transformed your old cabinet into a stylish piece. It looks like new peel and stick wallpaper has been applied.
Troubleshooting and Final Touches for Your File Cabinet Makeover
You have done a great job with your contact paper application. Now, let’s tackle any small issues. You will also add those final touches. These tips ensure your diy file cabinet makeover looks perfect.
Dealing with Air Bubbles and Wrinkles
Sometimes, air bubbles or wrinkles appear. Do not worry! You can fix them. For small air bubbles, use a fine needle or a pin. Gently prick the bubble. Then, use your smoothing tool. Press the air out towards the nearest edge. For larger bubbles or wrinkles, you might need to lift the contact paper. Peel it back slowly to the problem area. Then, reapply it. Use your smoothing tool. Work from the center outwards. This helps push the air out. Patience is key here.
Achieving Seamless Joins
You might have needed more than one piece of contact paper for large surfaces. You want those joins to look seamless. When you apply the second piece, overlap it slightly. Overlap by about 1/4 inch. Then, use a sharp craft knife and a ruler. Cut through both layers of contact paper. Cut right down the middle of the overlap. Remove the excess strips from both layers. Now, you have a perfect butt joint. Press it down firmly. This creates a clean, almost invisible seam. Your filing cabinet makeover will look professional.
Reattaching or Upgrading Hardware
Your cabinet is covered. Now, put the hardware back on. You can reattach the original handles. Or, you can upgrade them! New hardware adds a fresh style to your file cabinet. Many popular choices exist. You can find:
Hardware Types:
Solid Brass Card Holders with Pulls
Filing Cabinet Card Holders
Brass Handles (like 3.5″ Front Mount)
File Cabinet Card Holder Pulls
Brass Plated Filing Cabinet Card Holders
2″ File Cabinet Card Holder w/Pull
Finishes:
Antique Brass
Brass
Brushed Nickel
Oil Rubbed Bronze
Polished Nickel
Choose hardware that matches your new look. This small change makes a big impact.
Personalizing Your Transformed Cabinet
Your makeover is almost done. Now, make it truly yours! Add some personal touches. You can use decorative magnets. You can add labels to the drawers. This helps with organization. You can even add small decorative items on top. Think about what fits your space. This diy project lets you express your creativity. Your cabinet is no longer just a storage unit. It is a stylish piece of furniture. It looks like you applied custom peel and stick wallpaper.
You just transformed your old file cabinet! This DIY project with contact paper is so satisfying. You saw how easy it is to get a stunning new look. This budget-friendly file cabinet makeover lets you personalize your space. Embrace your creativity! Your DIY efforts give your office a fresh look. We can’t wait to see your amazing transformations. Share your results with us and inspire others!
FAQ
Can you use contact paper on any type of file cabinet?
You can use contact paper on most smooth, non-porous surfaces. Metal, laminate, and painted wood work best. Rough or heavily textured surfaces might not allow the paper to stick well. Always clean and prep your surface first.
How long does contact paper typically last on furniture?
Contact paper can last several years. Its lifespan depends on the quality of the paper and how much wear and tear it gets. Proper application helps it last longer. You can easily replace it when you want a new look.
What if you get bubbles or wrinkles during application?
Do not worry about bubbles! You can fix them. Gently lift the contact paper back to the problem area. Then, re-smooth it down with your tool. For small bubbles, prick them with a pin. Push the air out.
How do you clean your contact paper-covered file cabinet?
You can clean contact paper easily. Use a damp cloth and mild soap. Avoid harsh chemicals or abrasive scrubbers. They can damage the finish. Wipe spills quickly to keep your cabinet looking fresh.
Will contact paper damage the original finish of your file cabinet?
High-quality contact paper usually removes cleanly. It does not damage most surfaces. This makes it great for renters. Test a small, hidden area first if you are concerned.


