
You can create a truly unique pc with a diy custom computer case. This allows unparalleled personalization. You will optimize your pc’s performance with better airflow and component fit. The satisfaction of a unique build is immense. This guide covers the entire journey from initial design to final personalization. You will learn to build a custom pc case, an alternative to off-the-shelf options. This project offers great creative freedom. You will enjoy this rewarding build.
Why Build a Custom PC Case
Benefits of a Custom PC Case
You gain many advantages with a custom PC case. You achieve unparalleled personalization. Your PC will look exactly how you want. You can optimize performance. A custom case allows for superior airflow. This keeps your components cool. You ensure a perfect fit for all parts. This is especially true for a high-performance gaming PC. You can design a case around specific, powerful components. This leads to better thermal management. You also get the satisfaction of a unique build. No one else will have a PC like yours. This makes your gaming setup truly stand out. You control every detail of your PC’s home. This level of customization is impossible with standard gaming PC cases.
Is a Custom Build for You
Consider a custom build if you want complete control. Building your own PC case offers immense creative freedom. You might wonder if this endeavor suits you. This project is perfect for enthusiasts. You want a PC that reflects your style. You also seek optimal performance for your gaming needs.
However, you will face some challenges. First-time builders often encounter common issues.
You might not install everything correctly. This includes the I/O shield, CPU, memory modules, and cooling solutions.
You could forget to plug everything in. This leads to blank screens or system failure.
You might skip BIOS and driver updates. This causes compatibility issues and performance problems.
You may neglect testing after assembly. This can hide hardware issues or lead to unexpected failures.
Despite these hurdles, the reward is great. You create a truly unique gaming PC. This build will perfectly house your powerful gaming components. You gain a deep understanding of your PC. This makes future upgrades easier. If you enjoy hands-on projects, a diy custom computer case is for you. You will love the process of bringing your vision to life. This build is more than just a computer; it is a statement.
Planning Your Custom PC Case
You begin your custom build journey with careful planning. This stage is crucial for your diy custom computer case. You must design around your specific PC components. This ensures compatibility and functionality. Consider the smallest production-quality pc case for powerful components. This maximizes space efficiency for your gaming pc.
Key Design Considerations
First, think about the enclosure’s size. This is its form factor. Do you need a large tower for multiple GPUs? Or do you need a compact design for small spaces? This choice dictates specific form factors. These include mini-ITX or micro-ATX. They accommodate particular motherboard sizes.
Next, ensure internal component compatibility. Your case must support your GPU’s size. An oversized GPU causes issues. These include cable routing and RAM clearance. The PSU bay placement is also crucial. All cables must reach their components. This ensures your custom gaming pc performs optimally.
Cooling and airflow are vital. For demanding gaming applications, prioritize cases with ample breathing room. Proper ventilation is key. This means front, back, and top vents. They support optimal airflow and fan placement. If you use AIO liquid cooling, confirm the case has space and openings.
Finally, plan for cable management. A good system is vital for aesthetics. It improves airflow. It makes maintenance easier. This includes routing channels, Velcro straps, and PSU shrouds. You also need sufficient rear clearance.
Case Type | Dimensions (H×W×D) | Supported Boards | Notes |
|---|---|---|---|
SFF | 8–12″ × 4–6″ × 10–14″ | Mini-ITX only | Smallest, advanced builds |
Mini Tower | ~14″ × 12″ × 18″ | Micro-ATX, Mini-ITX | Compact, versatile |
Mid Tower | ~18–20″ × 7–9″ × 18–20″ | ATX, mATX, ITX | Best balance |
Full Tower | 20+” tall | E-ATX, ATX, mATX, ITX | Maximum expandability |
Motherboard Type | Size (W×D) | Slots | Fits In |
|---|---|---|---|
ATX | 12″ × 9.6″ | 7 | Mid & Full Towers |
Micro-ATX | 9.6″ × 9.6″ | 4 | Mini, Mid, Full |
Mini-ITX | 6.7″ × 6.7″ | 1 | SFF, larger |
E-ATX | up to 13.6″ × 13″ | 7+ | Full Towers only |
Designing Your PC Case
You can bring your vision to life with freeware CAD programs. These tools help you create a precise design. They are excellent for designing a pc case.
Some recommended programs include:
OnShape
Fusion 360
FreeCAD
Sketchup
Autodesk Inventor
SolidWorks
Solid Edge
Onshape is a highly recommended 3D CAD software. It offers parametric modeling. This records every operation for easy edits. It is a feature-rich 3D modeler. It compares to paid alternatives. It has additional functionalities. These come from free third-party apps and community scripts. Onshape is fully cloud-based. It requires no installation. It offers auto-save. It is platform-independent. It facilitates real-time collaboration. A significant advantage for PC case design is its ability to produce high-quality, watertight STL files. These are ideal for CNC manufacturing methods. These include laser cutting or 3D printing.
You must also design for specific space requirements. This ensures your custom enclosure fits your environment. Measure your desk or shelf space carefully. This helps you create a functional and aesthetic design for your gaming station.
Choosing Case Materials
Your material choice impacts your custom case’s performance and look. You need to consider thermal conductivity and structural integrity for your gaming setup.
For parts needing heat conduction, aluminum is ideal. It has excellent thermal conductivity. This helps dissipate heat from components.
Property | Value |
|---|---|
Thermal Conductivity | 0.17-0.19 W/mK |
Wood is an excellent material for CNC machining. It has good machinability and natural beauty. Wood is generally an insulator. Materials with low thermal conductivity, like wood, are good for heat insulation.
Consider the structural integrity of different materials for your gaming PC:
Material | Key Structural Properties |
|---|---|
Steel | Strength and Durability: Excellent strength, highly durable, resistant to bending and warping. Weight: Heavier than aluminum. Cost: Generally more affordable. Thermal Conductivity: Good thermal conductivity, aiding in heat dissipation. Corrosion Resistance: Susceptible to rust if not properly coated or treated. Acoustic Properties: Good at dampening noise due to its density. |
Aluminum | Strength and Durability: Lighter than steel but still offers good strength. Less rigid than steel, can be prone to dents if thin. Weight: Lightweight. Cost: More expensive than steel. Thermal Conductivity: Excellent thermal conductivity, superior to steel for heat dissipation. Corrosion Resistance: Naturally resistant to corrosion and rust. Acoustic Properties: Lighter and can transmit vibrations more easily, potentially leading to more noise if not designed well. |
Tempered Glass | Strength and Durability: Stronger and safer than regular glass. It shatters into small, blunt pieces upon impact. Weight: Heavier than both steel and aluminum for the same thickness. Cost: It adds to the overall cost of the enclosure. Thermal Conductivity: Poor thermal conductivity. It traps heat inside the case. Corrosion Resistance: Not applicable as it’s glass. Acoustic Properties: It reflects sound. This makes the case louder if not combined with sound-dampening materials. |
Plastic (ABS) | Strength and Durability: It varies greatly by type and thickness. Generally less durable than metal or glass. Weight: Very lightweight. Cost: Very affordable. Thermal Conductivity: Poor thermal conductivity. It traps heat. Corrosion Resistance: Resistant to most chemicals and moisture. Acoustic Properties: It molds to reduce noise. It is not as good as steel. |
Wood | Strength and Durability: It varies greatly by wood type. It can be strong. It is susceptible to moisture and temperature changes. Weight: It varies. It is generally lighter than steel. It is heavier than plastic. Cost: It can be expensive for high-quality wood. Thermal Conductivity: Poor thermal conductivity. It traps heat. Corrosion Resistance: It is susceptible to rot and pests if not treated. Acoustic Properties: It has excellent natural sound dampening properties. |
Carbon Fiber | Strength and Durability: Extremely high strength-to-weight ratio. Very rigid and durable. Weight: Extremely lightweight. Cost: Very expensive. Thermal Conductivity: Low thermal conductivity. Corrosion Resistance: Excellent resistance to corrosion. Acoustic Properties: It can be resonant. It can also design to dampen vibrations. |
Essential Tools for Building
You do not always need advanced tools like CNC machines or 3D printers. You can build a custom enclosure with basic hand tools. These tools help you achieve a professional finish for your gaming project.
Here are some essential tools for your build:
Hemostat: This is useful for hard-to-reach standoffs. It helps with standoffs trapped under a motherboard. You can clamp onto screw threads. You can hold rubber ‘screws’ for case fans.
Flathead screwdriver: This helps push in stubborn plastic clips on case panels. A standard driver with a longer neck works well. (1/4- or 3/8-inch head, 8-inch neck).
Rubber bands: These protect paint from tool teeth. They add grip for stripped screws. They make it easier to slide off side panels.
Adjustable wrench (crescent wrench): This tightens standoffs before motherboard installation. It holds a spinning standoff in place while loosening a screw.
Vise grip: This extracts screws with stripped heads. You clamp around the screw head and turn. It also holds rubber ‘screws’ for case fans.
Hex nut driver: This is essential for tightening motherboard standoffs to the enclosure. Do this before motherboard installation. It prevents them from spinning loose later. (5mm and 3/16-inch sizes are common).
Flashlight or headlamp: This provides illumination in dark areas of the case. It helps locate screws, pin labels, and screw holes. A headlamp offers hands-free operation.
Screw tray: This container organizes screws. It prevents screw loss during construction. (A shallow dish, pill case, or magnetic tray works).
Budgeting Your Custom Build
Your budget plays a big role in your custom case project. Material costs vary greatly. High-quality metals like aluminum or carbon fiber are more expensive. Wood or plastic can be more affordable. Consider the cost of tools. Basic hand tools are inexpensive. Specialized tools like a Dremel or a drill add to the cost. Factor in any outsourcing for cutting or finishing. This helps you manage your overall project cost. A well-planned budget ensures you complete your custom gaming pc without surprises. This allows you to focus on the fun of building your unique gaming setup.
Building Your DIY Custom Computer Case
You are ready to start building your custom PC case. This is the most exciting part. You do not need advanced tools like CNC machines or 3D printers. You can build a PC case from scratch using cheap materials and basic hand tools. This step-by-step guide will help you.
Workspace and Material Prep
First, set up your workspace. You need a clean, well-lit area. Make sure it is safe. You will use tools. Organize your materials. Lay out your design plans. Double-check all measurements. Cut lists help you prepare each piece. This preparation saves time later. It also prevents mistakes. Ensure you have all your chosen materials ready. This includes wood, metal, or plastic sheets.
Cutting and Shaping Case Parts
Now, you will cut your case parts. Use the right tools for your material. For wood, you might use a hand saw or a jigsaw. For metal, you might use tin snips or a hacksaw. Always wear safety glasses. Cut each piece according to your design. After cutting, shape the edges. Use files or sandpaper to smooth rough spots. This makes the case safe to handle. It also gives your gaming PC a professional look. You want clean lines for your gaming setup.
Assembling Frame and Panels
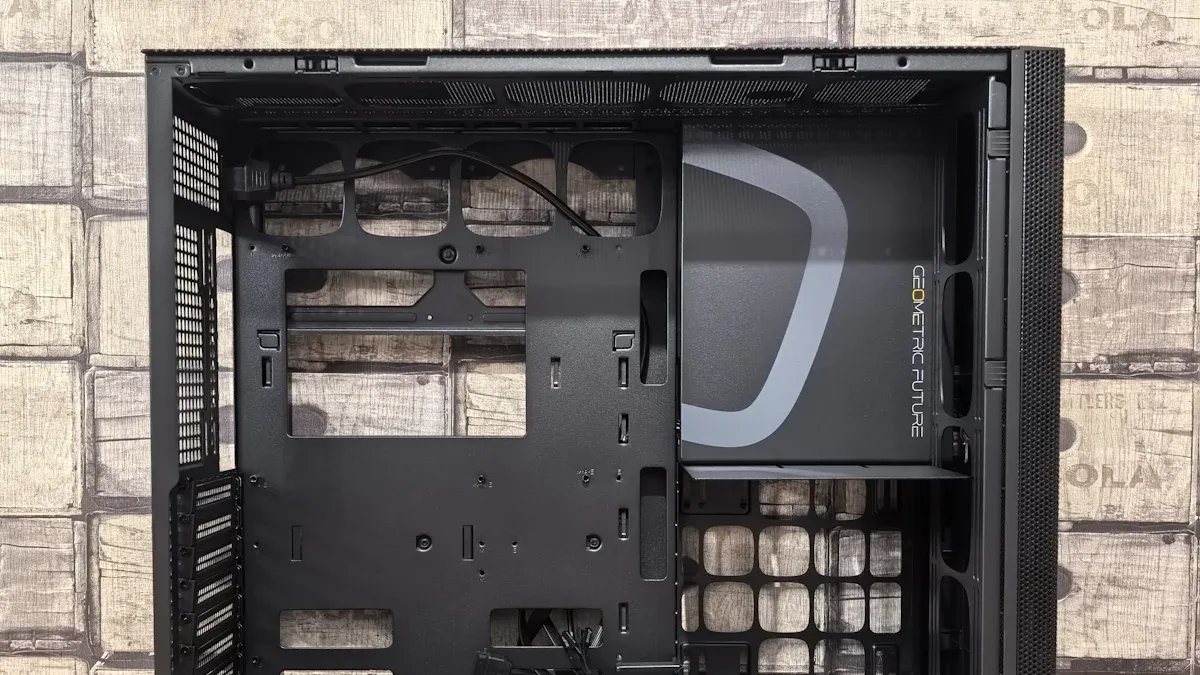
Next, assemble the main frame. This is the skeleton of your case. Join the pieces securely. You can use screws, rivets, or even strong adhesives. If you use metal, you might weld parts. Ensure the frame is square. Use a carpenter’s square to check corners. A rigid frame is important. It supports all your PC components. Then, attach the side panels, top, and bottom. These form the outer shell of your custom PC. Make sure they fit snugly. This helps with airflow and dust control.
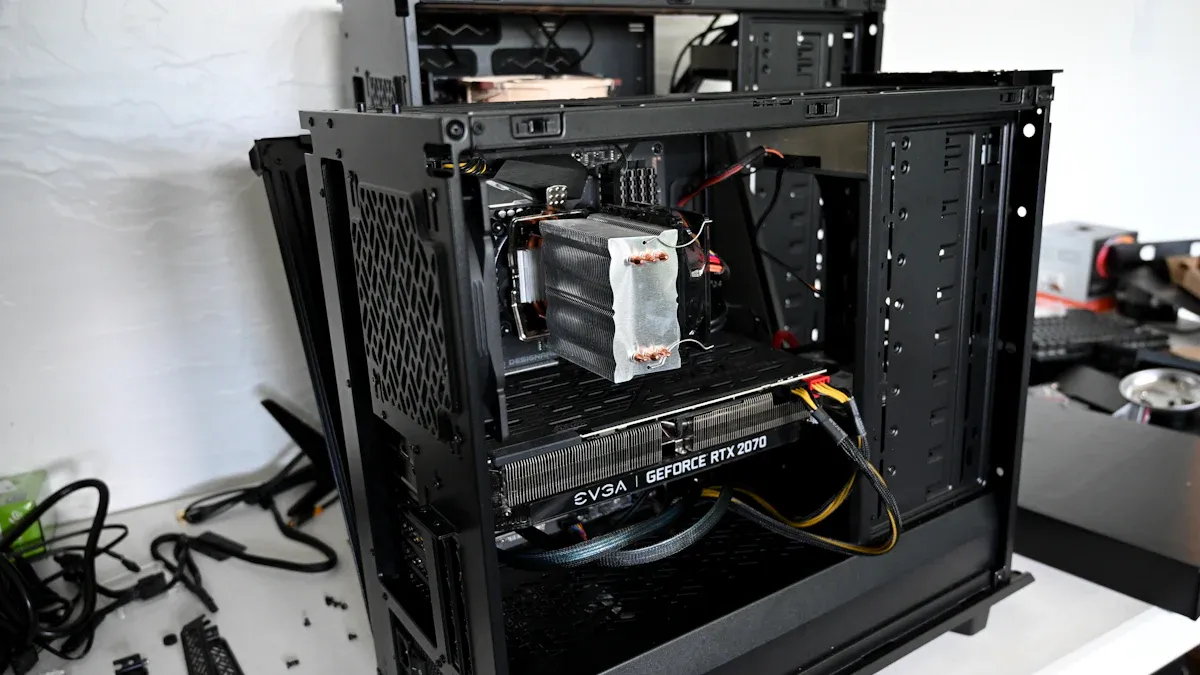
Mounting Internal Components
Now, you will mount your PC components inside the case. This is a critical step.
Motherboards use metal spacers called standoffs. You screw these into the case. They lift the motherboard. This prevents short circuits. The motherboard must not touch the metal case. ATX motherboards usually have 9 or 10 mounting points. Micro-ATX boards often share some of these. They have 9 total holes. Mini-ITX boards have 4 mounting points. You must remove any unused standoffs. If you install a smaller motherboard in a larger case, remove them. This avoids short circuits.
For power supplies, most modern systems use the standard ATX form factor. Smaller builds might need compact PSU types like SFX. You must check that your case supports your chosen power supply size. Also, ensure the PSU has the correct connectors. This includes a 24-pin main connector. It also includes an 8-pin CPU power connector.
Mount your storage drives. Use screws or tool-less trays. Install your graphics card. Ensure it is secure in its slot. You want everything stable for your gaming sessions.
Integrating I/O and Controls
You need to integrate the input/output (I/O) ports. These are on the front of your case. This includes USB ports, audio jacks, and power/reset buttons. Cut precise openings in your case panels. Install the I/O modules. Then, route their internal cables. Connect them to your motherboard. Make sure all buttons click properly. Test the ports. You can also add custom switches or displays. This adds unique flair to your gaming PC.
Airflow and Cable Management
Good airflow is vital for your gaming PC. It keeps components cool. You need to plan your fan placement.
Positive Air Pressure: More air enters the PC case than leaves it. This helps clear dust. It forces dust out. But too much positive airflow can trap heat.
Negative Air Pressure: More air leaves the PC case than enters it. This expels hot air. It keeps temperatures cooler. But dust can accumulate through unsealed areas.
Balanced Airflow: Both positive and negative airflow are important. You need to prevent overheating. You also need to manage dust. Fan size and case dimensions matter.
For optimal airflow, you want positive pressure. This means intake fans push more air than exhaust fans pull out. This helps reduce dust buildup. Only intake fans need filters. Air forces out through unfiltered vents. This also helps graphics card coolers.
Now, manage your cables. This improves airflow and aesthetics.
Plan your cable routing before you start. Visualize airflow. Identify cable lengths.
Use cable management holes. Use grommets. Route cables behind the motherboard tray. This keeps them out of sight. Grommets protect cables from sharp edges.
Route power cables behind the motherboard tray. Use dedicated cable management space.
Keep SATA cables and USB headers close to the motherboard.
Avoid running cables across airflow paths. Route them along case edges. This minimizes interference.
Use cable ties and Velcro straps. Secure cables in optimal positions.
Bundle related cables together. Route them as bundles. This reduces obstruction.
Use a modular power supply. Connect only necessary cables. This reduces clutter.
Choose a case with built-in cable grommets. Look for cutouts and rear routing channels. A PSU shroud helps too.
Make an airflow plan before installing components. Ensure cables do not block fan paths.
Clean out dust regularly. This prevents airflow obstruction.
Personalizing Your Custom Case
You can make your custom pc truly yours. Personalization adds unique flair. This section shows you how to customize your build.
Painting and Finishing
You can transform your pc case with paint. If you use an existing case, you must prepare it first. Sand the case down with high-grit sandpaper. Degrease the case with Windex. This ensures paint adhesion. It also prevents dust. Tape off headers and large holes inside the case. Dust off all metal components. Remove all buttons from the case front. Use a gray primer coat first. It dries quickly. This makes white coats easier to apply. You will need fewer coats. Always work in a well-ventilated area. Wear a mask to avoid inhaling paint. Use hangers for smaller pieces. Be careful not to scratch the paint. Paper your work area. Construction paper works better than newspaper. If paint runs, clean it off. You can also sand it down and redo it. After painting, use 600 grit wet sandpaper. Gently grind down any uneven corners. Rinse the area after sanding. Use new cloth towels to pat the surface dry. A hair dryer can speed up drying. Ensure the surface is bone dry and lint-free. Avoid touching freshly painted surfaces. Paint needs 3 to 7 days to cure completely.
For durability, consider powder coating. Engineers and designers often prefer it. It offers durability and aesthetic appeal. Powder coating uses a dry powder. You apply it electrostatically. Then you heat-cure it. This finish is tougher than liquid paint. Polyester powder coat offers excellent impact resistance. It has good flexibility. Epoxy powder coat provides superior corrosion resistance. It is very durable. Steel cases and aluminum cases both provide smooth surfaces. Paint adheres easily to them.
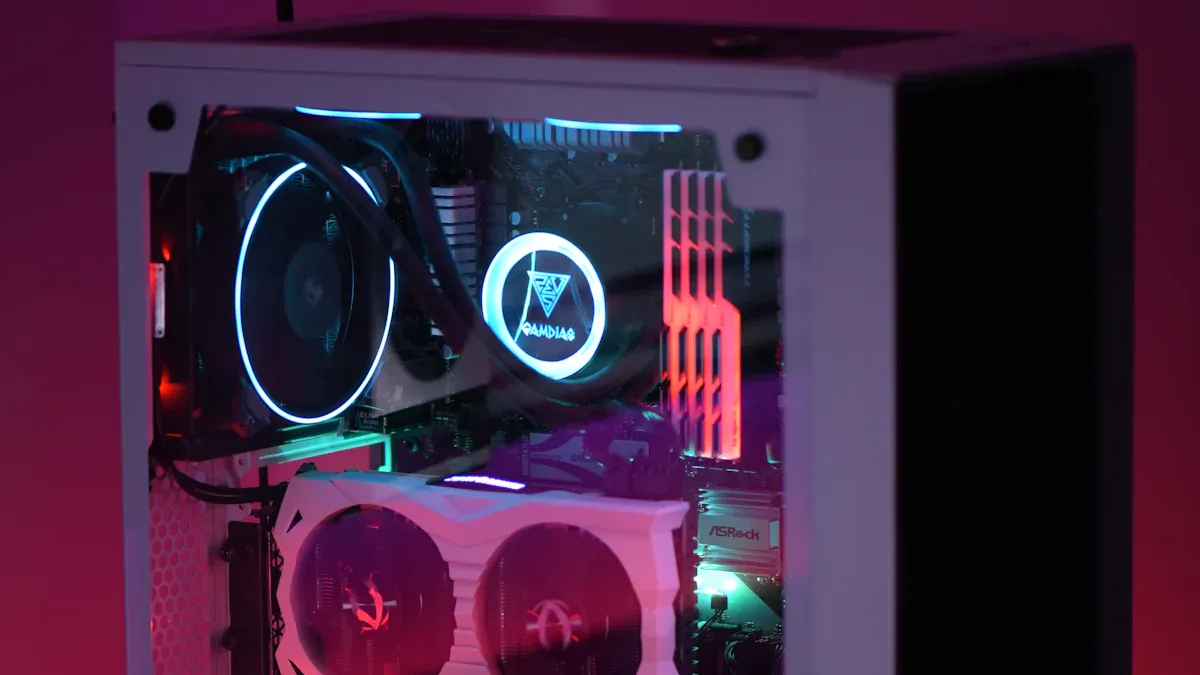
Custom Lighting Options
Lighting adds a dynamic touch to your pc. LED tape, or LED strips, are flexible lighting devices. They have multiple LEDs. You can place them on hidden edges for indirect lighting. You can also place them visibly for a bold effect. The pc case itself can be lit. This often serves as a tasteful accent. You can also light included case fans. This creates a vibrant gaming atmosphere.
Engraving and Decals
Engraving and decals personalize your custom build. For decals, prepare the area. Ensure the surface is clean and dry. Remove the backing paper from the decal. Slowly peel off the application tape. Position the decal. Carefully place one edge onto the surface. Gradually roll it down. Avoid direct placement to prevent bubbles. Use a card to squeeze it into place. Secure the decal. Rub over the entire decal with a squeegee. This ensures it sticks. It also pushes out bubbles. Slowly peel back the application tape. Pull it at a 45-degree angle. If any parts lift, lay the tape back down. Squeegee harder.
You can also create your own stickers. Gather digital designs. Use photo editing software. Place designs on an A4 document. Print on thick glossy photo paper. Laminate the printout. Cut out the designs. Blacken the edges with a marker. Apply glue to the back. Stick them onto A4 sticker paper. Cut them out again. You now have glossy, laminated stickers for your custom pc.
Adding Unique Features
You can add unique features to your build. Consider kinetic designs. The CyberPowerPC Kinetic Series case has motorized triangular vents. They open and close based on internal temperatures. This optimizes airflow. It makes the pc seem alive. You can customize temperature ranges for vent activation. You can also control them manually. Robert of Ideal Idea Creations built a kinetic pc case sculpture. It has motorized, swappable front panels. He used laser-cut plywood. A stepper motor controls the internal mechanisms. An Arduino Uno board powers it. You can adjust rotation parameters. You can also use custom scripting. Other ideas include customizable cables. You can customize component plates. Adding LED strips also enhances your gaming setup. This makes your custom pc truly one-of-a-kind.
Final Assembly and Testing
You have built your custom case. Now, you will bring your custom pc to life. This final stage involves careful component installation and thorough testing.
Installing PC Components
You will now install all your gaming pc parts into your custom build. Read all instructions before you start. Never force parts into place. They fit only one way. Many common pitfalls exist. You might skip the manuals. These provide crucial information for proper installation. You could ignore compatibility issues. Incompatible components, especially between the motherboard, CPU, and RAM, prevent system function. Tools like PCPartPicker help avoid this. You might underestimate power supply requirements. Incorrect wattage calculation leads to instability. Choose a reliable PSU with adequate wattage. Motherboard mistakes are common. You might forget the I/O shield before the motherboard. You might not connect AIO coolers or fans. Failing to install standoffs causes short circuits. Improper handling of components can cause damage. Hold delicate parts by their edges. Avoid excessive force. Ensure your graphics card seats correctly.
Internal Cable Management
Good cable management improves airflow and aesthetics. You want to prevent interference. Avoid sharp bends in cables. Maintain gentle curves. This minimizes stress. Separate power and data cables. This prevents cross-talk and interference. Utilize raceways and cable trays. Raceways are enclosed conduits. They route and protect wires. Cable trays provide elevated support for large bundles. They improve airflow. They also improve maintenance access. Implement conduits. Metal conduits protect from impact. Flexible conduits allow movement. PVC is cost-effective. Proper bundling and securing methods are important. Use hook-and-loop Velcro straps for sensitive cables. This prevents crushing. Use nylon cable ties for power and Ethernet runs. Avoid overtightening. Straps and ties prevent sagging. They maintain neat routing. They minimize signal interference.
First Power-Up and Troubleshooting
You are ready for the first power-up of your build. This is an exciting moment. If your pc fails to power on, follow these steps:
Examine the Power Supply Unit (PSU). Check if the power switch on the back of the PSU is on.
Inspect the power button. Check its associated cables. Ensure they connect properly to the motherboard.
Verify all power cables. This includes the main power cable and CPU power cable. Ensure they are firmly seated.
Review PSU capacity. Ensure the PSU has sufficient wattage for all components.
Inspect motherboard cable connections. Confirm the 24-pin ATX power connector and the 8-pin CPU power connector are securely attached.
Check SATA cables. Verify they connect drives to the motherboard. Ensure they insert properly at both ends.
Examine graphics card seating and power. Ensure the graphics card is snug in its PCIe slot. Its power cables must connect.
Review front panel connectors. Consult the motherboard manual. Confirm the small cables connect the physical power button to the motherboard. Ensure they align and seat correctly.
Performance and Thermal Testing
Your pc is now running. You need to test its performance. You also need to monitor its thermal behavior. Software tools help you do this. Open Hardware Monitor is a free open-source software. It monitors temperature sensors, fan speeds, voltages, load, and clock speeds. It supports most hardware monitoring chips. It monitors CPU temperature for Intel and AMD processors. It displays sensors for ATI and Nvidia video cards. It also shows SMART hard drive temperature. HWiNFO provides comprehensive hardware information. It offers real-time monitoring for Windows systems. It tracks clock speeds, voltages, and CPU core temperatures. HWMonitor offers straightforward system monitoring. It uses minimal resources. It tracks essential components like CPU temperatures, memory modules, and system voltages. SpeedFan focuses on temperature monitoring. It uses core temperature sensors. It also offers fan control. These tools help you ensure your build runs efficiently.
You feel immense satisfaction building your own diy custom computer case. This creates a truly unique pc. You journeyed from planning to personalization. Embrace your creativity. Share your amazing custom pc builds. This project blends engineering and art. Your pc is now a masterpiece. Enjoy your personalized pc.
FAQ
Is building a custom PC case difficult for beginners?
Building a custom PC case can be challenging. You need patience and attention to detail. Many resources exist to guide you. Start with simple designs. You can achieve great results with basic tools. Your first custom PC case will teach you a lot.
What are the best materials for a custom PC case?
The best materials depend on your goals. Aluminum offers good heat dissipation and is lightweight. Wood provides a unique aesthetic and is easy to work with. Steel is strong and affordable. Tempered glass adds a premium look. Consider your design and budget for your custom PC.
How long does it take to build a custom PC case?
The time varies greatly. A simple design might take a weekend. Complex designs with intricate details can take weeks. Planning and material preparation also add time. Your skill level and available tools influence the duration. Enjoy the process of building your unique PC.
Can a custom PC case improve my PC’s performance?
Yes, a custom PC case can improve performance. You can design for optimal airflow. This keeps components cooler. Cooler components often perform better and last longer. Proper component fit also prevents issues. Your custom PC will run efficiently.
