
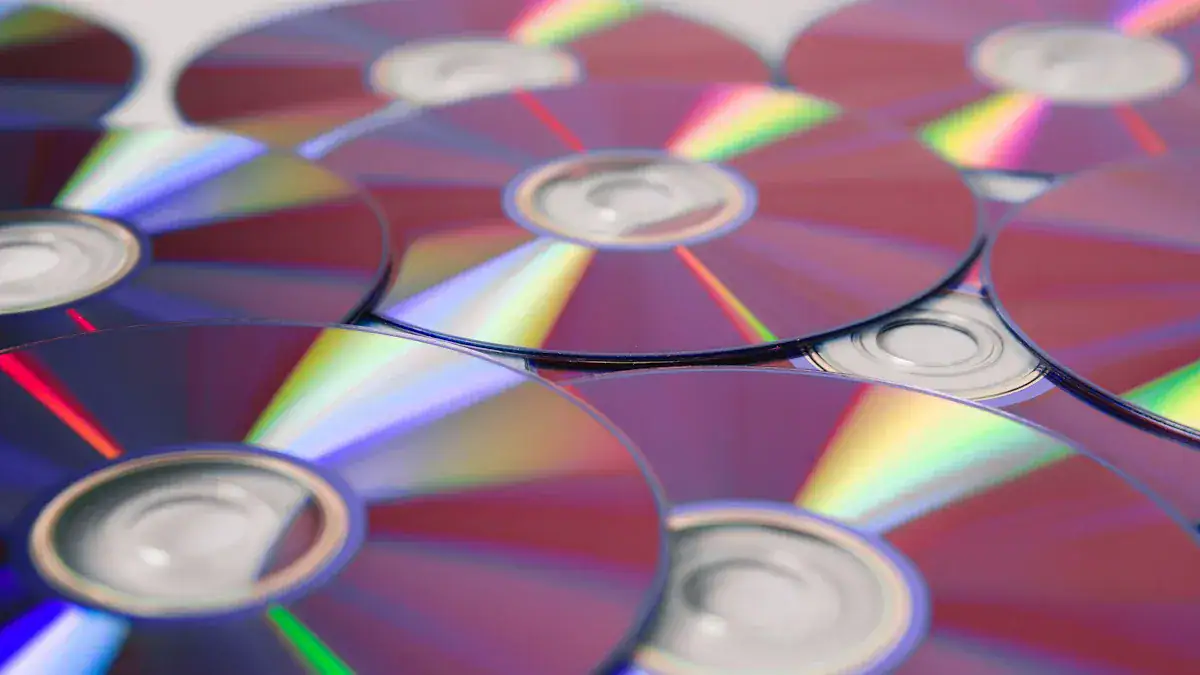
Do you have stacks of old CDs collecting dust? Those shiny discs often end up in landfills, harming our environment. But what if you could give them a new life? You can transform that waste into beautiful, functional items, bringing joy and satisfaction. Imagine creating dazzling home decor or unique personal accessories. These Creative Crafts let you embrace sustainability through fun DIY projects. It’s time to turn your old CDs into something amazing!
Key Takeaways
Upcycling old CDs helps the environment. It reduces waste in landfills and saves natural resources.
Crafting with CDs is cost-effective. You use materials you already own instead of buying new ones.
CDs offer many creative possibilities. You can make home decor, fashion items, and garden decorations.
Always prioritize safety when crafting with CDs. Wear safety glasses and use tools correctly.
Clean CDs before crafting. This helps glue stick better and makes your projects last longer.
Why Upcycle Old CDs
Environmental Benefits
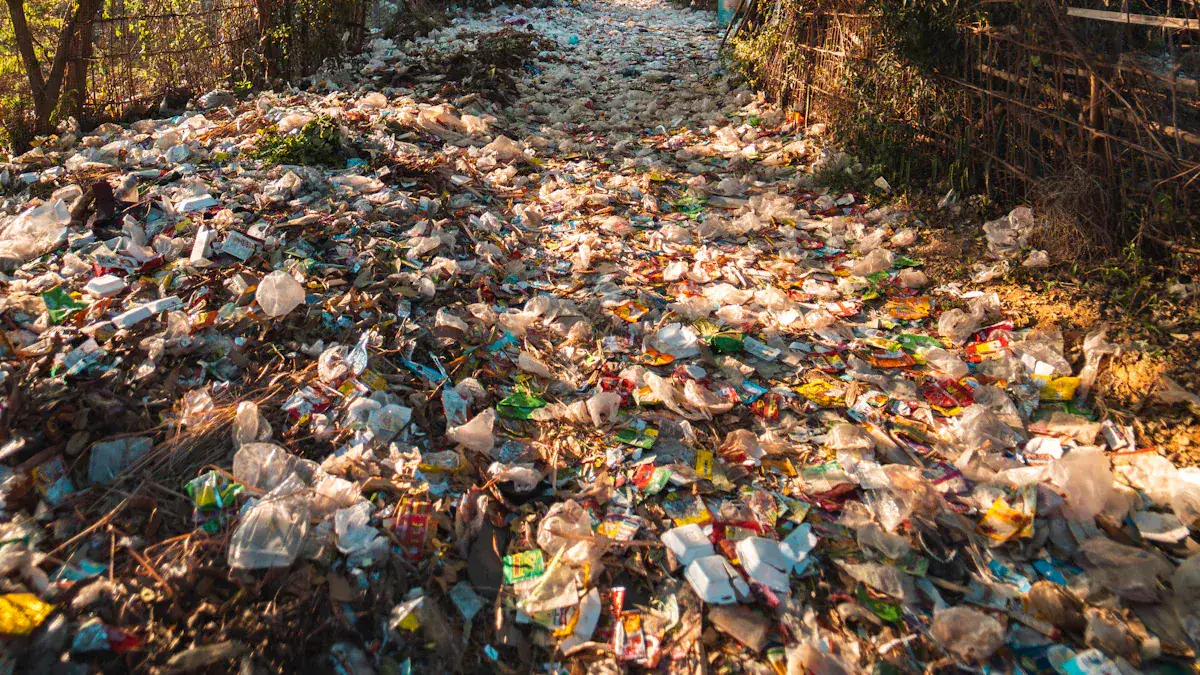
You might wonder why you should bother with old CDs. Well, think about our planet! CDs are a big problem for landfills. They are not easy to recycle with your regular trash. This is because they have many layers. They have plastic, a thin metal layer, and other coatings. These layers are hard to separate. So, most CDs just end up in the dump.
Once in a landfill, CDs don’t break down quickly. They can stay there for hundreds, even millions of years!
A CD can take over 1 million years to fully decompose.
They can release harmful chemicals like Bisphenol A (BPA) as they degrade.
Making new plastic for about 30 CDs uses 300 cubic feet of natural gas, 2 cups of crude oil, and 24 gallons of water.
Millions of music CDs and software boxes get thrown away every year. By upcycling them, you help reduce this huge amount of waste.
Cost-Effective Crafting
Upcycling old CDs is also super smart for your wallet! You already own the main material. Instead of buying new supplies, you use what you have. This saves you money.
When you choose to use recycled materials, you make environmentally friendly choices. These choices benefit your projects and the environment. You support sustainable and responsible crafting. This aligns with principles of environmental sustainability and social responsibility.
It feels great to make something beautiful without spending a lot. You minimize waste and reduce the negative impact of production on the planet.
Unleashing Creative Potential
Beyond saving money and helping the Earth, upcycling CDs lets your imagination run wild! You get to turn something old and useless into something new and exciting. It’s a chance to try new Creative Crafts. You can make unique items that no one else has. This process is fun and gives you a real sense of pride. You transform waste into art, showing off your unique style and making environmentally friendly choices. These Creative Crafts give old items a new purpose.
Dazzling Home Decor Projects
Ready to transform your living space with some sparkle? Old CDs are perfect for making unique home decor. You can turn them into eye-catching pieces that reflect your personality. Get ready to make your home shine!
CD Mosaic Art
CD mosaic art is a fantastic way to add reflective beauty to your walls or tabletops. You create stunning patterns by breaking CDs into small, shiny pieces.
First, you need to prepare your CDs. You can heat a disc with a hairdryer on high heat. Be careful! The disc gets hot. Hold it by the edges or put it on a pot-holder. This heat helps you separate the layers of the disc. Use a butter knife to gently wiggle between the layers. Pry them apart. Make sure the silver reflective film stays on the back of the disk. A clear plastic layer protects it. Heating the DVD is very important for good layer separation. One time, a disc hot from the sun made the shiny paper stick to just one layer. This made it easier to separate.
After separating, cut the reflective side of the disc into small, irregular shapes. Use sharp kitchen shears for this. Remember, different brands of CDs and DVDs might act differently. Some people find boiling DVDs helps them separate. Others say freezing, boiling, or just a hairdryer is not enough. You might even need to cut discs in half. Then flex or bend them to separate the layers. This works well when other methods fail. Computer discs (DVDs) can be harder to separate than other types.
Once you have your pieces, you need to stick them down. Tacky glue is a great choice for CD mosaics. It holds well. Hot glue also works. But be ready for some stringy residue. Hot glue dries very fast. This can be good for quick work. However, if you need to move pieces around, it is not ideal. DAP glue gives you about 30 seconds to reposition your pieces. This helps you get the perfect placement.
Adhesive | Repositioning Time | Notes |
|---|---|---|
DAP glue | Approximately 30 seconds | Allows for repositioning to achieve desired placement. |
Hot glue | Dries too fast | Not ideal if repositioning is needed. |
DIY CD Coasters
Protect your tables with stylish, homemade coasters. These are simple to make and very durable. You can glue fabric or cork to the back of a CD. This makes a soft base. Then, decorate the top. You can paint them, use stencils, or even glue small CD mosaic pieces onto them. Imagine a set of coasters that sparkle!
CD Lampshades and Chandeliers
Bring a unique glow to any room with CD lampshades or chandeliers. You can cut CDs into various shapes. Then, string them together. Or you can glue them onto an existing lampshade frame. The reflective surfaces will scatter light beautifully. This creates a dazzling effect. You can make intricate light fixtures that truly stand out.
CD Wall Clocks
Design your own unique timepieces with old CDs. A CD can be the perfect base for a wall clock. You can paint the CD. Then, add numbers or small CD pieces for markers. Buy a simple clock mechanism from a craft store. Attach it to the center. You now have a personalized clock that shows off your Creative Crafts skills.
Artistic CD Bowls
Turn CDs into decorative bowls. You can carefully melt and shape CDs. Place a CD over a heat-safe bowl in an oven on low heat. Watch it closely! The CD will soften and droop into the shape of the bowl. This creates a unique, wavy dish. Use these bowls for keys, jewelry, or other small items. Always do this in a well-ventilated area.
CD Art Walls
Create a stunning art wall using CDs. Print your favorite images on paper. Cut them into circles. Then, glue them onto the shiny side of your CDs. You can also paint directly onto the CDs. Arrange these decorated CDs on your wall. You can make a large, personalized display. This is a great way to show off photos or abstract designs.
Fashionable CD Accessories
You can turn old CDs into amazing jewelry. Imagine shiny, unique pieces! To make cool “gemstones,” you can use DVD or CD fragments. DVDs are often easier to cut. They have two layers you can split apart. CDs are thicker. You might need to heat them with a hairdryer or a candle to make them softer. Be careful if you use heat!
CD Jewelry
First, cut a small “foot” from a plastic bottle. Choose one with a flower-shaped bottom. This makes a nice, symmetrical dome for your gem. Next, cut your CD or DVD piece. Make sure it fits under this plastic dome. For extra sparkle, you can put clear nail polish or school glue on the CD piece. This adds texture and makes it look more “rainbowy.”
Then, use thin tape strips to connect the CD piece to the plastic dome. Now, you need a setting. Cover the sides of your connected pieces with a paper towel. Cut a hole in the paper towel that is smaller than your gem. Glue it on. Then, wrap yarn around the sides. Secure the yarn with glue. This creates a finished look for your “gemstone.” You can paint the yarn setting with acrylic paint for color. You can even use a marker for a blue tint and wipe off extra ink. These finished “gemstones” will look holographic and opal-like.
Clothing Embellishments
Give your clothes a new look! Cut small shapes from CDs. You can sew or glue these shiny pieces onto jackets, jeans, or bags. They catch the light and make your outfits pop. You can create cool patterns or just add a few scattered accents.
CD Belt Buckles and Hair Clips
Make your own unique belt buckles or hair clips. Cut a larger CD piece into a cool shape. You can paint it or add other decorations. Then, glue it onto a plain belt buckle blank or a simple hair clip base. You will have custom accessories that no one else has. These Creative Crafts let you show off your style.
Garden and Outdoor CD Creations
Your garden can sparkle too! Old CDs are perfect for adding a touch of magic and practicality to your outdoor spaces. You can create beautiful and useful items for your yard.
CD Bird Scarers
Do birds eat your garden produce? You can make reflective bird scarers from old CDs. They help keep birds away. Here is how you can make them:
Gather Materials: You need two old software install CDs for each reflector. Get some synthetic twine and Loctite instant mix epoxy. You will also need tin snips for cutting the CDs, scissors for twine, and clamps to hold pieces. Wear goggles when you cut!
Cut and Shape: Cut your CDs into trapezoid-like ‘pie slices.’ Each piece should be about 3/4 to 1 inch on the short inner side. You will get about 7 pieces from one CD. Round off any sharp edges with snips. This makes them safer and look better.
Lay Out for Gluing: Place 6 CD pieces, shiny side down, on a protected surface. Stretch and secure the twine over the middle of these pieces. Make sure it is tight.
Glue and Weight: Apply epoxy to the bottom CD pieces and the twine. Do not put glue near the edges. Place a second CD piece (shiny side up) on top of each glued piece. Put a flat weight over the lines. This holds them while the epoxy dries.
Final Result: Remove the weights once the epoxy is hard. Your bird scarers are ready to hang!
CD Wind Chimes
Make your garden sing with melodic CD wind chimes. You can string CD pieces together. They will clink and reflect light. You need strong string for this.
“Soft Flex Heavy” beading wire is very easy to use for restringing wind chimes. It lasts even in very windy conditions, with steady winds at 35 mph and gusts to 50 mph.
Other good options for stringing include:
Faux leather cord: It is strong and handles getting wet well.
Waxed cotton cord: This is water-resistant and good for knotting.
Hemp cord: It is eco-friendly, strong, and keeps its color.
Flexible beading wire (like Soft Flex®): This is much stronger than thread. It resists cutting, even with beads that have sharp edges.
CD Planter Decorations
Add sparkle to your plant pots with CD pieces. You can glue small, shiny CD fragments onto the outside of your planters. This makes them stand out. For outdoor planters, you need a strong, weather-resistant adhesive. Landscape Foam is a good choice. It is black, water-resistant, and UV-resistant. It bonds quickly to materials like rock, stone, wood, and cement. This makes it suitable for exterior use. It is also highly adhesive.
CD Suncatchers
Create beautiful, reflective garden ornaments. These suncatchers will catch the light and cast rainbows. Here are two ways to make them:
Method 1: Grout Mosaic Suncatcher
Gather old CDs and DVDs. Try to find different colors.
Cut the CDs into pieces using tin snips or side cutters.
Drill hooks into each corner of a wooden cube. Add a fishing swivel between them so it spins freely.
Paint the wood white. This makes the CD colors pop.
Attach the CD pieces to the wood with clear drying craft glue. Cover as much area as you can.
Mix and apply standard bathroom tile grout.
Smooth the grout with a spatula. Remove as much extra as possible.
Let the grout set for an hour. Then, use a dry or slightly damp sponge to remove more excess. It should be powdery.
Let it set overnight. Wash off any remaining dust.
Method 2: Reflective Film Suncatcher
Make a tiny scratch at the edge of a CD. Cover the entire CD with tape.
Carefully pull back the tape at an angle. This removes the reflective covering of the CD.
Choose a design, copy it, and cut it out.
Cut paper pieces to fit your design. Lay them on the CD. Or, use puffy paint to fill in designs.
Deco podge the top. Or, laminate the entire piece if you use paper.
Practical and Fun Creative Crafts
Old CDs offer endless possibilities for practical and playful projects. You can turn them into useful items or fun decorations. Get ready to explore some exciting new Creative Crafts!
CD Ornaments
You can make dazzling ornaments for holidays or any time of year. Imagine a sparkling disco ball ornament! You just soak old CDs in hot boiling water to soften them. Then, cut them into small, jagged mosaic pieces. Use a glue gun to attach these pieces onto a plain silver glass ball ornament. This creates a super reflective decoration.
But that’s not all! You can also:
Cut, paste, and paint CDs to make collages or even 3D sculptures.
Use CDs as tiny canvases for your paintings or sketches.
Combine CDs with wire to create cool light displays.
Heat CDs with a heat gun or oven to make them flexible. Then, form them into intricate 3D models.
Craft CD mosaics for unique designs.
Make fun “doodle discs” by drawing directly on them.
Turn them into dreamcatchers or even small lamps.
CD Gift Tags and Cards
Add a personal, shiny touch to your presents! You can make unique gift tags and cards from old CDs. Cut the CDs into fun shapes like stars or circles. You can paint them, glue glitter on them, or even attach small pieces of other CDs for a mosaic effect. Punch a hole in your tag, add a ribbon, and your gift will truly stand out! For cards, glue CD pieces onto the front for a shimmering design.
CD Photo Frames
Give your cherished memories a unique home. Old CDs can transform plain photo frames into works of art. Break CDs into small, irregular pieces. Then, glue these shiny fragments around the border of a simple photo frame. The reflective pieces will catch the light, making your photos even more special. You can create a mosaic pattern or just scatter the pieces for a random sparkle.
CD Candle Drip Catchers
Candles are lovely, but wax drips can be messy. Use an old CD as a practical candle drip catcher! Simply place a CD under your candle. The CD’s smooth surface is easy to clean if wax drips onto it. It also protects your furniture from heat and wax stains. It’s a simple, effective way to keep things tidy.
CD Card Holders
Do you have lots of business cards or small notes? Turn an old CD into a simple card holder. You can cut a slit into the CD’s center, just wide enough to hold cards upright. Or, you can glue two CDs together at an angle to create a stand. This makes a neat and shiny organizer for your desk.
CD Cat Toys
Your feline friends will love these engaging and reflective toys! Cats are often fascinated by shiny, moving objects. You can cut CDs into smaller, safe shapes. Make sure there are no sharp edges. You can string a few pieces together with strong twine or attach them to a stick. The reflections and movement will keep your cat entertained for hours. Always supervise your pet when they play with homemade toys to ensure their safety.
Essential Tips for CD Crafting
You are ready to start your CD crafting journey. Before you begin, remember some important tips. These will help you craft safely and effectively.
Safety First
Your safety is always most important. When you cut or shape CDs, always protect yourself.
Wear proper safety equipment. This includes safety glasses or goggles. You might also want gloves. These protect your hands from sharp edges.
Inspect your tools. Check any cutting tools for damage before you use them.
Keep your work area clear. Make sure your space is clean and well-lit. Remove anything flammable, especially if you use heat.
Use tools correctly. Hold your tools firmly. Apply steady pressure. Never twist the disc while cutting. This can weaken it.
Let tools stop naturally. If you use a rotary tool, wait for the disc to stop spinning on its own. Do not touch it while it moves.
Adhesives and Tools
Choosing the right tools and glues makes a big difference. You will find these tools helpful for cutting and shaping CDs:
A heat gun or blow dryer helps soften CDs.
Use a craft or utility knife with a cutting mat.
Strong scissors are great for cutting CD pieces.
Heat-resistant gloves protect your hands.
Sandpaper can smooth rough edges.
For adhesives, E6000 glue is excellent. It has industrial strength. It works well for attaching things like marbles to slick surfaces. It dries clear. Just make sure you use it in a well-ventilated area. It has toxic fumes. Hot glue is good for quick fixes, especially on felt or foam. But it might not last long on other materials. For attaching CDs to string, like for bunting, duct tape works well.
Cleaning and Preparation
Clean your CDs before you start crafting. This helps your glue stick better. It also makes your finished project look great.
Grab a dry microfiber cloth.
Hold the CD by its edges or the center hole.
Wipe gently from the middle outward. Use straight lines.
If dirt remains, dampen the cloth with lukewarm water.
For stubborn smudges, add a tiny drop of mild dish soap to the water. Then wipe.
Use a dry microfiber cloth to dry the disc completely.
Let it air dry for a moment.
Do not use harsh chemicals like ammonia. Avoid wiping in circles. Always wipe straight. Do not use abrasive materials like paper towels. Also, do not push too hard. This can crack the disc.
Sometimes, you might want to remove labels or coatings. A “green approach” uses a special thermo-mechanical treatment. This involves a basic solution with ammonia. It works at low temperatures. This method helps keep the recycled plastic good.
You transform old CDs into new treasures. This helps the planet. It also sparks your creativity. You feel great doing it. Share your amazing Creative Crafts with everyone. Start your next upcycling project today. Give those old CDs a dazzling new purpose!
FAQ
Can I recycle CDs if I don’t want to craft with them?
Yes, you can! ♻️ Many regular recycling centers do not accept CDs. You need to find special programs. Look for mail-in services or electronic waste (e-waste) collection events in your area. They can properly process your old discs.
What is the best way to cut CDs safely?
Always wear safety glasses! Use strong scissors or tin snips. You can also heat the CD with a hairdryer first. This makes it softer and easier to cut. Cut slowly and carefully to avoid sharp edges.
Can I use DVDs for these projects too?
Absolutely! DVDs work just like CDs for most crafts. They often have two layers you can separate. This gives you more reflective material. Some people find DVDs easier to cut than CDs. Experiment and see what you like best!
How do I make sure my CD crafts last?
Use strong, appropriate adhesives for your project. E6000 glue works well for many materials. For outdoor items, choose weather-resistant glues. Clean your CDs thoroughly before gluing. This helps the adhesive stick better. ✨


