
You want a beautiful bathroom. You do not want to spend a lot of money. Good news! Effective diy bathroom projects do not need a huge budget. Small, smart DIY efforts make a big difference in your bathroom. We offer 10 easy and affordable DIY ideas. These give your bathroom an instant style upgrade. You can do these projects. You do not need much experience. You only need some budget-friendly materials for an easy makeover.
Refresh Grout Lines
What It Is
Dingy grout can make your whole bathroom look old. It does not matter how clean your tiles are. Dirty grout lines can really stand out. Over time, grout faces many challenges. You might see:
Cracking: This happens from tile shifting or bad application.
Discoloration and Staining: Grout is porous. It soaks up dirt and spills. This leads to ugly stains.
Mold and Mildew Growth: Your bathroom is perfect for them. They grow on grout.
Erosion: Frequent cleaning can wear grout away. This creates gaps. It weakens tile bonds. Addressing these issues can instantly refresh your bathroom. It makes a big difference in how clean your space feels.
Supplies
You do not need many things to make your grout look new. Gather a few simple items. You will need a good grout cleaner. A stiff brush helps a lot. For coloring, get a grout pen or grout paint. Sometimes, you might need a small scraper for really tough spots. Always have some clean rags and water ready for rinsing.
How To
First, clean your grout. Spray the cleaner directly onto the grout lines. Let it sit for a few minutes. Always check the product instructions for exact times. Then, scrub with your brush. Use small, circular motions. Rinse the area well with water. For very stubborn stains, you might need a stronger cleaner. Look at this table for options:
Product Name | Stain Types Effectively Removed | Key Features | Why It’s Effective |
|---|---|---|---|
CLR Pro Grout Cleaner | Mold, mildew, soap scum, stubborn buildup | Removes mold, mildew, soap scum; safe for most grout/tile; non-toxic, biodegradable | Great for deep cleaning in moisture-exposed areas like bathrooms and kitchens. |
OxiClean MaxForce Gel | Oils, greasy stains, tough stains | Gel formula adheres to stains; works on various surfaces | Trusted for stain removal; effective and safe for everyday cleaning. |
Lysol Power Bathroom Cleaner | Stains, bacteria, mold | Kills bacteria and mold; works on grout, tiles, sinks, tubs; pleasant scent | Disinfects while cleaning grout; safe for daily use in bathrooms and kitchens. |
Method Antibacterial Bathroom Cleaner | Germs, general cleaning | Plant-based ingredients; kills germs; safe for children/pets | Eco-friendly and effective, suitable for modern households prioritizing sustainability. |
Scrub Free Grout Cleaner | Tough grout stains | No scrubbing required; safe and easy to use | Requires minimal effort; simply apply, wait, and rinse. |
Soft Scrub With Bleach Cleaner Gel | Mold, mildew, stubborn stains, discoloration | Bleach-based formula; gel consistency for precise application; ideal for grout and tiles | Powerful stain-fighting ability, especially for heavily soiled grout in high-moisture areas. |
Black Diamond Ultimate Grout Cleaner | Tough stains, grease, grime | Strong formula; suitable for residential/commercial use; non-toxic, safe for families/pets | Powerful stain removal without harsh chemicals; professional solution for heavy-duty cleaning. |
Zep Grout Cleaner and Brightener | Stubborn stains, discoloration | Restores original grout color; acidic formula; quick and easy application | Highly effective in brightening grout, making it look new, particularly in kitchens and bathrooms where stains collect. |
After cleaning, if your grout still looks dull, use a grout pen. Shake the pen well. Apply it evenly along the grout lines. Let it dry completely. This simple step makes a huge difference. It gives your grout a fresh, uniform look.
Update Cabinet Hardware
Why Do It
Old cabinet hardware can make your entire bathroom look tired. It does not matter how clean your cabinets are. Dingy knobs or pulls can really stand out. Changing them is one of the easiest and most impactful updates you can make. It gives your cabinets a fresh, modern look. You can completely change the feel of your space. This small change makes a big difference. It also lets you show off your personal style.
Consider these popular trends when you pick new hardware:
Trend | Description |
|---|---|
Mixing Metal Finishes | You combine warm metals like brass and bronze with cooler ones such as nickel and chrome. This adds depth and visual interest. |
Artisan-Made Hardware | This hardware is handcrafted. It blurs the line between function and art. It offers individuality and craftsmanship. |
Sculptural and Oversized Details | Handles, pulls, and hooks become decorative statements. They complement spa-inspired and modern interiors. |
Organic Shapes in Bathroom Hardware | This trend softens sharp lines. It uses nature-inspired forms and tactile beauty. This enhances the sensory experience of the space. |
Trust Instincts that Reflect Your Style | Your personal preference matters most. Choose hardware that feels good to use and shows your individual style. |
What You Need
You do not need many tools for this project. You will need a screwdriver. A tape measure helps too. Of course, you need your new cabinet knobs or pulls. When you choose new hardware, think about durability. Your bathroom is a humid place. You want hardware that lasts.
Moisture-resistant metals like stainless steel, brass, or zinc alloy are crucial. They prevent corrosion.
High-quality finishes such as powder coating, PVD, or anodizing ensure durability.
Sustainable hardware, often made from solid brass or recycled metals, offers unmatched durability and long-term value. It withstands daily moisture, heat, and wear.
This project is a great way to update your bathroom on a budget.
Simple Steps
First, remove your old hardware. Use a screwdriver to unscrew the old knobs or pulls. Keep the screws in a safe place. You might need them later. Next, clean the cabinet surface where the old hardware sat. Now, it is time to install your new hardware. If your new hardware uses the same holes, simply screw it in. If you need new holes, measure carefully. Mark the spots with a pencil. Drill pilot holes. Then, attach your new knobs or pulls. Make sure they are straight and tight. Step back and admire your updated cabinets!
Paint an Accent Wall
Design Impact
You can completely change your bathroom’s look with just one painted wall. An accent wall adds depth and personality. It draws the eye and creates a focal point. Think about the mood you want. Spa-like colors, like soft blues, greens, and warm neutrals, can make your daily routine feel like a rejuvenating experience. Green, especially bluer shades, creates a relaxed, spa-like feel. Blue is also great for bathrooms. It calms your blood pressure and promotes a serene atmosphere. Cool tones make your bathroom look clean and fresh. This supports your self-care routines. If you prefer a cozy feel, warm colors like soft yellows, oranges, or rich reds work well. They make the space inviting and energetic. Soft yellows bring sunshine and happiness. Deeper reds and oranges add luxury. You create an emotional connection, making your bathroom a place for happiness and relaxation.
Essential Materials
You do not need much to paint an accent wall. You will need paint, of course. Choose a color you love! Also, get painter’s tape, a paint roller, a paint tray, and a few brushes for edges. For a bathroom, pick the right kind of paint. Semi-gloss paint is a top choice. It repels water and cleans easily. Satin finish also works well. It offers a subtle shine and a washable surface. Acrylic paints resist moisture and stains. They are also eco-friendly. Always look for mold-resistant paint. This is essential for high-humidity areas. Waterproof paint gives extra protection against moisture and mold. This project is a smart way to update your bathroom on a budget.
Painting Guide
First, prepare your wall. Clean it well to remove any dirt or grime. Use painter’s tape to mask off the edges of your accent wall. Tape along the ceiling, baseboards, and adjacent walls. Press the tape down firmly. Next, open your paint can. Stir the paint thoroughly. Pour some paint into your tray. Start by “cutting in” with a brush. Paint along the taped edges and corners. Then, use your roller for the main wall area. Apply paint in even strokes. Let the first coat dry completely. You might need a second coat for full coverage. Once the final coat is dry to the touch, carefully remove the painter’s tape. Pull it off at an angle for a clean line. Now, step back and enjoy your new accent wall!
Upgrade Faucet or Showerhead
Instant Luxury
Do you want to give your bathroom an instant touch of luxury? Upgrading your faucet or showerhead is a great way to do it. These small changes make a big difference in how your bathroom looks and feels. A new, stylish faucet can become a focal point. A modern showerhead can transform your daily shower into a spa-like experience. You can find many options that fit your personal style and your budget.
Modern low-flow showerheads offer many benefits.
They lower your water bills.
They reduce heating costs and energy use.
They decrease carbon emissions.
New models use smaller openings and air to keep a strong, pleasant shower. You can save up to $50 each year on heating costs by using less hot water. One person using a low-flow showerhead can save 2,000 gallons of water every year. The average US home can save about 2,900 gallons of water each year by installing just one low-flow showerhead. This helps the environment and saves you money.
Required Tools
You do not need many special tools for this project. For a faucet, you will likely need an adjustable wrench, a basin wrench (for tight spots under the sink), and a screwdriver. For a showerhead, an adjustable wrench or pliers will usually do the trick. Always have some plumber’s tape ready. This helps prevent leaks. A bucket and some rags are also useful for catching any drips.
Installation Process
First, turn off the water supply to your bathroom. You usually find the shut-off valves under the sink for a faucet. For a showerhead, you might need to turn off the main water supply to your home. Next, remove the old faucet or showerhead. Use your wrench to loosen the nuts or connections. Clean the area where the old fixture sat.
Now, install your new fixture. For a faucet, follow the instructions that come with it. You typically attach the new faucet to the sink, connect the water lines, and tighten everything. For a showerhead, wrap plumber’s tape around the threads of the shower arm. Then, screw on the new showerhead by hand. Tighten it gently with your wrench.
Remember to check local plumbing codes. The 2021 International Plumbing Code (IPC) has rules for fixtures like faucets and showerheads. For example, residential bathroom sink faucets should have a maximum flow rate of 1.5 gallons per minute (gpm) or less. Showerheads should not go higher than 2 gpm. These rules help save water and ensure safety. Always make sure your new fixtures meet these standards.
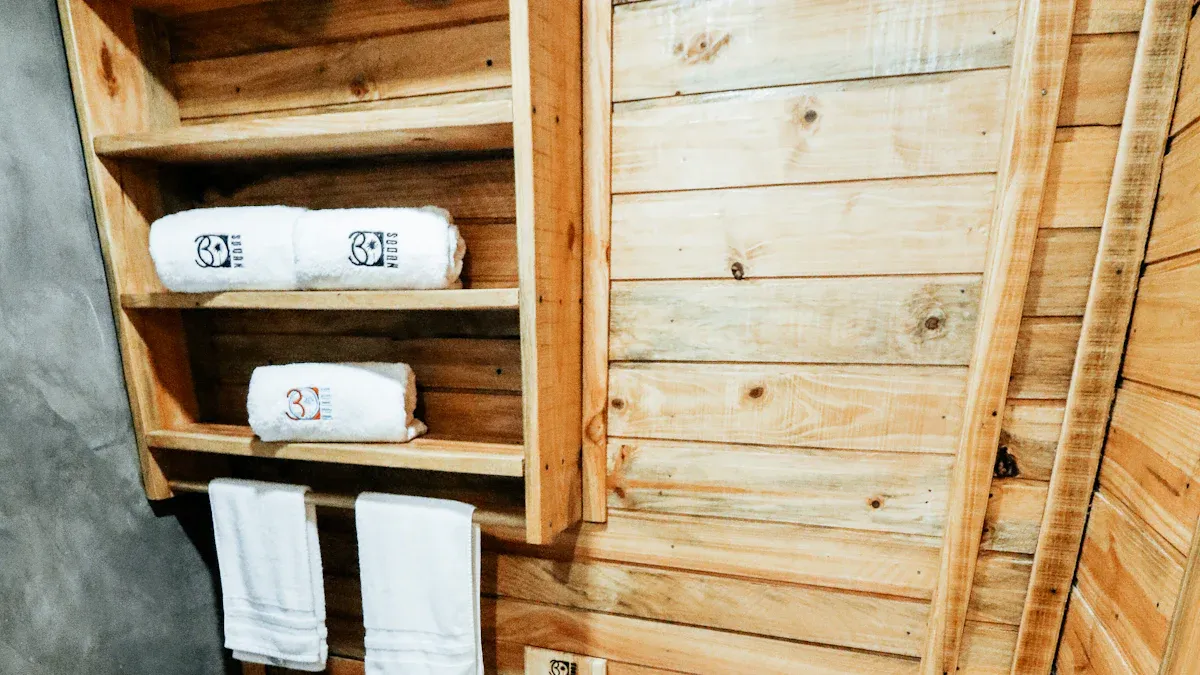
Create Open Shelving
Smart Storage
Do you need more storage in your bathroom? Open shelving is a fantastic solution. It makes your space feel bigger and more organized. You can display pretty towels, soaps, or small plants. This adds style and function. For shelves above the toilet, aim for about 5-6 inches deep and 22-24 inches long. This size looks good and works well in small bathrooms. If you plan to store folded towels, your shelves might need to be 9.25 inches deep, or even 11.25 inches deep. However, for shelves right above the toilet, keep the depth to no more than 7.25 inches. This prevents them from getting in your way.
Materials List
You have many choices for shelf materials. The material you pick affects how much weight your shelf can hold. Solid hardwoods, like oak or walnut, support a lot more weight than particle board or MDF. Metal shelves are very strong. They are great for heavier items. Thicker materials also give you better support. You will need the shelf boards themselves. Also, get brackets to hold them up. A drill, level, and measuring tape are essential tools for this diy project.
Assembly Instructions
First, decide where you want your shelves. Use your measuring tape and a pencil to mark the spots. Make sure your marks are level with a spirit level. Next, attach your shelf brackets to the wall. Use your drill to make pilot holes. Then, screw the brackets firmly into wall studs if possible. If not, use wall anchors for extra support. Finally, place your shelf boards on top of the brackets. You might want to secure them with small screws from underneath. Now, you have stylish new storage without breaking your budget!
Add Peel-and-Stick Wallpaper
Pattern Power
You can transform your bathroom walls with peel-and-stick wallpaper. It adds instant pattern, texture, and personality. This DIY project lets you experiment with bold designs or subtle elegance. You can create a stunning accent wall or cover an entire space. It is a fantastic way to update your bathroom without a big commitment. You can easily change it when your style evolves.
Supplies for Success
You do not need many tools for this project. Gather your chosen peel-and-stick wallpaper. You will also need a tape measure, a utility knife, and a smoothing tool (often called a squeegee). A pencil helps for marking. A clean cloth ensures your walls are ready. High-quality, moisture-resistant peel-and-stick wallpaper can last between 5 to 7 years in humid bathroom conditions. Proper ventilation is key to maintaining its look and longevity. Peel-and-stick vinyl wallpaper is a waterproof and highly durable solution. It is designed to maintain its beauty in tough conditions. It will not peel, warp, or fade even after years of moisture exposure. This is thanks to its extra-strong adhesive and waterproof properties.
Application Tips
First, prepare your walls. Clean them thoroughly. Make sure they are smooth, dry, and free of dust. Measure your wall and cut your first strip of wallpaper. Leave a few extra inches at the top and bottom for trimming. Peel a small section of the backing paper from the top. Align the wallpaper with your wall. Press it firmly into place. Slowly peel more of the backing paper. Use your smoothing tool to press the wallpaper onto the wall. Work from the center outwards. This removes air bubbles. Trim any excess wallpaper with your utility knife. Overlap subsequent strips slightly. Match the pattern carefully. Like peel-and-stick tiles, proper installation and effective humidity management are crucial. Regular maintenance, including gentle cleaning, also helps. This budget-friendly update gives your bathroom a fresh, new look.
DIY Bathtub Upgrade for a Mini Remodel
Transform Your Tub
Your old, stained bathtub can make your entire bathroom look dated. Replacing a tub is expensive and time-consuming. A DIY bathtub upgrade offers a smart solution. You can give your tub a fresh, new look without a full demolition. This project is a fantastic way to achieve a significant bathroom remodel on a budget. It revitalizes your space. This simple update makes your tub look brand new. It is one of the most impactful diy bathroom projects you can tackle.
Refinishing Kit Essentials
You need a special kit for bathtub refinishing. These kits usually include a cleaner, an etcher, a primer, and the topcoat finish. You also need sandpaper, a roller, and brushes. Safety is very important for this diy project. Always read product labels and Safety Data Sheets (SDS) carefully. Wear personal protective equipment (PPE). This includes safety goggles, chemical-resistant gloves, and a respirator with proper filtration. Work in a well-ventilated area. Open windows and doors. Use exhaust fans to remove harmful vapors. Bathtub refinishing uses various chemicals. These include stripping agents and finishing coats. These chemicals can be harmful if you inhale them in large quantities. As the new finish dries, it releases volatile organic compounds (VOCs). These can also be harmful. Keep the area clear of people and pets during and after the process.
Step-by-Step Refinishing
First, clean your tub thoroughly. Remove all soap scum and grime. Sand the surface to create a rough texture. This helps the new finish stick. Next, apply the etcher. This prepares the surface even more. Rinse it well. Then, apply the primer. Let it dry completely. Finally, apply the topcoat. Use smooth, even strokes with your roller and brush. You might need two coats. Let each coat dry fully.
DIY bathtub refinishing projects generally have a shorter lifespan than professional jobs. Professionals have technical skills and expertise. They use industrial-grade materials. Epoxy enamel, often found in DIY kits, typically lasts only up to about 7 years. It can be difficult to work with. It also has a strong odor. It can deteriorate quickly when exposed to water. While DIY kits offer initial cost savings, they often do not provide a long-lasting finish. Proper surface preparation and application techniques are crucial for a durable remodel.
Frame Your Bathroom Mirror
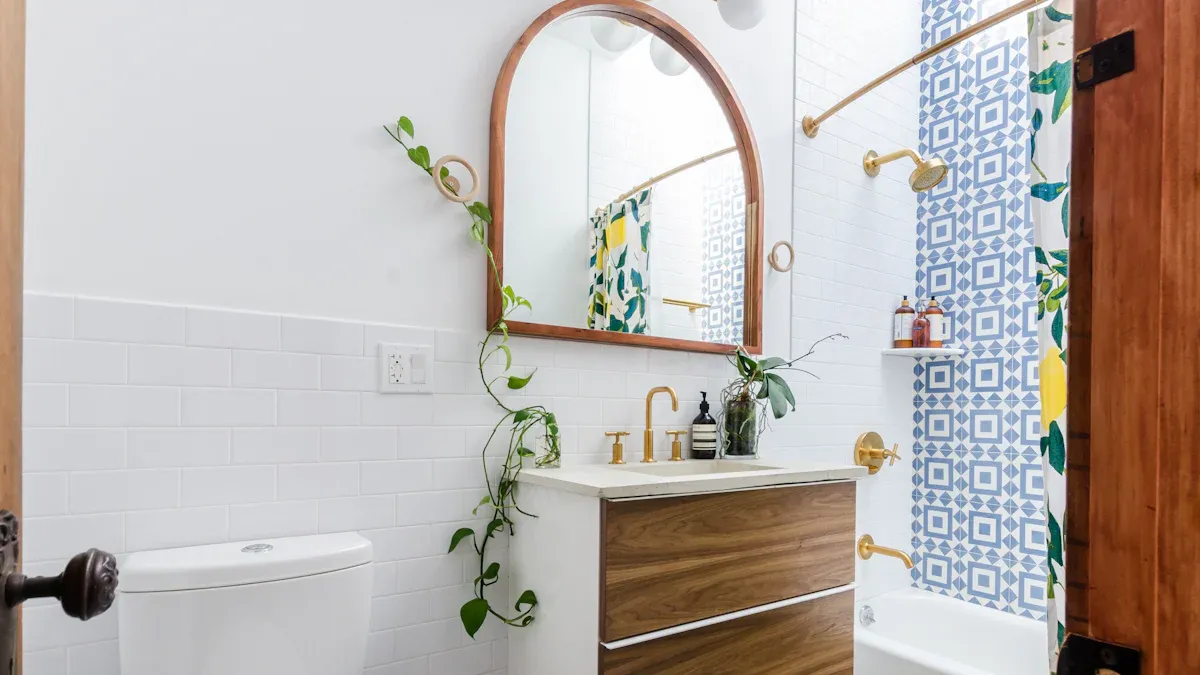
Elevate Your Reflection
You can easily upgrade your plain bathroom mirror. Framing it adds a touch of elegance. This simple change makes a big difference. A framed mirror becomes a focal point. It also makes your bathroom feel larger. Larger mirrors have a greater impact on perceived room size. Place your mirror opposite a focal point or in a corner. This creates an illusion of depth. The frame style also matters. Simple frames give a modern look. Ornate frames add elegance. Choose a style that matches your existing decor. Lighter frame colors make a space feel more open. Darker colors create a cozier atmosphere. A deep-framed mirror enhances the perception of space. Your brain sees the reflection as an extension of the real space. This creates an illusion of depth and volume. Deep frames also help reflect light. They brighten the space. They make it feel more open. Place a mirror opposite a window. It reflects sunlight. This makes the room appear brighter and more spacious.
Framing Materials
What materials do you need for your frame? You have many options. You can use pre-made molding strips. These come in various styles and finishes. Wood is a popular choice. You can paint or stain it. PVC molding is also good. It resists moisture well. You can also get creative. Use reclaimed wood for a rustic look. Or try metal strips for an industrial feel. Measure your mirror carefully. You want the frame to fit perfectly.
Attaching the Frame
Now, how do you attach your new frame? You need the right adhesive. Mirror adhesive tapes offer a reliable bond. They work on many surfaces. These include steel, aluminum, wood, stone, glass, and PET/PVC. For example, tesa® 4952 is a versatile adhesive. It has high immediate adhesion. It works on many substrates. It is also UV, water, and aging resistant. This tape compensates for differing thermal expansion. Another option is tesa® 62932. It has a thin foam backing. This creates a small design gap. It also offers high immediate and ultimate adhesion. This tape is also fully outdoor suitable. It resists UV, water, and aging. Always clean the mirror surface first. Make sure it is dry. Apply the adhesive tape to the back of your frame pieces. Press the frame firmly onto the mirror. Hold it in place until the adhesive sets. This project is a great way to update your bathroom on a budget.
Stencil Floor or Wall Tiles
New Tile Look
Do you dream of new tiles but not the cost or hassle? Stenciling your existing floor or wall tiles gives you a fresh, new look. You can completely change the vibe of your bathroom. This project lets you add patterns and colors. It transforms plain surfaces into something special. You get the appearance of brand-new tiles without any demolition. It is a fantastic way to update your space on a budget.
Stenciling Kit
You need a few key items for this project. First, pick your stencil design. Many companies offer durable stencils made for floors and walls. You will also need paint. Choose a high-quality, durable paint suitable for floors or walls. Look for paints designed for high-traffic areas. You will also need a small foam roller or stencil brush. Painter’s tape helps secure your stencil. A cleaning solution prepares your surface. You might also want a tray for your paint.
Design Application
First, clean your tiles very well. Make sure they are dry and free of grime. Next, position your stencil. Use painter’s tape to hold it firmly in place. You do not want it to shift. Pour a small amount of paint into your tray. Load your roller or brush with paint. Remove any excess paint. You want thin coats. Apply the paint over the stencil. Use light, even pressure.
Carefully remove the stencil. Let the paint dry completely. Then, reposition the stencil for the next section. Repeat this process until you cover your desired area. This method offers a custom look. It is a great alternative to peel-and-stick tiles if you want a painted design. You can also use stencils on top of peel-and-stick tiles for even more customization. Once finished, seal your stenciled surface. This protects your new design. It makes it last longer.
Install a Floating Shelf
Extra Storage Space
Do you need more storage in your bathroom? Floating shelves offer a sleek and modern solution. They create extra space without bulky cabinets. You can display decorative items, store towels, or keep toiletries organized. These shelves make your bathroom feel more open and less cluttered. They are perfect for small spaces.
Shelf Components
You need a few key items for this project. First, choose your floating shelf. These often come with hidden brackets. The brackets slide into the back of the shelf. You will also need a drill, a level, a tape measure, and a stud finder. The type of wall you have will determine the specific anchors or screws you need.
Mounting Guide
Installing a floating shelf requires careful planning. You must secure the shelf to wall studs for proper support. Fastening a shelf without hitting studs will damage your drywall. The shelf will likely fall. Drywall anchors alone are not strong enough. Always screw into at least two studs. Use drywall anchors only for other holes if needed. If bracket holes do not align with studs, drill new holes in the bracket’s back bar. This lets you hit a stud. For maximum strength, attach the bracket to every stud it crosses.
Here is how to install shelves on different wall types:
Wall Type | Installation Technique |
|---|---|
Drywall | Locate studs. Mount the bracket into each stud. Use drywall anchors for other holes. |
Plaster | Locate studs. Mount the bracket into each stud. Use appropriate anchors for other holes. |
Concrete/Brick | Use a hammer drill and masonry bits. Insert masonry anchors. Secure the bracket with masonry screws. |
Tile | Drill through the tile with a specialized bit. Then, follow the technique for the underlying wall material. Seal holes with silicone. |
A floating shelf can hold a lot of weight if installed correctly. Each wall stud the bracket attaches to adds about 50 lbs to the shelf’s capacity. This means a shelf attached to two studs can safely hold 100 lbs. Never rely only on wall anchors. They will pull out. Always install brackets into at least one wall stud. Attaching to two or more studs is much better. This project is a smart way to add storage on a budget.
Shelf Depth (inches) | Weight Capacity (lbs) |
|---|---|
Up to 12 | 25 |
Minimum 6 | 100 |
You can achieve significant style upgrades on a budget through accessible diy bathroom projects. These small, strategic changes collectively transform your bathroom’s look and function. While you might encounter challenges like improper waterproofing or plumbing complexity, don’t let that deter you from a successful diy bathroom remodel. Pick one or two projects to start. Experience the satisfaction of a transformed space and the pride of a personal touch. Your budget-friendly remodel awaits! Share your makeovers and keep exploring creative home solutions to refresh your bathroom.
FAQ
How long do these DIY bathroom projects usually take?
Most of these diy bathroom projects are quick. You can finish many in a weekend or even a few hours. For example, updating hardware or stenciling a small area takes little time. A bathtub refinishing or a larger diy effort might need more time.
Can I really refresh your bathroom on a tight budget?
Absolutely! These ideas focus on affordability. You use simple materials and your own effort. You can refresh your bathroom without spending a lot of money. Small changes make a big impact.
What is the most impactful DIY project for a small bathroom?
Framing your mirror or adding open shelving can make a big difference. These projects make your bathroom feel larger and more organized. They add style and function. You get a fresh look without a full remodel.
Are these DIY bathroom projects suitable for beginners?
Yes, many of these diy projects are perfect for beginners. We chose them for their simplicity. You do not need special skills. Just follow the steps. You can refresh your bathroom and feel proud of your work.
What if I make a mistake during a DIY project?
Do not worry! Most mistakes are fixable. For paint or wallpaper, you can often correct small errors. If you are unsure, watch online tutorials. Take your time. You will learn as you go.
