A homeowner can paint exterior aluminum trim when they follow careful steps and use the right materials. Initially, the surface must be cleaned with a strong degreaser and a deoxidizer to remove chalk and grime.
Next, loose paint is scraped and the metal is lightly sanded to aid primer adhesion, then an oil or specialty aluminum primer is applied. After primer dries, two thin coats of quality 100 percent acrylic exterior paint are rolled or brushed on in mild weather, with 2 to 4 hours between coats to avoid bubbling. Use synthetic brushes, maintain wet edges, and protect nearby surfaces. These steps increase adhesion and durability, and they reduce the chance of peeling, but there are a few more crucial tips ahead that make the job much easier.
Assessing the Condition of Your Aluminum Trim
How should someone commence during looking over aluminum trim around a home? A careful visual scan comes initially, noting aluminum trim defects such as chalking, oxidation, corrosion, and paint flaking. The inspector then probes edges and joints, where lifting paint signals the need for full removal to avoid bubbling under new coatings.
Next, environmental exposure is recorded, since sun and moisture speed wear and affect timing for work. A gentle scrape tests coating stability and guides surface prep efforts. Simultaneously, structural damage evaluation checks for dents, bends, and loose attachments that compromise a uniform finish. These assessment steps flow together, because surface condition and structural soundness both determine whether repair, replacement, or repainting will yield lasting, professional results.
Essential Tools and Materials You’ll Need
A solid start to painting exterior aluminum trim begins with gathering the right tools and materials so the job feels manageable and the results last.
The professional prepares cleaning, surface prep, and application items.
A power washer, metal scrapers, and an orbital sander with 180 to 220 grit are essential.
A TSP substitute or mild detergent cleans thoroughly and reduces risk of adhesion failure.
Primer and topcoat choices follow aluminum compatibility testing and an environmental impact assessment to guide selection.
- Primer and paint: oil based primer made for aluminum plus 100% acrylic latex topcoat
- Application tools: synthetic brushes, mini rollers, airless sprayer for larger panels
- Accessories: drop cloths, painter’s tape, ladders, gloves, goggles, respirator
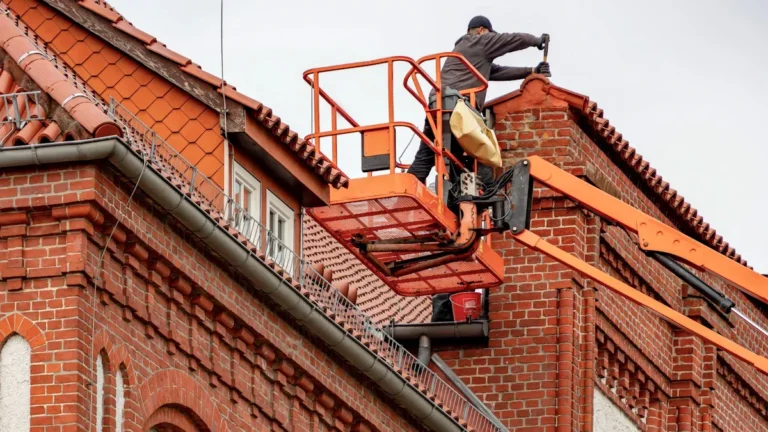
Safety Precautions and Site Preparation
With tools and materials ready, the next step is to set up a safe, organized worksite before any sanding or painting begins. One person assesses hazards, checks ladders, trims vegetation, and tests weather. Protective gear is worn at all times, and drop cloths protect nearby surfaces. A risk assessment locates electrical lines and power is shut off when needed. The team reviews emergency response protocols and completes an insurance coverage review before work starts. Clear communication keeps people safe and calm. Below is a quick checklist to guide setup, making the process efficient and reassuring.
| Task | Who | Frequency |
|---|---|---|
| Ladder inspection | Lead | Before use |
| PPE check | All | Daily |
| Site clearing | Crew | Once |
| Weather review | Lead | Before start |
Removing Peeling Paint and Loose Coatings
Before any fresh paint goes on, the surface needs careful attention to remove peeling paint and loose coatings so the new finish will stick and look good. The pro inspects every face of the trim to find failed areas, noting aluminum alloy variations and how trim design impacts accessibility and failure patterns. Hand scraping with metal scrapers and putty knives removes loose flakes with control. Where paint is stable, a knife tip test confirms adhesion. For heavier loss, an oscillating tool or wire brush speeds work yet stays gentle on metal. After removal the remaining edges are feathered with fine sandpaper to smooth changes and reduce future lift.
- Inspect thoroughly and test edges for adhesion
- Scrape and follow up with power tools where needed
- Feather sanding to blend old and sound coatings
Cleaning and Deoxidizing Aluminum Surfaces
Before repainting aluminum trim, the surface must be cleaned to remove chalky residue and then treated with a metal etching cleaner to remove stubborn oxidation.
The cleaner should be applied evenly with a nonabrasive pad and allowed to work for the recommended time before a full rinse to protect the metal.
Wear gloves and goggles, test on a small area initially, and allow the surface to dry thoroughly so paint will stick and last.
Remove Oxidation and Chalk
A clean aluminum trim surface looks better and aids paint adhesion, so gentle but effective removal of oxidation and chalk is the initial step. Aluminum restoration techniques start with simple, verifiable cleaning.
One method uses equal parts water and white vinegar, left fifteen to twenty minutes, then scrubbed with a nonabrasive pad and rinsed to restore sheen.
For chalky residue solutions, mix 1/4 cup TSP per gallon of warm water, scrub with a soft brush, and rinse well to clear powder without harm.
A commercial brightener with phosphoric acid can follow if needed. Always test in an inconspicuous spot initially. Dry thoroughly with microfiber cloths or air dry in shade to prevent spots and to prepare for priming and painting.
- Vinegar soaks loosen oxidation gently
- TSP removes chalk safely
- Brightener plus power wash strips corrosion
Use Metal Etching Cleaner
Metal etching cleaner helps revive dull, chalky aluminum so paint will stick and last. A phosphoric acid based cleaner chemically dissolves the oxide layer, removing contamination so primers bond. Apply with a brush or spray, let it dwell five to ten minutes, then rinse thoroughly to remove residue. Products like Metal Prep and other etching solutions increase surface roughness, improving mechanical adhesion up to two hundred percent. Wear gloves, goggles, and a respirator because these cleaners are corrosive and can emit fumes. After rinsing, perform a water break test; when water sheets evenly without beading, the metal is ready for priming. For those seeking gentler options, consider alternative etching solutions or eco friendly cleaners that balance safety with effectiveness.
Scuff Sanding for Better Adhesion
Scuff sanding aims to dull the finish so primer and paint can grip the aluminum surface more reliably. Using 180 to 220 grit sandpaper creates tiny grooves without removing much metal, and the user should sand the entire area including painted spots for even adhesion. A gentle hand and a final wipe to remove dust help prevent over-sanding and leave the trim ready for cleaning and priming.
Sand to Dull Finish
While preparing aluminum trim for paint, one gentle sanding step can make a big difference in how well the primer sticks and how long the finish lasts. Scuff sanding aims to dull the surface evenly so the primer can grip. Expertise means avoiding common scuff sanding mistakes like heavy pressure or missed spots. The benefits of dulling aluminum include better mechanical bonding and less chance of peeling. Use light, consistent strokes and cover exposed metal and old paint alike. Wipe away dust right after sanding to prevent contamination. Keep movements steady so the thin trim is not gouged and corrosion is avoided. A careful approach yields a uniform texture that helps primer perform at its best.
- Sand entire surface with medium grit
- Use light, even pressure
- Clean all sanding dust promptly
Use 180–220 Grit
One key step is to use 180 to 220 grit sandpaper to gently dull the aluminum so primer can grip more securely. The pros understand grit selection matters. Using a sanding block or an orbital sander with 180 to 220 grit creates microscopic grooves that help primer form a mechanical bond. Work the whole trim, painted and bare, with consistent sanding patterns so texture is uniform and delamination risks drop.
After sanding, wipe surfaces with a tack cloth or damp rag to remove dust that would stop primer from sticking. Sand in dry conditions and prime immediately to lock in the prepared surface. These small, disciplined steps build lasting results and give confidence during tackling exterior aluminum trim.
Choosing the Right Primer for Aluminum
Selecting the appropriate primer for aluminum trim is more significant than it first seems, since the incorrect option can result in bubbling, peeling, and hours of wasted effort. Two word term 1 and two word term 2 establish the foundation for knowledgeable choice. We suggests oil based and bonding primers for dependable adhesion, and observes brand options appropriate for exterior exposure. Permit 24 hours drying time and prime in fresh air to prevent trapped solvents.
- Use oil based primers like XIM 400W to avoid latex reaction with aluminum
- Choose bonding primers such as STIX by INSLX for problematic metal substrates
- Consider Sherwin Williams products with built in adhesion promoters for harsh climates
These choices reduce risk and give confidence during progression to topcoat stages.
Applying Primer: Tips for Even Coverage
Choose a primer made for aluminum and metal bonding to give the trim a strong, rust-resistant base before any topcoat is added. Work in 3 to 4 foot sections and keep a wet edge while using a thin, consistent application with a synthetic brush or short-nap roller to prevent drips and lap marks. On humid days allow extra drying time and always confirm the primer and topcoat are compatible so the finish will hold up over time.
Choose the Right Primer
A good oil-based metal primer makes a big difference during preparing exterior aluminum trim for paint. It bonds tightly and limits corrosion if selected and applied properly.
Professionals recommend products like Sherwin-Williams Pro-Cryl or XIM 400W as reliable, cost effective primer options. Primer compatibility testing on a small patch confirms that adhesion will hold and that no bubbling occurs.
- Apply thin, even coats with a brush on edges and a roller or sprayer on flats to avoid runs and achieve uniform coverage.
- Allow at least 24 hours drying between coats, increasing time in humid conditions, then sand lightly with 220 grit for a smooth profile.
- Combine careful product choice with precise application to create a durable base for the topcoat.
Maintain Wet Edge
After the primer has cured and been sanded to a smooth base, attention shifts to keeping the primer wet while applying it so the finish looks seamless and lasts longer. The painter follows a wet edge technique, starting each new section from the previously coated area to avoid lap marks. Work in 3 to 4 foot sections, overlap strokes at least 50 percent, and reload tools often. In humid climates like Pittsburgh extend overlap times to 10 to 15 minutes. Monitor temperature and paint between 50 and 85°F. Roller or brush pressure and steady speed support even primer blending. These steps reduce visible joins, help adhesion, and give confidence that the trim will wear well.
| Tool | Best practice |
|---|---|
| Roller | Consistent pressure |
| Brush | Smooth strokes |
| Timing | Overlap 50% |
Thin Consistent Application
Apply slender layers create a significant impact while preparing aluminum trim, and the painter comprehends this from the opening brushstroke.
The method demands serene focus, firm grip, and decisions regarding oil formulated paints or water formulated options that fit the task.
Slender layers minimize drooping and expose overlooked areas without squandering resources.
- Employ a superior quality brush or a 3/8-inch nap roller for wide surfaces to reduce brush strokes and enhance bonding.
- Aim for a wet film thickness of 4 to 6 mils per layer, overlap strokes 50 percent, and maintain a wet edge to avoid overlap marks.
- Allow the opening layer become tack free for 1 to 2 hours, inspect for gaps, then apply a second slender layer when required.
Selecting the Best Topcoat for Exterior Trim
Choosing the right topcoat for exterior aluminum trim can feel overwhelming, but the decision becomes simpler with a few clear guidelines. A masterful choice balances topcoat durability with desired color trends and surface appearance. Low sheen finishes like satin or low luster hide imperfections and keep a refined look.
Options include 100% acrylic exterior paints for tenacious grip and color retention, DTM acrylic latex enamels that adhere without extra primer on well-prepped metal, and proven acrylic waterborne formulas for long life without peeling. Some premium products add self cleaning and mildew resistance so maintenance is easier. Each option links performance to aesthetic priorities. Select based on adhesion needs, expected weathering, maintenance tolerance, and the finish level that flatters the trim.
Painting Techniques: Brushes, Rollers, and Sprayers
Often, a calm, steady approach works best in addressing painting techniques for exterior aluminum trim, because the right tools and methods make the job easier and longer lasting.
A 2-inch high quality synthetic bristle brush gives precise edges and helps with trim detailing patterns, while a 4-inch mini roller with 3/8-inch nap speeds coverage on flats.
Color theory application guides accent choices and highlights.
- Use thin even layers and allow 2-4 hours drying between coats to prevent runs and build adhesion.
- In spraying, choose a 515 reversible tip, keep 12-14 inches distance, then back-roll to work paint into micro grooves for durability.
- Match tool choice to scale, finish goals, and the detailing pattern to make certain a professional result.
Weather and Timing Considerations for Painting
A clear plan makes painting exterior aluminum trim much less stressful and helps the job last longer. Weather and timing determine adhesion and drying. Painters should pick mild spring or fall days with temperatures between 50°F and 90°F. They should avoid rain and high humidity, especially where summer humidity exceeds 70%, and watch forecasts for 48 hours after application. Wind under 10 mph prevents dust and overspray. In cold zones check for frost and apply primer before noon to use daytime warmth. Consider seasonal color trends during scheduling to match light and curb appeal. Be cautious about nighttime painting effects since cooler nights slow curing. The table below helps choose conditions.
| Condition | Ideal Range | Action |
|---|---|---|
| Temp | 50–90°F | Paint midday |
| Wind | <10 mph | Delay unless lower |
| Humidity | <70% | Check forecast |
Troubleshooting Common Problems (Bubbling, Flaking)
After checking weather and timing, painters often face two common headaches on aluminum trim: bubbling and flaking.
Surface pretreatment methods matter and interact with aluminum alloy selection, so the right prep prevents heartbreak later.
When bubbling appears, it usually signals trapped moisture or improper primer.
Use oil-based primers like XIM 400W not latex, allow up to 24 hours dry in humid conditions, sand with 180-grit when needed, and reapply a bonding primer such as STIX by INSLX.
- For chalky surfaces remove residue with a TSP substitute and power wash before priming to stop flaking.
- Test adhesion through scraping; loose paint requires oil-based primer then a 100% acrylic topcoat like Sherwin Williams Superpaint.
- Follow drying times and inspect edges to confirm sound adhesion and avoid repeat failure.
Maintenance Tips to Prolong Your Finish
Regularly checking painted exterior aluminum trim helps keep it looking good and saves money over time. A careful annual clean with mild detergent and a soft cloth removes grit and prevents buildup that degrades the coating.
Then inspect biannually for fading or chalking and touch up chips with matching paint to keep the protective barrier intact. When UV damage appears, apply a high quality acrylic topcoat to restore protection and color retention. Pay attention to gutters and seals to ensure proper drainage because trapped moisture causes bubbling or failure within a few years. Consider winter storage effects on nearby materials and expect seasonal color changes that may require earlier refreshes. Avoid abrasive tools to preserve the smooth surface and adhesion.