
Yes, you can paint ceiling tiles! Most types of ceiling tiles are paintable, but success truly depends on the tile material and your preparation. Painting is a cost-effective way to update your space and greatly improve its look. This guide provides essential tips for achieving a professional finish when you paint ceiling tiles. You will learn how to paint ceiling tiles effectively.
Key Takeaways
You can paint most ceiling tiles. This updates your space and saves money.
Clean and prime tiles well before painting. This helps the paint stick and look good.
Choose the right paint for your tile type. Latex and acrylic paints work for many tiles.
Apply paint in thin, even coats. This prevents drips and gives a smooth finish.
Do not paint moldy or heavily damaged tiles. Replace them instead for safety and best results.
Types of Tiles to Paint
You can paint ceiling tiles of many different materials. Knowing your tile type helps you choose the right approach. Standard ceiling tiles, like mineral fiber, PVC, wood, and fiberglass, are generally paintable.
Acoustic and Fiberboard Tiles
You can often paint acoustic and fiberboard tiles. Some acoustic foams, made from urethane and melamine plastics, accept paint. Painted PVC-faced fiberglass and latex-faced fiberglass are available. These mimic painted drywall but keep acoustic properties. Special acoustic plasters coat fiberglass panels. They give a drywall look with sound benefits. SonoKote is an acoustically transparent paint you can use. Timberwool™ Wood Wool Acoustic Ceiling Tiles are primed for painting. Use a spray gun for these. Apply thin coats for an even finish. Do not use brushes or rollers.
Mineral Fiber Tiles
Mineral fiber tiles are common. You can paint these. They generally accept paint. Proper preparation ensures good results.
Metal Tiles
Metal tiles are paintable. You need an appropriate metal primer. The primer helps paint stick well. It also prevents rust.
Plastic and Vinyl Tiles
You can paint ceiling tiles made of plastic and vinyl. These surfaces are smooth. They need specific primers for good adhesion. MAPEI ECO-PRIM GRIP works well. It is a synthetic resin-based primer. It helps paint stick to smooth surfaces like vinyl. You usually only need one coat. This primer creates a sticky surface.
Styrofoam and Polystyrene Tiles
You can paint Styrofoam and polystyrene tiles. Be careful with paint types. Avoid paints containing solvents. Solvents can damage or dissolve these materials. Standard spray cans often have solvent-based paints. Do not use them. Instead, use acrylic water-soluble paints or emulsion paints.
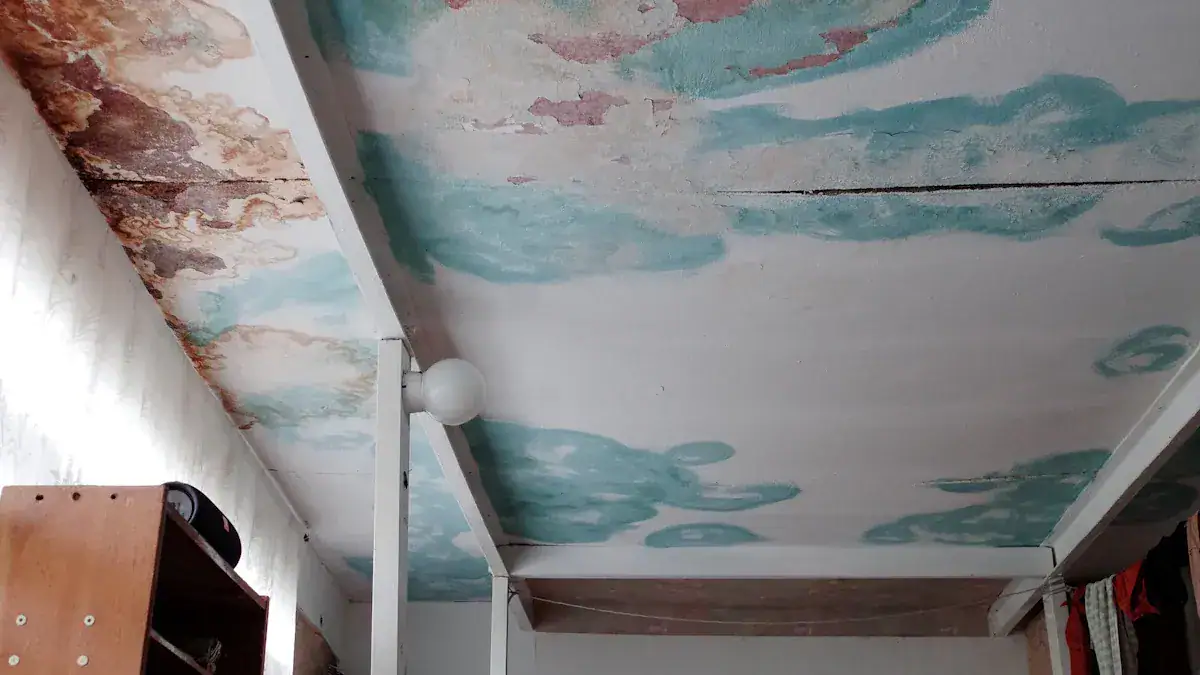
Tiles to Avoid Painting
Some tiles you should not paint. Do not paint water-damaged or moldy tiles. Painting them will not fix the problem. It can trap moisture or mold. Heavily textured acoustic tiles are also a poor choice. Painting them impacts acoustic ratings. Paint fills tiny pores, reducing sound absorption. This is important in offices or schools. Painting can also cause bonding problems. Many tiles have non-smooth surfaces. Paint may not stick well, leading to peeling or cracking. Incompatible paint types can cause streaks. Painting can also affect fire ratings. No paints are tested for compatibility, creating safety risks.
Benefits of Painting Ceiling Tiles
You gain several advantages when you decide to paint ceiling tiles. This project offers a smart way to refresh your space. It provides both practical and visual improvements.
Cost-Effective Update
Painting your ceiling tiles saves you money. Replacing old, stained, or outdated tiles can be expensive. You avoid the cost of new materials and installation labor. A fresh coat of paint gives your ceiling a new look for much less. This makes it a budget-friendly renovation choice.
Aesthetic Improvement
Painting changes a room’s look and feel. It enhances lighting. It also makes the space seem larger. You can choose colors that match your decor. Light colors on ceilings, like soft whites and neutrals, create an open and airy feeling. They make living rooms feel more spacious. In narrow areas, such as hallways, light ceiling colors make the space appear wider and more welcoming. Semi-gloss or satin finishes reflect more light. This makes rooms brighter, especially in kitchens.
Hiding Minor Imperfections
A new coat of paint helps hide small flaws. It covers minor stains, discoloration, or scuffs on your tiles. This gives your ceiling a clean, uniform appearance. Remember, paint works best for minor issues. It does not fix major damage or structural problems.
Potential Drawbacks
While painting ceiling tiles offers benefits, you should know the downsides. Paint applied to ceiling tiles can degrade over time. This leads to cracking and peeling. The ceiling then looks undesirable. If you use paint as an adhesive, it can hold panels in place. This makes future repairs difficult. You will find it harder to remove or replace individual tiles. Also, painting sound-absorbing tiles can reduce their ability to absorb sound. This affects the room’s acoustics.
Ceiling Tile Preparation

Proper preparation is key for a successful ceiling tile painting project. You must prepare your tiles well. This ensures the paint sticks and looks good.
Cleaning the Tiles
You must clean your ceiling tiles before painting. This removes dust, grease, and mildew. A clean surface helps the paint adhere better. For water stains, use a 1:3 bleach and water solution. Spray the stains. Let them air dry. Repeat if needed. Ensure good ventilation. For grease stains, mix TSP (trisodium phosphate) and water. Follow package directions. Spray or wipe it on greasy spots. Let it sit. Buff with a microfiber cloth. Let it dry. For smoke stains, use half water and half distilled white vinegar. Spray the mixture. Gently blot the area. Let it dry completely. Repeat as needed. If you have textured ceilings, like popcorn, use a vacuum attachment or a lint-free cloth. Use a light touch. Avoid wetting the ceiling. Always use a drop cloth. Wear protective clothing. Use a sturdy stepladder.
Repairing Damage
Fix any minor damage before you paint. Fill small cracks or holes with spackle. Sand these areas smooth. This creates an even surface for painting. Do not paint heavily damaged or moldy tiles. Replace them instead.
Priming for Adhesion
Priming is essential. It helps the paint stick. It also blocks stains. For general use, consider Zinsser Bulls Eye 1-2-3 Plus Interior/Exterior Water-Based Primer. It works on drywall and blocks stains. Rust-Oleum Zinsser Cover Stain Interior/Exterior Oil Primer Sealer is great for oil-based priming. It blocks stains and seals porous surfaces. KILZ Original Interior Oil-Based Wall and Ceiling Primer also blocks severe stains. Priming gives you better adhesion. It creates smoother surfaces. It covers old paint and stains. You will need fewer paint coats. Acrylic latex primers are water-based and dry fast. Oil-based primers cover stains well.
Protecting the Area
Protect your room before you start painting. Clear the room of all items. Move small furniture out. Cover larger items with drop cloths. Use plastic blanket film for floors. A 0.08 mm thick film is durable. It withstands ladder weight. Blanket paper rolls are also good. They do not tear easily. Use painter’s tape to secure coverings. Tape where walls meet the ceiling. This prevents paint damage to walls. Wrap light fixtures with lightweight plastic. This shields them from paint.
Best Paint for Ceiling Tiles
Choosing the right paint is crucial for a successful ceiling tile project. The type of tile you have often dictates the best paint for ceiling tiles. You want paint that adheres well and provides a lasting finish.
Latex and Acrylic Paint
Latex and acrylic paints are popular choices for many ceiling tile types. You can easily apply them, and they dry quickly. These paints work well on mineral fiber, PVC, wood, and fiberglass tiles. For mineral fiber acoustic ceiling boards, a high-quality latex mold-proof coating offers several benefits. It provides antioxidant properties, stable attachment, and mold-proof functions. Adding a fire prevention agent to the coating also effectively prevents fire spread. This significantly improves the fire prevention capabilities of the mineral wool acoustic ceiling board. Acrylic paint is also a viable choice. You can use it as a top coat for finished tin tiles.
Water-Based Primer and Sealer
A water-based primer and sealer are essential before you apply your topcoat paint. These products offer significant advantages. They improve adhesion, preventing paint from cracking, peeling, flaking, or blistering. This ensures a durable finish. Primers also excel at stain blocking. They safeguard surfaces from water stains, rust, pencil marks, ink, scuff marks, grease, soot, and charring. On porous surfaces like wood, concrete, or drywall, sealers make the surface less porous. This prevents new paint or primer from soaking in too quickly. This helps you achieve an attractive, even finish. It also reduces the amount of paint you need. Primers and sealers can also eliminate existing bad odors from surfaces. This contributes to a cleaner breathing environment. They provide a barrier against mold, especially in high-humidity areas. This saves you time and money on future treatments.
Specialty Paints
You can find specialty paints designed for ceiling tiles. These offer unique properties. Unfinished and paintable ceiling tiles are available for ultimate customization. You can paint them on-site to achieve the perfect color. This helps them seamlessly integrate into any design aesthetic. Some specialty paints improve the noise reduction coefficient (NRC) by 9.1 percent. They act as a Class-A fire retardant, reducing flame spread rate by 80 percent and smoke development by 50 percent. These paints can also enhance light dispersion by 8.6 percent compared to a new tile. They are non-toxic with minimal volatile organic compounds (VOCs). They maintain whiteness longer and at a higher level than the original manufacturer’s coating. Avoid using standard paint products on acoustic ceilings. They can bridge the material’s pores, inhibiting sound absorption. Dried paint can also cause tiles to stick to the T-bar system. This hinders maintenance access. Some standard paints can negatively impact the flame spread rating, which is an important safety consideration.
Recommended Finish
A flat or matte paint finish is generally recommended for ceiling tiles. Flat paint is exclusively recommended for ceilings. These finishes are ideal for low-traffic areas, which ceilings typically are. They excel at concealing surface imperfections. They are forgiving for less experienced painters. Ceilings do not endure the same wear and tear as walls. So, an easily cleanable surface is not necessary.
Application Methods
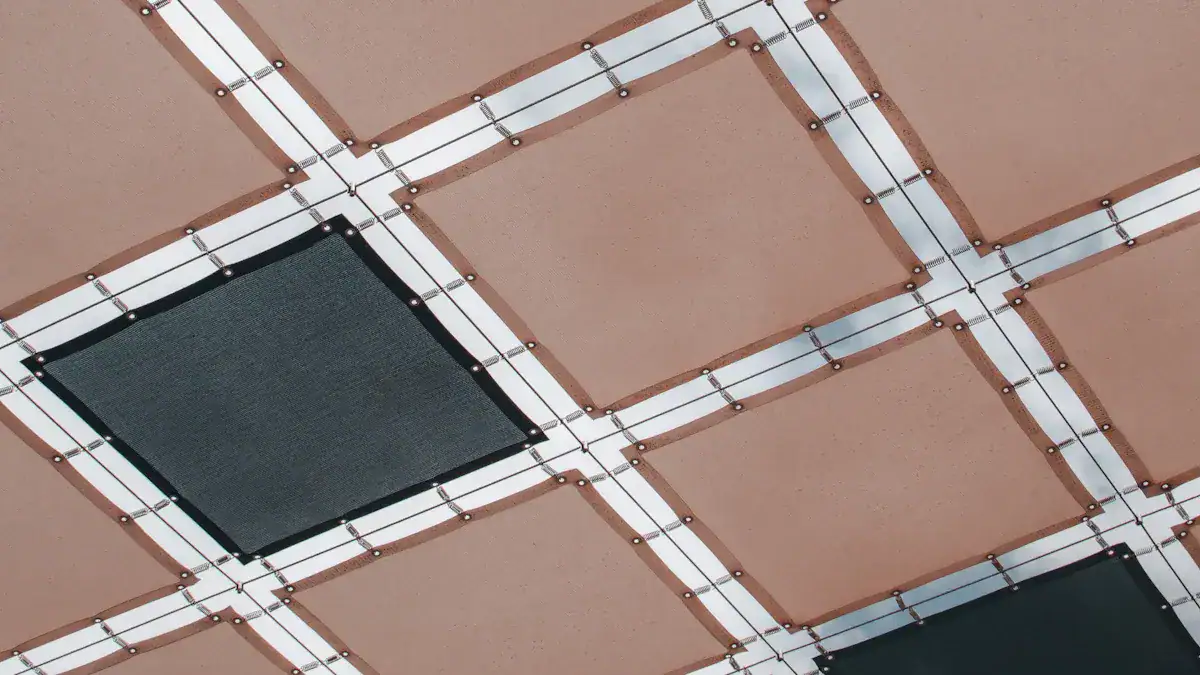
You have several effective application methods for painting ceiling tiles. These ensure efficiency and a quality finish. For consistent primer application, use a small foam roller, a brush, or a sprayer. This ensures even coverage. When applying the base coat, use a clean brush, roller, or sprayer. Apply it evenly. Multiple light coats are recommended over a single heavy coat. This prevents drips and achieves smoother coverage. For sealing, apply the sealant evenly with a brush or sprayer. For drop ceiling grids, you can use premium acrylic paint or a simple rattle can. Remember to choose the right paint for your specific tile type.
How to Paint Ceiling Tiles: Step-by-Step
Painting your ceiling tiles can transform a room. This step-by-step guide helps you achieve a professional finish. You will learn how to paint ceiling tiles effectively.
Step 1: Remove or Mask Tiles
You first decide whether to remove your ceiling tiles or mask them in place. For the best results, remove tiles from the grid. Lay them flat to paint. Allow them to dry completely before you reinstall them. This method prevents paint from causing tiles to stick to the frame. One person found that painting tiles in place made them adhere to the frame. This led to “weird cracks and peeling paint” when the tiles shifted. If you cannot easily remove your tiles, painting them in place without preventing sticking can lead to a poor finish.
Sometimes, removing tiles is too difficult. Some ceiling installations only allow side-to-side movement. Full removal would require “dismantling the entire framework.” This is often “too much work.” If your ceiling’s installation makes tile removal hard, you can mask the area. You can also prop up tiles to paint edges separately. For commercial drop ceilings, painting in place can be more efficient. This avoids damage and saves time. Always test a small, inconspicuous area first. This helps you see how the paint will look and adhere.
Step 2: Clean Thoroughly
You must clean your tiles well before painting. Refer to the “Ceiling Tile Preparation” section for detailed cleaning instructions. Remove all dust, grease, and mildew. A clean surface helps the paint stick better. Ensure proper ventilation in your work area. Open windows or use fans. This helps fumes escape and paint dry faster.
Step 3: Apply Primer
Apply primer to your tiles. Priming is essential for good adhesion and stain blocking. Use a small foam roller, a brush, or a sprayer for consistent application. If your tiles have intricate designs, use a nylon brush. This helps you coat the entire tile thoroughly with primer. Avoid over-saturating the tiles with primer. Too much liquid can damage some tile types.
Step 4: Apply First Coat
Now, you apply the first coat of paint. Use a clean brush, roller, or sprayer. Apply plenty of paint. Do not spread it too thin. This prevents poor coverage and roller markings. Use the “Cross Hatching” method for uniform coverage. Roll the first coat in one direction, like East to West. You will roll the second coat in the opposite direction.
Tip: If a large window provides light, apply your second coat towards that light source.
Ensure you spread the paint evenly. This prevents roller lines. Use slow and steady strokes with the roller. Roll in straight lines. Do not zig-zag. Go easy on roller pressure. This prevents breaking lightweight ceiling tiles. If you notice uneven areas, you can sand them lightly after the paint dries. This helps you avoid common mistakes to avoid, like rough patches.
Step 5: Apply Second Coat
After the first coat dries, apply a second coat of paint. Follow the same application techniques as the first coat. This ensures full, even coverage. If you used the cross-hatching method, roll this coat in the opposite direction from the first. For example, roll North to South if your first coat went East to West. This technique helps eliminate roller marks and provides a smooth finish. Avoid over-saturating the tiles.
Step 6: Allow Drying and Curing
Allow your painted tiles to dry completely. Drying time varies based on paint type and humidity. Read the paint manufacturer’s instructions. Most paints are dry to the touch within a few hours. However, they need more time to cure. Curing means the paint hardens fully. This can take several days or even weeks. Do not reinstall tiles until they are fully cured. This prevents damage to the fresh paint.
Painting ceiling tiles is a smart, budget-friendly DIY project. You learned that proper preparation, selecting the correct paint for your tile type, and careful application are vital. Tackle this project with confidence. A refreshed ceiling significantly enhances your room’s appearance. A fresh coat of paint offers amazing transformative power.
FAQ
Can painting acoustic tiles reduce sound absorption?
Yes, painting acoustic tiles can reduce sound absorption. Paint fills the tiny pores in the material. These pores are essential for sound absorption. Using specialty acoustic paints can help maintain some sound-dampening properties.
What happens if you paint over moldy ceiling tiles?
Painting over moldy ceiling tiles is not recommended. Paint does not kill mold. It can trap moisture and allow the mold to continue growing underneath. This can lead to further damage and health issues. Always replace moldy tiles.
How long does it take for painted ceiling tiles to dry completely?
Drying time varies based on the paint type and humidity. Most paints feel dry to the touch within a few hours. However, full curing can take several days or even weeks. Always check the paint manufacturer’s instructions for specific drying and curing times.
Can you paint ceiling tiles that are water-stained?
You can paint over minor water stains after proper cleaning and priming. For severe water damage, replace the tile. Use a stain-blocking primer to prevent the stain from bleeding through the new paint. This ensures a clean, uniform finish.
Is it better to spray paint or roll paint ceiling tiles?
Both methods work well. Spray painting offers a smoother finish, especially on textured tiles. Rolling is often easier for DIYers and provides good coverage. Choose the method you feel most comfortable using for your project.
