
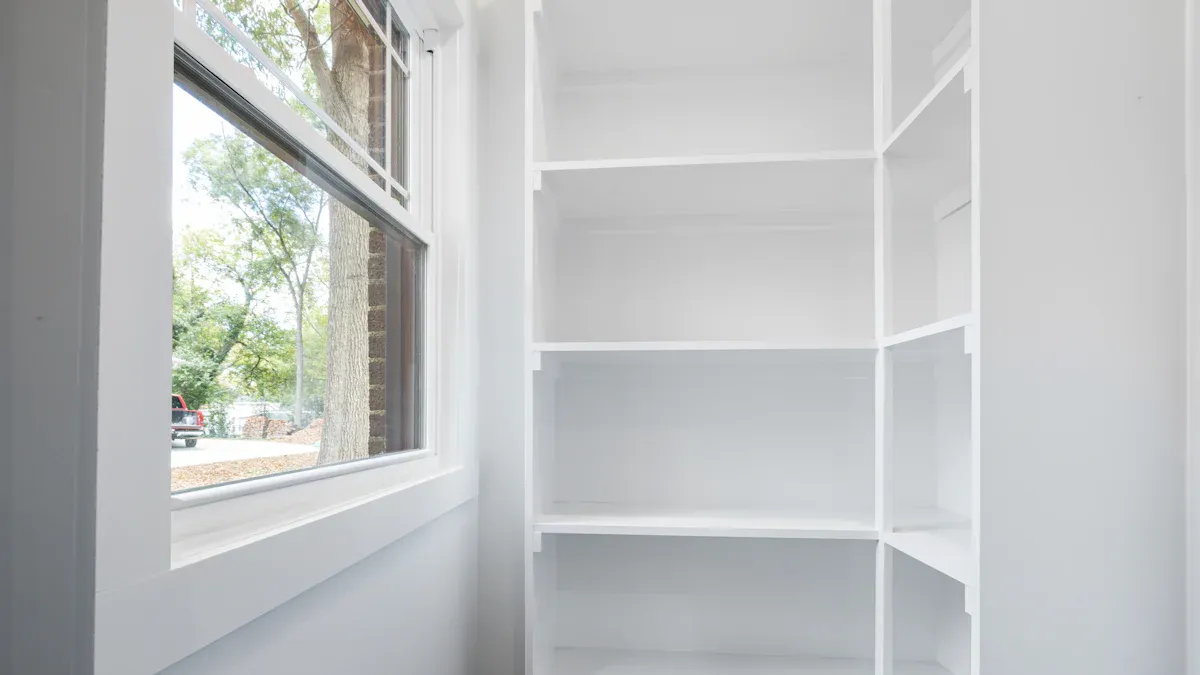
Is your small closet a constant source of frustration? Do you face daily battles with closet clutter? You are not alone! Many small closets feel cramped and disorganized. But you can easily change that! You can build closet shelves yourself. This simple DIY project is cost-effective and very rewarding. You will transform your closet with basic DIY closet shelves. Adding new shelves brings order to your space. Say goodbye to messy closets and hello to smart shelving!
Why DIY Closet Shelves?
You might wonder if building your own shelves is worth the effort. It absolutely is! You can transform your closet quickly. Many people finish this project in under two hours. Plus, it is very affordable. You can often complete a full closet makeover for less than $80. Imagine the satisfaction of a budget-friendly closet upgrade!
Cost-Effective Storage
Building your own storage is a smart financial move. You save money on expensive pre-made units. You also avoid installation fees. This means you get more storage for less cash. Your wallet will thank you. You get a custom look without the custom price tag. This makes diy a great choice for any home.
Customizing Your Space
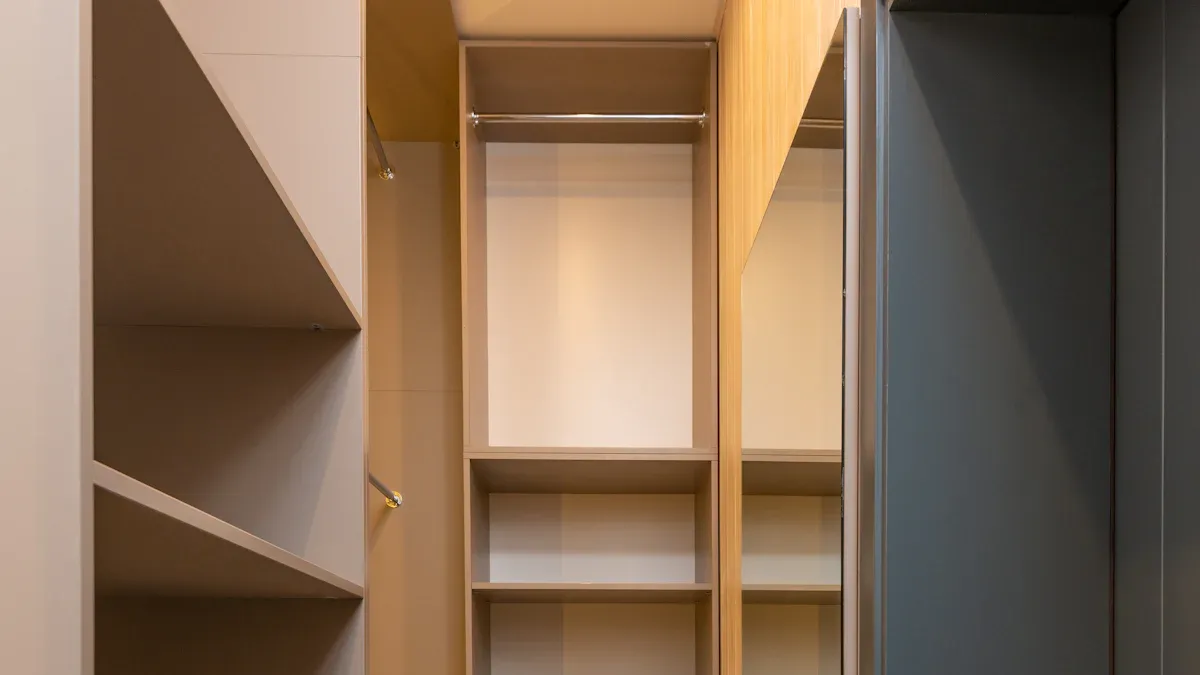
One of the best parts of diy closet shelves is making them perfect for your needs. You are not stuck with standard sizes. Do you have an awkward nook? A sloped ceiling? You can build shelves to fit those tricky spots. Think about unique configurations like ‘S’ shapes or corner bookshelves. You can even create built-in looks. For example, you can add shelves to fireplace niches. These can hold books or media. You can also design mudroom storage benches. These benches offer a drop-off point for shoes and coats. They often include a hinged top for extra storage. You can even build wall-mounted wardrobes if your closet is small or you lack one. This lets you create storage that looks like furniture. You can make your closet work exactly how you need it to.
Maximizing Vertical Storage
Small closets often have unused space above your head. Building your own simple shelving lets you use every inch. You can stack items higher. This frees up floor space. You can store seasonal clothes, extra linens, or rarely used items up high. This makes your closet much more efficient. You get more storage without making your closet feel cramped. This simple shelving solution helps you organize your entire closet.
Planning Your Small Closet Shelves
Before you grab your tools, you need a solid plan. Good planning makes all the difference for your new shelving. You want your new shelves to work perfectly for you. Consider adjustable shelving for future flexibility. This lets you change shelf heights later if your storage needs change.
Measuring Closet Dimensions
First, get out your tape measure. You need accurate measurements of your closet. Measure the width, depth, and height of your entire space. Knowing these numbers helps you design shelves that fit just right.
Here are some typical dimensions for different types of closets:
Small Walk-In Closets:
Dimensions often are 4 ft. x 8 ft. x 4 ft.
You can use a dual hanging method with 40” and 80” rods. Or, create hanging storage on two adjacent walls.
Avoid large, bulky dressers. Choose compact options like adjustable shelving and cabinetry. This keeps your walk space clear.
Reach-In Closets:
These are typically 24 inches deep.
Widths can range from 36 to 96 inches.
You can customize them with double hanging rods, adjustable shelving, and drawers.
Wardrobe Closets:
They are approximately 24 inches deep.
Widths range from 30 to 60 inches.
Heights are usually around 72 inches.
These standard sizes give you a good starting point for your diy project.
Determining Shelf Spacing
Next, think about what you will store on your shelves. Different items need different amounts of space. This helps you decide how far apart your shelves should be.
Item Type | Recommended Shelf Spacing (inches) |
|---|---|
General Storage | 12 |
Bulky Sweaters/Jeans | 14-16 |
Shoes/Small Accessories | 6-8 |
Walk-in Closet (Sweaters/Denim) | 14-16 |
Reach-in Closet (Most items) | 12 |
Reach-in Closet (Shoes/Baskets) | 6-8 |
Linen Closet (General) | 12-15 |
Linen Closet (Comforters) | Up to 18 |
Folded Clothing (T-shirts) | 10 |
Folded Clothing (Heavy Sweaters) | Up to 14 |
Shoes (Low-profile) | 6-8 |
Boots | 18-20+ |
Accessories (Belts, Scarves, Handbags) | 6-10 |
Bath Towels | 12-16 |
Hand Towels/Washcloths | 6-10 |
Bedding (Sheets/Pillowcases) | 10-12 |
Bedding (Comforters/Blankets) | 16-20 |
Use this guide to plan your spacing. You can mix and match different heights. This makes your small closets super efficient.
Sketching Your Shelf Design
Finally, draw your plan. A simple sketch helps you visualize everything. Draw where each shelf will go. Mark the heights. This step helps you catch any problems before you start building. It also ensures you use your closet space wisely.
Materials and Tools to Build Closet Shelves
You have your plan. Now, let’s gather what you need. You can often use materials you already have. Or, you can find affordable options like 1×2 lumber and precut shelf boards. For example, if you have a 3×3 closet, you can cut a sheet of material at 76 inches. Then, rip it into 15 3/4 inch sections. This gives you many shelves from one sheet.
Selecting Shelf Materials
Choosing the right material for your new shelves is important. Think about what you will store.
Material | Pros | Cons |
|---|---|---|
Plywood | Durable, less prone to warping, more affordable than solid hardwood, strong, resistant to bending or sagging, natural look. | Can be more expensive than MDF, edges might require finishing. |
MDF | Smooth surface for easy painting or veneering, cost-effective, resistant to moisture and humidity, offers a consistent surface. | Not as strong as solid wood or plywood, can’t hold heavy weights as well, edges can be vulnerable to damage. |
Particleboard | Budget-friendly. | Less durable than plywood or solid wood, best for areas with less weight and wear. |
Plywood is a great choice for strong, lasting shelves. MDF works well if you want a smooth finish for paint. Particleboard is good for light items and a tight budget.
Choosing Support Cleats and Fasteners
You need good support for your shelves. The right fasteners depend on your wall type.
For drywall, Floreat hangers work for heavy items.
OOK Professional Picture Hangers are secure and reusable. They work for both plaster and drywall.
French Cleat Hangers (Z Clips) support large objects across their full length. You can buy them or make them from wood.
Z Hangers (Z Bar) are very strong. They hold up to 400 lbs for art, mirrors, or cabinets.
These options help you securely attach your new shelves to the wall. This is key when you build closet shelves.
Essential DIY Tools
You do not need many special tools for this project. Most are common household items. This makes it a great project for anyone with beginner skills and tools.
Tool | Primary Function |
|---|---|
Miter saw or Circular saw | Cutting wood planks to correct lengths |
Jigsaw | Cutting a notch in the bottom shelf to fit around existing baseboards |
Nail gun (or hammer and nails) | Nailing components together |
Drill | Attaching shelf supports to the wall |
Stud finder | Locating studs in the wall |
Level | Ensuring shelves are straight |
Measuring tape | Taking accurate measurements |
Ear and eye protection | Safety |
Gather these tools. You will be ready to build your new diy closet shelves in no time.
Step-by-Step to Build DIY Closet Shelves
You are ready to start building! This is where your planning turns into action. Follow these steps to create your new shelves.
Preparing the Closet
Before you can install shelves, you need a clean slate. This step is super important for a smooth project.
Empty everything out. Take all your clothes, bins, and anything else out of the closet. If you have old shelves or rods, remove those too.
Clean up. Get rid of any old anchors or fasteners from the walls. You can save any hardware that looks good enough to reuse.
Vacuum and wipe. Give the whole closet a good vacuum. Then, wipe down all the walls and surfaces.
Declutter. This is a perfect time to sort through your stuff. Donate what you do not need. This stops your new system from getting too crowded.
Fix the walls. Fill any holes or cracks with spackle. Sand them smooth once they dry.
Paint if you want. If you plan to paint your closet, do it now. Use a durable paint and let it dry completely.
Marking Studs and Shelf Heights
Accurate marking makes sure your shelves are strong and level. You want your basic diy closet shelves to look great.
First, find those wall studs. These are the strong wooden beams inside your walls. You will attach your cleats to them.
Standard Spacing: Studs are usually 16 inches apart from the center. Once you find one, you can often find others easily.
Look for clues: Electrical switches, outlets, and heating vents are often right next to studs.
Check base trim: Look for filled nail holes in your baseboards. These show where nails went into studs.
Drywall bumps: Shine a flashlight across the wall at a low angle. You might see tiny bumps or dips where screws hold the drywall to the studs.
Now, mark where your shelves will go.
Use painter’s tape. Instead of marking directly on your wall, put a strip of blue painter’s tape at your desired shelf height. This gives you a temporary guide.
Make it level. Use a bubble level or a laser level to make sure the tape is perfectly straight. A laser level is great for bigger projects. It projects a perfectly level line across the whole area.
Mark on the tape. Once the tape is level, mark the exact spots for your shelf supports right on the tape. This keeps your walls clean!
Drill pilot holes. After marking, drill small pilot holes. This makes putting in screws easier. It also helps prevent wall damage. The drill bit should be a little smaller than your screw.
Cutting Boards and Cleats
Precise cuts mean better-looking and stronger shelves. You want your diy project to be perfect.
Use guides. For circular saws, tools like Rip-Cut™ or Accu-Cut™ help you make straight, accurate cuts.
Choose the right blade. Use a blade with many teeth (like 60 to 80 teeth) for smooth cuts. This helps prevent splintering, especially with plywood. Keep your blades sharp!
Adjust blade height. Set your saw blade to just a bit deeper than your wood’s thickness. This helps reduce tear-out.
Support your material. Place your board on sawhorses or a workbench. Good support prevents sagging and gives you cleaner cuts.
Prevent splinters.
Tape it: Put masking or blue tape along your cut line. For circular saws, tape the bottom side and cut with the good side up.
Score the line: Use a utility knife to score the wood along your cut line before cutting. This cuts the top fibers and stops the saw from catching and splintering.
Use a backer board: Place a scrap piece of wood under your main board. This supports the wood fibers and prevents tear-out on the back of your cut.
Attaching Support Cleats
Cleats are the strips of wood that hold up your shelves. They are key to a strong shelving system.
Temporary hold. You can use small pieces of double-sided tape to hold the cleat in place while you work.
Screw it in. Drive a screw through one end of the cleat into a wall stud.
Level and secure. Make sure the cleat is perfectly level. Then, add more screws across the middle and into any other studs you can hit. Aim for at least two studs if possible.
Use anchors. If you cannot hit a stud, use heavy-duty drywall anchors. These will support the weight of your closet items.
Strongest bond. For the strongest hold, use wood glue along with screws when attaching cleats.
Installing and Securing the Shelves
Now, it is time to put your shelf boards in place. You are almost done with your build closet shelves project!
Once your cleats are secure, you can place your cut shelf boards on top of them. For long-term durability and incredible strength, many people use a French cleat system. This is a clever way to secure objects.
How it works: You attach a strip of wood with a 45-degree angle (bevel) to the wall. Then, you attach another strip with an opposing 45-degree bevel to the item you are hanging. They hook together!
Super strong: French cleats are known for their strength and versatility. They are great for hanging cabinets or creating modular storage.
Modern options: You can also use aluminum Z clips. These are like metal French cleats. They are very strong and thin, so your shelves sit closer to the wall. They also resist mold, which is great for a closet.
Reinforce your work: While quick screws are easy, taking the time to reinforce your shelves offers big benefits. It makes sure your diy closet shelves last a long time.
Finishing Your Shelves
The final step is to make your new shelves look great and protect them.
Stain them. If you want a wood look, apply stain with a lint-free cloth. Work in a well-ventilated area and wear gloves. Let the stain dry for a full day.
Add a top coat. After the stain dries, put on a water-based top coat. Use a synthetic paintbrush. It might look milky at first, but it will dry clear and smooth.
Sand between coats. For a super smooth finish, lightly sand your shelves between top coats. Use very fine sandpaper (like 220- or 320-grit). You just want to remove any slight roughness, not the stain.
Second top coat. Apply a second coat of the top coat. This gives your shelves a beautiful sheen and a smooth feel.
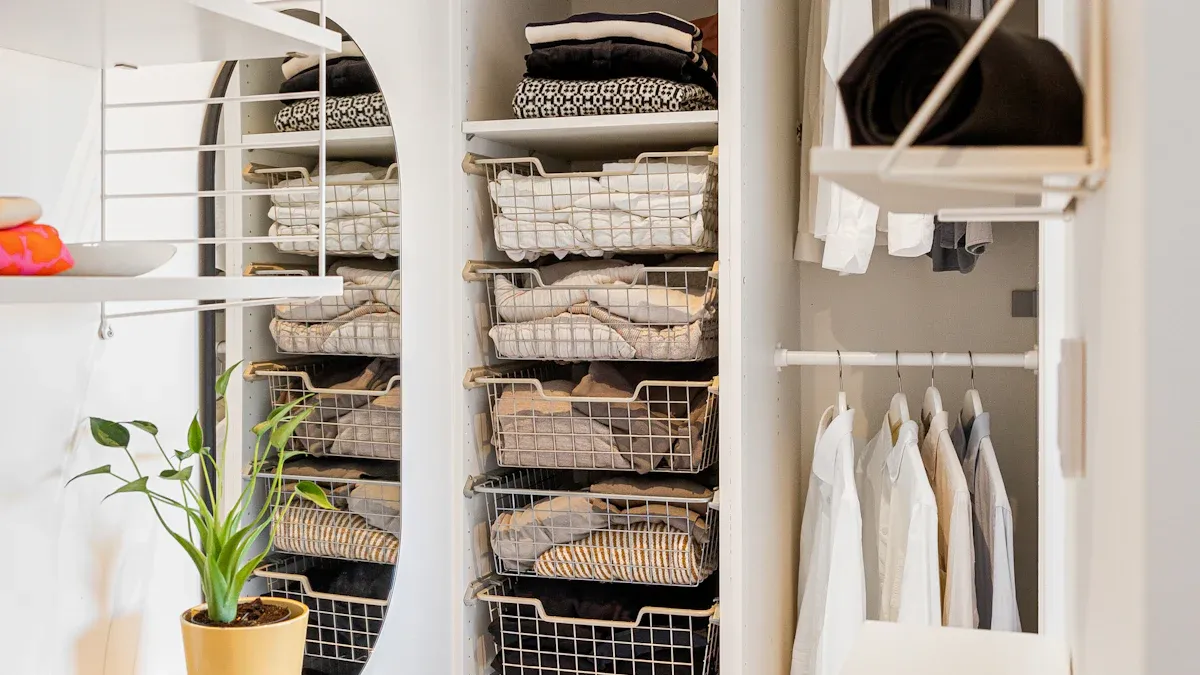
Maximizing Small Closet Storage
You have built your new shelves. Now, make the most of your small closets. Smart organization tools help you use every inch. These ideas will transform your closet.
Using Shelf Dividers
Shelf dividers are game-changers for your closet. They keep items neat and tidy. You can organize folded clothes like sweaters or jeans. They also work great for accessories. Subdividable drawer dividers are simple to use. They organize small items like socks and underwear. This maximizes drawer space. It keeps these specific items neatly arranged. Shelf dividers make it easier to find what you need. You save time. You do not dig through piles of clothes. Proper storage also protects your belongings. It keeps them from getting creased or wrinkled.
Adding Bins and Baskets
Bins and baskets are essential for small closets. They create visual calm. They also protect your belongings. You can find many types. Fabric storage boxes offer flexibility. Foldable bins save space when you do not use them. Stackable storage boxes are crucial. They maximize vertical space. Bins with compartments organize small accessories. See-through boxes let you see contents easily. This saves time. Labeled bins help you find items fast. Series like SKUBB manage chaos. KUGGIS boxes stack well. SAMLA boxes with lids store many items without taking up too much room.
Considering Pull-Out Solutions
Accessibility is key in any closet. Pull-out solutions make your closet much easier to use. They help you reach items at the back. You do not need to bend or strain. Pull-out racks make garment retrieval easier. Shallow shelves and drawers reduce bending. Pull-down rods are fantastic. They bring clothes down to you. This is great for high places. Pull-out and pop-out accessories like tie or belt racks move towards you. Smooth sliding mechanisms ensure effortless operation.
Installing a Second Hanging Rod
Do you need more hanging space? Install a second hanging rod. This simple shelving addition doubles your capacity. You can hang short garments on both rods. This efficiently separates short and long clothing. It adds capacity without making your closet feel crowded. You get much more storage from your existing closet space.
You can see, building your own diy closet shelves offers many rewards. You get a well-organized closet. This project is very practical. Imagine the satisfaction you will feel. Your space will be tidy. Tackle this easy diy task. Even small changes make a big difference in your home organization. You can truly transform your closets with smart shelving.
FAQ
How long does it take to build these shelves?
You can often finish this project quickly. Many people complete it in under two hours. This depends on your skill level and how many shelves you build. You will enjoy your new organized closet fast! ⏱️
What if my closet walls do not have studs?
You can still build shelves! Use heavy-duty drywall anchors. These anchors hold a lot of weight. Make sure you choose anchors rated for the weight you plan to put on your shelves. Always follow the anchor’s instructions.
Can I paint or stain my new shelves?
Yes, you definitely can! Painting or staining protects your shelves. It also makes them look great. You can match your closet’s decor. Just make sure to sand lightly between coats for a smooth finish. ✨
How much weight can these DIY shelves hold?
Your shelves’ weight capacity depends on a few things. It depends on the material you use. It also depends on how you attach them. Plywood shelves attached to studs with screws hold a lot. Always use strong fasteners and hit studs when you can.
Do I need special tools for this project?
No, you do not need many special tools. You probably have most of them already. A saw, drill, level, and tape measure are key. This makes it a great project for beginners. You can start building with basic tools. 🛠️
