
Is your workshop a constant battle against clutter? Many people struggle with workshop disarray. A CRAFTSMAN survey shows 52% of Americans with garages are unsatisfied with how their garage is arranged. In fact, 50% of homeowners call their garage the most disorganized room.
A DIY pegboard offers a highly effective solution to this common problem. This customizable and cost-efficient system brings ultimate workshop organization. You gain satisfaction and efficiency from a well-organized space. A pegboard holds tools, craft supplies, and more. This DIY project is also very affordable.
Why a DIY Pegboard for Workshop Organization

The Problem: Clutter and Disorganization
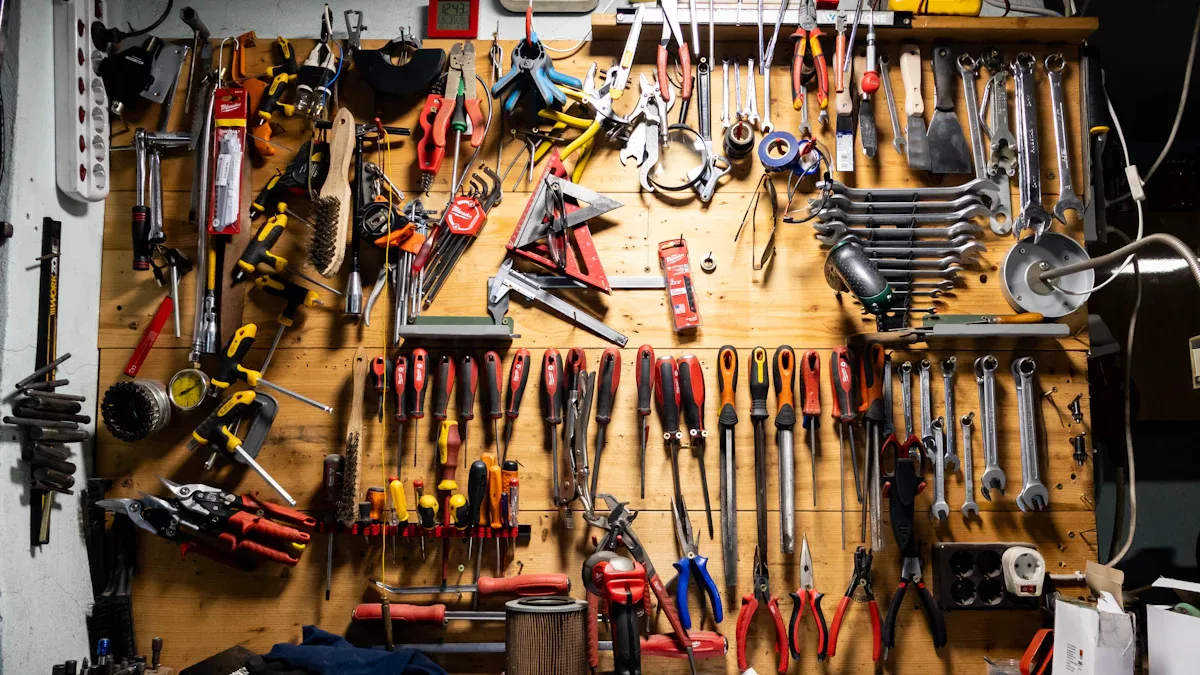
You know the frustration of a messy workshop. Clutter on benchtops and floors reduces your active work area. You struggle to find necessary tools. Deep, disorganized bins or drawers often hide items. You waste time digging through them. Sometimes, you even buy duplicate tools because you cannot find the originals. A lack of designated storage leads to a constantly messy space. This creates safety hazards. You might trip or knock over unsecured items. Prioritizing looks over function in storage design also causes problems. Frequently used tools stay out if their “beautiful” storage is inconvenient. This leads to quick disarray. Hoarding unused items, like scrap materials or broken tools, consumes valuable space. This adds to overall chaos.
The Solution: Pegboard Versatility and Accessibility
A pegboard offers a powerful solution. It saves space. You mount it on a wall. This frees up floor and countertop space. It works well for small rooms and large garages. A pegboard is also highly customizable. You choose the right size for your space. You can buy extra shelves and pegs. This lets you hang and store items of different shapes. All your tools and supplies are in sight. You access them easily. No more searching through drawers. Pegboard systems offer great flexibility. You can arrange hooks, shelves, or baskets. You change them as your needs change. This makes it a versatile tool for ultimate workshop organization.
Cost-Effectiveness of DIY Solutions
Building a diy pegboard is a smart financial choice. Buying pre-made storage systems can be expensive. A diy approach uses affordable materials. You save money on labor costs. You also get a custom solution. It fits your exact space and needs. This makes it a very cost-effective way to improve your workshop organization.
Planning Your DIY Pegboard
Assessing Space and Layout
You need to plan your pegboard carefully. First, look at your workshop wall. Measure the available space. This helps you decide the best size for your pegboard. Think about all your tools and supplies. How much storage do you need? Consider future tools you might buy. This planning ensures your pegboard fits your current and future needs.
Choosing Pegboard Materials
You have several material choices for your pegboard. Each has pros and cons.
Feature | Wooden Pegboards | Metal Pegboards | Plastic Pegboards |
|---|---|---|---|
Durability | Medium | High | High |
Cost | Medium | High | Low-Medium |
Moisture Resistance | Low | Medium | High |
Ease of Installation | Medium | Low | High |
Weight Capacity | Medium | High | Medium-High |
Plastic pegboards offer great benefits. They are very durable. They resist wear and tear. Plastic does not warp in humidity like wood. It also does not scratch or rust like metal. Plastic pegboards are immune to moisture. This makes them perfect for humid areas like garages. They are also cost-effective. You get excellent value for your money.
Consider the material thickness.
Thickness | Characteristics | Recommended Applications |
|---|---|---|
1/8″ | Holds hooks adequately | Lighter applications, such as craft storage |
3/16″ | Holds hooks more securely, supports heavier loads | Garage workshops with power tools, heavier applications |
For a sturdy diy pegboard project, use ¾-inch birch plywood. This thickness provides excellent support.
Essential Tools for Building
You need specific tools to build your pegboard. Gather these before you start:
Drill
3/32 Drill Bit
Saw (Jigsaw, Circular Saw, or Table Saw)
Measuring Tape
Pencil
Straight Edge
Sandpaper
Safety Glasses
Ear Protection
Stud Finder (if mounting on wall)
Level
This list ensures you have everything for a successful build.
Step-by-Step Pegboard Construction
Building your own pegboard is a rewarding project. This diy guide helps you create a functional storage solution. Follow these steps carefully for the best results.
Cutting and Preparing Material
First, you need to cut your pegboard material to size. Accurate measurement is key. Use a reliable tape measure and a sharp pencil. A long straightedge helps you mark the required dimensions. Try to make cut lines fall in the solid sections between holes. This ensures a clean result and maintains board strength. Cutting through holes can create weak spots.
To prevent splintering, apply painter’s tape or masking tape along the entire cut line. This tape stabilizes the hardboard fibers as your saw blade passes through. Secure your pegboard to a stable workbench. Use clamps to prevent movement. Make sure the piece you want to cut off overhangs the edge. Place a sacrificial piece of lumber underneath the cut line. This prevents tear-out on the underside of your pegboard.
Choose the right tool for cutting. For long, straight cuts, use a circular saw. A high-tooth-count blade (like a 60-80 teeth plywood or laminate blade) works best. For curves or intricate cuts, a jigsaw with a fine blade is suitable. Guide the saw steadily along your marks. Let the tool do the work. Cut slowly and watch for splintering. Support the board at the edges. Immediately place offcuts on supporting surfaces. This prevents the pegboard from snapping during the cut.
Drilling Peg Holes Accurately
If you are using solid material like plywood, you need to drill the peg holes yourself. Standard pegboard hole spacing is 1 inch between holes. This accommodates common peg hooks and accessories. Use a 1/4-inch drill bit for these holes. Mark your grid precisely. You can create a template or use a ruler and pencil to mark each hole. Drill slowly and steadily. Ensure your drill bit goes straight through the material. This creates clean, usable holes for your hooks.
Building the Support Frame
Your pegboard needs a support frame. This frame creates space behind the pegboard. This space, about 1/2 inch, allows hooks to fit properly. You have a few options for building this frame.
One way is to install screw-in standoffs with nuts as spacers. For larger panels, add standoffs in the center for extra support. Another method is to build a frame for the back of the panel. Use 1x2s or 1x3s for this. For panels wider than 3 feet, include a 1×2 rib every 2 feet. This supports weight and prevents flexing.
You can also frame the pegboard with baseboards and molding. Secure these with brad nails. Ensure the frame is perfectly aligned and square. Then, secure it with brads and screws. This frame will attach to your wall.
Finishing Your Pegboard
After construction, you can finish your pegboard. Sand any rough edges. Use fine-grit sandpaper for a smooth finish. You can paint or seal your pegboard. This adds durability and improves its look. Choose a color that matches your workshop. A clear sealant protects the wood from moisture and wear. This step makes your pegboard last longer. It also makes your new storage system look professional. This diy guide helps you create a sturdy and attractive storage solution.
Installing Your Pegboard Securely
You have built your pegboard. Now, you need to install it firmly on your wall. Proper installation ensures your pegboard holds tools safely. It also makes your workshop organized and efficient.
Locating Wall Studs
Finding wall studs is the first crucial step. Wall studs provide the strongest anchor points for your pegboard. You will use a stud finder to locate these studs. A stud finder is a reliable tool. It helps you secure the pegboard directly to the studs. This is the strongest option available. Mark the stud locations with a pencil. Use a level to ensure your marks are straight. This ensures proper alignment. It also maximizes direct attachment to the wood. This reduces reliance on drywall anchors.
Attaching Frame to Wall
You need to attach the support frame to the wall. This frame creates a hollow space behind the pegboard. This space allows hooks to fit properly. You can install your pegboard on exposed stud walls. Or, you can secure 1-inch by 2-inch boards to studs. These boards create the necessary hollow space. Add blocking to corners if you need extra support for nailing. Drive screws through studs to secure these blocks.
Mounting the Pegboard Panel
Now, you will mount the pegboard panel. Measure and cut your pegboard panels. Ensure each side aligns with a stud. This provides strong support. Start in one corner of your planned installation area. Apply a bead of construction adhesive along all studs. These studs will support the first panel. Place scrap wood below the pegboard. This raises it off the ground. It prevents liquid spills. It also allows for expansion. Nail one side of the pegboard to the end stud. Place nails every 9 to 12 inches. Continue adding pegboard panels. Use the same process for each panel. Apply construction adhesive. Then, hammer nails to secure the panel.
Anchor directly into wall studs whenever possible. Studs are typically 16 inches apart. They offer superior holding capacity compared to drywall alone. Use fasteners no more than 16 inches apart horizontally. This prevents sagging or flexing. Ensure each fastener goes through the pegboard itself. It should not just go around its edges. This distributes stress evenly. Utilize spacer blocks. These are cut wood pieces. They go between the pegboard and the wall. They create airflow. They provide room for hooks. They prevent moisture. They also allow hook stems to move freely. Fasteners must penetrate fully. They need to go at least 1/8 inch beyond drywall thickness. This ensures proper anchor grip. Follow manufacturer specifications for anchor types.
Ensuring Stability and Level
You want your pegboard to be stable and level. Use furring strips. You can attach these to the back of the pegboard. Use drywall screws or double-sided adhesive. This creates a gap between the pegboard and the wall. It prevents bowing. It also provides a secure mounting surface. Screw-in standoffs work with furring strips. Drive them through the pegboard face. They go into pre-drilled holes in the strips. This ensures a firm attachment. You do not drive screws directly through pegboard holes.
Locating and marking wall studs provides strong anchor points for screws. This is crucial for stability. Use a level during installation. A level ensures the pegboard is perfectly horizontal. This prevents a crooked appearance. It also ensures items hung on it remain stable. Drive drywall screws into studs. Once you locate studs, use these screws. Attach the pegboard directly into these studs. This provides robust support. It prevents sagging or tipping.
Organizing Your Workshop: Pegboard Organization Tips

You have built and installed your pegboard. Now, you can make it work for you. Proper peg board organization transforms your workspace. It makes your tools easy to find. This section helps you achieve ultimate workshop organization.
Selecting Pegs, Hooks, and Bins
You need the right accessories for your pegboard. Many types of pegs, hooks, and bins exist. You can find kits like a 36 Bin Kit or a 96″ Wide Pegboard Kit with hooks and bins. There are also 32″H x 72″W and 32″H x 48″W kits. You can get a Garage Storage System Panels, Bins, Peg Hooks & Panel Set. A 48″ Wide Pegboard Kit with 2 Panels and 25 hooks is also available. Pegboard bins are very useful. They come in heavy-duty options for holding and storing items. These bins have integrated hooks. You can easily attach them to any pegboard. They are also simple to remove and reposition. These bins are often made from tough polymer. They fit standard pegboards, including wood, plastic, and metal. You will also find many types of hooks and accessories. These include brackets, shelves, and add-ons. Choose hooks that match your tools.
Strategic Tool Placement
Place your tools where you use them most. Put frequently used hand tools at eye level. This includes tape, squares, and drivers. Keep drills, bits, clamps, and sanding equipment at chest level. Store lighter cases and seasonal items above your head. Place heavier items, like nailers or polishers, in the low band. This helps you lift them safely with your legs. For future expansion, leave two empty columns between tool families. This allows for new additions without reorganizing everything.
Maximizing Vertical Storage
Your pegboard is excellent for vertical storage. You can create a command center above your desk. Use hooks, small baskets, and shelves. This keeps daily essentials visible. It also clears your work surface. You can combine a pegboard behind floating shelves. This adds depth. Shelves hold larger items. The pegboard organizes smaller tools. Consider mobile pegboard panels on casters. You can move these to create flexible work zones. Use a color-coded system for hooks and bins. This helps you find items quickly. You can also add LED strips and hidden cable channels. This improves lighting and manages wires.
Maintenance and Expansion
Maintain your pegboard to keep your organization effective. Regularly check your hooks. Make sure they are secure. Clean your pegboard as needed. Plan for future growth. Use modular and stackable systems. This lets you build up or out. Keep pegboard sizes and dowel spacing uniform. This ensures new sections fit well. Mount pegboards on walls to free up floor space. Leave 20–30% extra space when you first install it. This allows for new items. Combine different storage methods. This includes wall-mounted pegboards, drawer inserts, and clear bins. This adapts to your changing needs.
You now understand the significant benefits of a diy pegboard for ultimate workshop organization. This rewarding project brings improved efficiency and a great sense of accomplishment. Its customizability offers long-term value. Start your own pegboard project today. You will transform your workspace.
Share your creations or organization tips with us! Your new pegboard will make your workshop more functional.
FAQ
What materials work best for a pegboard?
Plastic pegboards are very durable. They resist moisture well. Metal pegboards are also strong. Wood pegboards are good for lighter items. You choose based on your tools and workshop environment.
How do I hang heavy tools on my pegboard?
Mount your pegboard directly into wall studs. Use strong, heavy-duty hooks. Distribute the weight across several hooks if possible. This prevents sagging. It keeps your tools secure.
Can I paint my pegboard?
Yes, you can paint your pegboard. Sand it lightly first. Use a primer. Then apply your chosen paint color. This adds durability. It also matches your workshop’s look.
How much space should be behind the pegboard?
You need about 1/2 inch of space. This gap allows peg hooks to fit properly. Use spacers or a support frame. This ensures your accessories work well.


