
Achieving a professional finish and durable installation requires precision when you cut vinyl siding. This guide shows you essential tools and effective techniques for cutting vinyl siding. Mastering these skills prevents common issues like cracking and splintering. This ensures your installation is successful.
Key Takeaways
Use the right tools for cutting vinyl siding. Hand tools like snips are good for small cuts. Power tools like circular saws are good for long cuts. Always use a fine-tooth blade and reverse it on a circular saw.
Cut vinyl siding carefully. Measure twice before you cut. Support the siding well. Score and snap with a utility knife in cold weather. This helps prevent cracks.
Always wear safety gear when cutting vinyl siding. Protect your eyes, ears, and hands. This keeps you safe from flying pieces and loud noises.
Avoid common mistakes. Do not use the wrong tools. Do not cut too fast. Always prepare your work area. This helps you get good results.
Understanding Vinyl Siding
Material Properties
Vinyl siding is a popular and durable material for home exteriors. It consists of polyvinyl chloride (PVC). This composition gives vinyl its distinct properties. You will observe its inherent flexibility. However, temperature significantly influences this characteristic. In colder temperatures, vinyl siding becomes quite brittle.
It loses its natural pliability. This makes the material much more prone to cracking or snapping when you handle or cut it. This brittleness means you need different cutting approaches in cold weather. On the other hand, warmer temperatures cause vinyl to expand. This expansion and contraction are normal. You must understand these thermal movements. They directly affect how you should approach cutting and installing the material. Ignoring these properties can lead to damaged pieces and a less effective, long-term installation.
Why Precision Matters
Precision is absolutely essential when you cut vinyl siding. Improper cuts lead to several noticeable problems. You might encounter unsightly cracks along the cut edges. The material can also splinter, leaving rough, jagged lines. These flaws immediately make your installation look unprofessional. They detract from your home’s curb appeal. Beyond aesthetics, poor cuts compromise the siding’s protective function.
Cracked or splintered pieces do not fit together tightly. They create small gaps or weak points in the siding system. These openings allow moisture, wind, and even insects to penetrate behind the panels.
Over time, this can lead to water damage, mold growth, or reduced insulation efficiency for your home. Accurate, clean cuts ensure each piece interlocks perfectly. This creates a strong, weather-resistant barrier. It also provides a smooth, polished, and attractive finish for your home’s exterior. Taking the time for precise cuts saves you from future headaches and costly repairs.
Tools Needed for Cutting Vinyl Siding
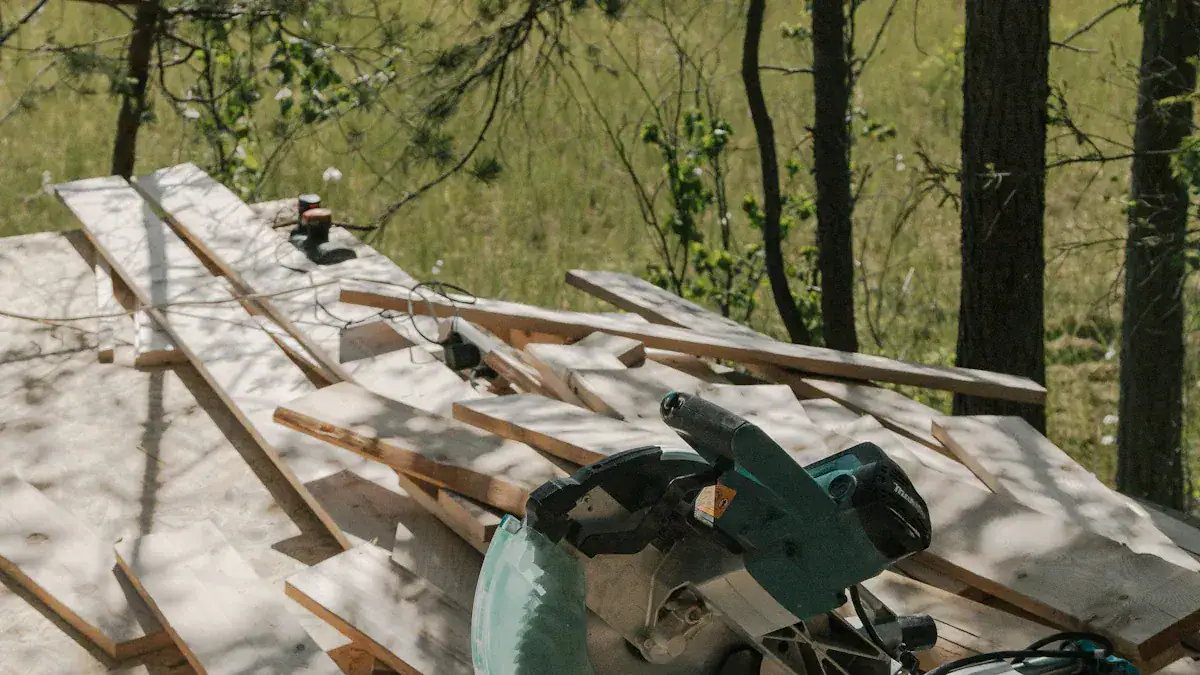
To successfully cut vinyl siding, you need the right equipment. The proper tools make your job easier and ensure clean, professional results. This section details the tools needed for cutting vinyl siding, from simple hand tools to powerful electric saws, along with crucial safety gear.
Hand Tools for Precision
Hand tools are excellent for smaller jobs, intricate cuts, or when you need precise control. They are often the essential tools for cutting vinyl siding for many tasks.
Vinyl Siding Snips/Shears: These specialized snips cut cleanly without damaging or cracking the siding. They work well for straight cuts and trimming smaller pieces. You can find ultra-lightweight vinyl cutting snips, like the ULV10, which weigh less than 9 oz. These snips feature a strong polymer frame and replaceable, razor-sharp blades. They produce long, controlled 3-inch cuts in thick vinyl and other materials.
Utility Knife: A utility knife is ideal for scoring and snapping vinyl, especially in colder weather when the material is more brittle. You use it for precise cuts and for trimming small sections or cutting notches around windows and doors. A sharp blade prevents jagged edges. For rips, you can score the siding with a utility knife. Then, you bend and snap the siding. This method is very effective. One user found it “real easy” to cut vinyl siding by sticking a razor knife into the joint and pulling it along. A razor knife is “alright for rips” in vinyl siding.
Power Tools for Efficiency
Power tools offer speed and efficiency for larger projects and longer cuts.
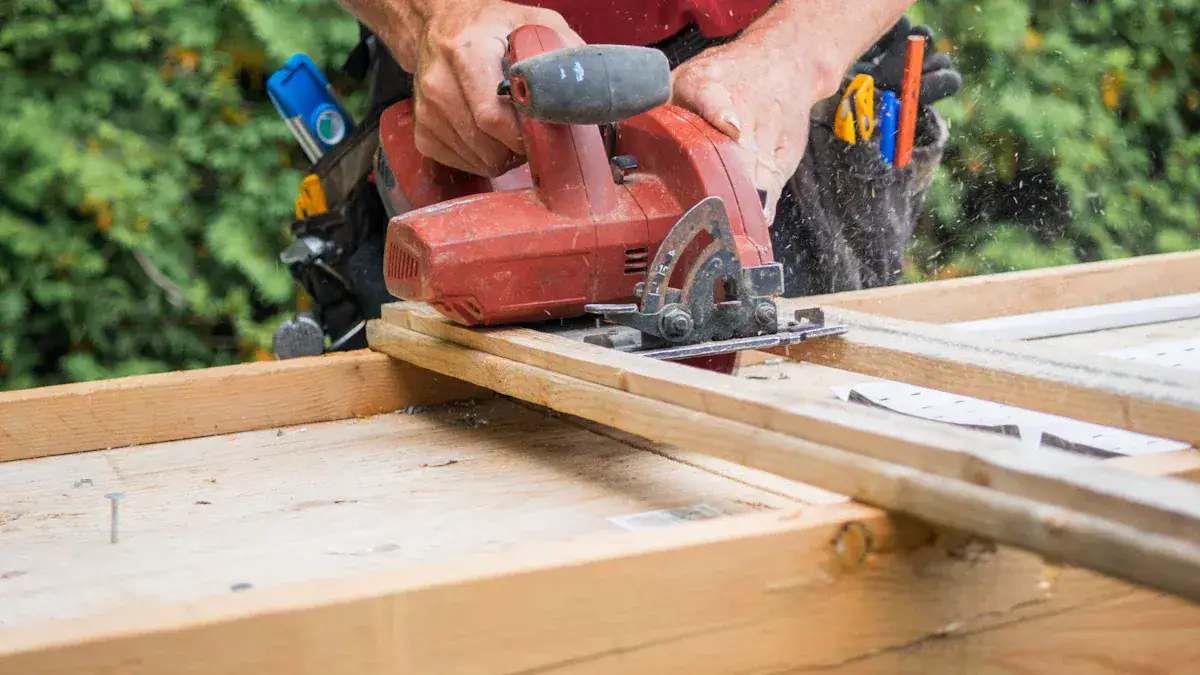
Circular Saws/Miter Saws: These saws are best for long, straight, and angled cuts. When you use a circular saw, you must use a fine-tooth blade. You should also reverse the blade. This setup minimizes chipping and creates a cleaner cut. A circular saw with fine tooth blade is useful for large or thick panels. It enables quick and precise cuts.
Jigsaws: A jigsaw is suitable for intricate or curved cuts. You need to select the correct blade type for vinyl. A slow, steady approach with the right blade ensures a smooth cut.
Vinyl Siding TurboShear® (TSV1): This is a power-assisted attachment for cordless drills or impact drivers. It makes fast straight cuts, circles, or squares in vinyl siding. It has a knife-like beveled blade for easy penetration.
Specialized Tools and Safety Gear
Beyond the basic cutting tools, some specialized items can help, and safety gear is always a must.
Other Specialized Tools: You might also encounter oscillating saws, angle grinders, aviation snips, and pneumatic nibbling tools. These tools offer solutions for specific cutting challenges or increased efficiency.
Safety Gear: When you use any tools, especially power tools, safety is paramount. You must protect yourself from debris and potential hazards.
Eye Protection: Wear safety goggles or glasses. They protect your eyes from flying particles. High impact resistance is recommended.
Hearing Protection: Use earplugs or earmuffs. They safeguard against loud noise levels.
Respiratory Protection: A mask or respirator shields your respiratory system from dust and fine particles.
Hand Protection: Utility gloves protect your hands from sharp edges and materials. Look for durability and good grip.
Foot Protection: Sturdy shoes or boots protect your feet from hazards. Steel or composite toe caps are good for heavy objects.
Clothing: Wear high-coverage clothing, like long sleeves and pants. They should be made from durable materials to protect your skin from cuts and scrapes.
Additional Protection: Depending on the job, you might also need head protection (a hard hat or helmet), face protection (a face shield), or fall protection (a harness and safety lanyard).
How to Cut Vinyl Siding: Techniques
Mastering the proper techniques for cutting vinyl siding ensures a smooth installation. You need precision and the right approach for each type of cut. These steps to cut vinyl siding will guide you.
General Cutting Principles
Successful vinyl siding installation starts with good preparation. You must always prepare your material before you make any cuts.
Measure Twice, Cut Once: Always use a tape measure. Get accurate dimensions. Double-check your measurements. This prevents errors. You should mark these measurements directly on the siding. Use a pencil or chalk.
Prepare the Chalk Line: Use a chalk line for straight cuts. Snap it along your marked measurements. This creates a clear guide for cutting.
Support Your Siding: Place the vinyl siding on a long, flat work surface. This prevents the material from bending or breaking during cutting. Proper support gives you a stable base.
Straight and Angle Cuts
You will make many straight and angled cuts. How to cut vinyl siding cleanly depends on your chosen tool.
Using Snips/Shears:
Hold the siding material steady.
Make smooth, continuous cuts.
Do not close the blades completely while cutting.
Only close tin snips about two-thirds of the way. This ensures straight and clean cuts.
Slowly open and slightly close the snips across the vinyl. Continue until you reach the end of the siding. This creates a clean, uniform cut without tearing.
Using a Utility Knife:
This method is great for clean breaks.
Score the vinyl siding deeply with the utility knife.
Place the scored line over a sharp edge.
Apply firm, quick pressure. The siding will snap cleanly along the score. This works well, especially in colder weather.
Using Circular Saws/Miter Saws:
Choose your cutting method carefully. For power saws, select a fine-tooth blade.
Reverse the blade on your saw. This setup minimizes chipping. It creates a cleaner cut.
Set your cutting speed. A slower, steady speed often works best.
Always wear safety glasses. Keep your hands clear of the blade.
Notches and Curves
You will need to make special cuts around windows, doors, and other obstacles.
Creating Notches:
Siding snips are crucial for making smaller, intricate cuts. They offer precision. Quality snips provide easy handling and a sharp cutting edge. They cut through material effectively.
The Freund Notch Punching Tool is engineered for clean, precise slot punching. It has an adjustable depth stop. Lever-assisted operation makes it effortless. This tool creates 1/8″ x 5/8″ notches. You can adjust the depth between 3/8″ and 7/8″. This ensures consistent outcomes.
The J-channel Cutter & Vinyl Siding Notcher is a versatile tool. It makes precise cuts and notches. You can create lapping notches, drain tabs, cutouts, and trim cuts. This tool combines several cutting functions. It streamlines siding installation.
Cutting Curves with a Jigsaw:
A jigsaw is perfect for curved cuts. You need the right blade for vinyl.
Keep your eye on the blade. Position yourself for a clear view of the cutting area. Look through the gap between the blade housing and the shoe. This helps you maintain a straight and clean cut. Keep your head to the side of the tool for better visibility and safety.
Draw the tool toward you. Start the cut at the furthest point. Gently pull the jigsaw toward your body. This improves visibility and control. It results in a smoother process with consistent pressure.
Change the angle of attack for complex curves. Anticipate changes in direction. Gradually rotate the jigsaw as you approach a curve. Avoid sharp movements. Stop and reposition the saw if needed. This helps you maintain control and accuracy.
Cold Weather Cutting
Cutting vinyl siding in cold weather presents unique challenges. Vinyl becomes brittle in cold conditions. This compromises its integrity. It increases its susceptibility to cracking and breakage. This effect is very noticeable in extremely cold temperatures. The material becomes harder to cut cleanly. It is more prone to damage.
Adjust Your Techniques:
Avoid using power saws if possible. A user reported significant chipping when cutting vinyl siding with a table saw in cold weather.
The scoring and snapping method with a utility knife works best. It minimizes stress on the brittle material.
Make slower, more deliberate cuts. This reduces the chance of cracking.
Consider bringing the siding indoors to warm up slightly before cutting. This can restore some flexibility.
Avoiding Common Mistakes When Cutting Vinyl Siding
You can make mistakes when you cut vinyl siding. These errors often lead to poor results or safety risks. You must understand these common pitfalls. This helps you achieve a professional finish.
Tool and Technique Errors
You might use the wrong blade or tool. This is a frequent error.
The concern I have with this is that you risk chipping vinyl but cutting it this way as your saw will tend to tip from side to side causing more tension on blade to material. Not saying it cant be done, but I’d hate to chip vinyl I can’t find replacement for. I’d never cut existing vinyl I can’t easily find, with a saw in a MI winter, but might consider the “melt” method in a summer. Either way, even cutting with snips is a risk on a cold day.
This shows you risk chipping the vinyl. You might not find a replacement. Cutting too fast or with too much pressure also causes problems. High pressure can erode the siding’s protective layer. It makes the siding vulnerable to damage.
Excessive force can crack the cladding. It can also force water into your building. Improper pressure washing techniques can damage vinyl siding. They can bore holes, cause dents, or create warped areas. Concentrated pressure leaves streaks or water marks. You must also support the siding adequately. Failing to do so can lead to poor cuts or breakage. These are crucial for good results.
Preparation and Safety Oversights
You also need to avoid mistakes in preparation and safety. These oversights can lead to bigger problems.
Overlooking the Importance of Preparation is a common mistake. Preparation is a cornerstone for successful vinyl siding installation; without it, you’re building on shaky ground. Ensuring that the surface is clean, dry, and free from damages forms the foundation for durable siding. Begin by assessing the wall for any signs of rot or mold and rectify them before moving forward.
This will help in maintaining the structural integrity and the longevity of your siding. Before you even start with the housewrap, remember that correct orientation and application are indispensable in keeping moisture out.
Failing to prime the walls adequately may lead to issues with panel attachment, affecting flatness and alignment. Incorrect Measurement Techniques is another overlooked step. Correct measurements aren’t just about getting the length and width right; they impact the entire installation’s precision.
Incorrect dimensions can lead to wasted materials or worse, panels that don’t fit. Measurements should account for overlaps and trim adjustments, adding a little extra for any mishaps. Precise dimensions help ensure a steady installation flow. Double-check every measurement before cutting to mitigate costly mistakes and laborious adjustments.
To avoid variances, make use of proper marking tools like chalk lines and carpenters’ squares. Professionals often recommend measuring each panel twice to avoid having to re-cut.
You must prepare your work area properly. You should also consider the temperature. Vinyl becomes brittle in cold weather. This makes it harder to cut vinyl siding without damage.
You must always prioritize safety. Many frequent errors happen because people skip safety gear.
You might make inaccurate measurements. This wastes material.
You could over-tighten nails. This causes buckling. It hinders expansion and contraction.
You might skip safety gear. This compromises your personal protection.
Ignoring safety precautions can lead to serious hazards.
A dull blade causes jagged edges and uneven cuts.
You risk eye and hand injuries if you do not wear safety glasses and gloves.
Dusty conditions from cutting vinyl siding can harm your respiratory health. Wear a dust mask.
Flying vinyl chips can damage your eyes.
Power saws are loud. They can damage your hearing.
Cutting vinyl creates dust and small particles. These are harmful to breathe.
Dull blades need more force. They are more likely to slip or bind. This leads to accidents.
Wobbly workbenches or unstable sawhorses cause accidents and poor cuts.
You now understand the critical role of selecting the right tools. You also know how to apply correct techniques for successful vinyl siding installation. Attention to detail and avoiding common mistakes will lead to durable, professional-looking results. Remember to cut and trim precisely.
Leave sufficient space for expansion. This prevents buckling. You can confidently approach your vinyl siding projects with this knowledge. Many resources are available for further learning, including installation manuals and certified installer programs.
