
You want a comfortable outdoor living area. A cozy covered patio offers great appeal. However, adding shade often raises concerns about your carefully maintained backyard. You might wonder, how do I install a patio canopy without affecting my yard? Good news: effective patio shade ideas do not need to disrupt your landscape. This guide focuses on selecting the right canopy, strategic placement for backyard shade ideas, and non-invasive installation methods. You can protect your beautiful backyard patio.
Key Takeaways
Choose the right canopy type. Retractable awnings, sail shades, and portable canopies offer shade without disturbing your yard.
Plan where to put your canopy. Look at sun patterns and use existing structures like your house wall for support.
Use installation methods that do not harm your yard. Try weighted bases, ground screws, or secure wall mounting instead of concrete.
Protect your ground during installation. Lay down tarps or plywood to keep your grass and plants safe from tools and foot traffic.
Take care of your canopy after you install it. Watch how the shade affects your plants and adjust your canopy as needed. Store it properly in the off-season.
Choosing the Right Canopy Type for Your Yard
You want to find the best canopy for your outdoor space. Different canopy types affect your yard in various ways. You can choose options that provide excellent shade without disturbing your landscape. This section helps you understand these choices.
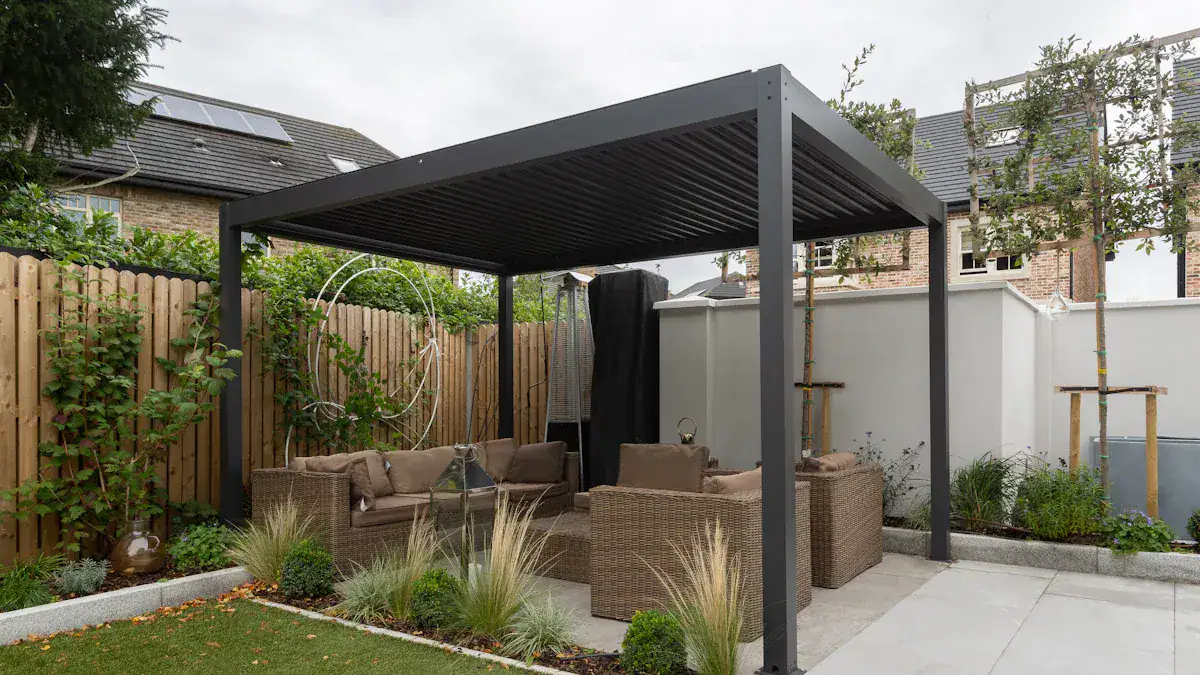
Freestanding Canopy Options
Freestanding canopies offer a strong, defined outdoor room. These include structures like pergolas and gazebos. You can find models with portable bases. These bases allow you to move the structure if needed. They do not require permanent ground installation.
Installing a freestanding canopy can be a significant investment. Costs for these structures, including gazebos and cabanas, typically start at $3,000. They can go up to over $10,000. The size and materials you choose affect the final price. For a standalone patio cover, the average installation cost is about $7,000.
When you choose a portable base pergola or gazebo, you should consider its size and weight. This table shows common dimensions and weights:
Frame Type | Size (m) | Packed Dimensions (mm) | Packed Weight (kg) |
|---|---|---|---|
Standard | 2 | 1610x250x250 | 15 |
Standard | 3 | 1610x250x250 | 18 |
Standard | 4.5 | 1610x250x330 | 24 |
Standard | 6 | 1610x250x440 | 32 |
Luxury | 3 | 1610x340x340 | 30 |
Luxury | 6 | 1610x330x590 | 55 |
Common gazebo sizes are 2m x 2m, 3m x 3m, 4.5m x 3m, and 6m x 3m. A standard 3m x 3m gazebo usually has a peak height between 2.5 to 3.5 meters. Pop-up gazebos often have adjustable height settings. These range from 2170mm to 2410mm at the side and 3250mm to 3490mm at the center for a 3x3m model.
Retractable Awnings for Flexible Shade
Retractable awnings are an excellent choice for flexible shade. You mount these awnings to your house wall. They do not take up space in your yard. You can extend them for shade or retract them to enjoy full sun. This prevents constant sun blockage on your patio. A retractable patio awning gives you control over your outdoor environment.
You should check the durability and wind resistance of any awning you consider. Most residential awnings can handle winds up to 20–25 mph. This is about 4–5 on the Beaufort wind scale. Commercial-grade awnings, especially those with heavy-duty steel and aluminum frames, can withstand higher speeds. Always check the manufacturer’s specifications. For example, some brands include wind ratings and weather condition guidelines in their product manuals.
Here are important features for a durable awning:
Durable Frame Materials: Aluminum or steel frames offer better wind resistance than cheaper materials. Look for rust-resistant metals.
Heavy-Duty Mounting Brackets: Secure your awning with strong mounting brackets and anchors. This is especially important in windy areas.
Integrated Wind Sensors and Automatic Retraction: Wind sensors detect dangerous gusts. They automatically retract the awning to prevent damage. This feature is very useful in coastal or mountain homes.
A quality motorized retractable awning should withstand at least Beaufort scale level 5 winds. This matches Class 2 under the EN 13561 standard. High-end models can reach Class 3, handling winds above level 6. Look for arms made from T5 or T6 aluminum alloy. T6 is stronger. The wall thickness should be at least 2.0mm. High-quality folding arms often have internal steel cables or double-chain systems. These improve wind shock resistance and smooth retraction. Wind-rated awnings use cast stainless steel or reinforced galvanized fittings with heavy-duty bolts. They avoid plastic clips. Powder coating or anodized aluminum finishes improve corrosion resistance.
The fabric of your awning also matters for UV protection.
Material | UV Protection Capabilities |
|---|---|
Acrylic Coated Polyester | Can fade easily. |
100% Acrylic Fabric | Will not fade; guaranteed for 10 years. |
Vinyl Laminated Polyester | Can decrease the number of UV rays penetrating inside, protecting interiors from fading. |
Cotton Canvas | Prone to fade caused by weather. |
Awnings protect areas from harsh sunlight and UV rays. Choose an awning that fully prevents UV rays from entering. This safeguards you from dangerous UV rays. It also preserves furniture colors from staining. Solution-dyed acrylic retains color better than almost any other fabric. It is highly rated for sun protection. Polyester is good at blocking UV rays. It maintains color and pattern after sun exposure.
Sail Shades for Minimal Footprint
Sail shades offer a modern and minimal footprint solution. You can use flexible and often temporary anchor points for these. You can attach them to existing sturdy posts or trees. This makes them a great choice for patio shade ideas that do not involve heavy construction. You can add a simple canopy with a sail shade.
You need to properly tension sail shades for them to work well.
Attach each corner of the sail using snap hooks or shackles. Start with a loose connection.
Gradually tension the sail at each corner. Use turnbuckles in small, equal steps.
Aim for a firm, wrinkle-free fabric. Do not overstretch it. It should allow slight flex in windy conditions.
Avoid over-tightening. This prevents stress on hardware or fabric. Always follow manufacturer guidelines.
Ensure anchor points are secure. Posts should be deeply set in concrete. Wall fixings must be strong enough for a continuous load.
Consider weather conditions like wind, rain, and snow. Remove the sail during extreme weather.
Inspect for wear, rust, or movement at anchor points regularly.
Adjust tension seasonally. Increase tension slightly in warmer months for water runoff. Loosen or remove the sail in colder climates for snow.
You should tension each corner of the sail with at least 100 lbs of force. Special fastening kits can help. For example, some kits use a pulley system. This triples the force you apply. A 40 lbs force on the rope can result in 120 lbs of tension on the sail.
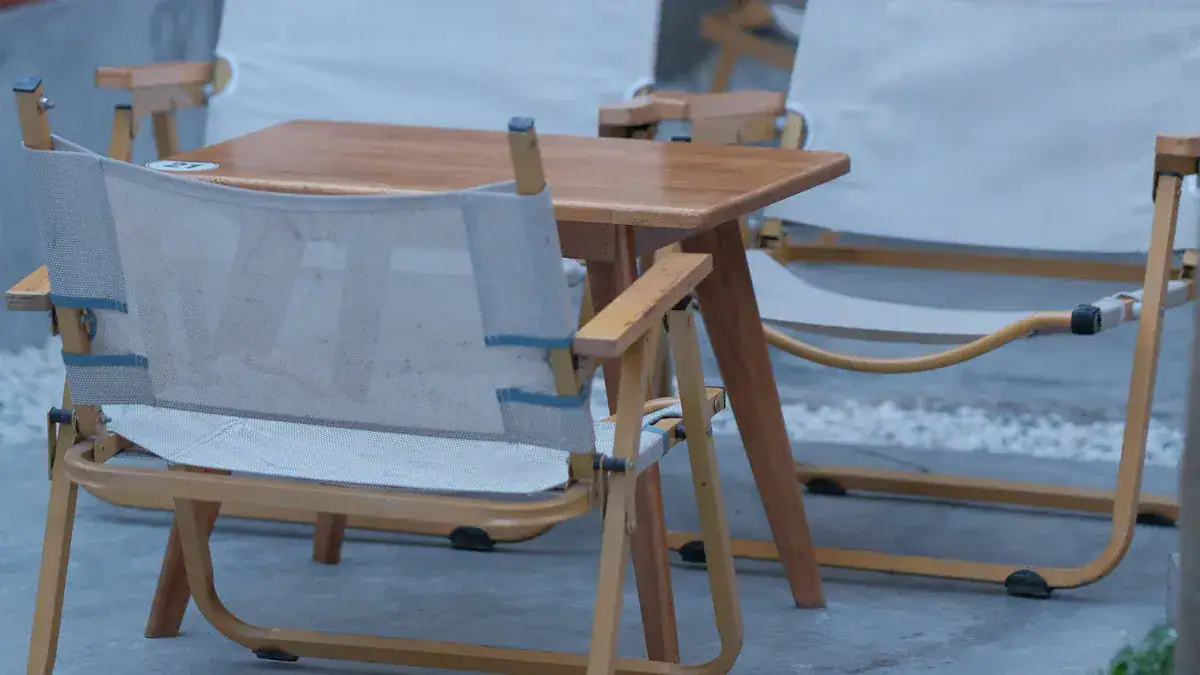
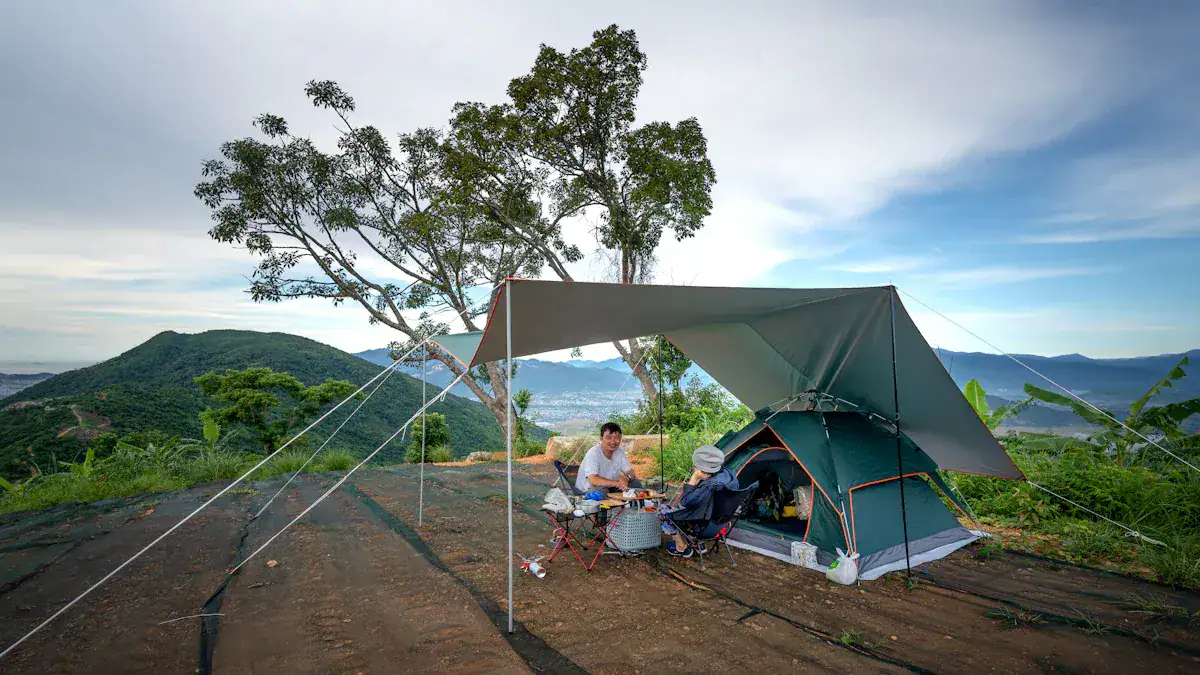
Portable Canopy Solutions
Portable canopy solutions are quick and budget-friendly. Pop-up tents are a popular choice for temporary backyard shade. You can set them up with tie-down walls. They offer instant shade for your patio.
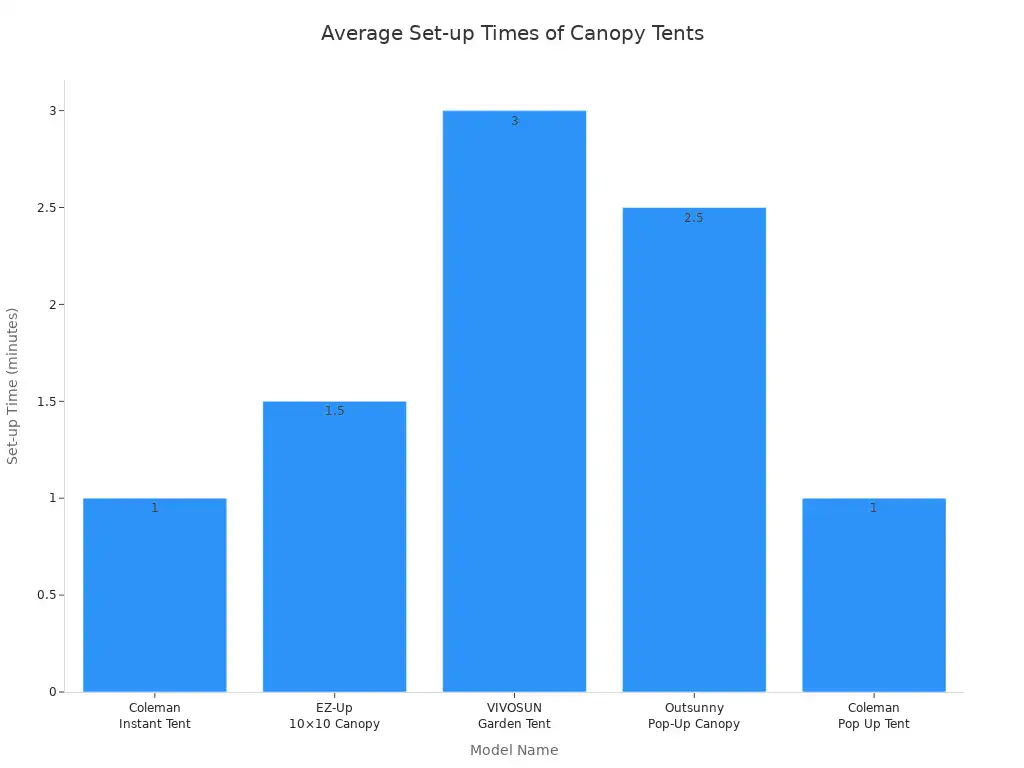
Pop-up tents are known for their fast setup times.
Model Name | Set-up Time |
|---|---|
Coleman Instant Tent | 1 minute |
EZ-Up 10×10 Canopy | 1-2 minutes |
VIVOSUN Garden Tent | 3 minutes |
Outsunny Pop-Up Canopy | 2-3 minutes |
Coleman Pop Up Tent | 1 minute |
Many pop-up tents are easy to set up. Some models allow one person to set them up. They feature pinch-free lockers and height adjusters. A crank-style center mast helps with lifting and fabric tensioning. While pop-up tents offer quick setups, their frames and materials can be bulky. This makes them less suitable for long-distance carrying.
You can also use outdoor curtains. These are an accessory for existing structures. You can hang them on porches or pergolas. They create additional shade and privacy. This is a simple solution to enhance your outdoor living space.
Strategic Placement for Backyard Shade Ideas
Strategic placement is key when you want to add shade without affecting your yard. You can maximize comfort and protect your landscape. Thoughtful planning helps you create shady retreats in the yard.
Assessing Sun Exposure and Shade Needs
First, understand how the sun moves across your property. This helps you find the best spot for your patio shade ideas. Create a simple map of your lot. Mark shady areas from buildings or large trees. Remember, deciduous trees give summer shade. Evergreens provide year-round shade.
To find exact light levels, pick a sunny day. Mark sun exposure on your map every hour. The brightest spots get the most sun. You can also take hourly pictures of your main garden area. This shows how shade moves. Doing this in April helps predict summer shade patterns. You can also use apps like Sun Surveyor. This app tracks the sun’s path. It helps you find areas with intense afternoon heat. Mark shadow patterns at 9 AM, noon, and 3 PM. Use chalk or garden stakes. This shows you where shade falls.
Considering Existing Landscape Elements
Look at your existing backyard. Do you have large trees or fences? These already provide some shade. Plan your canopy placement to work with these elements. You can extend existing shade or fill in sunny gaps. This helps you create a comfortable patio.
Utilizing Existing Structures for Support
You can often use your house wall or an existing pergola for support. This saves space in your yard. A house can support a two-post pergola. This is a wall-leaning pergola. The connection to your home must be very strong. This prevents damage to your house walls. For brick homes, use individual joist hangers for each rafter. A traditional wooden ledger board can make brick crumble. For wood homes, use a ledger board to anchor the pergola’s rafters. Fasteners for brick veneer houses must go into the wall studs. Do not put them directly into the brick veneer.
Install the wall connection profile to be completely watertight. This prevents moisture and mold. Use sealing tape between the roof beam and the wall. Seal edges with outdoor silicone. Mark the installation height carefully. This ensures wall brackets are level. Ensure correct distances between wall brackets for even support. If you are unsure about DIY installation, hire a professional. This avoids costly damage from wrong fastening or moisture. Your insurance might not cover such damage. This is especially important for an awning.
Planning for Water Runoff and Drainage
Your new canopy will collect rainwater. You need a plan for water runoff. This prevents yard erosion around your patio. Grade your patio surface at a 1-2% angle. This directs water away from your home. You can install French drains. These are perforated pipes underground. They collect and redirect large amounts of water. Channel drains are narrow strips along patio edges. They capture surface water. Rain gardens are shallow, planted areas. They absorb rainwater runoff. Permeable materials like gravel or natural stone allow water to seep through. This greatly reduces runoff. You can also connect downspouts to your landscape with piping. This directs roof runoff away from your backyard patio.
Non-Invasive Canopy Installation Techniques
You want to know how do i install a patio canopy without affecting your yard. Non-invasive installation techniques are crucial. These methods help you add shade to your patio without digging up your lawn or damaging your landscape. You can protect your outdoor space while creating a comfortable area.
Ground Anchoring Without Concrete
You can secure many canopies without pouring concrete. This is a great solution for temporary or semi-permanent structures. Weighted bases are a popular choice. You fill these bases with heavy materials.
For example, the US Weight Fillable Free Standing Umbrella Base is a good option. You can fill this base with up to 120 lbs of concrete, rock, sand, or 6.5 gallons of water. It has a 24-inch diameter base. A 20-inch stainless steel stem holds umbrella poles from 1.5 to 2 inches in diameter. Two tightening knobs keep the pole secure. This base is made from high-density polyethylene. It has UV protection. This makes it durable and resistant to rust, dents, and fading.
Ground screws are another option. You twist these into the ground. They provide a strong anchor point. Temporary stakes also work for lighter structures. These methods keep your yard intact.
Secure Wall Mounting for Awnings
Mounting an awning to your house wall is a common way to add shade. This method does not disturb your ground. You must attach the awning securely. Anchors and fasteners are very important. They hold the awning frame and mounting brackets to your building.
You need specific anchors and fasteners for different materials. Wood, concrete, or brick walls require special screws, bolts, or expansion anchors. Mounting brackets support the awning’s frame. They must be strong enough for wind. The type of bracket depends on the awning’s size, weight, and your wall material. You need rust-proof brackets. They must match your building’s exterior for long-term stability.
Here are steps to mount an awning:
Mark Your Spot: Use a pencil and level to mark where brackets will go.
Pre-Drill Holes: Do this, especially on hard surfaces like brick or concrete.
Bolt It In: Secure brackets with the hardware provided.
Attach the Awning: Line up the awning with the bracket holes and bolt it in place.
Test for Movement: Check the awning’s operation. Use arrow keys for motorized awnings or a manual crank.
Different wall materials need different approaches for your awning. Vinyl siding needs spacers or backing boards. This prevents crushing. Stucco requires careful drilling with masonry anchors. You must seal it to avoid cracks. Brick or block walls are best with sleeve anchors or chemical anchors. This ensures lasting stability. Pergolas or wooden frames often need reinforcement plates. Softwood may not hold heavy brackets well.
You can choose different bracket types for your awning. Wall-mounted brackets are most common. They fasten directly into studs or masonry. They are good if you have enough wall space above doors or windows. Roof-mounted brackets are for when wall space is limited. They anchor into the roofline. This needs careful flashing. Bay brackets are angled. They bridge gaps for bay windows or uneven walls. Steel brackets offer maximum strength. They are good for larger awnings. Aluminum brackets are lighter and resist rust. They are useful in coastal or humid areas.
Your wall-mounted awning must be structurally sound. It needs to resist wind loads. The American Society of Civil Engineers (ASCE) provides guidelines for wind loads. The design wind pressure calculation considers velocity pressure, wind direction, and net pressure. Fabric awnings have special design rules. The frame must handle the full design load. It should not rely on the fabric. Rigid awnings must meet specific load requirements. Retractable awnings must withstand wind and live loads. Their open design helps reduce pressure.
Building codes are always changing. The Florida Building Code (FBC), International Building Code (IBC), and ASCE update canopy codes. This improves structural integrity. ASCE 7-22 updated wind speed maps. It added new criteria for tornado loads. It also revised wind pressure calculations. The 2024 IBC guidelines build on ASCE 7-22. They emphasize that canopies and awnings must withstand various loads. This includes wind and lateral forces. They also include guidelines for uplift reactions. This maintains stability during high winds. The 2023 FBC aligns with ASCE 7-22. It incorporates updated wind speed maps and tornado load criteria. This ensures designs handle Florida’s specific wind conditions. It also requires site-specific wind speeds for precise design.
Temporary Anchors for Sail Shades
Sail shades offer a flexible shade solution. You can use existing sturdy posts or trees as anchor points. This avoids new construction. You can also use minimal, removable ground anchors. These are less invasive than permanent concrete footings. They allow you to move or remove the sail shade easily. This helps you maintain your yard’s appearance.
Protecting Ground During Installation
When you install any canopy, protect your ground. Use tarps or plywood. Lay them down to shield grass and plants. This protects them from tools, debris, and foot traffic. This simple step prevents damage to your lawn. For more robust temporary structures, you can use heavy galvanized sheets under runners. This prevents ground damage from the structure’s weight. This helps you install a patio canopy without affecting your yard. This solution keeps your patio area looking great.
Post-Installation Care and Maintenance
You have successfully installed your patio shade. Now, focus on its care. Proper maintenance ensures your canopy lasts. It also keeps your yard healthy and beautiful.
Monitoring Yard Impact
After installing your patio shade, watch your yard closely. Observe how the new shade affects your lawn and plants. Less sunlight limits grass energy production. This leads to thinner, weaker grass. Shaded areas hold more moisture. This can cause fungal diseases and moss growth. Grass in shade often grows shallow roots. This makes it vulnerable to drought and stress. Trees and other plants in shaded spots compete with grass. They take essential water and nutrients. This further hinders lawn growth. Adjust your watering schedule if needed. You can also choose shade-tolerant plants for these areas.
Adjusting Canopy Elements as Needed
Your patio setup might need small changes over time. You can adjust your awning. Change its angle to block more sun. This provides better shade. For sail shades, check the tension. Tighten them if they sag. This keeps them effective. These adjustments optimize your shade. They also protect your yard from too much sun. A well-adjusted awning works best.
Seasonal Removal and Storage
Prepare your awning for off-season storage. This protects your investment. First, clean your awning fabric. Make sure it is completely dry. This prevents mold and mildew. Store the fabric in a dry, cool place. A garage or shed works well. Avoid damp areas. Roll or fold the fabric carefully. This prevents creases. Use breathable covers. These protect against dust and debris. Regularly check your awning frame. Look for rust or damage. Clean the frame. Lubricate your awning’s moving parts. This includes hinges and pulleys. This ensures smooth operation next season. Proper storage extends your awning’s life.
You can install a patio canopy without affecting your yard. Thoughtful planning and execution make this entirely achievable. You learned how to select the right canopy type. Strategic placement and non-invasive installation methods are key solutions. Now you know how do I install a patio canopy without affecting my yard. Enjoy your new, comfortable patio space. Your backyard’s beauty and health remain intact. This creates a perfect balance between comfort and environmental preservation. This is a great solution for your patio.
FAQ
What is the best canopy type for minimal yard impact?
For minimal yard impact, consider a retractable awning. This awning attaches to your house. It provides shade without disturbing your lawn. A sail shade is another good option. It uses existing anchor points. This awning choice keeps your yard clear.
What are non-invasive anchoring options for an awning?
You can use weighted bases for freestanding structures. Ground screws offer strong, temporary anchors. For an awning, secure wall mounting is best. This method avoids ground disturbance. It keeps your yard intact. Your awning stays firm. This awning installation is clean.
What should I consider for water runoff with my new awning?
Plan for water runoff. Grade your patio away from your home. Install French drains or channel drains. Rain gardens absorb water. Permeable materials help. This protects your yard from erosion. Your awning will shed water. This awning design helps.
What is the importance of seasonal care for my awning?
Seasonal care protects your awning. Clean the fabric. Ensure it is dry before storage. Store your awning in a cool, dry place. Check the frame for damage. Lubricate moving parts. This extends your awning’s life. Your awning will last longer.
What are the benefits of a wall-mounted awning?
A wall-mounted awning saves yard space. It provides flexible shade. You can retract the awning when not needed. This prevents constant sun blockage. It keeps your landscape open. This type of awning is very practical.

