
Yes, can limewash be applied over paint? Absolutely. However, achieving a successful outcome hinges on proper preparation. Applying limewash over previously painted walls introduces unique challenges, primarily concerning adhesion and surface porosity. Neglecting these crucial steps can lead to issues like bubbling or an uneven, patchy finish. This post offers a comprehensive guide to successfully applying limewash over existing paint.
Key Takeaways
You can apply limewash over paint. You must prepare the wall well first.
Clean and sand your painted walls. Then, use a special primer. This helps the limewash stick.
Apply limewash in thin coats. Use a large brush. Let each coat dry before adding more.
Limewash works best on porous surfaces. It needs to soak in. Paint can block this.
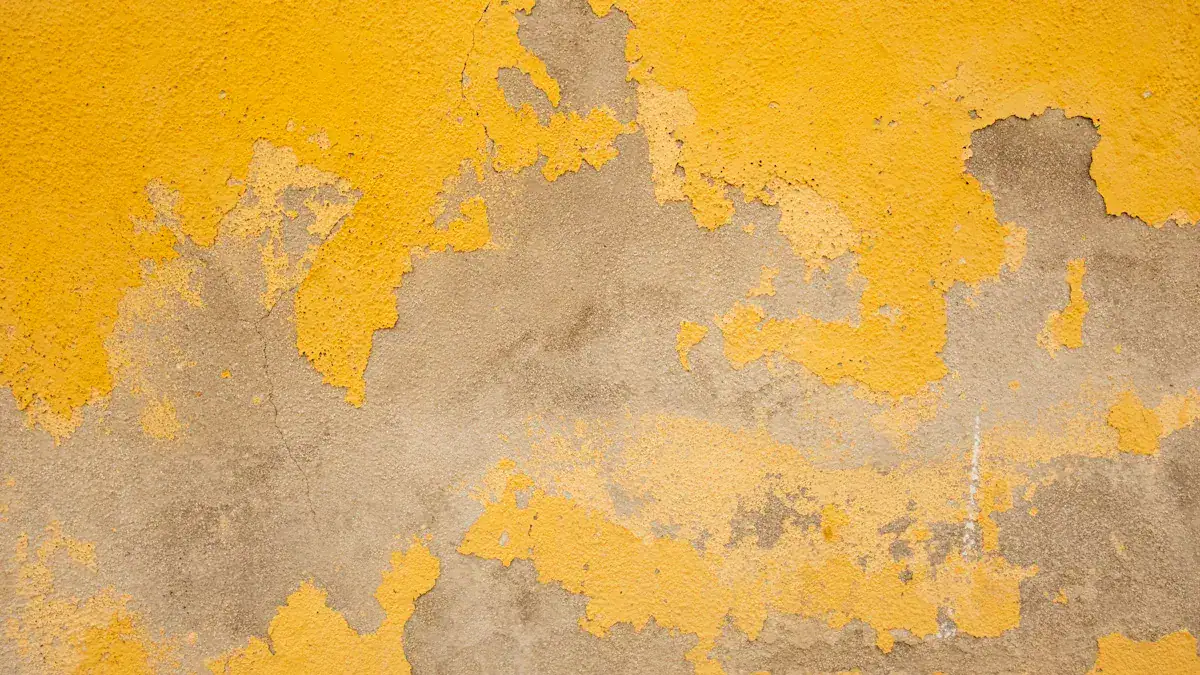
If your paint is peeling, do not use limewash. Consider other natural paint options instead.
Limewash and Paint Compatibility
Why Limewash Prefers Porous Surfaces
Limewash is a unique type of paint. It is a mineral-based product. It contains slaked lime and natural pigments. This material needs to soak into a surface. It forms a strong bond this way. Traditional limewash is different from regular paint. Regular paint sits on top of a surface. Limewash absorbs into the material. It works best on porous surfaces.
Think of plaster, stone, or brick. For good adhesion, lime must be compatible with the surface. This means it needs both chemical and mechanical compatibility. Chemical compatibility stops flaking. Mechanical compatibility means the lime crystals can expand and “lock” onto the surface. This creates a strong bond.
Adhesion Challenges Over Non-Porous Paint
Applying limewash over an existing painted surface can be tricky. Many common paints create a non-porous barrier. Latex and alkyd paints are examples of these. They stop the limewash from soaking in. This prevents the limewash from bonding correctly. Without proper penetration, the limewash will not stick well. Smooth surfaces also offer no grip. The lime crystals cannot penetrate them. This leads to poor adhesion. The limewash may peel or flake off.
When Limewash is Not Recommended Over Paint
You should not apply limewash in certain situations. If the existing paint is peeling, do not use limewash. An unstable surface will not hold the limewash. Also, avoid applying limewash to sealed surfaces. These surfaces lack the porosity limewash needs. They are chemically incompatible. This means the limewash cannot bond properly. Applying limewash to such surfaces will lead to failure.
Preparing Previously Painted Walls for Limewash
You can apply limewash over an existing painted surface. However, careful preparation is crucial. This step-by-step guide helps you get your walls ready. Proper preparation ensures the limewash adheres well and looks beautiful.
Assess Existing Paint Type and Condition
Before you start, you must understand your existing paint. You need to know its type and condition. This helps you decide the best preparation steps.
First, check the paint type. You can do a simple test:
Apply rubbing alcohol to a cotton swab or clean rag.
Wipe a small, hidden area of the painted surface. Move the swab back and forth.
If the paint rubs off, showing white or faded streaks, you have latex paint.
If no paint comes off, it is oil-based paint.
Another way to test is with denatured alcohol:
Dip a cotton ball into a small amount of denatured alcohol.
Rub the damp cotton over a small area on the surface.
If the paint does not rub off, it is oil-based paint.
If the paint comes off, it is water or latex-based paint.
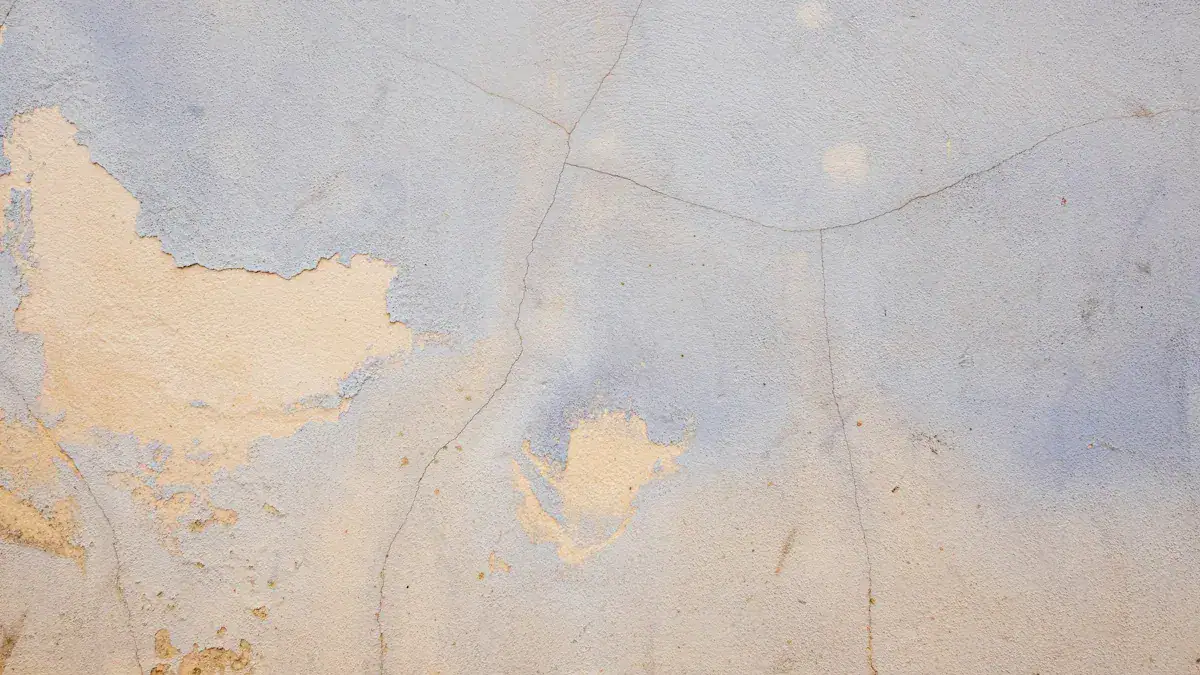
Next, assess the paint’s condition. The existing paint should be in good condition. Look for any peeling, cracking, or flaking. If the paint is unstable, you must address these issues first. Limewash will not hide or fix damaged paint. It needs a solid base. Limewash adheres best to absorbent surfaces. Non-porous surfaces, like glossy or vinyl paints, can prevent proper adhesion. This can lead to peeling or flaking.
Thorough Surface Cleaning
A clean surface is vital for good adhesion. You must remove all dirt, grease, and mildew.
For general dirt and grime: Use a mild detergent and warm water. Wipe down the entire wall.
For general grease stains: Regular liquid detergent can work. Apply it directly to the stain. Let it sit for a while to dissolve the grease.
For flat or eggshell paint: These paint types are often hard to clean effectively. You might need to consider a primer or light sanding.
For semi-gloss or higher sheen paint: Use a good degreaser. Follow this with a rinse using hot water or a vinegar mixture.
For latex paint with absorbed grease: Cleaning might not be enough. You should seal these areas with a solvent-based primer/sealer. Then, you can repaint them if needed before applying limewash.
Make sure the surface is completely dry before moving on.
Sanding for Mechanical Grip
Sanding creates a rough surface. This rough surface gives the limewash something to grip onto. This is called mechanical grip.
For matte paints: A light scuffing with fine-grit sandpaper (180-220 grit) is usually enough. This breaks the surface tension.
For glossy finishes: You need more aggressive sanding. Use medium-grit sandpaper (100-150 grit). Sand until the shine is gone. The goal is to dull the surface completely.
After sanding, wipe down the walls. Remove all dust with a damp cloth.
Priming for Limewash Adhesion
Priming is a critical step when applying limewash over previously painted walls. It ensures proper bonding and an even finish. Some people think priming takes away the limewash effect. However, for painted surfaces, a primer is necessary for good adhesion.
You have several primer options:
Lime-Prep Primer: This primer is made for limewash. It helps limewash paint stick to non-mineral surfaces. It is zero VOC and low-odor. You can apply it over an acrylic latex sealing primer if needed.
Limewash Primers: These primers are specifically designed for limewash. They improve adhesion and durability. They create a good base for a smooth, lasting finish.
Acrylic Primer: A good quality acrylic primer can work. It creates a consistent surface.
After priming, consider a prep coat. A prep coat is not a primer. It is a special preparatory paint. Bauwerk Prep Coat, for example, is a white water-based paint. It has three main jobs:
It gives a uniform matte white background color.
It has the right absorbency for the limewash to anchor itself.
It allows for easy application. You have enough time to brush out the paint as you like.
You should use a prep coat if your indoor surface is non-absorbent. This includes surfaces with conventional paint or sealer. These surfaces can stop limewash from absorbing correctly. The prep coat gives the limewash paint something to stick to. It also makes the finish more durable.
Also, use a prep coat if your surface has different materials. For example, a wall with repairs or different sections. Limewash will absorb differently on these materials. A prep coat creates an even, neutral base. This prevents “ghosting” and ensures equal absorbency.
Patching and Surface Repairs
Before any paint or lime wash paint goes on, you must fix all imperfections. Limewash does not hide or fix damage. Applying limewash over unaddressed surface repairs means these flaws will still show. For example, if you are limewashing internal walls, patch any holes in drywall beforehand. Limewash does not repair the surface itself.
Unfixed cracks or holes can also lead to poor adhesion. The limewash might lift off. This can happen if the surface is not stable. Make sure all repairs are smooth and dry. Then, prime these patched areas. This ensures they match the absorbency of the rest of the wall. This step is crucial for a uniform and lasting finish. You want your previously painted walls to look their best.
Lime Wash Application Over Paint
You have prepared your walls. Now you are ready for the exciting part: applying the limewash. This section guides you through choosing the right product and applying it correctly.
Choosing the Right Limewash Paint Product
Selecting the correct limewash product is important. You need one that works well over primed surfaces. These special limewash paints form a surface layer on top of the primed wall. They are suitable for many surfaces. You can use them on Level-4 Finished Drywall, existing painted walls, and sealed or painted masonry. This includes brick, concrete block, and stone.
Good limewash paint offers excellent adherence. It is easy to work with. The product should be durable and breathable. Look for options with no VOCs, microplastics, phthalates, or toxic additives. A quality limewash paint will not dust off over time. It is also UV resistant and colorfast. This means its color will not fade in sunlight.
When you apply limewash to primed surfaces, it bonds and absorbs into the surface. It does not just form a film on top. This creates a breathable finish. Moisture can evaporate naturally. This reduces the risk of blistering or peeling. This breathability is a big advantage. It helps prevent dampness and mold growth. This makes it good for many rooms. Its high alkalinity also fights fungi and bacteria naturally. If you are painting over emulsion paint, some limewash products contain linseed oil. These can offer better compatibility.
Optimal Limewash Application Techniques
Applying limewash needs patience and a specific method. You want to achieve that unique, soft look.
Prepare Your Tools: Use a large, block-style brush. This brush holds a lot of lime wash paint.
Apply Thin Coats: You will apply 2 to 3 thin coats over your Lime-Prep Primer. Thin coats give you a soft, lightly textured finish. Spread the paint as far as it naturally goes. Do not apply it too thickly. Multiple thin coats always look better.
First Coat: The first coat will not give full coverage. This is especially true on smooth, primed walls.
Brush Strokes: Use consistent triangular or arching brush strokes. You can also use curved motions for a more organic, cloud-like appearance. Work in small sections. Keep the edge wet to avoid awkward dry patches. If you work with a partner, start at opposite ends and move towards the middle.
Drying Between Coats: Allow the first coat to dry for at least one to two hours. Then you can apply the second coat. Some recommend waiting 12 hours or even 24 hours between applications for the most consistent results. If you apply sooner, lightly mist the surface before the next coat. This helps the paint spread well.
Second Coat: Apply the second coat for better coverage. It helps blend the finish. You might apply it a bit thicker to ensure no underlying wall shows through. Be careful to maintain your pattern and evenness. This avoids visible lines and brush strokes.
Achieving Subtlety: For a subtler look, ensure complete wall coverage. Blend thoroughly. Pay attention to areas with thin coverage or visible brush strokes.
Avoid Touch-Ups: Do not touch up areas after they have dried. These spots will dry darker.
Practice: Create a sample mock-up board first. Apply two or more coats. This lets you practice brush patterns and make adjustments.
Fixing Unevenness: If your lime wash application looks uneven, let the first layer dry completely. Then, apply more thin coats. This helps you achieve a uniform finish.
Drying and Curing Considerations
Drying and curing are different. Drying means the paint feels dry to the touch. Curing is a chemical process. It makes the paint hard and durable.
Between Coats: Limewash paint dries quickly to the touch. It is fully dry within 1-2 hours. In cold weather, allow longer drying times. Some suggest 2-3 hours, or even an overnight wait for the best results between coats.
Full Curing: Full curing continues for about two weeks or longer. Avoid rubbing your walls during this time. This prevents marking.
Before Sealing: If you choose to seal your limewash, wait at least 48 hours after the final application. For the best results, wait until after one week of curing. Some recommend applying a protective matte wall sealer after 7 days. This allows the paint to cure properly.
Environmental factors greatly affect drying and curing.
Drying Process: Limewash needs dry conditions. This allows carbonation to happen. Carbonation is when calcium hydroxide reacts with carbon dioxide. It forms calcium carbonate. Rain stops this process. It adds too much moisture. This dilutes the limewash. It prevents proper curing.
Adhesion: Rain also stops proper adhesion. Limewash can slide off wet surfaces. It can form an uneven, patchy coat.
Weather Conditions: The best conditions for application are mild temperatures. This means 50°F to 80°F (10°C to 27°C). Low humidity is also ideal. High humidity, often with rain, slows drying. It negatively affects the final finish. Windy conditions can make limewash dry too quickly. This can lead to cracking and unevenness.
Achieving the Desired Finish
The beauty of limewash comes from its natural variations. Each coat adds depth. The way you apply it creates unique patterns. You will notice subtle shifts in color and texture. This is part of the charm. Multiple thin coats build up this unique aesthetic. The final look is soft, matte, and full of character. It is a finish you cannot get with regular paint. This unique look is why many people choose limewash for their previously painted walls.
Limewash Challenges and Troubleshooting
You might face some issues when you apply lime wash paint over existing paint. Knowing these problems helps you fix them.
Poor Adhesion or Peeling Issues
Sometimes, your limewash paint might not stick well. It could even peel. This often happens because of bad preparation or wrong primer choice. Remember, limewash paint is not as strong as regular paint when you put it over sealed or painted walls. Regular paint forms a film. Limewash absorbs into porous surfaces. This makes it less likely to peel on those surfaces. Poor adhesion can come from moisture problems or dirty surfaces. Thermal changes can also cause issues. Using the wrong types of paint together, like oil over latex without primer, also causes problems.
Uneven Absorption or Blotching
You might see uneven spots or blotches on your wall. This means the surface absorbed the limewash paint differently. If your wall has different materials or repairs, they absorb moisture at different rates. This causes the blotchy look. A good prep coat helps create an even surface.
Color Variations from Underlying Paint
The color of the old paint can change your final limewash shade. Limewash is somewhat transparent. A dark color underneath can make your limewash look darker. A bright color might make it look different than you expect. Always test a small area first.
Addressing Common Application Problems
You can fix many common problems. If your limewash is peeling or flaking, make sure the wall is dry before you start. Scrub the first coat of limewash into the surface. Do not apply the first coat too thick. If you used TSP for cleaning, rinse it off completely. Leftover TSP can stop the limewash from sticking. You can also add hide glue for better adhesion. Check how old your lime bag is. Old lime might not bind well.
Alternatives to Limewash on Painted Surfaces
When Existing Paint is Unsuitable
Sometimes, your existing paint makes limewash a bad choice. You might have severely damaged paint. It could be peeling, cracking, or flaking everywhere. Preparing such a wall takes too much effort. The underlying issues might be too deep. You might also have a very glossy or non-porous surface. Even with primer, the limewash might not bond well. In these cases, you should consider other options. Trying to force limewash onto a problematic wall leads to frustration and poor results. It is better to choose a finish that suits the wall’s current state.
Prioritizing Authentic Limewash Look
You might want the true, authentic look of limewash. This look is best on raw, porous materials. Think of plaster, stone, or masonry. Limewash penetrates these substrates. It bonds deeply. This allows the natural character of the material to show through. You get a soft, matte finish. It has subtle movement and texture. This finish is breathable. It lets the wall breathe. When applied correctly, it does not dust or rub off. It calcifies and hardens on absorbent, unpainted brick, stone, or masonry. This creates a durable finish. It also patinas and ages naturally. This gives a unique, beautiful look over time. Achieving this exact effect over previously painted walls is very difficult. The paint layer prevents the deep penetration needed for this authentic character.
Exploring Other Mineral-Based Finishes
You can explore other options if limewash is not right for your painted surface. Many mineral-based paints offer similar benefits. They are often breathable. They can give a matte, natural look. These paints are more forgiving on painted walls. You might find silicate paint or clay-based paints.
They offer a natural aesthetic. They are also easier to apply over existing finishes. These alternatives give you a beautiful, healthy finish without the intense preparation needed for traditional lime wash paint over difficult surfaces. They provide a good compromise when you cannot achieve the full limewash effect.
You can apply limewash over paint. You achieve beautiful results. However, you need meticulous preparation and the correct products.
Proper priming plays a critical role. Understand your existing paint’s characteristics. Clean, sand, and prime your previously painted walls. Apply thin coats carefully. Approach the project with patience and attention to detail. This ensures a unique and lasting finish.
FAQ
What kind of primer should you use for limewash over paint?
You should use a lime-prep primer. This primer helps limewash stick to non-mineral surfaces. You can also use a good quality acrylic primer. A prep coat creates an even, absorbent base for the limewash.
What happens if you do not prime painted walls before limewash?
If you do not prime, the limewash will not stick well. It might peel or flake off. Painted surfaces are often not porous enough. This prevents the limewash from absorbing and bonding correctly.
What is the best way to apply limewash for a good finish?
Apply limewash in thin coats. Use a large, block-style brush. Work in small sections. Use consistent triangular or arching brush strokes. Let each coat dry completely before applying the next one.
What if your limewash looks uneven after applying it?
If your limewash looks uneven, let the first layer dry completely. Then, apply more thin coats. This helps you achieve a uniform finish. Do not try to touch up small areas after they dry.
What are the ideal environmental conditions for applying limewash?
You should apply limewash in mild temperatures. This means between 50°F and 80°F. Low humidity is also best. Avoid applying it in rain or very windy conditions. These factors can affect drying and curing.

