
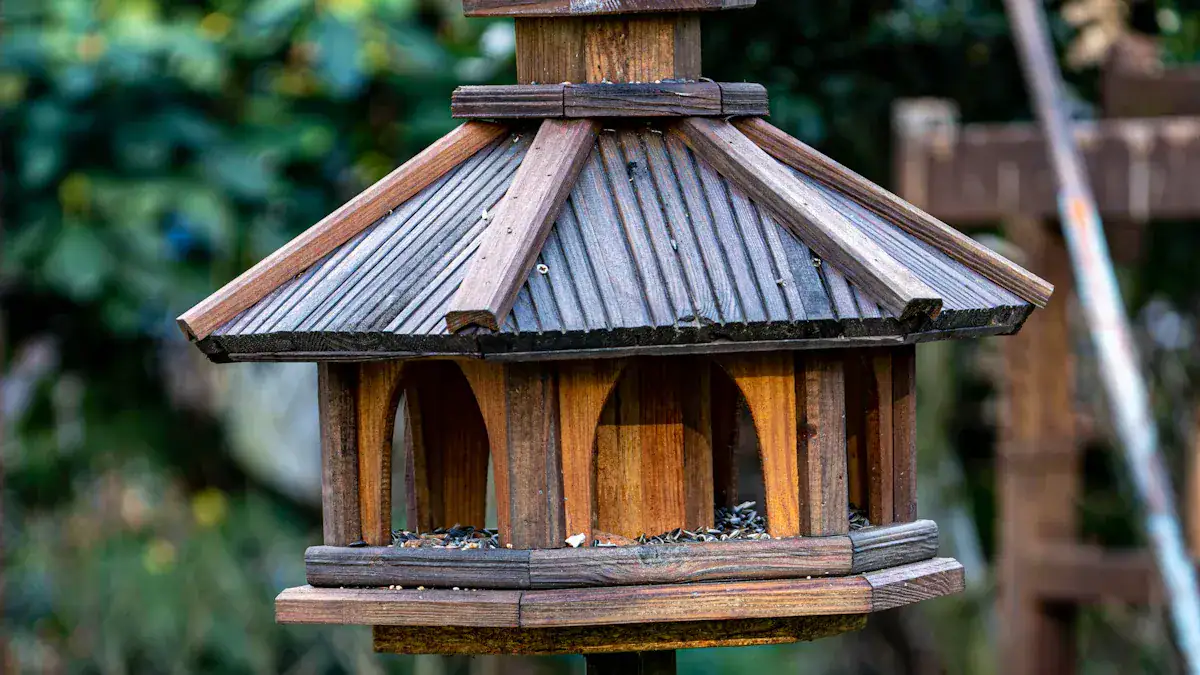
Imagine the joy you’ll feel creating a charming, rustic homemade log cabin birdhouse. It connects you to nature and gives local birds a cozy home. This is a rewarding project for any skill level, and you can find fantastic free bird house plans to guide you. Building this diy rustic birdhouse plans project is often easy, using scrap wood to add a lovely rustic touch to your yard. Even storm-damaged wood can inspire your unique diy birdhouse. Your new birdhouse can attract many feathered friends! Wrens and Black-capped Chickadees love a birdhouse with an entry hole around 1 1/4 inches, perfect for your diy log cabin birdhouse. These free bird house plans make building your own special birdhouse a breeze.
Key Takeaways
Choose safe wood like cedar or redwood for your birdhouse. Avoid treated wood because it has chemicals that can hurt birds.
Gather simple tools like a saw, drill, and hammer. These tools help you build your birdhouse easily.
Build the birdhouse step-by-step. Start with the base, then add log walls, a roof, and an entry hole.
Pick the right size entry hole for the birds you want to attract. A small hole keeps bigger birds out.
Clean your birdhouse often. Use safe paints and place it in a good spot to keep birds healthy and safe.
Materials and Tools for Your DIY Rustic Birdhouse Plans
Building your own charming diy log cabin birdhouse starts with gathering the right materials and tools. You want to pick things that are safe for birds and will last a long time outdoors.
Wood and Fasteners
Choosing the right wood is important for your birdhouse. You need materials that resist rot and are safe for birds.
Cedar (Western Red Cedar) is a top choice. It naturally resists rot and insects. It also insulates well and lasts for decades.
Redwood is another great option. It is durable and resists decay. Its natural beauty also adds to your birdhouse’s appeal.
Cypress also resists rot and insects, especially in wet areas.
Pine is affordable and easy to work with. Just remember, pine needs bird-safe paint or sealer to last longer.
Avoid pressure-treated wood, plywood, or particleboard. These materials contain chemicals that can harm birds. Also, do not use pallet wood marked ‘MB’ as it has toxic treatments.
When you put your diy log cabin birdhouse together, use the right fasteners. Screws create strong joints and you can easily remove them for repairs. Galvanized or polymer-coated deck screws are very durable. Nails are quicker to use. Look for ring-shanked or spiral nails. They resist backing out. A 2-inch (6d) size works well for most construction. Always pre-drill holes for your screws or nails. This prevents the wood from splitting. It also helps you get a tight, secure joint.
Hand Tools
You don’t need many fancy tools for these diy rustic birdhouse plans. Here are the basic hand tools you will need:
A saw (a hand saw works fine)
A drill with different bits
A hammer or a screwdriver
Sandpaper for smoothing edges
A ruler or tape measure
A pencil for marking your cuts
Power Tools
Power tools can make your project faster and more precise. If you have them, consider using these:
A miter saw helps you cut boards to length and make angled cuts for the roof.
A jigsaw is great for cutting the entry hole.
A router can give your wood pieces a nice ‘log’ effect if you want that look.
A drill press ensures perfectly straight holes for the entry and perch.
A belt sander or random orbit sander speeds up sanding. This gives your birdhouse a smooth finish. These tools can help you create professional-looking woodworking plans.
Building Your DIY Log Cabin Birdhouse
Now you have your materials and tools ready. It’s time to start building your very own diy log cabin birdhouse! These easy step-by-step instructions will guide you through each part of the process. You will find building this birdhouse a rewarding experience.
Base and Floor Assembly
First, you need to create a solid base and floor for your birdhouse. The size of your base depends on the birds you want to attract.
For common backyard birds, a base of 5-1/2” x 5-1/2” works well.
Smaller birds might prefer a 4” x 4” or 5” x 5” base.
If you are building for larger birds, you might need a 10” x 10” base.
An open-front shelter could use a 6” x 6” base.
You can also choose a 4” x 4” or 4” x 6” base.
Cut your chosen wood to the correct dimensions for the floor. Make sure the edges are smooth. Then, attach the floor to a slightly larger base piece. This gives your birdhouse stability. You can use screws and wood glue for a strong connection.
Constructing Log Walls
This is where your diy log cabin birdhouse really takes shape! You will create the rustic log look using scrap wood.
Use a table saw with a push block. You can rip scrap wood strips to the width you want for your ‘logs’.
Next, use a miter saw. Cut these strips to the specific lengths you need for each wall of your birdhouse.
Soften the sharp edges of your cut pieces with sandpaper. This gives them a rustic, log cabin-like appearance.
To make those classic interlocking corners, you can install a 1/2″ dado head in a table saw. Use a miter gauge to keep the wood pieces at 90° to the blade. This helps you form notches on two sides at a time. You will build up the walls layer by layer, just like a real log cabin. Remember, one sidewall will be the front of your birdhouse.
Gables and Roof Supports
After you build your log walls, you need to prepare for the roof. The gables are the triangular parts of the wall that support the roof. Cut two pieces of wood into triangles that match the slope you want for your roof. These will sit on top of the front and back walls. You can use smaller wood strips as roof supports. Attach them securely to the top edges of your side walls and the gables. These supports give the roof a strong frame.
Attaching the Roof
A good roof protects your feathered friends from the weather. You have several options for roofing materials. You can use copper tops, which come in shiny or patina finishes. Cedar tops also look great and offer good protection. Some people even use weather-proof cellular PVC material. This material resists rotting and cracking and does not need painting.
When you attach the roof, you want it to be secure and leak-proof. Here are some helpful instructions:
Design your roof with an angle. This helps it shed water effectively.
Elevate the floorboard 1/2 inch above the bottom of the walls. This prevents rain from leaking inside.
Apply caulk to all wood joints. This seals against leaks and drafts.
Include a minimum 2-inch front overhang on the roof. This protects the interior from driving rain.
Use exterior-grade fasteners and hinges. They last longer outdoors.
Choose screws over nails. Nails tend to loosen because of weather changes and moisture.
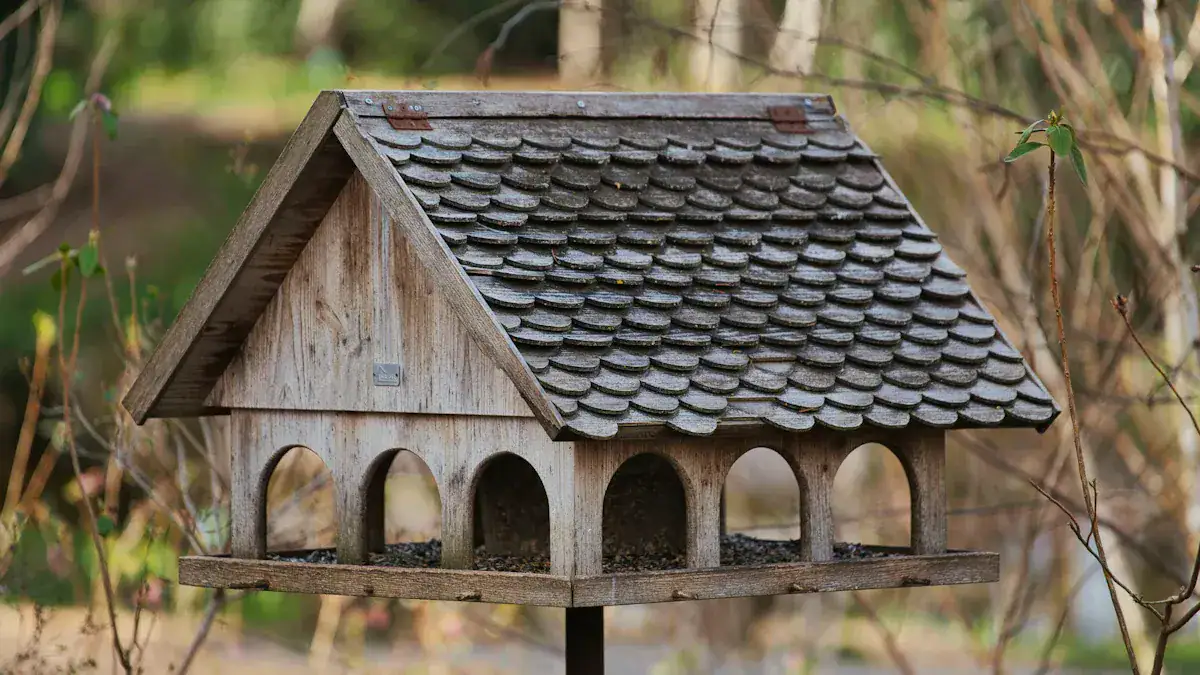
If you use a shingled roof, wrap the top with synthetic felt underlayment. This prevents leakage from blowing rain.
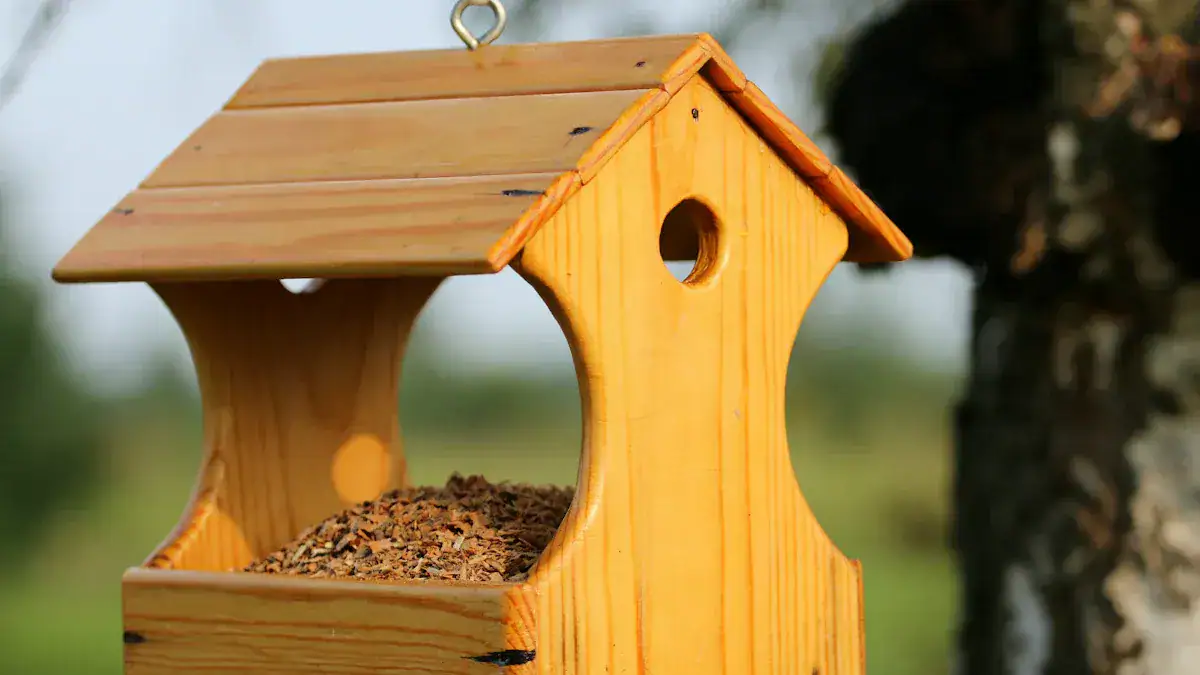
Perch and Entry Hole
The entry hole is very important. It determines which birds will use your birdhouse. You typically place the entry hole near the top of the front sidewall.
Bird Species | Hole Diameter (inches) |
|---|---|
Barn Owl | 6 |
Bewick’s Wren | 1–1¼ |
Bluebird | 1½ |
Carolina Wren | 1½ |
Downy Woodpecker | 1¼ |
Flickers | 2½ |
Flycatchers | 2 |
Hairy Woodpecker | 1½ |
House Finch | 2 |
House Sparrow | 1¼–2 |
House Wren | 1⅛ |
Kestrel | 3 |
Nuthatch species | 1¼ |
Prothonotary Warbler | 1⅛ |
Purple Martins | 1¾–2¼ |
Red-bellied Woodpecker | 2½ |
Red-headed Woodpecker | 2 |
Screech Owl | 3 |
Sparrow Hawk | 3 |
Titmouse species | 1¼ |
Tree Swallow | 1½ |
Wood Duck | 4 |
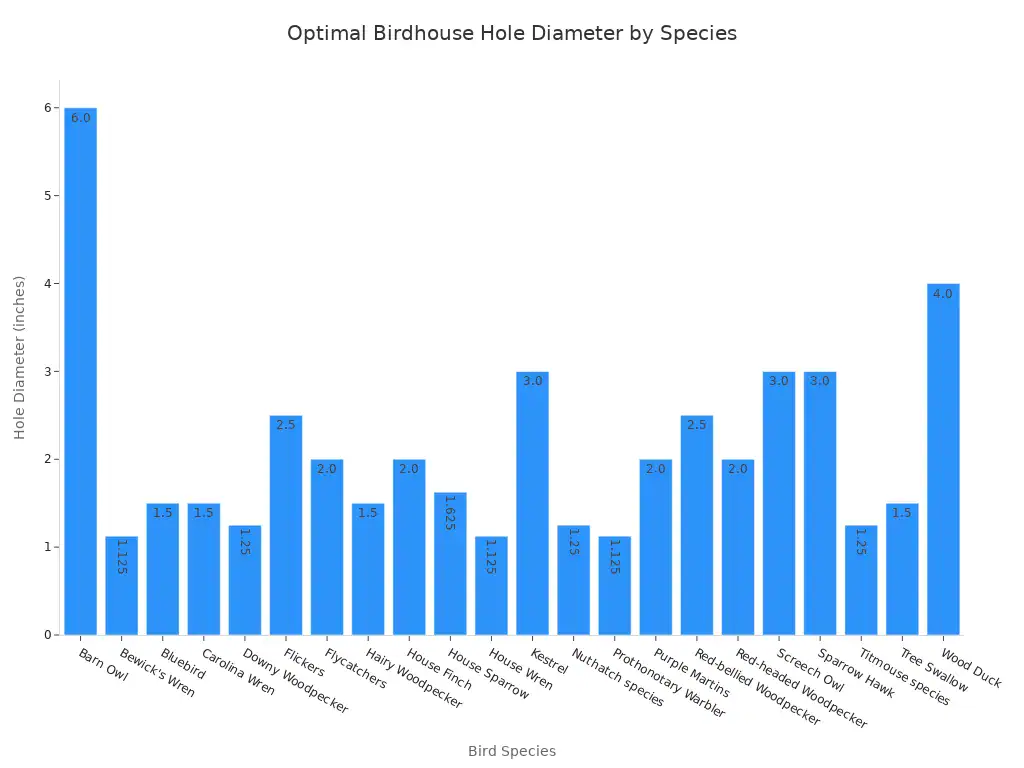
The right entry hole size attracts specific birds and keeps unwanted ones out. For example, starlings cannot fit through holes smaller than 1 1/2 inches.
For the perch, you want to ensure bird safety and comfort.
Place perches at multiple levels. This encourages movement and climbing.
Do not overcrowd the inside of the birdhouse. Birds need free movement.
Make sure perches are not so close to the sides that a bird’s tail hits the walls.
Never place perches directly over food or water dishes.
The highest perch, where birds often sleep, should be secure.
Provide multiple perches with varying diameters. A bird’s feet should wrap between 2/3 and 3/4 around the perch.
Diameter Range | Appropriate for: |
|---|---|
3/8″ – 7/8″ | Finch, Canary |
1/2″ – 1″ | Parrotlet, Lovebird, Parakeet, Cockatiel |
3/4″ – 1 1/4″ | Conure, Caique, Meyers, Quaker, Pionus, Senegal, Timneh Grey |
1″ – 2″ | Eclectus, Congo African Grey, Small Cockatoo, Small Macaw, Amazon |
2″ – 3 1/2″ | Large Cockatoo, Large Macaw |
Hanger Installation
Finally, you need to install a hanger to support your diy log cabin birdhouse safely. You have several options for hanging your new creation:
Use natural fiber ropes like jute or hemp. They are gentle on tree bark.
Plastic or rubber-coated wires prevent abrasion on branches.
Adjustable nylon straps with buckles offer secure support. They adapt as a tree grows.
Distribute the weight evenly. Use multiple attachment points for stability.
You can use non-adhesive horticultural tapes to secure ropes or wires.
Consider rope-and-pulley systems for suspension.
Pole-mounted birdhouses are a great alternative if you do not want to attach them to a tree.
Flexible, flat nylon webbing with fabric fasteners can work. You glue them to the birdhouse and straps.
Eye screws or hooks with rubber hosing for wires are also good options.
Bungee cords can provide a more secure attachment.
These instructions help you hang your diy log cabin birdhouse safely and securely.
Finishing and Birdhouse Care
You have built your beautiful birdhouse! Now, let’s talk about how to protect it and keep your feathered friends safe and happy.
Finishing Options
Protecting the wood is important for your birdhouse to last. You want to use non-toxic finishes that are safe for birds. Corinne Segura, a Building Biologist, says, “We want to select a sealer and stain that is 0-VOC and safe for birds.” Avoid products with harmful preservatives.
You have several great choices for finishes:
Tricopolymer Lumber-Seal is a non-toxic sealant. It makes your birdhouse water-resistant and prevents wood dry-out. It also reduces splits and warping. This sealant is VOC-free and safe for children and pets.
Rubio Monocoat Linseed Oil (like Hybrid Exterior Wood Protector) is safe and comes in clear or colored stains. It holds up well outdoors.
Natural Tung Oil is another durable oil for outdoor conditions. You can mix it with natural Citrus Solvent.
Milk Paint is an all-natural, non-toxic option. If you use milk paint, put a natural drying oil like Tung or pure Linseed oil over it for outdoor protection. Earth tones are best for paint colors.
ECOS Paints (Pet Dwelling Primer and Paint) are 0-VOC acrylic options. They are safe for birdhouses.
Maintenance and Cleaning
Regular cleaning keeps your birdhouse healthy for birds. You should clean feeders at least every two weeks. If you see sick birds or lots of droppings, clean them weekly.
Here is how to clean your birdhouse:
Scrub off all visible debris.
Use a cleaning solution of 1 part bleach to 9 parts water. Do not mix bleach with soap.
Rinse the birdhouse thoroughly.
Make sure it is completely dry before birds use it again. This stops mold growth.
You need a deep cleaning at the end of each nesting season. This removes bacteria and prevents mold. Clean after young birds leave the nest. Also, clean if you see ants, wasps, or other unwanted guests. Old nests can deter birds and mites can harm new hatchlings.
Optimal Placement
Where you put your birdhouse makes a big difference. Generally, face your birdhouse northeast to avoid strong winds. It should be at least five feet off the ground.
Here are some optimal heights for different birds:
Bird Species | Optimal Height (feet) |
|---|---|
Purple Martin | 15-20 |
Bluebird | 5-8 |
Chickadee | 4-8 |
Place your birdhouse in partial shade to keep it cool on hot days. Avoid facing it west, especially in warm areas, as this can make it too hot for chicks. Use predator guards to protect against snakes, raccoons, and squirrels. Mount your birdhouse securely and away from busy areas or feeders.
You just built a fantastic diy log cabin birdhouse! This project offers such a rewarding experience. Share your amazing diy rustic birdhouse plans with friends. Enjoy watching your new feathered residents use their new birdhouse. You connect with nature through your craftsmanship. This diy log cabin birdhouse also contributes to the environment. You will feel great providing a safe, charming home for local birds.
FAQ
Can I use any type of wood for my birdhouse?
No, you should use specific types of wood. Cedar, redwood, or cypress work best. They resist rot naturally. Avoid pressure-treated wood or plywood. These materials contain chemicals harmful to birds.
How often should I clean my birdhouse?
Clean your birdhouse every two weeks. If you see sick birds, clean it weekly. Do a deep clean after nesting season. This removes old nests and prevents mold.
Where should I place my new birdhouse?
Place your birdhouse facing northeast. This avoids strong winds. It should be at least five feet high. Partial shade keeps it cool. Use predator guards for safety.
Is it safe to paint my birdhouse?
Yes, you can paint your birdhouse. Use non-toxic, 0-VOC paints. Milk paint or ECOS Paints are good choices. Earth tones blend best with nature. Always ensure the paint is bird-safe.


