
The right essential carpentry tools form the backbone of any successful woodworking project. A well-chosen set of carpentry tools empowers your creativity and precision. You gain satisfaction and efficiency when you use appropriate essential tools. This comprehensive guide sets the stage for building your reliable carpentry arsenal. Use this list as your starting point, whether you are a beginner or refining your collection.
Key Takeaways
Good carpentry tools help you work better and more safely. They make your projects easier and more fun.
Start with basic hand tools like saws, chisels, and planes for detailed work. Add power tools like a circular saw and drill for faster tasks.
Always measure and mark carefully with tools like tape measures and squares. This helps your projects fit together correctly.
Wear safety glasses and ear protection when you work. Keep your tools sharp and clean to make them last longer and work better.
Essential Carpentry Hand Tools
You need fundamental hand tools for precision, control, and traditional craftsmanship in your workshop. These essential carpentry tools allow you to perform detailed tasks. They are crucial for many woodworking projects.
Hand Saws
Hand saws are vital for making precise cuts. You use different types of saws for various tasks. Back saws have a stiffening rib. They are excellent for precise cuts, especially in joinery work. You often use them with a miter box for accurate angled cuts. Coping saws feature a thin, narrow blade in a C-shaped frame. These saws are ideal for intricate curved cuts and decorative woodworking. You can rotate the blade for various angles.
Japanese saws cut on the pull-stroke. This action allows for thinner blades and greater control. It leads to enhanced precision and efficiency in woodworking. The Shark 10-2315 Carpentry Saw 15-Inch is a highly praised option. Professional carpenters value its speed and precision. Its pull-stroke cutting style contributes to its accuracy and ease of use. This saw outperforms traditional push-stroke saws. It maintains a straight, clean cut line. It leaves minimal shredding, even on delicate materials. This design ensures extreme precision.
Chisels
Chisels are versatile hand tools for joinery and carving. You use them for many tasks.
Chisel type | Specifications | Distinctive feature(s) |
|---|---|---|
Bench chisel | 25° beveled edge on the front of the blade | Most common, suitable for cutting dovetail and mortise-and-tenon joints. |
Firmer chisel | 25° bevel and 90° edge | Good for paring (trimming away outer edges) and chopping. |
Mortise chisel | 30° bevel and 90° edge, harder steel (A2 or PM-V11) | Stronger leading edge, chops mortises (holes that receive tenons). |
Paring chisel | Primary bevel has a low level (e.g., 17°), harder steel (Cr-Mn steel) | Great for paring end grains and softwoods, long handle for better control. |
Butt chisels are smaller than bench chisels. You use them for cutting and carving in confined spaces. Skew chisels have two beveled edges and a long, angled blade. You use these for finish carving and intricate woodworking. Mortise chisels are thick and powerful.
They have long, tough blades. You design them for making deep rectangular or square mortise cuts. These cuts join wood pieces in furniture. Paring chisels have longer, thinner blades. They have a smaller bevel angle. You use them for fine, controlled cuts. They shave off thin pieces of wood. Dovetail chisels cut, shape, and clear out dovetail sockets. Sash mortise chisels have an extended, narrow profile. They are ideal for cutting into tight corners.
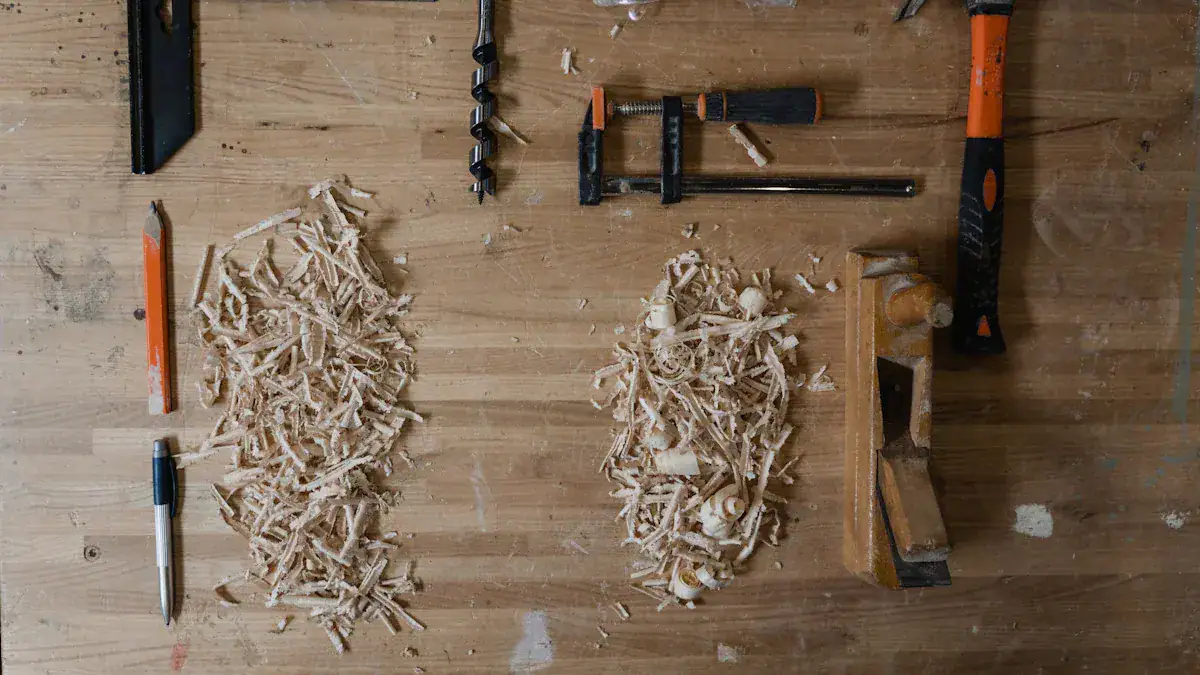
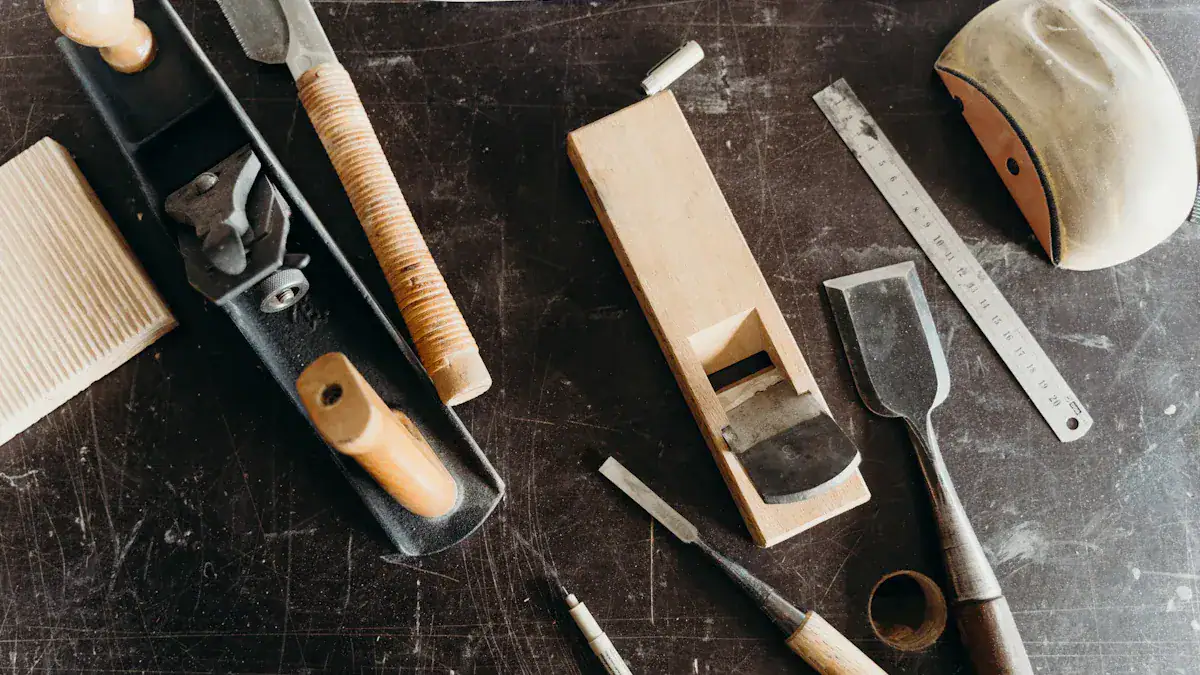
Hand Planes
Hand planes are crucial hand tools for smoothing and shaping wood. You use them to achieve flat and smooth surfaces.
Smoothers (Sizes 1-4½): These are the shortest planes. You use them primarily for producing a smooth surface. The Stanley Number 4 is a popular all-around smoother. Extra mass in half-sizes helps in planing figured woods. It also reduces chatter.
Jack Planes (Sizes 5, 5½, 6): These are “jacks of all trades.” They can smooth and flatten shorter boards. Their primary use is to remove significant material. This brings stock to the desired thickness. They are longer than smoothers. They can bridge high spots and cut them down. This results in a flatter board.
Jointers (Sizes 6, 7, 8): These are the longest planes. They are typically 22-30 inches long. You use them primarily for flattening very long boards. The Number 7 is the most popular among jointers.
Hammers and Mallets
You need hammers and mallets for various assembly tasks. They help you join pieces without damage.
Hammer/Mallet Type | Key Features | Woodworking Application |
|---|---|---|
Rubber Mallet | Soft rubber head, prevents surface damage, lighter than metal hammers | Assembling joints without marring |
Dead Blow Hammer | Hollow head filled with steel shot/sand, minimizes rebound, non-marring rubber/plastic surface | Knocking joints together without denting |
Soft-Faced Hammers (Brass, Nylon, Rawhide) | Made from softer materials than steel, prevents surface damage | Protecting surfaces and finishes during construction |
You use a joiner’s wood mallet for striking chisels. This helps you cut dovetails and chop mortises. A small hammer, like a cross pein or Warrington, adjusts hand planes. You also use this hammer for hammering small nails. A dead blow mallet assembles difficult workpieces. It knocks joints together and minimizes rebound. A white rubber mallet assembles furniture without leaving marks. A wooden handled claw hammer drives traditional cut nails. You also use this hammer for hitting hold fasts.
Screwdrivers and Wrenches
You need screwdrivers for common woodworking hardware. A screwdriver set is essential. It includes both flathead and Phillips-head types. You use them for driving screws into wood. They also tighten various fasteners in woodworking.
Standard Slot or Flathead Screwdriver: You use this for straight-slotted screws. These are common in traditional wood joinery.
Phillips Screwdriver: You widely use this for furniture and cabinetry. It ensures a snug fit and reduces stripping.
Square (Robertson) Screwdriver: This provides excellent torque. It minimizes cam-out. You commonly use it in North America for softwood screws.
Torx Screwdriver: This features a six-point star pattern. It offers superior torque. It is suitable for hardwoods and heavy-duty applications.
Precision Screwdriver Set: This includes small flathead and Phillips heads. It is invaluable for detailed work on hinges and small-scale woodworking.
You should choose screwdrivers made from durable metal. This prevents stripping. A long screwdriver with a square blade provides significant torque for heavy-duty tasks. A cabinet screwdriver has a thin shank. It reaches screws in deep holes. This is useful for cabinet work.
Clamps
Clamps are essential hand tools for securing workpieces. You use them during gluing and assembly.
Band Clamps (Strap Clamps): These are ideal for gluing boxes or oddly shaped items. They require unique clamping pressure. You use them for complex miter joints.
Right Angle or Corner Clamps: These help you achieve precise corners. They securely hold two pieces of wood at a 90-degree angle. They are useful for small pieces and picture frames.
Hand Screw Clamps: These are versatile due to their throat depth and long screw. They allow you to secure boards and panels. They also hold items vertically.
Toggle Clamps: These use a toggle action to apply pressure. You secure them to a workbench. They are excellent for repetitive tasks like sanding or drilling.
Panel Clamps: These are versatile for gluing large panels. They provide four-sided pressure for firm holding. They also ensure perfect alignment.
Essential Power Tools for Woodworking
Power tools significantly boost efficiency and speed in your woodworking projects. They help you complete tasks faster and with greater precision. You will find these tools indispensable for many jobs.
Circular Saw
A circular saw makes straight cuts quickly and efficiently. You use it for breaking down large sheets of plywood or cutting lumber to length. This tool is a workhorse for many construction and woodworking tasks.
⚠️ Safety First! Operating a Circular Saw When you use a circular saw, safety is paramount. Always wear safety glasses and hearing protection. You should also wear a respirator or dust mask. Tie back long hair and avoid loose clothing or jewelry. Prepare a stable cutting surface. Keep your work area clear of debris. Check all safety features before you start. Verify the blade rotates correctly. Do not start the saw with the blade already touching the material. Let the saw reach full power before you begin a cut. Set the saw’s depth to 1/8 inch thicker than the material you cut.
Never alter the manufacturer’s guard. Avoid cutting with a dull blade. Select the correct blade type for your material. Do not twist the blade while cutting. Do not try to remove the blade while it is cutting. Ensure the blade guard moves freely before and during cutting.
Be aware of knots, foreign objects, or sap in the wood. Cut smaller material from larger pieces first. Use an outfeed table for large pieces. Use a push stick when the material is less than six inches wide from the blade. Stand to the side to protect yourself from kickback. Maintain a solid stance for balance. Do not reach over a moving blade.
Keep two hands on the saw. Do not force the saw while cutting. Keep electrical cords clear of the cutting path. Unplug the saw before making adjustments or changing the blade. Do not move the saw with your hand on the trigger. Take extra precaution if you are left-handed, as circular saws often suit right-handed users.
Jigsaw
A jigsaw is perfect for cutting curves and intricate shapes. You use it for detailed cuts that a circular saw cannot handle. This tool is excellent for making complex cuts in various building materials. These include softwood, hardwood, and plywood. You can cut intricate patterns in wood for your woodworking projects. Jigsaws use narrow, precision-focused scroll-cutting blades.
These blades are ideal for navigating tight curves and intricate patterns. This makes them a top choice for detailed woodworking. You can also use a jigsaw for remodeling projects, like making room for a larger bathroom sink.
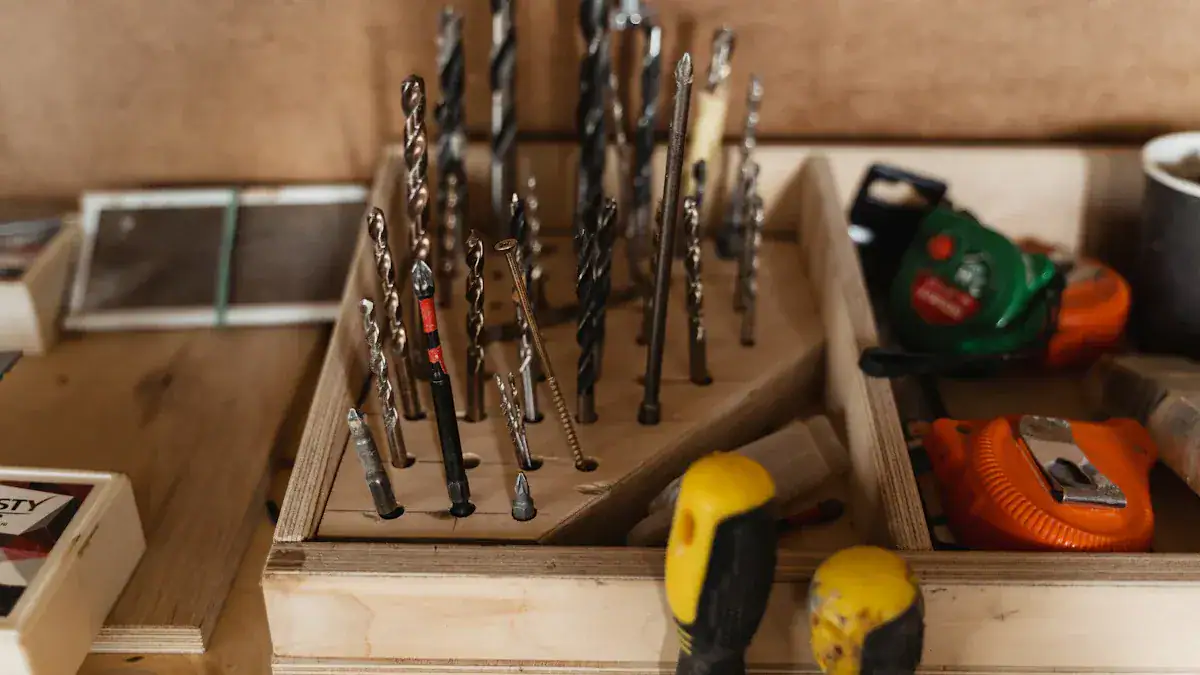
Power Drill
A power drill creates holes and drives fasteners. It is one of the most versatile power tools in your workshop. You use it for assembling furniture, installing hardware, or creating pilot holes. Different drill bits suit various tasks.
Drill Bit Type | Neatness of Hole | Best Suited For |
|---|---|---|
Metal drill bit | ☆☆☆☆ (neat – minimal tearing) | Small holes in Wood, All-round drilling |
Wood drill bits (Brad point) | ☆☆☆☆☆ (Very neat – no tearing or wandering) | Precise small holes in Wood, Repetitive drilling jobs |
Forstner bits | ☆☆☆ (Neat – some tearing) | Larger holes in wood (fast), Boring holes (for recessing) |
Holesaw bits | ☆☆ (Some tearing) | Larger holes in wood, Cutting discs or wheels |
Spade Bits | ☆ (Expect tearing) | Medium sizes holes in wood, Holes in hard-to-reach places |
Plug cutter | ☆☆☆☆☆ (Quality – the plug) | Cutting small circles for projects, Plugs for covering up screws |
Kreg (Pocket Hole Screw) bit | N/A | Drilling clearance and pilot holes simultaneously for pocket hole jigs |
Centreing bit | N/A | Centering holes for hardware like drawer runners and hinges |
Countersink drill bits | Perfect circles | Creating conical holes for screw heads to sit flush |
Stepped bits | N/A | Drilling precise holes, especially with a pedestal drill |
You need various drills for different materials and hole sizes.
Random Orbital Sander
A random orbital sander gives you a smooth finish on your woodworking projects. It moves in tiny circles and orbits, preventing swirl marks. You use these sanders for preparing surfaces for staining or painting.
When you determine your grit sequence for wood finishing, choose the finest starting grit possible. This achieves your desired removal rate. It prevents extra work and ensures a more efficient sanding process. For instance, if you sand solid beech with a total removal of 0.8mm and aim for a P220 finish, an efficient sequence could be P60 + P100 on the first machine and P150 + P220 on the second.
For a slightly better finish, consider P80 + P120 followed by P180 + P220. Skipping grits, like going from P80 to P180, will not totally remove the scratch from the previous grit. This leads to over-sanding and swirls in the wood. Incorrect grit sequence can result in a blotchy, uneven finish. Sanding swirls can occur due to an incorrect grit sequence or poor sanding technique.
Router
A router shapes edges, cuts dados, and creates decorative profiles. It is a versatile tool for adding professional touches to your woodworking. You use it for many tasks.
For dado cuts, straight bits are the most common. They are ideal for cutting dados or grooves. You can find them in standard or plywood-specific dimensions for a perfect single-pass dado.
Spiral bits, also known as Mortise bits, also suit various woodworking tasks, including plunge cuts. For edge profiling, edge forming router bits have profiled cutting blades and a bearing. You use them to add specific geometry to edges. Roundover bits add a small curved edge. This enhances tactile feel and provides a professional look. Chamfer bits create a consistent angled aesthetic along the edge of a workpiece. Cove bits create concave quarter circles. You sometimes use them on furniture.
Nail Gun
A nail gun speeds up assembly tasks significantly. It drives nails quickly and consistently. You use it for framing, trim work, or cabinetry. Different types of nail guns suit specific applications.
Nail Gun Type | Specific Woodworking Uses |
|---|---|
Framing Nailers | Heavy-duty tasks, framing buildings, building decks and fences, sub-flooring, carpentry work. |
Finish Nailers | Finer woodworking projects requiring a clean finish, installing molding, trim, baseboards, building cabinets, bookcases, and other woodworking projects. |
Brad Nailers | Small wood projects, repairing furniture, installing delicate, decorative trim. |
Pin Nailers | Attaching thin, delicate wood strips and moldings, cabinetry work, craft projects, leaving almost undetectable holes. |
Palm Nailers | Driving nails in tight spaces where larger nailers won’t fit, installing joist hangers and other metal framing connectors. |
Staple Gun | Upholstery projects, installing hardwood flooring, attaching plywood backs to cabinets and bookcases. |
You choose the right nail gun based on the project’s scale and the desired finish. These power tools make your woodworking more efficient.
Measuring and Marking Tools
Accuracy is key in carpentry. You need precise measurements and clear markings for successful woodworking projects. These essential carpentry tools help you lay out your work with confidence. They ensure your cuts and joints fit perfectly.
Tape Measure
A tape measure is one of the most fundamental carpentry tools. You use it to determine lengths and distances. It helps you lay out your project pieces. To ensure accuracy, you should always go slow. Pay close attention to every detail. Double-check your measurements. Make sure they are consistent throughout your project.
Invest in a high-quality tape measure. It should have clear and easy-to-read markings. This helps you minimize errors. You need to identify the units you are using, whether imperial or metric.
Locate the whole numbers first. Then, look for smaller markings between them, like fractions or millimeters. Always consider the end hook. Make sure it aligns properly with your starting point. Keep tension on the tape to hold it taut and straight. Always double-check your measurements, especially for precise cuts.
You should test new tape measures against accurate rules before you use them. Write the purchase date on the back of each tape. This reminds you to recheck its accuracy regularly. Retire tapes that no longer meet accuracy standards. Use them for less critical tasks.
Look for tape measures with excellent design. They should have rigid hooks, durable construction, and clear readability. Some models include a bump stop or shock absorber. These features protect the blade and hook. When you buy a new tape measure, bring a precision ruler. Test each tape for alignment when it is extended and pushed in. Check the hooks and rivets carefully.
Familiarize yourself with both fractional and decimal measurements. Understand how to convert between them. Know the different increments. Regularly calibrate your tape measure. Measure a known distance. Replace or recalibrate it if it is inaccurate. High-quality tape measures are a good investment. They are made of durable materials. They often have etched or engraved markings. Look for locking mechanisms and ergonomic designs.
Squares
Squares are vital for checking and marking angles. They help you ensure your work is perfectly square. Different types of squares serve different purposes.
Feature/Application | Speed Square | Combination Square | Framing Square |
|---|---|---|---|
Shape/Design | Triangular with a flange | Steel ruler with an adjustable protractor head | L-shaped with a long blade and shorter tongue |
Primary Use | Marking cut lines (square/45-degree miter), saw guide, rafter/roof/stair angles | Measuring inside/outside angles, marking device, miter/try square, plumb, straight edge | Laying out stairs and rafters, checking squareness on large boards |
Angles Marked | 90-degree, 45-degree, 135-degree, rafter/roof/stair angles | 90-degree, 45-degree | 90-degree |
Versatility | Versatile for marking and guiding saws, 5 squares in 1 | Highly versatile, can measure depths/heights, find center of round stock, includes a bubble level | Essential for large-scale layout |
Material | Heavy-gauge aluminum | Steel ruler, adjustable head | Steel |
Portability | 7″ fits in apron pocket | Various sizes, 6″ to 24″ | Large, less portable |
Specific Applications | Common, hip, valley, and jack rafters; perpendicular cut marks; crosscutting fence | Laying out lines for ripping, crosscutting, mitering, notches; checking angles; depth gauge | Determining roof pitch, marking cut lines on sheet goods |
A Speed Square is a compact right triangle. It has a flange that rests against the edge of your workpiece. You also know it as a rafter square or triangle square. You use it for marking 90-degree and 45-degree angles. It serves as a saw guide for crosscuts. You can also use it to measure and mark rafter angles. It helps you check for square on boards and framing.
A Combination Square has a ruler blade and an adjustable head. The head can mark specific distances. It has fences at 90 and 45 degrees. The head slides along the blade. You use it for measuring and marking depths and heights. It helps you check 45-degree and 90-degree angles. It works as a depth gauge. You can find the center of round stock with it. It helps you lay out lines for ripping, crosscutting, mitering, and making notches.
A Framing Square has an L-shaped design. It features a long blade and a shorter, narrower tongue. You use it for laying out stairs and rafters. It helps you check squareness on large boards. You can mark cut lines on sheet goods with it. It also helps you determine roof pitch.
Marking Gauge
A marking gauge helps you scribe lines parallel to an edge. It is essential for precise joinery. You set the distance from the edge. Then, you slide the gauge along the workpiece. A sharp pin or wheel creates a fine, consistent line. This line guides your cuts or chisel work. It ensures accuracy for tasks like cutting tenons or grooves.
Levels
Levels help you ensure surfaces are flat (level) or perfectly vertical (plumb). They are crucial for building stable and true structures.
Box-Beam Levels: These are versatile tools. You use them for measuring flat horizontal surfaces and vertical plumb. They are usually made of extruded metal like aluminum. They often have grips and multiple vials.
Magnetic Levels: These levels attach securely to metal surfaces. This allows for hands-free readings. They are great for both plumb and level checks. You can find them in digital versions for more precision.
Digital Box Levels: These are similar to box levels. They include a digital readout for very precise measurements. They are useful when bubble vials are hard to read.
I-Beam Levels: These are good for general or light use. They are a cost-effective choice for less demanding jobs. You need to check their accuracy more often than box-beam levels.
Classic Hardwood Levels: Purists prefer these for their traditional feel. Masons like them because mortar does not stick to them easily. They come in various lengths.
Six-Footer Levels: Longer levels, like 72-inch ones, offer greater accuracy. They are ideal for tasks needing minimal error. This includes installing tall windows, hanging doors, or setting up pool tables.
Post Levels: These have a 90-degree bend and an elastic strap. You secure them to square-edged posts for quick plumb checks. They also have magnets for metal posts.
Vial Levels: These are the core part of many levels. Vials contain alcohol and a bubble. Acrylic block vials are usually the most accurate and durable. They often have extra lines for specialized pitches.
Marking Knives and Pencils
You use marking tools to transfer measurements onto your wood. Pencils are common for general layout. However, marking knives offer superior precision for fine woodworking.
Marking knives create the finest and most accurate lines. Unlike pencils, a marking knife leaves a physical reference groove. Your cutting tools, like chisels, can register into this groove.
This leads to extremely precise joinery. Marking knives make it easy to find lines again. They create a physical reference. The tip of a knife can literally click into the groove. This removes the need for eyeballing. It is very useful for wrapping lines around a board.
They create a physical reference for your tools. Chisels, table saw blades, and other tools can register precisely in the line. This ensures square and accurate cuts. It enhances accuracy with hand saws, table saws, routers, and bandsaws. Marking knives also sever wood fibers.
This creates a barrier that prevents tear-out or chipping. This is crucial when you chop waste with a chisel. A deep knife line will stop fibers from tearing out beyond your intended cut. This helps when shaping round tenons or clearing waste in mortises and dovetails.
Safety and Tool Maintenance
You must prioritize safety and proper tool care in your woodworking shop. This ensures your well-being and extends the life of your essential carpentry tools.
Personal Protective Equipment
You need essential personal protective equipment (PPE) to stay safe. Always wear safety glasses or goggles. They shield your eyes from flying wood chips and debris. Use hearing protection like earbuds or earmuffs. Power tools often exceed 85 dB, which can damage your hearing.
A woodworking apron protects you from injuries, such as kickbacks from a table saw. It also guards against accidental stabs from sharp tools. Wear a dust mask or respirator. These protect your lungs from airborne particles and harmful fumes. Keep a fully stocked first aid kit nearby for quick responses to any injuries.
⚠️ Safety Alert! Avoid wearing gloves when you operate power tools. They can get caught by bits or blades. This pulls your hand into the machinery. Do not wear loose-hanging clothing or jewelry. These items can also get caught in spinning blades. Keep your work area clear of tripping hazards. Tape down loose cords. Wear sturdy work boots.
Tool Sharpening
Sharp tools perform better and are safer to use. Dull tools require more force. This increases the risk of accidents. You should gather your sharpening materials. Waterstones are excellent for sharpening. Naniwa 1000 grit and 8000 grit stones work well. You can use a stone trough to keep your waterstones wet. This also keeps your bench dry.
You need to flatten the back of your chisels and plane blades. Then, raise a burr across the entire bevel. Remove the factory scratch pattern from the bevel. Raise a burr across the entire back. Refine the edge. Then, strop the blade. A sharp chisel can take a full-width, end-grain shaving with hand pressure alone. It should have a flat back and a well-polished bevel.
Category | Item | Details |
|---|---|---|
Required Tools | Waterstones | Naniwa (1000 grit, 8000 grit) or other equivalent grit sizes |
Stone trough | To keep waterstones wet and bench dry | |
Blades / Tools | Plane blade(s) | Block plane, bench plane, shoulder plane, or specialty plane |
Chisels | ½” and above |
Cleaning and Storage
Proper cleaning and storage prevent rust and maintain tool functionality. Keep your tools clean. Dust and wood particles retain moisture. Apply protective coatings. Wax-based products like Glide-cote or Johnson paste wax work well. Camelia oil also protects your tools. For long-term storage, consider Cosmoline.
Control humidity in your workshop. Use a dehumidifier, especially in basements. For toolboxes, use moisture-absorbing gel packs. These are silica gel desiccants. You can also use vapor corrosion inhibitors (VCIs). Avoid getting your tools wet. After cleaning rust with steel wool, wipe tools with an oily rag. This leaves a fine film. Then, apply a soft wax.
Investing in quality essential carpentry tools is crucial. They form the backbone of any woodworking endeavor. The right equipment enhances your process and improves your outcomes. A well-equipped workshop, even with just the basics, opens up many creative possibilities. It allows for greater precision and enjoyment in carpentry. Gradually build your collection of carpentry tools. Prioritize quality and safety. Embark on your woodworking journey with confidence.
FAQ
What hand tools are essential for a beginner?
You need a tape measure, a claw hammer, and a screwdriver set first. These tools help you measure, assemble, and fasten. Also, get a reliable hand saw and some clamps. They are fundamental for many basic woodworking tasks. You will use them often.
What power tools should I buy first?
Start with a power drill and a circular saw. A drill makes holes and drives screws quickly. A circular saw cuts straight lines efficiently. These two tools will help you complete many projects faster. You can add a jigsaw later for curved cuts.
What is the best way to keep my tools sharp?
You must sharpen your tools regularly. Use waterstones or sharpening stones to maintain a keen edge. A sharp tool works better and is safer. Dull tools require more force, which can cause accidents. Always follow proper sharpening techniques.
What safety gear do I need for woodworking?
Always wear safety glasses to protect your eyes from debris. Use hearing protection when operating loud power tools. A dust mask or respirator protects your lungs from fine particles. Wear sturdy work boots. Avoid loose clothing and gloves around moving machinery. 👷♂️

