
Every DIY project needs a functional workspace. Building your own workbench is cost-effective. It also builds quickly and offers immense satisfaction. This guide provides free, reliable DIY workbench plans. You can create a sturdy workbench without breaking the bank. These easy-to-follow instructions help you build your ideal workbench. We cover options from beginner-friendly to more advanced.
Key Takeaways
Building your own workbench saves money. You can customize it for your needs. It also gives you a strong and lasting workspace.
Before you start, measure your space. Think about how you will use the workbench. Choose the right materials and gather your tools.
You can find many free plans. These include simple 2×4 benches, benches with storage, and mobile options. There are also heavy-duty benches for serious projects.
To build your workbench, first gather materials. Then, measure and cut parts carefully. Assemble the frame and legs. Finally, secure the work surface.
To make your workbench last, use good fasteners and glue. Make sure it is level. Protect it with a finish. Clean and check it regularly.
Why Build Your Own Workbench
Building your own workbench offers many advantages. You gain a functional space. You also save money and get exactly what you need. Consider these key benefits.
Cost Savings
You save a lot of money when you build your own workbench. Store-bought workbenches can be expensive. They often include labor costs and brand markups. You buy raw materials directly. This cuts down on overall expenses. You can find affordable lumber and hardware. This makes your project budget-friendly. You get a high-quality workspace for less money.
Customization for Your Needs
A custom workbench fits your specific requirements. You choose the exact size. You decide the perfect height for your tasks. Do you need extra shelves? Do you want specific drawer sizes? You can add them. You design it to fit your tools and projects. This means no wasted space. You create a workspace that works perfectly for you.
Durability and Longevity
You control the quality of your materials. You select strong wood. You use robust fasteners. This ensures your workbench lasts for many years. Factory-made benches sometimes use cheaper components. Your custom build will withstand heavy use. It will handle tough projects. You build it to be sturdy and reliable.
Satisfaction of DIY
There is great pride in building something yourself. You gain new skills. You see your hard work take shape. Every time you use your new workbench, you will feel a sense of accomplishment. It is rewarding to create a functional item with your own hands. This personal satisfaction makes the effort worthwhile.
Essential Considerations Before You Start

Before you begin building your new workbench, think about a few key things. These steps help you plan a successful project. They ensure your workbench meets your needs.
Space Assessment
First, measure your available space. Consider the length and width of your area. A good average size is 6-8 feet wide. This length handles large or multiple smaller projects. It does not take over your entire workspace. Many find 72 inches (6 feet) ideal. For smaller areas, 48 inches (4 feet) works well. Think about depth too. Twenty-four inches is often too shallow. A 30-inch depth is better. This allows for 12-inch deep storage bins. You still get 18 inches of usable benchtop space. Depths of 36 inches are usually too deep. You might struggle to reach the back. For height, 36-37 inches is common. This is like kitchen counters. Your elbows should bend slightly downwards when you work. This prevents crouching. A compact workbench, like the Dash-Board ShortCut, measures 46.75 inches long by 24.5 inches wide by 35.5 inches tall. This size is great for smaller workshops.
Intended Use and Load
Think about how you will use your workbench. What projects will you do? This helps you decide on stability and weight capacity. Even small benches need a stable surface. It should not flex or wobble. A good workbench holds at least 200-300 pounds. If you need portability, consider a design that folds flat. It should set up quickly, ideally in under a minute. Look for versatile clamping systems. These secure your workpieces. Features like dog holes or integrated clamp tracks are helpful.
Material Selection
Choosing the right materials is important. It affects durability and cost. For the frame, 2×4 dimensional lumber is a strong, low-cost choice. Pine is a good option for a workbench. You can use hardwood for high-stress parts, like a leg vise. For the workbench top, you have choices:
Material | Pros | Cons |
|---|---|---|
Butcher Block | Smooth, sturdy, pleasant to use, good for light-to-medium duty. | Can swell or stain, needs maintenance. |
Hardwood Planks | Tough, resists dents, can be refinished, stable. | More expensive, harder to install. |
Plywood | Affordable, versatile, easy to cut, good for budget builds. | Not as durable as hardwood, needs sealing. |
Resin/Epoxy | Chemically resistant, handles heat/spills, nearly indestructible. | Harder to install, permanent, might be overkill. |
Tool Requirements
You need some basic tools to build your workbench. These tools needed are common for DIY projects.
Cordless screw gun (for driving screws)
Cordless drill (for pre-drilling holes)
Tape measure
Carpenter’s square
Pencil
Top Free Sturdy Workbench Plans
You can find many excellent free plans to build a sturdy workbench. These plans cater to different skill levels and needs. You will find a perfect project for your workshop.
Basic 2×4 Workbench
This plan is perfect for beginners. You can build it quickly, often in about an hour. It uses minimal tools. You need a drill and a circular saw. This design often features a simple 2×4 rectangle frame. It has a plywood top and a lower shelf. This results in a sturdy workbench suitable for many tasks. These diy workbench plans are very straightforward. You get a functional workspace fast. This simple design is a great starting point. You will find many free plans for this type of workbench. These plans are ideal for your first build.
Plywood Top Workbench with Storage
This plan offers a smooth work surface. It includes integrated shelving for organization. It is a moderate difficulty build. You can complete it in a few hours or over a weekend. This design provides a highly functional sturdy workbench. You can add various storage solutions to your workbench. For example, a simple DIY workbench plan often includes a full-length lower shelf. This provides convenient storage for your tools and materials. You can also integrate DIY drawers for smaller tools. Tool organization systems help store various accessories. Some advanced designs, like the Paulk-style workbench, feature integrated storage and comprehensive clamping options. These are suitable for contractors and woodworkers.
Folding or Mobile Workbench
This type of workbench is perfect for small spaces. It offers portability or a collapsible design. This is an advanced beginner project. It focuses on space-saving solutions. You can build it over a weekend. The cost might range from $150 to $300, depending on the hardware. You need to ensure stability. Wall-mounted folding benches achieve stability through a clever bracing system. Mobile project centers gain stability from locking casters. They also have a substantial top thickness, 1 1/2 inches or more, to dampen vibration. You can reinforce a lightweight frame at the joints with glued-on gussets. This provides significant strength. Add a 1×2 brace at each corner of the mid-frame. This resists racking.
For mobile workbenches, choose the right casters. Heavy-duty retractable casters allow your workbench to stay firmly in place while you work. You can easily lift it for relocation. These casters support heavy loads without wobbling. They feature durable materials for long-lasting use. Some casters have a total lock feature. This locks both swivel and roll. You can find casters with a 400 lbs load capacity per set. Wheels made of durable polyurethane or rubber protect your floors.
Caster Type | Load Capacity | Key Features |
|---|---|---|
Workbench Casters | 4,600 lbs (2086 kg) | Swivel, Total Lock, Pedal Brake, Double Sealed Ball Bearings |
Low Center of Gravity Casters | 1,000 lbs (450 kg) | Swivel, Total Lock, Pedal Brake, Double Sealed Ball Bearings |
These casters ensure your mobile workbench remains sturdy and functional.
Heavy-Duty Woodworking Bench
This workbench is designed for serious projects. It focuses on maximum stability and high weight capacity. This plan is for intermediate builders. You seek a truly sturdy workbench. You can expect to spend $300 or more on materials. The build time will likely be a weekend or longer. A heavy-duty plank workbench is rock-solid and long-lasting. It handles heavy repairs and fine woodworking. It features a sturdy frame built from 4×4 posts. It has a thick, durable top made from 2x lumber. This design uses readily available construction-grade materials. It withstands abuse and lasts for generations.
Consider the dimensions. A height of 36″ – 39″ is recommended. This is about elbow height. It is comfortable for standing. It is also low enough for leaning over tools. Make the depth as deep as you can comfortably reach.
For maximum stability, use strong joinery techniques. Mortise and tenon joints are very strong and reliable. They offer superior strength under pressure. Pocket-hole joints also provide impressive durability. They have good load-bearing capacity. Reinforce traditional joinery with fasteners or adhesives. Use screws, dowels, or strong woodworking glue. Glue can be stronger than the wood itself. For mortise and tenon joints, add a peg or dowel through the tenon and mortise for extra reinforcement.
You can add many features. Install AC outlets along the back of the benches. Place them at least every two feet. Each bench should have its own AC circuits and breakers. Consider AC outlets in the front, just below the bench top. This provides easy access for handheld tools. Ground-fault interrupters are important for safety. A decent woodworking vise is also useful. Look for one with a raising bench-dog bar. A large machinist’s vise (4″ jaws minimum) is also good. Mount it securely on a corner of a wall-mounted bench. These free plans help you build a robust workspace.
Building Your Sturdy Workbench: General Steps

Building your own workbench is a rewarding process. You follow a series of clear steps. These steps ensure your workbench is strong and functional.
Gather Materials and Tools
You start by collecting everything you need. This includes all your wood, hardware, and necessary tools. Having everything ready saves you time. It also makes the building process smoother. Here is a comprehensive checklist for a standard workbench build:
For the base:
Two 4x4s (for legs)
Four 2x4s (for stretchers)
Four 3/8″ all-threaded rods, 48″ long
Four 3/8″ all-threaded rods, 24″ long
For the top:
One 49×97″ panel of 3/4″ MDF
One 25×73″ panel of 1-1/2″ edge-glued oak
One 1/2×1-1/2″ oak board, six feet long
One 1/2×1-1/2″ oak board, five feet long
One 1/2×1-1/2″ oak board, two feet long
For the vise (if installing):
Two 24″ lengths of 2×8 oak
One 13″ length of 2×6 oak
Scrap MDF or plywood (for mounting thickness)
Hardware:
32 – 3/8″ dowels
16 – 3/8″ nuts
16 – 3/8″ washers
30 – 1-1/2″ drywall screws
30 – 2″ drywall screws
30 – s-clips
4 – levelers
Additional hardware for attaching vises
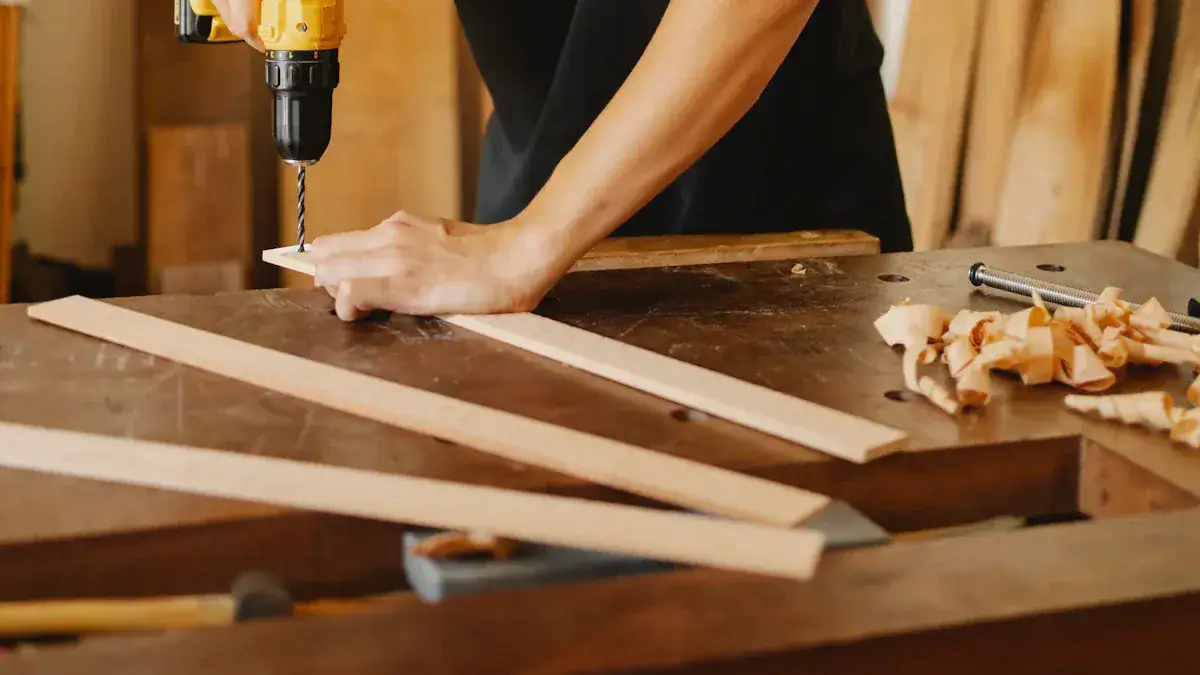
Measure and Cut Components
Accuracy is very important when you measure and cut your wood. Precise cuts ensure your workbench fits together correctly. This makes your final product strong and stable.
You can achieve high accuracy with the right setup. Compare different cutting methods:
Feature/Scenario | Traditional Table Saw Setup | Portable Workbench with Guide Rail System |
|---|---|---|
Initial Fence Setup Time | 2-3 minutes | 30 seconds |
Recalibration Needed | After every 5-6 cuts (1 minute each) | No recalibration needed |
Total Setup Time | 8-10 minutes | 30 seconds |
Typical Variance | ±1/32 inch | ±0.004 inch |
Accuracy for Repetitive Cuts | 0.010 to 0.025 inches | 0.004 inches (2.5 to 6 times more accurate) |
Follow these best practices for accurate measurements:
Maintain a good point of view. Align your eye, the object, and the rule marks. This avoids parallax errors.
Keep the tape parallel. Keep your tape measure parallel to the distance you measure. Use a block or flat surface for a definite starting point.
Start from a specific mark. Measure from the 1-inch or 10-inch mark on a rule. This avoids the ‘one-inch mistake’. It also makes errors easier to spot.
Use a firm reference. The end of your rule needs a solid surface for an accurate start.
Understand small increments. Learn to read 32nds and 64ths of an inch. Use terms like ‘plus’ or ‘heavy’ for precision.
Use calipers for small increments. Dial calipers improve accuracy and speed for small measurements. They help you avoid rounding errors.
Work to twice the resolution. You can mark and measure to the visual center between marks on a rule with practice.
Use sharp marking tools. A sharp pencil or knife defines accurate locations. Wide pencil lines can cause errors.
Here are steps to ensure precise cuts:
Master the Art of Transferring Measurements. Use tick marks, story sticks, and direct transfer methods. Always ensure marking tools are sharp and clean. Double-check measurements before transferring.
Measure Twice, Cut Once. Make this a consistent routine. Account for the saw kerf. Mark the correct side of the line. Align the blade accordingly.
Use Jigs and Templates. Determine the specific type you need. Construct it with precise dimensions and reinforced joints. Test and adjust it on scrap material. Then label and store it properly.
Familiarize Yourself with Fractional and Decimal Measurements. Understand both systems. Practice conversions. Be aware of rounding errors. Keep a conversion chart handy.
Develop a System for Marking and Labeling. Use standardized symbols, color-coding, numbering, or labels for mating parts. This ensures consistency and reduces errors.
Calibrate Your Measuring Tools. Regularly check and adjust tools like combination squares, tape measures, and calipers. This maintains accuracy.
Choose the right marking tools for your project:
Pencils: Use sharp pencils for fine lines. Carpenter’s pencils make bolder marks. They are versatile and forgiving.
Markers: These provide bold, visible lines. They work well on rough or dark surfaces. However, they are harder to remove.
Marking Knives: These offer the highest accuracy for precise joinery. They create fine, clean lines that prevent tear-out. Choose one with a comfortable handle, sharp blade, and flat back.
Awls: These are useful for marking hole centers. They also lay out lines for rough cuts. Select one with a comfortable grip and a sharp, hardened steel point.
Chalk Lines: These are ideal for long, straight lines on large panels. Extreme precision is not always required here. Stretch the line tight, lift, and snap to mark.
Assemble the Frame and Legs
Now you will assemble the workbench frame and legs. This forms the main structure of your workbench. Follow your chosen plan carefully. You typically start by attaching the legs to the long side pieces (stretchers). Then you add the shorter cross pieces. Use strong fasteners like screws or bolts. Make sure all joints are square. This ensures your workbench stands straight and true. You want to assemble the workbench so it is stable from the start.
Secure the Work Surface
Attaching the work surface is a critical step. Your workbench top needs to be FLAT, SOLID, and FUNCTIONAL. Man-made materials work well for the top. Solid core doors or multiple layers of plywood are very stable. They do not move like solid wood. This means you do not need special clips for expansion.
The ‘SOLID’ aspect comes from a robust base. A 4×4 frame secured to the floor and wall ensures the bench cannot move easily. You should not glue the top surface directly. Instead, use a replaceable top layer. A 1/4 inch hardboard works well. You can screw it down. This makes it easy to replace if it gets damaged.
Add Reinforcements and Features
You can make your workbench even stronger. Add reinforcements to increase its stability and load capacity.
Reinforced legs and bracing systems: Use triangular leg braces or crossbeams. Thick 4×4 steel legs and gusset plates improve structural integrity. They also prevent wobbling. Vertical supports spaced every two feet reduce surface movement by nearly two-thirds.
Thicker steel gauges: 10-gauge steel frames offer about 30% more strength than 12-gauge. They hold around 3,500 pounds before stress. 12-gauge steel is 0.104 inches thick.
Steel aprons and L-brackets: Bolt 3/16 inch steel aprons to 4×4 vertical posts. Place 1/4 inch thick L-brackets at stress points. This improves stability.
Welded frames: These provide superior rigidity. They maintain alignment within 0.5° under load. This extends lifespan by 15–20 years. Bolted joints can develop play after 500+ load cycles.
Triangular gussets: Use these at connection points instead of regular L-brackets. They spread weight better. They reduce stress points by about 40%.
Center loading with 8-inch foot pads: This design reduces ground pressure by nearly half. It is better than edge-only weight distribution.
These additions make your workbench incredibly sturdy.
Tips for a Long-Lasting Workbench
You want your new workbench to last for many years. Proper care and construction choices make a big difference. Follow these tips to ensure your workspace remains sturdy and functional.
Quality Fasteners and Wood Glue
Always use good quality fasteners. Screws and bolts hold your workbench together. Strong wood glue adds extra strength to every joint. Apply glue to all mating surfaces before you drive fasteners. This creates a bond often stronger than the wood itself. These small details prevent your workbench from becoming wobbly over time.
Leveling for Stability
An uneven floor can make your workbench rock. You need a stable surface for safe work. Leg levelers are a great solution for very uneven floors. You can find these on Amazon. They let you quickly adjust the height if you move the bench. Another option is to create ‘built to fit’ leg extensions. Clamp a scrap piece of wood to a leg. Extend it to the floor. You can scribe it to match the floor’s shape. Then, secure the extension with screws. This is often a fast and cheap fix.
You can also use shims:
Place your workbench where you want it.
Check the top to see if it is level.
Add wood shims under the legs as needed. This makes the top level.
Secure the shims with glue or screws.
Mark where each leg sits on the floor. This helps you put the bench back in the same spot if you move it.
Protecting with Finishes
Protect your workbench surface from spills and wear. A good finish extends its life. Here are some durable options:
Finish Option | Durability/Protection | Application/Repair | Notes |
|---|---|---|---|
Poured Epoxy | Strong, wear-resistant, thick layer. | Difficult to spot repair, nearly impossible to remove. | Can scratch, chip, crack; yellows with time; potential allergic reactions. |
Polyurethane Varnish | Pretty durable, resists most common liquids. | Multiple coats needed; requires sanding for re-coating. | Can scratch, chip, crack; some oil-based versions may amber; difficult to spot repair. |
Oil Finishes | Thinner layer, less durable to wear/scuffs/water. | Easy to recoat (clean and wipe on); long application. | Not film-forming; can spontaneously combust (rags); good repairability. |
Spar Varnish | Designed for boats, resists cracking from changes. | Can be sanded and reapplied every few years. | Good alternative for durability and flexibility. |
Regular Maintenance
Regular care keeps your workbench in top condition.
Clean and organize your workbench often. This stops dust and spills from causing damage. Store tools in their proper places.
Protect the surface. Apply a finish like oil-based polyurethane. This shields the wood from stains and moisture. Use a removable hardboard cover for heavy tasks.
Inspect and tighten fasteners regularly. Vibrations or heavy use can loosen screws and bolts. This affects stability. Do not overtighten them.
Control moisture and temperature. Aim for consistent humidity (around 45%). This prevents warping or cracking. Use a dehumidifier if needed. Ensure good ventilation.
Avoid excessive weight. Know your workbench’s weight capacity. Distribute weight evenly. This prevents structural damage.
You now understand the immense value of building your own sturdy workbench. You save money, design it perfectly for your needs, and feel great pride. These free diy workbench plans and practical advice give you all the resources. You can successfully complete your project, even as a first-time builder. Use these diy workbench plans. Start your build today. Enjoy increased productivity and pleasure in your workshop with these reliable plans.
FAQ
What essential tools do you need for a basic workbench?
You need a cordless drill and a circular saw. A tape measure, carpenter’s square, and pencil are also essential. These tools help you cut and assemble your workbench accurately. 📏
What is the ideal height for your workbench?
A common height is 36-37 inches. This height is like kitchen counters. Your elbows should bend slightly downwards when you work. This prevents crouching and ensures comfort.
What materials work best for a sturdy workbench top?
Plywood: Affordable and versatile.
Butcher block: Offers a smooth, durable surface.
Hardwood planks: Tough and resist dents. Choose a material that fits your budget and project needs.
What is the easiest way to make your workbench stable on an uneven floor?
You can use leg levelers for very uneven floors. Alternatively, place wood shims under the legs. Secure the shims with glue or screws. This makes your workbench level and stable. 🛠️

