

DIY home improvement projects are booming. The market will reach US$800 billion in 2025. Experts expect it to grow to US$1,400.9 billion by 2032. This shows an 8% growth rate. Many homeowners choose a DIY staircase railing upgrade. You save money on your new railing. You also achieve a unique design and personal style for your home’s railing. Building a diy stair railings project offers a great safety feature. It lets you create a custom design that matches your home’s style. Remember, safety and adhering to building codes are crucial for any railing project. A well-planned railing makes your home safer and more beautiful. This new railing enhances your space.
Key Takeaways
Building your own stair railing saves money. It lets you choose a unique design for your home.
Always follow safety rules and building codes. This ensures your railing is safe for everyone.
You can pick from many materials like wood, metal, or glass. Each material offers a different look and feel.
Plan your project carefully. Measure everything correctly. This helps you build a strong and good-looking railing.
Outdoor railings need strong materials. They must stand up to bad weather.
Why DIY Your Stair Railings
Building your own stair railing offers many advantages. You gain control over the project from start to finish. This approach brings both practical and personal rewards.
Cost Savings & Budget Control
You can save a lot of money when you build your own railing. Professional installation costs add up quickly. Doing the work yourself cuts down on labor expenses. Consider the material costs for your new handrail:
Railing Material | Cost per Linear Foot |
|---|---|
Wood | $10–$40 |
Stainless steel | $25–$110 |
Cable | $60–$220 |
Wrought Iron | $50–$120 |
Glass | $100–$500 |
You can further reduce costs. Choose classic, premade designs. Remove your old railing yourself. Paint and finish the railing independently. Select economical materials like wood or aluminum. These choices help you manage your budget for the entire railing project.
Customization & Personal Style
DIY projects let you create a unique design. You are not limited to standard options. You can design a railing that perfectly matches your home’s style. This includes special features like loft stair railings. You can also incorporate current trends. For example, 2025 design trends feature sleek glass railings. These use minimal hardware and maximize light. Cable railings are also popular. They often mix materials like steel posts and wood cap rails. Vertical balusters offer a classic yet modern design. You can even try daring designs. These use bold forms and colors to make your staircase a focal point. Your personal style shines through in every design choice for your railing.
Learning New Skills & Satisfaction
Undertaking a DIY project teaches you new skills. You learn about materials, tools, and construction. Completing the project brings a significant sense of achievement. You feel deep satisfaction seeing your vision become real. This hands-on effort improves your home’s aesthetics and function. You will feel more comfortable and proud of your space. This feeling of accomplishment can boost your confidence. You create a unique living space that reflects your individuality. This self-expression makes your home truly yours.
Safety & Code Basics
Understanding safety regulations is crucial before you start any diy stair railings project. These rules ensure your railing is safe for everyone. Your stair handrail must be between 34 and 38 inches high. Measure this from the stair treads’ nosing. The spacing between balusters cannot exceed 4 inches. A 4-inch sphere should not pass through any opening. Your handrail needs to be graspable. It should have a minimum diameter of 1 ¼ inches and a maximum of 2 inches. The surface must be continuous and smooth. The entire railing must withstand a 200-pound load. This load applies in any direction at any point. A handrail is usually required on at least one side of stairs with four or more risers. Always understand these regulations for your railing’s safety.
Understanding Railing Safety & Codes
You must understand building codes before you start your diy stair railings project. These codes ensure your railing is safe and functional. They protect everyone who uses your stairs.
Key Code Requirements
Building codes set specific rules for your railing. For residential buildings, the International Residential Code (IRC) states that stair handrails must be between 34 and 38 inches high. You measure this vertically from the nose of the stair tread to the top of the railing. Always use a level to extend a flat plane from the nose of the stair tread. Then measure vertically from this plane to the top of the railing. Check the height at multiple points to ensure uniformity. Another critical rule is the baluster spacing. Building codes typically require a maximum spacing of 4 inches between balusters. This is often called the ‘4-inch ball rule’. It prevents a 4-inch sphere from passing through. This rule ensures safety, especially for small children. Your handrail must also be graspable.
Local vs. National Codes
National codes provide a baseline for safety. However, local building codes can add more standards. For example, your city or county might have specific requirements beyond national guidelines. You should visit your local building department’s website. You can also contact them directly. Search online for “local handrail building codes for [your county]” to find specific information. Local governments choose which national codes they adopt. They can also create their own rules. This means your local railing requirements might differ from a neighboring town.
Permits & Inspections
You often need a building permit for new construction or major renovations. Permits are generally required for any commercial stair or ramp needing handrails or guards. For residential projects, if your stair is part of the path of travel to a public way or egress system, it typically needs a permit. Even if your local code does not explicitly require a permit for a residential railing, it is wise to check. A permit ensures your railing meets all safety standards. It also protects you from future issues.
Avoiding Safety Pitfalls
You can make common mistakes when installing a railing. Choosing the wrong handrail height can lead to failed inspections. It also creates safety issues. Inadequate support or poor anchoring is another problem. You might screw into drywall instead of studs. This makes the railing wobble or fall. Neglecting code compliance for handrail height, spacing, or grip size creates hazards. Forgetting to check the angle can make the handrail feel awkward. Using low-quality materials, like interior-grade hardware outdoors, causes premature wear. Sloppy joint connections compromise the railing’s integrity. Failing to extend the handrail beyond the top or bottom of the stairs also reduces safety. Always ensure secure attachment for your railing.
Exploring Stair Railing Ideas & Materials
You have many choices for your stair railing ideas. Each material offers unique benefits. They also present different challenges. You can find the perfect fit for your home’s aesthetic and your budget. Consider how each material contributes to the overall style of your railing.
Wood Options & Finishes
Wood railings offer warmth and classic appeal. You can choose from various wood species. Each type brings its own character and durability.
Yellow Pine: This wood is dense and durable. It resists rot and handles harsh climates well. You will find it easy to work with. It is a tough choice for your railing.
White Oak: White oak resists rot. This makes it a durable option for railing parts. It also works well with tools.
Walnut: Walnut resists wear and decay. It is tough during processing. It handles indoor humidity well. You can easily machine it for detailed designs.
Maple: Maple is strong and easy to process. However, it can crack with humidity and temperature changes. This makes it less durable in changing conditions.
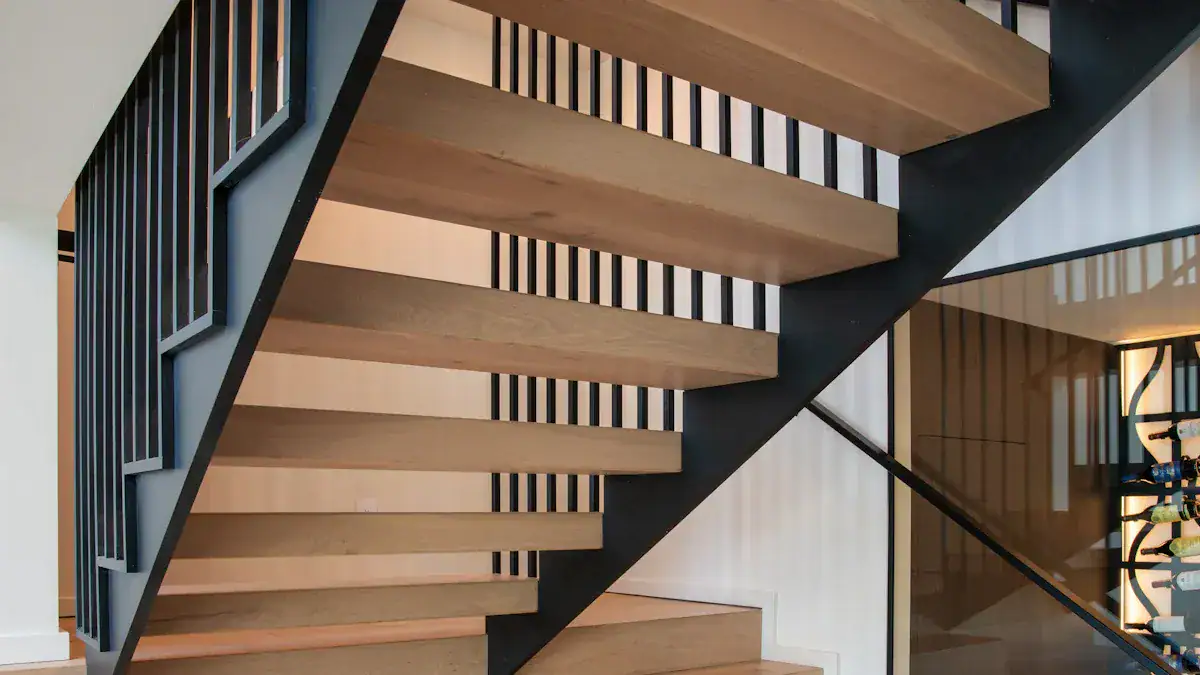
You can stain or paint wood to match your home’s decor. A classic wood and black stair railing offers a timeless look. This design works well in many homes.
Metal Railings
Metal railings provide strength and a sleek look. They are a popular choice for modern and contemporary homes.
Steel: Steel is very strong. You can find steeltex black pipe from Lowe’s for a DIY project. This material creates a robust and modern stair railing.
Wrought Iron: Wrought iron offers incredible versatility. You can customize it in many ways.
Traditional scrollwork adds elegance to older homes.
Minimalist designs fit contemporary interiors perfectly.
Geometric patterns give a modern flair. They also keep structural strength.
You can combine wrought iron with wood, glass, or stone. This allows for mixed-material designs.
Wrought iron serves as both a safety feature and a focal point.
Modern architecture uses iron with sleek black railings and simple lines. It often pairs with glass panels or minimalist lighting. This creates a striking aesthetic.
Baluster patterns range from simple lines to elaborate scrollwork. They complement your interior décor.
Wrought iron handrail components provide support. They also enhance the overall aesthetic.
Profile variety lets you shape the iron to match your railing system’s style. This includes round, rectangular, or specific shapes.
Wrought iron balusters come in many designs. These include straight, twisted, hammered, or decorative baskets. They define the visual rhythm and style.
Decorative elements like scrolls, rosettes, and leaves add unique character.
Wrought iron stair railings greatly influence your home’s style. For traditional homes, classic elements like rosettes and S-curves boost historical authenticity. Victorian homes use dramatic, complex patterns. These often have geometric or nature-inspired motifs. They usually come in deep blacks or oil-rubbed bronze. In contemporary and modern interiors, wrought iron features clean lines and minimalist patterns. Think simple geometric shapes, straight bars, and sleek horizontal configurations. You can powder-coat it in various colors. Matte black to metallic finishes are popular. You can combine it with glass panels or wooden handrails for an updated look. Transitional designs mix vintage and modern styles. They use wrought iron with traditional scroll patterns alongside clean-lined balusters. They also mix classic black iron with glass panels. Simplified geometric patterns or straight spindles with subtle curved details also work well. You can complement wrought iron with light wood treads or sleek metal handrails. This enhances its transitional appeal.
Cable Railings
Cable railings offer a sleek and modern design. They are a popular choice for contemporary spaces.
Aesthetic Benefits:
They provide a clean, contemporary look. They can also complement traditional homes with their minimalist design.
Their thin cables do not block views. This makes them ideal for scenic landscapes or open interior designs.
Aesthetic Challenges:
The transparency that allows for unobstructed views also means less privacy. This might be a drawback if you need more seclusion.
You must maintain their appearance. Proper tensioning and code adherence for cable spacing are crucial. This keeps both safety and appearance intact. Improper installation can harm the aesthetics.
You can find code-compliant kits for cable railings. These make DIY installation easier.
Glass Panel Railings
Glass panel railings create an open, airy feel. They are perfect for a modern or contemporary stair railing. This type of railing maximizes light and views.
Safety Considerations:
Glass railing is very safe when you use the correct type of glass. It works for both homes and businesses.
Check local requirements for glass type and thickness. Also check railing heights, handrails, top rails, and mounting surfaces.
Glass railing systems use modified glass. This includes tempered and laminated glass. It improves strength and shattering protection.
All glass railing systems undergo extensive testing. This ensures safety. They often exceed code requirements for strength when mounted correctly.
Railing heights follow International Building Code (IBC) and International Residential Code (IRC) guidelines. They are typically 42 inches for commercial use. They are 36 inches for residential stairways. Balconies often need 39 or 42 inches. Pool guards often require 48-inch tall railings.
Glass thicknesses are not set by IBC or IRC. Tempered glass is usually ½ inch thick for homes. Laminated glass is typically 9/16 inch thick for businesses, rooftops, or hurricane areas.
Handrails provide support. They must be strong enough for grasping. Top rails primarily tie glass panels together.
The mounting structure must be strong. Posts or spigot brackets can mount to various surfaces. You might need through-bolting instead of lag screws. This depends on the substrate thickness.
Maintenance Requirements:
Regular maintenance is crucial. It preserves clarity, structural integrity, and safety. Glass railings face elements, frequent use, and minor impacts.
Neglecting maintenance leads to reduced visibility from smudges and dust. It also causes compromised structural stability from loose fittings or worn seals. This creates safety risks and costly repairs.
Maintenance ensures safety. It addresses wear and tear like fingerprints, dust, rain, wind, and temperature changes. It catches minor issues like wobbly panels or gaps before they get worse.
Consistent upkeep keeps the sleek, modern aesthetic. It removes dirt, pollen, and rain streaks. It also prevents corrosion on metal parts.
Regular maintenance helps you comply with building codes. This ensures railing strength and stability. It prevents hazards and costly replacements.
Maintenance steps include regular inspections. Look for loose screws, shifting panels, or worn seals.
Clean gently and consistently. Use a microfiber cloth and non-abrasive glass cleaner. Avoid harsh chemicals like ammonia or bleach. A mix of white vinegar and water works for stubborn spots.
Protect metal components. Wipe them down to remove moisture. Apply stainless-steel polish or a clear sealant to prevent corrosion.
Address misalignments early. Schedule professional adjustments if panels are out of place or gaps form.
Increase cleaning and maintenance frequency in harsh environments. This includes coastal areas or regions with high air pollution.
Clean glass railings regularly, a few times a year. Use standard glass cleaning chemicals and a microfiber cloth. This prevents grime buildup and streaks.
Exterior glass railings may need more frequent cleaning than interior ones.
For deeper cleaning, especially in cooler climates, use a pressure washer. Start at a low pressure and distance. Follow with a microfiber cloth and glass cleaner.
Never lean over glass railings to reach difficult spots. Instead, use an extendable squeegee.
A glass stair railing offers a truly contemporary look.
Hybrid Options
Hybrid railings combine different materials. This allows you to create a unique design. You can blend the strengths and aesthetics of various materials.
Steel post cable railing system with a wooden or composite cap.
Wooden frame supporting stainless cable infill.
Wooden or composite top rail combined with steel posts and cable infill.
Cost-effective framing with glass or pipe infill.
Wooden graspable rails with steel brackets.
Glass panels and cable infill on a single installation.
Wooden top rail (e.g., oak) with a steel or stainless system.
These combinations allow for a truly personalized style. You can achieve a modern or contemporary look.
Maintenance & Durability
You want your railing to last. Different materials offer varying levels of durability and require different maintenance.
| Material | Durability Expectation Trex Railing is engineered for longevity, backed by a strong warranty that covers fading and staining. With appropriate maintenance, Trex Railing can endure for decades, offering a lasting and attractive outdoor feature. Its key features include durability against harsh weather and heavy use, low maintenance requirements, and cost-effectiveness due to long-term savings on upkeep and replacements.
You can see that choosing the right material for your railing involves balancing style, safety, and how much work you want to put into maintenance. Each option offers a distinct look and feel for your home.
Designing for Safety and Style
You must plan your DIY railing project carefully. A good design ensures both safety and visual appeal. This section guides you through the design process.
Accurate Measurements
Precise measurements are crucial for a code-compliant railing. Your baluster spacing must not allow a 4-3/8 inch sphere to pass through. This prevents children from slipping. Stairs need to be at least 36 inches wide. This measurement is above guards or handrails. Guards or handrails can project up to 4-1/2 inches into this width. This leaves a minimum clear width of 31-1/2 inches below a single guard or handrail. Newels must align for straight lines. Maintain a minimum of 29 inches between the newel and the wall. Newels must resist a 200-pound force. Guards on stairs must be at least 34 inches tall. Measure this from a sloping line connecting tread nosings. Your handrail must mount between 34 and 38 inches above the tread nosing. Round handrails need a diameter between 1-1/4 inches and 2 inches. This careful design ensures safety.
Design Sketching & Prototyping
Sketching your railing design helps visualize the final product. You can create a prototype to test your ideas. This helps you refine the design. For example, test a “Diagonal Cut I-Beam Rail” prototype. This checks how MikroRails work for diagonal applications like stair railings. It focuses on mitering I-beams for vertical posts. An initial prototype, like “Establishing a ‘Base Line’,” sets standards for post and rail construction. These techniques apply to stair railings cut to match stair angles. This design step is vital.
Integrating Home Style
Your railing design should complement your home’s architectural style. Analyze your home’s design language. This helps you choose a railing system that fits. Glass and metal create a sleek, modern look. They add lightness to contemporary spaces. Classic wood railings offer warmth and sophistication. They blend with almost any home decor. Align your railing with your home’s architectural details. Sleek aluminum railings suit modern homes. Coordinate railing finishes with other materials in your home. Custom designs tailor the railing to your unique space. This ensures a perfect fit for both layout and aesthetic.
Handrail Ergonomics
A comfortable handrail grip is essential for safety. Handrail height, continuity, and gripping surface must meet accessibility standards. This accommodates diverse users. Ergonomically designed handrails offer a comfortable grip. They have a smooth surface. This aids balance and safe movement. It helps prevent falls. Proper handrail height and diameter are crucial. They ensure a secure grip for various hand sizes. An appropriate grip surface and texture enhance safety. This thoughtful design improves usability.
Required Tools & Equipment
You need specific tools for your DIY railing project. Gather these before you start.
4 ft. level
Drill bit set
Cordless drill/driver
Hammer
Miter saw
Stud finder
Tape measure
Safety equipment (gloves, safety glasses)
Screws and fasteners
These tools help you build your railing safely and effectively.
Installing Your DIY Stair Railing
You are ready to install your new railing. This part of your project step-by-step requires precision and careful work. Follow these steps for a safe and stylish result.
Site Preparation & Support
Proper preparation makes your installation smooth. You need a solid plan before you begin.
Plan the Installation Process: First, select materials matching your home’s look. Ensure they meet local building codes. Consider durability, maintenance, and safety. Decide on your railing’s style, whether modern or traditional.
Measure and Map the Installation Area: Accurately measure your stairway’s height and length. This determines material needs. Note newel post positions and baluster spacing. This meets safety and aesthetic rules. A detailed sketch helps you visualize the outcome. It also guides your installation.
Assess Safety Measures: Inspect the area for obstacles. Make sure it is clean and well-lit. Remove any risks. Wear safety gear like gloves, eye protection, and sturdy footwear. Measure your handrail height from the bottom of the stairs. This ensures it meets safety standards.
Gather Necessary Tools and Materials: Collect essential tools. You will need a drill, screws, a level, and a tape measure. You might also need a saw. Ensure all railing system parts are present. This includes posts, balusters, and handrails. Consult manufacturer instructions for specific tools. You might need wood glue, a stud finder, or a miter saw.
Take Accurate Measurements: Precisely measure the height and length of your stairs. This determines the railing length. Calculate baluster spacing. This complies with local building codes. Typically, a 4-inch sphere should not pass through. Correct measurements prevent errors. They also save time.
Newel Post Installation
Newel posts provide the main support for your handrail. Install them securely.
Mark the Location: Identify and mark the newel post’s spot. This is usually at the base, landing, or top of the staircase. Use a measuring tape and carpenter’s square for correct positioning.
Drill for Mounting Hardware: Create a hole in the stair tread or floor. Use a drill for this. The hole accommodates the newel post fastener. This could be a lag bolt or a newel post mounting kit.
Secure the Mounting Hardware: Insert and tighten the lag bolt or mounting block. Place it into the subfloor. Ensure it is level and stable. This affects the post’s alignment.
Prepare the Newel Post: Drill a center hole at the bottom of the wood newel. This accepts the fastener. Dry-fit the post. Confirm proper alignment before final installation.
Install the Post: Apply wood glue to the base. Align it over the fastener. Rotate or slide it into place. Use a wrench or appropriate tool. Tighten and secure the post to the subfloor.
Check for Plumb: Use a level. Verify the newel post is perfectly vertical. Make any necessary adjustments before the adhesive sets.
Reinforce with Fasteners: For added strength, secure the post. Use finishing nails or screws through the sides. Drive them into the floor or tread framing. Fill any visible holes with matching wood filler.
Attach Handrails: Once the newel post is secure, attach the stair railing. Use rail bolts or brackets. Follow the manufacturer’s recommendations.
Remember to always pre-drill holes. This prevents wood splitting. Use construction adhesive for extra holding strength. This is especially true for wood-to-wood connections. If you install on concrete or tile, use masonry anchors and specialized tools. Consider a trim collar or base plate. This covers mounting hardware. It also provides a finished look.
Handrail Attachment
You need to securely attach the handrail to newel posts or walls. Several methods ensure strength.
Plywood Blocking: Cut a hole in the wall. Insert plywood blocking. Secure it to the back of the drywall with glue and screws. Then patch the hole.
1×4 or 1×6 Board: Install a 1×4 or 1×6 board. Run it along the full length of the handrail. Screw it directly into the wall studs. Then screw handrail brackets to this board.
Wingits: These specialized fasteners are for grab bars. They have strict specifications. This suggests they are strong enough for a handrail. They work well for retrofitting without large holes.
Oval Rosette with Plywood Blocking: Use an oval rosette. Choose one that complements the railing. Cut a hole slightly smaller than the rosette. Insert a long piece of 3/4″ plywood. Screw the handrail, attached to the rosette, to the inserted blocking. This creates a strong laminated wood sandwich.
Half Newel Post: Adhere a half newel post directly to the wall. This provides a sturdy attachment point for your handrail.
Baluster/Panel Securement
Secure your balusters or panels to complete the railing structure. This ensures safety and stability.
When you assemble balusters and a railing section as one unit, use a ratchet strap. Cinch everything together before installation. This prevents components from falling apart.
Railing kits and preassembled railing sections are easiest to install. They ensure code compliance if you follow manufacturing instructions. They include most components. They also simplify baluster spacing calculations.
All components, including balusters, must be securely fastened. Install them according to manufacturer and code guidelines. This prevents safety hazards and code violations.
Finishing & Protection
Finishing your railing protects it and enhances its beauty. Start by sanding all wood surfaces. Use progressively finer grits of sandpaper. This creates a smooth finish. Clean the railing thoroughly to remove dust. Apply a wood stain or paint. Choose a color that matches your home’s decor. Follow the product’s instructions for application and drying times. After staining or painting, apply a protective topcoat. This could be polyurethane or a clear sealant. This layer guards against wear, moisture, and UV damage. Ensure good ventilation during this process. Proper finishing extends the life of your railing.
Final Safety Checks
Your diy stair railings project is almost complete. Perform thorough final safety checks. This ensures your new railing is secure and code-compliant.
Test Stability: Grasp the handrail firmly. Apply pressure in different directions. The entire railing system should feel solid. It should not wobble or flex.
Check Baluster Spacing: Use a 4-inch sphere. Try to pass it between balusters. It should not fit through any gap. This confirms child safety.
Verify Handrail Height: Measure the handrail height again. Check it from the nose of the stair treads. It must fall within the 34 to 38-inch range.
Inspect All Fasteners: Look at all screws, bolts, and connections. Ensure they are tight and secure. No loose parts should exist.
Smooth Surfaces: Run your hand along the entire handrail. Check for splinters, sharp edges, or rough spots. Sand and smooth any imperfections.
Review Local Codes: Double-check your local building codes one last time. Confirm your railing meets all requirements.
Installing an Outdoor Stair Railing

You need to consider specific factors when you install an outdoor stair railing. An outdoor stair railing faces different challenges than an indoor one. You must prioritize durability and weather resistance in your design.
Material Considerations for Outdoors
Choosing the right material for your outdoor stair railing is crucial. Metal is often the best option. It withstands harsh weather and resists scrapes or dents. Wrought iron offers a durable and moldable metal choice. It adds vintage charm to your home. Wrought iron is known for its durability. You can design it to meet ADA compliance. Wood requires more maintenance. You must properly seal and periodically refinish it. Unfinished or worn wood can lead to splinters, rot, and safety hazards. Wood railings are also not ADA compliant. Commercial settings often need additional metal railings for compliance.
Securing Railings on Concrete Steps
Securing your railing to concrete steps requires precision. First, you drill precise holes for the railing posts into the concrete. Use a coring drill for this. Score the surface first to guide accuracy. Consider a water-cooled drill bit with a ‘boot’ to manage dust and water. Drill holes to the necessary depth for stability. Next, you position the railing carefully. Get assistance for this step. Check that it does not obstruct doors. Ensure it allows ample space. Use small wood shims to keep the railing plumb and straight. Verify alignment with a level. Then, you secure the railing. Mix hydraulic cement to a soupy consistency. Pour it into the drilled holes around the posts. Fill the gaps completely. Bevel the cement tops to prevent water collection. Wipe off any excess cement from the posts before it cures. Allow the hydraulic cement to cure for at least 24 hours. This achieves maximum strength and stability before you use the railing. Clean any remaining residue from the railing and stairs for a finished look.
Deck Railing Specifics
Deck railings have specific code requirements. These ensure safety. The standard code requires railings to be a minimum of 36 inches for decks over 30 inches off the ground. For your deck railing design, you might plan a 42-inch tall deck railing. You could use 29-inch aluminum balusters. Required guards cannot have openings from the walking surface to the guard height. A 4-inch sphere cannot pass through these openings. This rule prevents small children from falling. For stairs, triangular openings at the open side, formed by the riser, tread, and bottom rail of a guard, cannot allow a 6-inch sphere to pass. Guards on the open side of stairs cannot have openings that allow a 4-3/8 inch sphere to pass. This careful design ensures your outdoor stair railing meets all safety standards.
You can build a DIY stair railing. Careful planning and execution make this project achievable. You balance safety, code compliance, and personal style. This creates a functional and beautiful railing. Take your time. Research thoroughly. Seek professional advice for complex aspects of your railing. You will enhance your home with a safe and stylish self-built railing. This brings great value and satisfaction.
FAQ
What are the most important safety codes for a DIY stair railing?
You must ensure your railing is between 34 and 38 inches high. Baluster spacing cannot exceed 4 inches. Your handrail needs to be graspable. It must withstand a 200-pound load. Always check local codes for your specific railing project.
Which materials are best for an outdoor stair railing?
Metal options like steel or wrought iron are excellent. They resist harsh weather. Wood works, but you must seal and refinish it often. Metal offers greater durability and less maintenance for your outdoor railing.
How can I make my DIY stair railing look unique?
You can combine different materials. Try wood with metal balusters. Consider glass panels for a modern look. Custom designs allow you to match your home’s style. This makes your railing truly personal.
Do I need a permit for my DIY stair railing project?
You often need a building permit for new construction. This includes major renovations. Check with your local building department. A permit ensures your railing meets all safety standards. It protects you from future issues.


