
Modern work and gaming demand personalized spaces. You often find off-the-shelf desks fall short. Over 28% of the global workforce operates remotely, and more than 50% of knowledge workers use remote or hybrid models. This highlights a clear need for custom setups. Building your own diy computer desk offers immense freedom. You can build a setup tailored exactly to your needs, saving money and ensuring quality. This guide helps you design and build your perfect PC setup.
Key Takeaways
Building your own computer desk lets you customize it perfectly for your needs, saves money, and ensures high quality.
Careful planning is important. Think about your space, how you will use the desk, and ergonomic features for comfort.
Choose materials like wood or metal based on your budget and desired look. Always plan your budget for materials and tools.
Popular desk designs include simple slab desks, L-shaped desks for more space, standing desks for health, and desks with built-in storage.
Follow safety rules when building. Wear protective gear, use the right tools, and always measure twice before cutting.
Why Build Your Own DIY Computer Desk
You gain many advantages when you decide to build your own computer desk. These benefits go beyond just having a place for your computer.
Customization and Personalization
You can create a workspace that perfectly fits your needs. Off-the-shelf desks often lack specific features you want. A diy computer desk allows you to design every detail. You can add unique elements:
Built-in Integration: You can add side panels. This creates a custom look within a room nook. You can even incorporate shiplap on the back wall.
Ergonomic Keyboard Trays: Design personalized keyboard trays. Place them at a lower level for comfort. You can choose flip-up or pull-out designs.
Repurposing and Dimension Adjustment: Reuse existing furniture. A three-drawer unit can become part of your desk. You can cut cabinets to match specific heights.
Material and Finish Customization: Choose specific countertops. Stain them to get your desired aesthetic. For example, you can make an IKEA Möllekulla top darker with wood wax.
Advanced Cable Management: Integrate multiple power outlets. Place them behind monitors or under the desk. Create cable chases within walls. Drill holes in cabinets to hide hard drives and route cables efficiently.
Cost Savings
Building your own desk often saves you money. Custom-sized or feature-rich desks cost much more in stores. You choose your materials. You control the labor. This helps you stay within your budget.
Quality and Durability
You control the quality of your desk. You select superior materials. You use strong construction methods. This ensures your desk lasts for many years. Thorough research helps you ensure structural stability. This is crucial for your desk’s longevity. You must test its sturdiness. Check for wobbling before you use it. Proper assembly is key. Use carpenter’s glue for legs. Let it dry overnight. This makes your desk stable. L-shaped desks need careful leg placement. They may need more legs for support. For L-shaped desks, support the corner joint. Use a sturdy leg or a floating bracket system. This enhances stability. Trestle table designs offer great stability. Their A-frame legs provide strong support. A solid butcher block top is very stable. It is also highly durable. You can build a desk that handles decades of use.
Project Satisfaction
You feel great satisfaction when you finish your desk. You created something unique. This diy computer desk is exactly what you wanted. It is a perfect gaming computer desk or work setup. You put your effort into it. You see the results. You can proudly say, “I built this.” This sense of accomplishment is truly rewarding.
Planning Your Perfect PC Desk
You begin your DIY journey by planning. Careful planning ensures your diy computer desk meets all your needs. This step saves you time and effort later.
Assess Needs and Space
First, you need to understand your requirements. Consider how you use your desk. Do you game, work, or both? How much equipment do you have? Then, look at your available space.
You must consider the overall room size. A compact home office typically needs between 70 and 100 square feet. This accommodates a standard desk, an ergonomic chair, and storage. Creative workspaces often require 100 to 150 square feet. These spaces need larger surfaces and more storage. Collaborative offices need 150 square feet or more. This supports multiple desks and meeting areas. Dedicated home offices in the US usually range from 100 to 150 square feet. Smaller homes might have offices of 70 to 90 square feet. Larger homes can accommodate 100 to 150+ square feet.
You also need critical spatial measurements for the desk itself.
Measurement | Typical Range (Inches) | Notes |
|---|---|---|
Width | 48 – 72 | Provides surface area for monitors, accessories, and workspace. Varies by intended use. |
Depth | 24 – 36 | Essential for monitor, keyboard, and other essentials without feeling cramped. |
Height | 29 – 30 | Standard for most users; ideal height varies by user height and chair. Adjustable height is recommended for ergonomics. |
Home Office Desk Width | 48 – 60 | Balances functionality and space efficiency. |
Home Office Desk Depth | 24 – 30 | Allows space for computer, documents, and supplies. |
Gaming Desk Width | 60 – 72 | Accommodates multiple monitors, peripherals, and tower. |
Gaming Desk Depth | 30 – 36 | Ensures comfort during long gaming sessions. |
Professional Workstation Width | 60 – 72 | Needs more surface area and storage. |
Professional Workstation Depth | 30+ | Advisable for graphic design or programming. |
L-Shaped Desk (each side) | 60 – 72 (width), 24 – 30 (depth) | Offers ample workspace, ideal for corner setups. |
You should position the desk to maximize natural light. Avoid screen glare. The window should ideally be to the side. Ensure enough space to move comfortably between the desk, chair, and other furniture. Avoid high-traffic areas. Corner desks and L-shaped desks optimize space in smaller rooms. They also create dedicated work zones. If your room has multiple functions, use furniture and layout to create distinct zones. This helps with organization and professionalism.
Ergonomics for Comfort
Ergonomics ensures your desk supports a healthy posture. This prevents strain and discomfort. You want your desk to be comfortable for long hours.
For seated positions, your desk should allow your elbows to form a 90-degree angle. Your forearms should be parallel to the floor. An ideal seated desk height for the average person is between 64 to 76 cm. For standing positions, your elbows should also be at a 90-degree angle while typing. Your monitor should be at eye level. You should distribute your weight evenly. If you are tall, height-adjustable desks are best. They accommodate longer limbs. Your feet should be flat on the ground. Your knees should be at a 90-degree angle. If you are shorter, height-adjustable desks prevent discomfort from desks that are too high. This avoids raised shoulders or strained wrists. You can also use footrests to keep your feet flat on the ground.
The viewing distance to your monitor is also important. The optimal viewing distance between your eyes and a computer monitor is generally between 20 and 40 inches (50 and 100 cm). This is about an arm’s length away. This distance minimizes eye strain and ensures comfortable viewing. Screen size and resolution influence this ideal distance.
For a 27-inch monitor, the recommended distance is 20 to 30 inches (50 to 75 cm).
For a 24-inch monitor, the recommended distance is 20 to 30 inches (50 to 75 cm).
For a 32-inch monitor, the recommended distance is 28 to 40 inches (70 to 100 cm). Larger screens need more distance to keep the entire display within your field of view.
Larger screens or higher resolutions may allow for slightly different viewing distances. Higher-resolution monitors, like 4K, let you sit closer without pixelation. Lower-resolution displays might require you to sit further away for clarity. Maintaining the correct distance (20-40 inches) encourages a neutral posture. This prevents slouching from sitting too close. It also prevents leaning forward or squinting from sitting too far. Ergonomic recommendations suggest an ideal screen viewing distance between 20-30 inches (50-76 centimeters). You should adjust this based on your personal comfort. Consider the specific tasks you perform. Also, think about individual factors like font size and screen dimensions. Do not rely solely on generic guidelines like the ‘arm’s length’ rule.
Essential Features
Think about the features you want to include in your plans. These features enhance functionality and organization.
Monitor Mounts: Integrate VESA mounts directly into the desk structure. This frees up surface space.
Cable Management: This is crucial for a clean setup. You can create bone-shaped pieces from rubber or cardboard to wrap long cables. Cable ties or Velcro straps bundle cables effectively. Velcro straps are reusable. Zip ties and cable clips are inexpensive. They bundle cables and attach them to surfaces. Use low-impact clips to protect paint. Duct tape secures cables together or holds them in place. You can tape them down to a desk or wall. Integrate power bars and cables into a desk with shelves. Drill holes for connections. This creates an invisible cable tray. Wire sleeves collect and untangle multiple wires. They offer a minimalist look. A foam organizer uses a strip of foam rubber and Velcro. It creates holes for inserting and organizing chargers and USB cords. You can also build in grommets or a back panel. Route cables through these features. This keeps them organized and hidden. Built-in cable troughs or trays efficiently hide cables. They maintain a tidy workspace. Attach cable raceways or sleeves to a standing desk’s frame or legs. This allows smooth height adjustments while keeping cables hidden. Adhesive cord holders or clips attach cables under the desk. This keeps them out of sight.
Storage: Consider shelves, drawers, or hidden compartments.
Power Outlets: Integrate multiple power outlets. Place them conveniently.
Integrated USB 3.0 Ports: Add 4 or 6 USB ports for easy access.
Ethernet Jacks: Include 2 Ethernet jacks for reliable network connections.
LED RGB Controller: If you build a gaming pc desk, an integrated LED RGB controller adds aesthetic appeal.
When you design your desk, focus on core functionality. Avoid unnecessary features. These might bloat the desk or become obsolete. Create a desk just big enough for your needs. Avoid wasted space. Incorporate elements like a cabinet for storage. Use a light-looking leg to maintain an open feel. You can tastefully add some features like LEDs. Prioritize essential functions and a clean design. You can adapt or enhance it later.
Material Selection
Your choice of materials impacts the desk’s look, durability, and cost. You have many options beyond traditional wood.
Wood: Plywood, butcher block, or solid hardwood are popular choices. They offer strength and a classic aesthetic.
Metal: Steel or aluminum frames provide industrial strength. You can combine them with other surfaces.
Laminate: This offers a durable, easy-to-clean surface. It comes in many finishes.
MDF sheets: Medium-density fiberboard is a cost-effective option. You can paint or laminate it.
Aluminum: You can use aluminum tubing or profiles for lightweight yet strong structures.
Upcycled elements: Repurpose old bookshelves or other furniture. This adds character and saves money.
Consider the weight your desk needs to support. Think about the tools you have for working with different materials.
Budgeting Your Build
You need a clear budget for your build. This helps you manage costs.
Materials: List all the wood, metal, fasteners, and finishes you need. Research prices from different suppliers.
Tools: Do you need to buy any new tools? Factor these costs into your budget.
Hardware: Include costs for monitor mounts, cable management solutions, power strips, and USB hubs.
Finishing Supplies: Account for sandpaper, stain, paint, and sealant.
Compare the cost of your plans to pre-built desks. You often find significant savings, especially for custom sizes or features. This makes your gaming computer desk project even more rewarding.
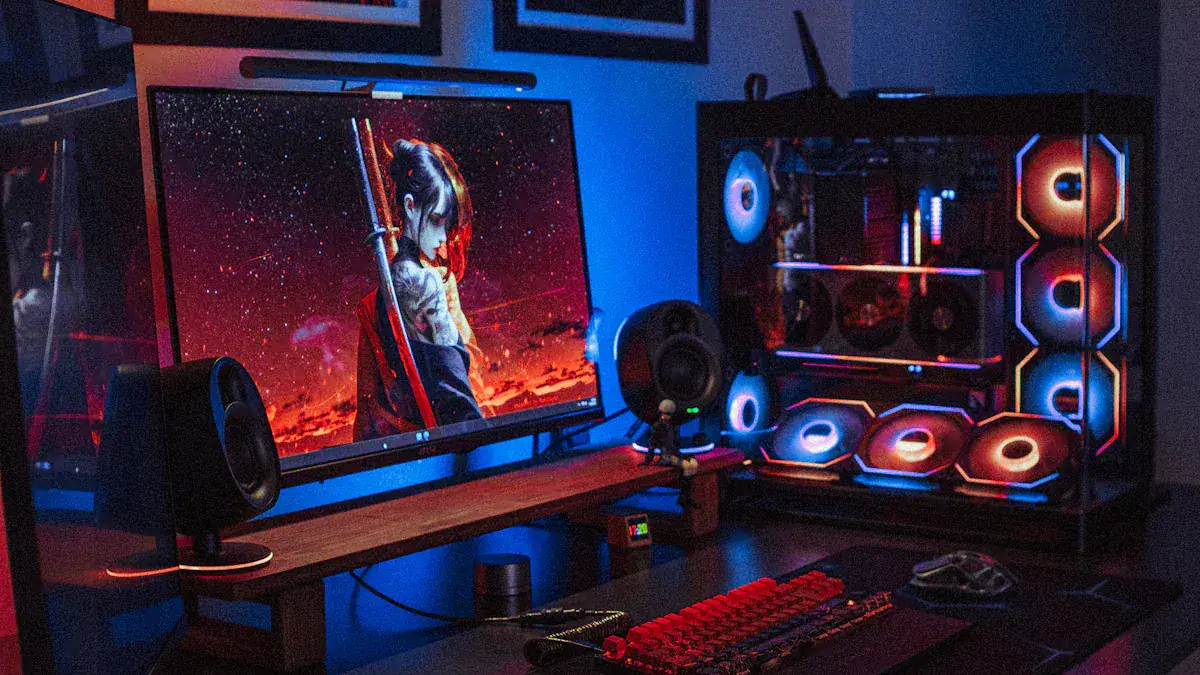
Popular Gaming Computer Desk Designs
<<>>
Popular Gaming Computer Desk Designs
You can choose from many popular designs for your gaming computer desk. Each design offers unique benefits. You can tailor these designs to your specific needs.
Simple Slab Desks
You can easily build a simple slab desk. This design uses a flat surface on top of legs or cabinets. A single sheet of ¾ plywood works well. You can combine it with ¼ birch plywood for a thicker, stronger surface. You apply wood glue in grooves. You insert wood strips to join the top and sides. Use a triangle ruler square and 90-degree clamps. This ensures a perfect 90-degree angle as the glue dries. Metal braces add extra support underneath. You can also install 90-degree triangular wood pieces in back corners. Birch laminate edging covers visible plywood layers. You use an iron to activate the glue. Sand any overhang for a smooth finish. Sand the desk with 160-grit, then 220-grit sandpaper. You can stain it with Danish oil or other stains. Seal it with polycrylic for protection.
You can use common materials for the surface. IKEA Karlby countertops are popular. They offer good size and affordability. Solid-core doors are cheaper. You can find them used. You might need to stain or cut them. For legs, you have many options. Standard desk legs or industrial pipes work. Adjustable legs, like IKEA Olov legs, offer ergonomic benefits. Filing cabinets or drawer sets provide support and storage. Anti-sag stiffeners are good for large surfaces. You prepare the surface by sanding and staining. You plan for ergonomics. You place parts like legs and cable management. You assemble with pilot holes. You attach the legs. You check stability and height. Finally, you set up your workspace. These plans help you create a sturdy desk.
L-Shaped and Corner Desks
L-shaped desks give you a lot of space. They offer two desktop surfaces. You can spread out documents. You can use multiple devices. These desks do not take up too much room. Many L-shaped desks focus on ergonomics. They enhance comfort and productivity. You can add storage like hutches or shelves. You can place external storage units next to the desk. This keeps your workspace tidy. Built-in cable management is important. Grommets or cable ties keep wires neat. This is key for multiple monitors or a gaming pc desk setup. Durable materials like solid wood or metal ensure longevity.
Standing Desk Builds
You can build a standing desk for better health. These desks let you switch between sitting and standing. The Solo Ryzer Frame is one option. It converts a regular table into an adjustable standing desk. It has easy up/down motion control. Another method uses Kee Klamp Fittings with extra pipes. Four additional pipes act as adjustable legs. You adjust the desk height by tightening or loosening a set screw.
Integrated Storage Desks
Integrated storage keeps your area clean. Foldable desks offer hidden compartments. They store small items like stationery. You can tuck them away when not in use. This saves space in multi-purpose rooms. Convertible desks have modular storage. You can rearrange components for different tasks. Vintage-inspired secretary desks have fold-down surfaces. They include many small drawers. These offer practical organization. They provide hidden storage when folded down.
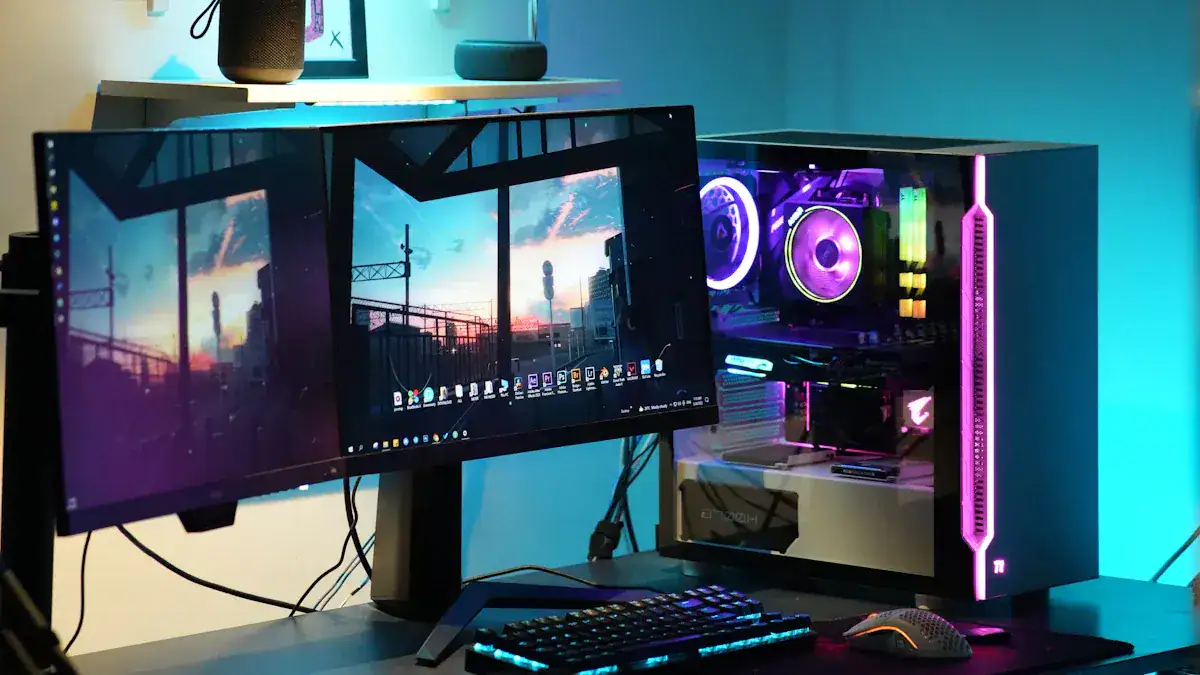
PC Integration Designs
You can integrate your PC directly into your desk. This creates a very clean look. You build the entire PC into a drawer. You can also build it directly into the desk structure. You can make components viewable through the desk. This is a popular choice for a custom gaming pc desk. These plans allow you to showcase your hardware. <<>>
Step-by-Step Building Tutorial
You can build a modern industrial gaming computer desk. This step by step tutorial guides you through the process. Even if you have no prior building experience, you can follow these instructions. Many step-by-step tutorials and printable plans are available to help you.
Gather Tools and Materials
Before you start, you need to gather all your tools and materials. Having everything ready saves you time. It also makes the building process smoother.
For power tools, you will need:
A circular saw for long, straight cuts.
A mitre saw for precise angle cuts.
An orbital sander with 120-grit sandpaper for smoothing surfaces.
An electric drill for making holes and driving screws.
Your essential hand tools include:
A Japanese hand saw for detailed cuts.
Clamps, both quick-grip and sash types, to hold pieces together.
A pocket hole jig for strong, hidden joints.
You also need your chosen materials. This includes wood, fasteners, and finishing supplies. Refer back to your initial plans for the specific materials you selected.
Measure and Cut
Precise measurements and accurate cuts are crucial for a sturdy desk. You must take your time during this stage.
Invest in quality measuring tools. Choose tools made of durable materials like stainless steel or aluminum. Look for etched markings and features like locking mechanisms.
Understand wood movement. Wood expands and contracts with moisture changes. Acclimate your wood to your workshop environment. Consider the grain direction when you plan your cuts.
Use the right marking tools. A sharp pencil makes fine lines. Marking knives create precise joinery. Chalk lines help you mark long, straight lines.
Master measurement transfer. Use tick marks, story sticks, or direct transfer. This helps you avoid errors.
Measure twice, cut once. This fundamental rule prevents costly mistakes.
Use jigs and templates. These ensure identical parts and accurate cuts.
Familiarize yourself with fractional and decimal measurements.
Develop a system for marking and labeling. Use symbols, color-coding, or numbering. This enhances accuracy.
Calibrate your measuring tools regularly. Check combination squares, tape measures, and calipers for precision.
For highly accurate measurements, especially when you fit a divider between two rails, avoid using a ruler or tape measure. Instead, place the workpiece directly against the opening. Then, mark the dimension onto the workpiece itself. This method minimizes potential errors from measuring and then transferring that dimension.
Assembly Techniques
You will now join your cut pieces. Strong joints ensure your desk’s durability.
Pocket-hole joints are highly recommended. They offer strength, versatility, and ease of use. They are suitable for various woodworking projects, including sturdy computer desks. These are among the easiest strong wood joints for beginners. They are standard in the woodworking industry due to their reliability, durability, and adaptability. Pocket screws work from the inside out. They pass through end grain and screw into the long grain of the mating part. This provides a tighter grip. This method ensures a surprisingly strong joint. You can often hide the holes. A “Knockdown Computer Desk” project used pocket screws to attach support pieces for a keyboard tray. This shows their practical application for desk assembly.
Lap joints offer decent strength and versatility. Reinforce them with screws or dowels. They are suitable for certain applications, but not for very heavy loads.
Dado joints create solid connections. They are particularly useful for cabinets and shelves. They provide a larger gluing area and better alignment. This contributes to a sturdy desk structure.
Always use wood glue with your fasteners for maximum strength. Clamp your pieces together while the glue dries.
Finishing Touches
Finishing your desk protects the wood. It also enhances its appearance.
Sanding:
Begin sanding with medium-grit sandpaper (around 120-grit) across the entire desk. Focus on rough spots, scratches, or old paint.
Sand in the direction of the wood grain. This prevents visible scratches.
Follow up with finer grit sandpaper (around 220-grit). This achieves an ultra-smooth finish.
Wipe down the desk with a tack cloth. This removes all sanding dust.
Pro Tip: Use an orbital sander for larger surfaces. This speeds up the process. Always wear a mask to avoid inhaling dust.
Staining:
Apply your chosen stain with a brush or rag.
Wipe off any excess stain. Allow it to dry completely.
Apply additional coats as desired to achieve your preferred color depth.
Sealing:
Apply a coat of sealer, such as water-based polyurethane, with a sponge brush. Let it dry.
Lightly sand the first coat with 220 or 300-grit sandpaper.
Repeat these steps one to two more times. Sand after the second coat.
Finish Type | Characteristics | Application Method | Notes |
|---|---|---|---|
Polyurethane | Hard, durable surface; can yellow over time | Brush or spray | Great for high-traffic surfaces; less suitable for light colors |
Polycrylic | Dries clear; won’t yellow | Brush or spray | Ideal for lighter finishes |
General Tip | Lightly sand between coats | Brush-on: more control, may need sanding; Spray: convenient, faster drying | Use fine-grit sandpaper between coats for a smoother, more durable finish; ensure good ventilation for sprays |
Safety Precautions
You must prioritize safety when you use power tools.
PPE Item | Purpose/Protection | When to Use |
|---|---|---|
Safety Glasses/Goggles | Protects eyes from flying debris, dust, sparks, and chemical splashes. | All power tool operations, especially cutting, grinding, drilling, and fastening. |
Hearing Protection | Prevents noise-induced hearing loss from loud machinery. | When noise levels exceed 85 dBA (most power tools easily surpass this). |
Work Gloves | Protects hands from cuts, abrasions, and punctures. (Avoid near some rotating machinery). | Handling rough materials, operating tools with high vibration. |
Dust Masks/Respirators | Protects lungs from inhaling fine dust (wood, silica), fumes, and airborne particles. | Sawing, sanding, grinding, demolition, mixing concrete, working with insulation. |
Steel/Composite-Toe Boots | Protects feet from falling objects, compression, and punctures. | All job site environments, especially during demolition, framing, and heavy material handling. |
Always read your tool’s manual. This is essential for understanding specific hazards, assembly, and maintenance. Maintain a proper grip and stance. This ensures control over the tool and prevents overreaching. Maintain focus and avoid distractions. This is crucial for preventing accidents. Power down tools before you have conversations. Use the right tool for the job. This prevents poor results, tool failure, binding, or kickback. Always disconnect power for adjustments. Unplug or remove the battery before you change accessories. This prevents accidental activation. Never bypass safety features. Guards, interlocks, and anti-kickback pawls are designed for protection. You should not modify or remove them.
Optimize Your PC Setup
You can elevate your DIY computer desk experience. Optimize your PC setup for both function and aesthetics. These enhancements make your workspace more efficient and enjoyable.
Advanced Cable Management
You want a clean and organized desk. Advanced cable management is essential. You can use channels, grommets, and hidden compartments. These features keep wires out of sight. You can route cables through built-in troughs or trays. This maintains a tidy workspace. Adhesive cord holders or clips attach cables under the desk. This keeps them out of sight. For standing desks, attach cable raceways or sleeves to the frame. This allows smooth height adjustments.
Integrated Lighting
Integrated lighting enhances your desk’s look and function. You can add LED strips or other custom lighting solutions. LED strip, rope, or tape lighting works well for ambient light. Place it under the desk lip or behind your monitor. These lights offer illumination without clutter. RGB options let you change colors for different moods.
Monitor Arm Placement
Proper monitor arm placement is crucial for comfort. The top of your screen should be at or slightly below eye level. Aim for about 2-3 inches below. Position the screen at least an arm’s length away from you. You should sit directly in front of the screen. This prevents neck twisting or craning. A height-adjustable monitor arm allows precise and easy adjustments. A desk depth of 20 to 30 inches is ideal. A 24-inch deep desk provides enough space for a keyboard and mouse. This allows a comfortable monitor viewing distance. Desks from 27 to 30 inches deep offer more flexibility. This is good for larger monitors or spread-out workflows.
Peripheral Organization
You can keep your peripherals organized. This reduces clutter. Consider specific tools for your gear.
Controller Holders: A dual game controller desktop holder stand works for Xbox, PS5, PS4, and PC controllers. You can find universal designs.
Headphone Stands: The BMEGA Headphone Stand suits all headsets.
Multi-Device Organizers: Some organizers hold game controllers, TV remotes, pens, and stationery. These reduce desktop clutter.
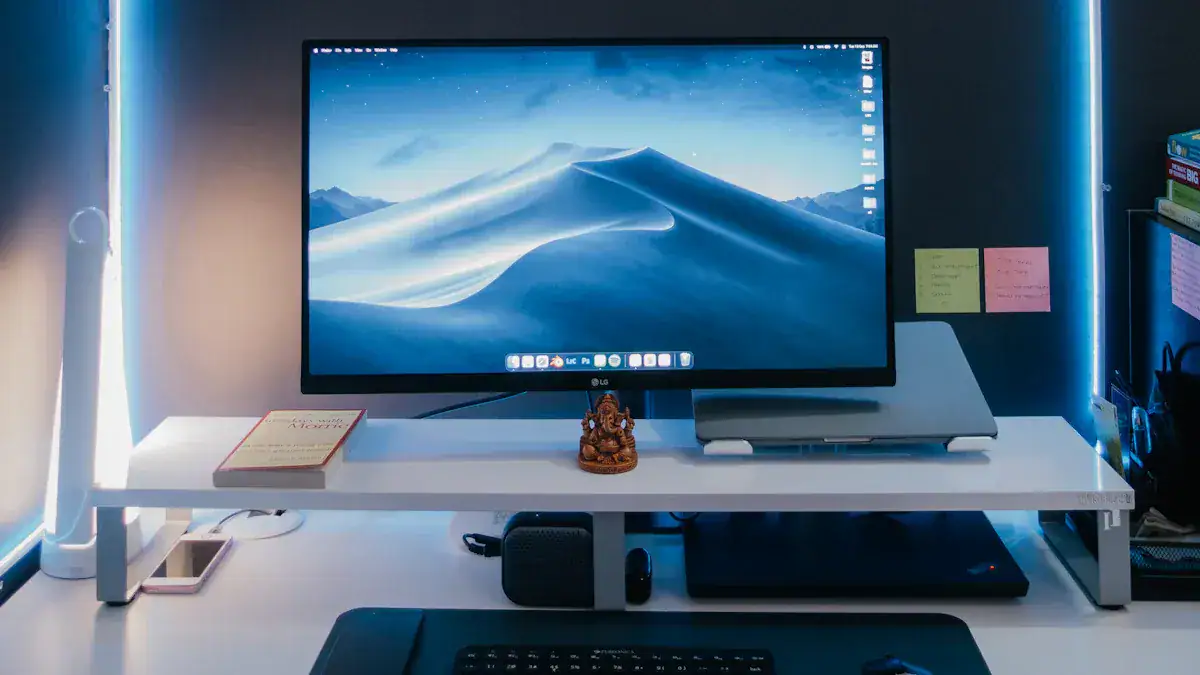
Personalizing Accessories
You can personalize your desk with accessories. This reflects your style. Add a custom mouse pad. Choose unique desk mats. Display figures or artwork. These small touches make your workspace uniquely yours.
You gain immense value building your own custom computer desk. You achieve a perfectly tailored, ergonomic, and aesthetically pleasing workspace. These detailed plans help you create a desk that truly fits your needs. Embark on your DIY journey. With careful planning and execution, you can build a desk. This diy computer desk elevates your PC experience. Your careful plans make it possible. Share your creations and inspire others.
FAQ
What materials are best for a DIY computer desk?
You can use various materials. Plywood, butcher block, and solid hardwood offer strength. Metal frames provide industrial support. Laminate gives a durable, easy-to-clean surface. MDF sheets are cost-effective. Choose materials based on your budget and desired look.
What tools do I need to build a simple desk?
You will need basic tools. A circular saw helps with straight cuts. A drill makes holes and drives screws. An orbital sander smooths surfaces. You also need measuring tape, clamps, and safety gear. These tools help you complete your project.
How can I make my DIY desk ergonomic?
You can adjust your desk for comfort. Ensure your desk height allows your elbows to form a 90-degree angle. Your monitor should be at eye level. Your feet should rest flat on the floor. Consider an adjustable-height frame for flexibility.
What is advanced cable management?
Advanced cable management hides and organizes your wires. You can use channels, grommets, and hidden compartments. Cable ties and Velcro straps bundle wires. Built-in troughs or adhesive clips keep cables out of sight. This creates a clean and tidy workspace.
What are PC integration designs?
PC integration designs build your computer directly into the desk. You can place the entire PC inside a drawer. You can also integrate components into the desk structure. This creates a very clean setup. You can even make parts visible through the desk.

