
Does your laundry room feel like a constant battle with clutter? Many homeowners find laundry room organization frustrating. They often lack enough storage. This makes the space difficult to use. You might struggle to keep it neat. However, effective planning can transform your laundry space. DIY shelving ideas provide cost-effective, customizable solutions. This blog post offers practical ways to build your own diy laundry room shelf. A well-organized laundry area boosts efficiency. It lowers stress. It also makes your home look better.
Benefits of DIY Shelving
Cost-Effective Organization
Building your own shelving saves you money. You avoid the higher costs of buying pre-made units or hiring professionals. DIY projects let you control your budget. You can choose materials that fit your financial plan. This makes diy shelving ideas a smart choice for organization without overspending. You get functional storage for less.
Customization for Unique Spaces
Every laundry room is different. Some have odd corners or unusual layouts. Store-bought shelves might not fit well. When you build your own shelving, you can design it perfectly for your space. You measure and cut to exact specifications. This means you maximize every inch of your laundry area. Your custom diy shelves will fit like a glove.
Enhanced Efficiency and Storage
A well-organized laundry room makes your daily tasks easier. Maximizing storage and reducing clutter improves your daily life. You find what you need quickly. Practical solutions enhance efficiency. This transforms your laundry area into a functional and inviting space. An organized layout improves your workflow. It reduces frustration from cluttered areas. A well-organized laundry room promotes efficiency and reduces stress. Consider these ideas for better efficiency:
Create a designated space for a laundry basket for each family member. Add one for towels.
Have a folding surface above the basket space.
Fold clothes directly from the dryer. Place them into the correct basket.
Use transparent bins or labeled jars for supplies. This saves time. It makes your routine more enjoyable.
Increased Home Value
A functional and attractive laundry room can increase your home’s value. Many home buyers look for a good laundry space. A 2021 study showed 87% of people considered a laundry room necessary. Almost half of respondents would not consider homes without a separate laundry room. Buyers often want a sink and good storage for items like ironing boards. Upgrading with custom shelving can make your laundry room more appealing. A remodeled laundry room, including a sink and ample storage, can recoup a large part of its cost.
Planning Your Laundry Room Shelving
Before you start building, you need a clear plan. This initial assessment helps you create effective shelving for your laundry room. You will understand your specific needs and space limits.
Assess Your Laundry Space
You should begin by thoroughly examining your laundry room. Measure the length and height of your walls. Note any windows, doors, or existing fixtures. Consider your washer and dryer type. Top-loaders require different shelf heights than front-loaders. Think about the available vertical space. This helps you maximize your laundry space for shelving.
Identify Storage Needs
Next, determine what items you need to store. Do you have detergents, fabric softeners, or stain removers? Do you need a dedicated spot for an ironing board, clothes hampers, or drying racks? Make a detailed list of everything. This helps you decide the type and amount of storage you need. These tips help you create practical storage solutions.
Choose the Right Materials
Selecting the correct material is crucial. Your laundry room often has high humidity. You need durable, moisture-resistant options. Consider treated hardwood. It offers long-term performance. It withstands humidity and daily use when properly sealed. Marine-grade plywood is also highly reliable. It handles humidity well when sealed. Moisture-resistant MDF (HMR board) is a budget-friendly choice. It has a smooth, paintable surface. Stainless steel and aluminum provide excellent moisture resistance. They offer a sleek, industrial look. Eco-friendly options like bamboo or recycled wood composites are also available. They have advanced coatings to resist high humidity. Plywood is strong and resists warping. It is cost-effective. Proper sealing improves durability by up to 35%. Studies show sealing extends the lifespan of materials in humid environments. High-quality finishes also enhance longevity.
Understand Weight Capacity
You must know how much weight your shelves can safely hold. This prevents accidents. It ensures your shelving lasts a long time. For example, wood shelves (3/4-inch thick) typically hold 40–50 pounds per foot. Wire shelving is sturdy. It uses reinforced metal rods. This distributes weight efficiently. Always check the manufacturer’s guidelines for specific materials. This ensures your laundry room shelving is safe and functional.
Popular DIY Shelving Styles
You have many options when you choose a DIY shelving style for your laundry room. Each style offers unique benefits. You can pick the best one for your space and needs.
Open Shelving for Easy Access
Open shelving provides quick access to your laundry supplies. It also creates an airy, clean look. You can use shallow shelves, about 8-10 inches deep, above your washer. This keeps sightlines clear. It makes your laundry room feel more open. Store items you use often in clear jars or matching bins. This reduces visual clutter. Wire shelving also works well. It allows good airflow and collects less dust. You can pair wire shelves with woven baskets or fabric bins. This softens the industrial look.
Consider combining open and closed storage. You can alternate open shelves with shallow cabinets. This lets you display attractive items. It also hides less appealing supplies like stain removers. You can even style your shelves like a mini-mudroom. Fold towels neatly. Add small plants. Use labeled jars and trays for small items. This requires regular upkeep. You can also use tall vertical shelving. Leave space for a slender rolling cart. High shelves can hold lighter items. The cart can store detergents for easy reach.
Always use moisture-resistant materials. Painted plywood, sealed MDF, metal, or powder-coated steel work well. This is especially important near washers and dryers. Install shelves 12-18 inches above appliances. This gives you room for tall bottles. It also prevents head bumps. Measure with your machine in place. Open shelves encourage organization with baskets and jars. Consistency helps prevent clutter. Use washable liners in baskets. Schedule weekly cleaning to minimize lint and dust. Ensure clearance around your dryer for easy vacuuming. Store chemicals like detergents and bleach safely. Keep them out of reach of children and pets. Labeled bins are a good idea. You can style affordably. Use uniform jars, thrifted baskets, and small plants. A consistent color palette makes inexpensive items look cohesive. Use open shelves for display and daily access. Use cabinets for bulkier items. This reduces visual fatigue. These design ideas help you create a functional and beautiful laundry space.
Floating Shelves for Modern Look
Floating shelves offer a sleek, modern look. They appear to float on the wall without visible supports. This creates a minimalist aesthetic. When you install floating shelves, you must ensure they are secure. Always install floating shelves into at least one wall stud. Attaching to two or more studs is much better. Never use only wall anchors. The shelf’s weight will lever them out. The best practice involves installing the shelf into wall blocking. This might require professional help. Studs are critical for supporting floating shelves. Fastening without hitting studs will damage your drywall. Your shelf will fall.
If bracket holes do not line up with studs, you can drill new holes in the bracket. This lets you hit a stud. For maximum strength, attach into every stud the bracket crosses. Blocking means placing horizontal wood pieces between studs. This allows every hole in the bracket to screw into solid hardwood. This significantly increases strength. You can use a stud finder, nail, or thin drill bit to locate studs. Mount the floating shelf bracket into each stud. Use drywall anchors in every other available hole. For small floating shelves in areas without studs, use all included wall anchors. Remember, strength will be reduced. A very strong installation method involves attaching a steel bracket to the sides of the studs. This may require accessing studs before drywall or by removing and patching drywall. This creates a robust support system. It can hold significant weight. Always anchor shelves securely to wall studs or appropriate wall anchors. Stud installation ensures maximum load-bearing capacity. It reduces the risk of shelves becoming loose or falling. If stud placement is not practical for your diy project, use specialized drywall anchors rated for heavy loads. Proper installation is crucial for safety, stability, and long shelf life.
Built-In Shelves for Seamless Integration
Built-in shelves offer a custom, seamless look. They blend perfectly with your laundry room’s design. You can tailor their colors and finishes. This matches your home’s aesthetic. Built-in shelving elevates your home’s harmony and appeal. These shelves maximize every square inch of available space. You design them to fit your specific room layout. Built-in shelving allows for specialized features. You can have built-in shelving for folded linens. You can add pull-out bins for sorting. You can include compartments for cleaning supplies. This makes laundry tasks easier and more efficient. It reduces clutter.
Built-in solutions increase your property value. They become an attractive feature for future buyers. They provide an integrated style that complements your home. You can select finishes, door styles, and hardware. This matches your personal taste. For example, you can choose modern minimalism with flat-panel doors. Or you can choose traditional with stained wood. You can match cabinetry to other rooms. This creates a cohesive, whole-home design. Built-in options offer tailored storage for your needs and room dimensions. They improve organization. They provide a designated place for everything. They maximize space, even in small closet-style laundry areas. You can include floor-to-ceiling cabinets for detergents. You can add deep drawers for bulky items. You can install pull-out hampers and adjustable shelving. Incorporate drying racks. Wall-mounted, pull-out, or built-in racks save floor space for delicate garments. These laundry room shelving ideas truly transform your space.
Corner Shelving for Maximizing Space
Corners often go unused in a laundry room. You can turn these overlooked areas into valuable storage. Corner shelving, whether standing or floating, maximizes this space. You can install triangular shelves in a corner. This provides a perfect spot for detergents or small baskets. Another great space-saving solution is a rolling cart. You can store supplies on it. You can move it as needed. It fits into unused corners of your laundry area. This makes your laundry room more functional.
Adjustable Shelving Systems
Adjustable shelving systems offer incredible flexibility. You can reconfigure shelf heights quickly. You do not need tools. This makes them perfect for evolving storage needs. These systems provide complete customization. You can tailor solutions for diverse items. This ensures efficient storage and easy access. Adjustable shelving prevents material decay. This reduces equipment replacement costs. It also maintains item longevity. It minimizes damage from environmental factors. It reduces loss.
Adjustable shelving provides the flexibility to adapt and expand. It meets changing storage needs. These systems offer total flexibility. Shelf heights can be reconfigured fast. They optimize space. They eliminate unused areas between shelves. They are strong and stable. They can hold heavy items. This ensures secure storage. No tools are required for setup and modifications. This benefits renters and mobile businesses. Many come with a corrosion-resistant finish. This offers durability and a polished look. It suits various environments. Adjustable shelving allows you to tailor storage solutions. This works for books, periodicals, multimedia, medical supplies, and equipment. This adaptability ensures efficient management. It avoids costly overhauls as inventory changes. These systems enhance efficiency and productivity. They provide organized and accessible storage. This reduces time spent searching for items. It leads to higher productivity and lower labor costs. They support lean operations. They optimize space and material flow. They offer the flexibility, efficiency, and customization needed for growth. They prepare you for expansion, relocation, and diversification. Cantilever shelving, for example, allows vertical expansion and adjustable heights. This maximizes storage capacity within your existing footprint. This is especially true when integrated with high-density mobile systems.
Beyond Basic Shelving: Creative Storage

You can go beyond simple shelves. Think about innovative ways to organize your laundry room. These creative storage solutions use vertical space well. They also combine different functions. You will make your laundry area much more efficient.
Shelves with Integrated Hanging Rods
You can add hanging rods to your shelves. This gives you a place to hang clothes right after washing or drying. You can hang delicate items to air dry. You can also hang clothes that need ironing. This saves you steps. It keeps your clothes from wrinkling. Typically, you install these hanging rods 40–48 inches above counters or your washer. This height works well for drying clothes. This type of shelving adds great functionality to your space.
Pull-Out Shelves and Bins
Pull-out features make your laundry tasks easier. They help you access items without reaching deep into cabinets. You can use different types of pull-out hampers.
Single-bin pull-out hampers: These have one compartment. You can store dirty laundry here.
Multi-bin pull-out hampers: These offer separate sections. You can sort laundry by color or type. This helps you stay organized.
Discreet pull-out laundry hampers: These fit inside cabinets or drawers. They hide dirty laundry. They keep your room tidy.
You can also use full-extension laundry room storage shelves. These shelves slide out completely. You can reach all your laundry essentials easily. This maximizes your storage space. You can also install pull-out laundry room shelves below your washer and dryer. This creates a barrier. It gives you easy access to the area underneath. These pull-out options help you manage your laundry with less effort. They keep your baskets out of sight.
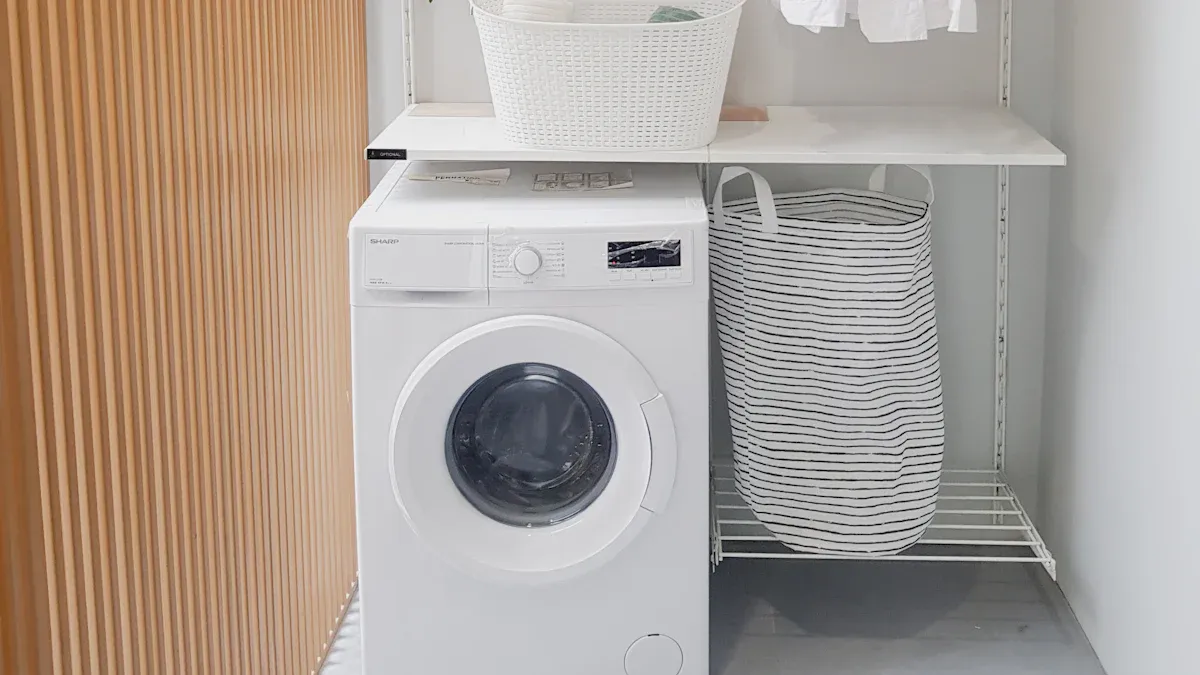
Over-Appliance Desk-Like Shelves
You can build a sturdy shelf over your washer and dryer. This creates a flat surface. You can use it like a desk. It is perfect for folding clothes. You can also use it to temporarily hold laundry baskets or supplies. This maximizes the space above your appliances. It gives you a dedicated workspace. This simple diy project adds great functionality.
Wall-Mounted Drying Racks
Wall-mounted drying racks are excellent space-saving solutions. They help you dry clothes without taking up floor space. These racks are very compact. You can quickly fold them up. This allows you to store them in tight spaces. This feature is especially helpful if you do not have a dedicated laundry room. Models like the Brabantia wall-mounted rotary dryer are very efficient. They collapse easily. You can fold them away when you do not need them. This keeps your space neat and uncluttered.
Cabinets Above Washer/Dryer
Installing cabinets above your washer and dryer offers excellent enclosed storage. These cabinets hide away detergents, cleaners, and other laundry supplies. This creates a clean and uncluttered look. You can choose cabinets that match your home’s style. This provides a seamless, built-in appearance. These cabinets offer great functionality and storage. They keep your laundry room tidy. This diy shelving ideas approach helps you organize your space effectively.
DIY Shelving Installation Guide
Installing your own shelves can seem daunting. However, with careful planning and the right approach, you can achieve professional results. This guide provides clear steps. It helps you install sturdy and level shelves in your laundry room.
Gather Tools and Materials
Before you begin, collect all necessary tools and materials. This saves time and prevents interruptions. You will need your chosen shelves and brackets. You also need a level, a stud finder, a tape measure, and a pencil. Have a drill with appropriate bits. You will also need wall anchors and screws. The type of wall anchors depends on your wall material. Make sure you have everything ready.
Measure and Mark Placement
Accurate measurements are crucial for successful shelf installation. You want your shelves to be level and secure.
Apply Blue Painter’s Tape: Run a strip of blue painter’s tape along the wall. Place it at your desired shelf height. Use a bubble or laser level to ensure the tape is perfectly straight. This tape acts as a temporary guide. It protects your wall from pencil marks.
Mark Bracket Placement on Tape: Measure and mark where your brackets will go directly onto the tape. Try to align these marks with wall studs if possible. If not, plan to use wall anchors.
Locate Wall Studs: Use a stud finder to locate wall studs. Mark their centers. Attaching shelves to studs provides the strongest support. This is especially important for heavy items.
Remove the Tape: Carefully peel off the blue painter’s tape once you have marked your bracket positions. This leaves your wall clean.
For accurate and secure shelf placement, always try to anchor into solid structures like wood studs. If studs are not accessible, use appropriate anchors for your specific wall type. Use heavy-duty toggle bolts for drywall. Use specialty anchors for plaster. Use masonry screws for brick and concrete. For steel stud walls, use metal stud brackets or anchors designed for metal. You must choose hardware and fasteners compatible with your wall material. This ensures your shelves remain securely mounted.
Remember these installation tips:
Measure twice (or even three times!) before drilling any holes.
Use a level at every step. Check when mounting brackets, installing standards, or positioning pilasters.
For long shelves or multiple brackets, mark all positions on the wall first. Double-check their alignment.
Secure Brackets and Supports
Properly securing your brackets is key to shelf stability.
Pre-drill Holes: Make small pilot holes where you marked for your screws. This prevents wood from splitting. It also makes driving screws easier.
Install Screws or Anchors: If you hit a stud, drive screws directly into the wood. If you are drilling into drywall or plaster, install the appropriate wall anchors first.
Drywall: Toggle bolts are excellent for drywall. They can hold significant weight. They are good for heavy items.
Plaster: Self-drilling metal anchors work well for plaster walls. They are sturdy and effective.
Stud: No anchor is needed when you screw directly into a wood stud. This provides a very secure hold.
Attach Brackets: Hold each bracket in place. Align it with your marks and the pre-drilled holes. Drive the bottom screw first, but do not tighten it completely. This allows for minor adjustments.
Level and Tighten: Use your level to ensure the bracket is perfectly straight. Then, drive the top screw in fully. Tighten the bottom screw completely. Repeat this process for all brackets.
Level and Finish Your Shelves
Now you will install the shelves themselves and ensure they are perfectly level.
Position Shelves: Place your shelf onto the secured brackets. Align any pre-drilled holes in the shelf with the brackets.
Fasten Shelves: Secure the shelf to the brackets with screws. If your shelves do not have pre-drilled holes, use fasteners that will hold them firmly to the brackets.
Final Level Check: Use your level one last time. Check that the shelf is perfectly horizontal before you fully tighten all screws. This ensures a stable and attractive result.
Address Uneven Walls: If your wall is slightly uneven, you can use thin wooden shims behind the brackets. This helps you achieve a level result.
Maintain Shelves: Periodically check your shelving for sagging or loosening. Inspect brackets for secure fastening. Tighten any loose screws or readjust brackets as needed. Weight or settling can cause movement over time.
Safety During Installation
Safety is paramount during any diy project. Follow these installation tips to protect yourself and ensure a durable result.
Use Appropriate Hardware: Always use the manufacturer’s recommended hardware. Or use replacements rated for the intended weight. This ensures the shelving’s structural integrity.
Ensure Shelves Are Level: Unlevel shelves look bad. They also pose a hazard. Use a level during installation. Adjust components to achieve a flat surface.
Avoid Overloading: Be mindful of your shelving unit’s weight capacity. Distribute items evenly. This prevents structural failure.
Secure Tall Units: Anchor tall shelving units to a wall. This prevents tipping. This is especially important in homes with children or pets.
These installation tips help you create a safe and functional laundry room.
Personalizing Your DIY Laundry Room Shelf
You can make your new diy laundry room shelf truly your own. Personalizing your shelving adds style and improves your laundry space. These aesthetic enhancements make your laundry room more inviting.
Painting and Staining Techniques
Paint or stain your shelves to match your room’s style. A fresh coat of paint can brighten the space. You can choose a bold color for a pop of energy. Or, you can select a neutral tone for a calm feel. Staining wood shelves brings out natural beauty. It adds warmth to your laundry area. Always use moisture-resistant paint or stain for durability.
Adding Decorative Elements
Decorative elements make your laundry room feel thoughtful. Wallpaper behind shelves adds visual interest. You can choose abstract geometric, floral, or tropical motifs. These patterns infuse energy and personality. The interplay between white surfaces and warm wood creates a modern, inviting atmosphere. Wood effortlessly infuses natural richness. Arrange objects and plants on shelves. Woven wicker baskets add visual interest. Luxe knobs can enhance a single wall-mounted cabinet. High-quality details like hexagonal gold knobs make a difference. Styled curios add personality. Matched sets of bins and baskets provide textural storage. Pale patterned wallpaper behind shelves adds visual interest. Greenery can be incorporated for natural richness.
Incorporating Labels and Baskets
Labels and baskets keep your laundry organized. Basket label clips are effective for identification. They are durable and functional. They simplify identification and create a cohesive system. You can use multi-section sorters for streamlining laundry. These have 2-3 divided compartments for whites, darks, and colors. They often include removable bags and rolling bases. Color-coded organization also works well. You can create separate bins for white, light, dark, and bright items. This helps you sort clothes easily.
Lighting for Function and Ambiance
Good lighting improves your laundry room’s functionality and ambiance. Pendant lights work well for higher ceilings. They provide concentrated light over work counters. Flush mount ceiling lights are best for low ceilings. They offer even overhead lighting. Wall sconces complement overhead lighting in compact rooms. They eliminate shadows near appliances. Undercabinet lighting is excellent for task lighting. It reduces shadows while folding clothes. Recessed lighting provides even, shadow-free illumination. It offers a sleek, modern aesthetic. LED lights are energy-efficient. They have a long lifespan. Consider a color temperature of 4000K-5000K for accurate color representation. These design ideas help you create a beautiful and practical space.
DIY laundry room shelving ideas transform your space. You achieve better organization, efficient workflow, and a beautiful laundry area. These practical laundry room shelving ideas offer great storage solutions. Start your diy project today. Your skill level does not matter. A well-organized laundry room creates a more harmonious home.
Share your new diy laundry room shelf with us.
Ask any questions you have about shelving.
FAQ
How do I choose the best materials for my DIY laundry shelves?
You need materials that resist moisture. Consider treated hardwood or marine-grade plywood. Seal them properly for durability. Moisture-resistant MDF is a budget-friendly option. Stainless steel also works well in a humid laundry environment.
Can I install floating shelves in my laundry room?
Yes, you can install floating shelves. Always secure them into wall studs for strength. Never rely only on wall anchors. For maximum support, use blocking between studs. This ensures your floating shelves hold weight safely.
What are some easy solutions for laundry room organization?
Use clear containers and labels for your supplies. Baskets help sort items like towels or cleaning cloths. Consider pull-out bins for dirty laundry. These simple solutions keep your space tidy. They make your laundry routine smoother. (sparkle emoji)
Tip: Labeling helps everyone in the family find things easily!
How can I maximize space in a small laundry room?
Utilize vertical space with tall shelving units. Corner shelves turn unused areas into storage. Consider wall-mounted drying racks that fold away. These ideas help you make the most of your small laundry area.


