Do you have old metal items gathering dust? Don’t toss them! You can give your metal pieces an amazing transformation. A DIY makeover is super satisfying and saves money. This simple makeover lets you create stunning before and after pieces. You will learn easy paint and refinishing tips. This DIY painting project makes your decor unique. It’s a fun way to update old metal decor and be sustainable.
Why Update Old Metal Decor
Cost-Effective Makeover
You want to refresh your home, right? Buying brand-new decor can really empty your wallet. That’s where a smart DIY makeover comes in! Giving your old metal pieces a new look is super budget-friendly. You already own the item, so you just need a few supplies. This simple makeover lets you achieve a fresh, stylish look without spending a fortune. Think of the money you save!
Personalize Your Space
Your home should tell your story. It needs to reflect your unique style and personality. Old metal items are like a blank canvas waiting for your creative touch. You get to pick the exact color, texture, or finish that speaks to you. This DIY makeover empowers you to create something truly one-of-a-kind. No one else will have the exact same piece. This personal touch makes your space feel truly special and uniquely yours.
Sustainable Decor Choices
Choosing to update old metal decor is a fantastic choice for our planet. 🌎 You give forgotten items a brand-new purpose, which dramatically reduces waste. When you upcycle metal home decor, you lessen the demand for new products. This means fewer resources get used. Consider these big benefits:
It reduces the need for energy-heavy virgin mining.
You minimize the consumption of raw resources.
It helps conserve precious natural resources.
This lowers the overall environmental impact significantly. Plus, you help keep things out of landfills. Less new manufacturing means less energy use and less pollution in our air and water. You also help preserve finite natural resources like various metals. Making this choice actively helps reduce your carbon footprint. It’s a win for your home and a win for Earth!
Essential Tools & Materials
This DIY makeover needs the right tools. Gathering your supplies before you start makes the process smooth. You will need these items to update old metal decor.
Cleaning & Prep Supplies
First, clean your metal pieces. You need a good degreaser.
The effectiveness of a degreaser depends on the metal type. Always check product labels for compatibility. Consider water-based degreasers for an eco-conscious choice. Alkaline cleaners work well for steel and aluminum. Also, grab a wire brush and sandpaper (various grits) for rough spots.
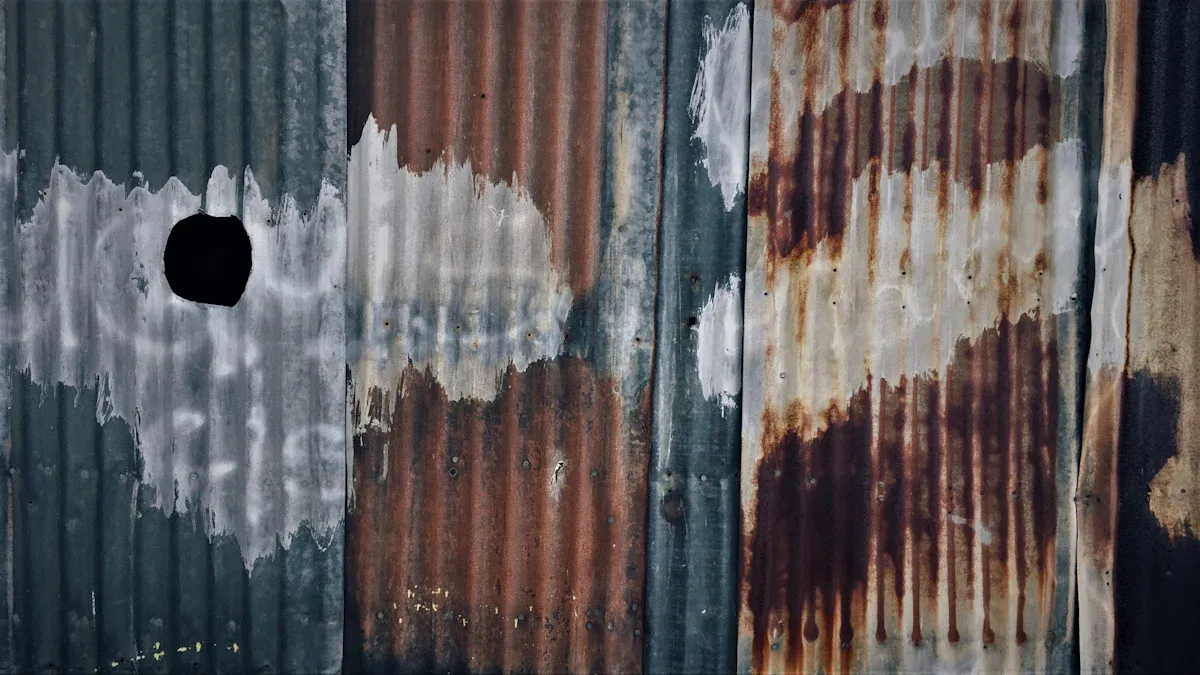
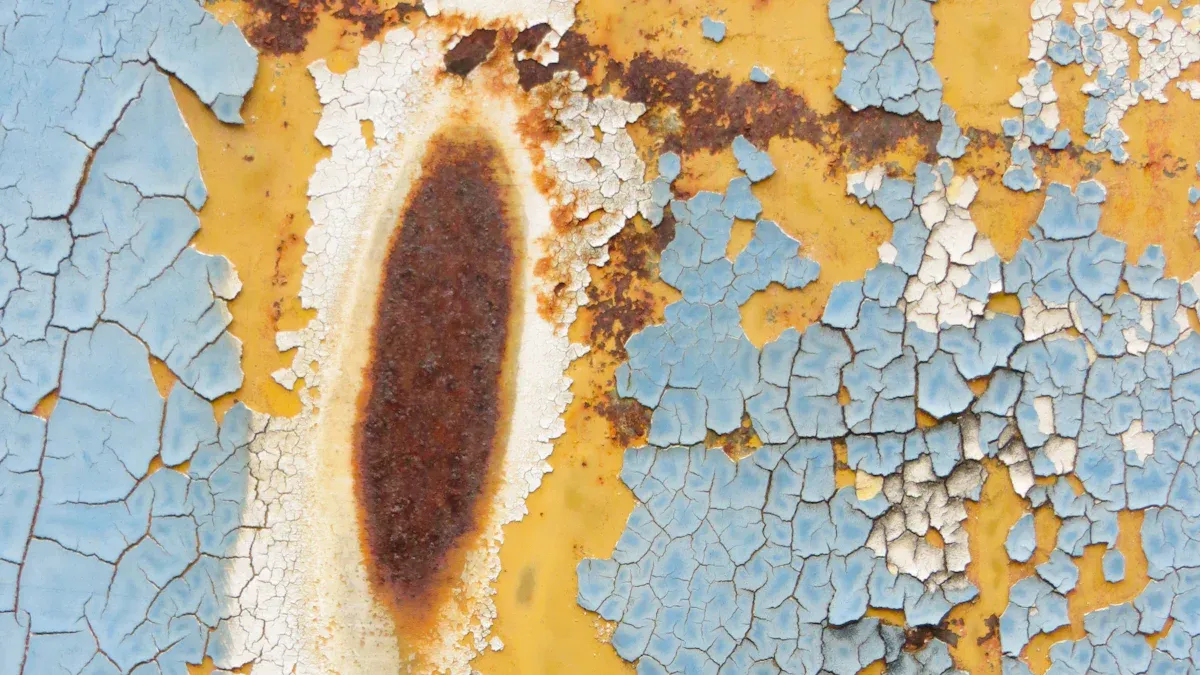
Rust Treatment Options
Rust is common on old metal. You have options to treat it. You can use rust converters or rust removers like naval jelly.
Feature/Product | Rust Converter | Rust Remover (e.g., Naval Jelly) |
|---|---|---|
Primary Action | Converts rust to stable compound | Causes rust to separate |
Benefit | Eliminates sandblasting | Speeds up rust removal |
For heavily corroded items, specialized products exist. POR-15 Rust Remover dissolves rust from intricate parts. Rust Bullet offers advanced formulations for great results on your metal. |
Primers for Metal
Priming is key for good paint adhesion. You need the right primer for your metal type.
Wash primers: Use these on steel, aluminum, and zinc for a smooth base.
Oil/Alkyd primers: These are great for wrought iron, cast iron, and steel. They bond well.
Red Oxide Primer: This protects against rust and corrosion on ferrous metals.
Fast Dry Metal Primer: This anti-corrosive primer for ferrous metals dries quickly.
Paint Types & Finishes
Now for the fun part: choosing your paint! You can use spray paint or brush-on enamel. For a quick makeover, spray paint is often easiest. Many brands offer paint and primer in one.
Rust-Oleum Universal Premium Metallic Spray Paint is a “Spray Paint and Primer In One.”
Krylon COLORmaxx Spray Paint and Primer is also a “Paint and Primer” product.
You can also explore specialty finishes. Hammered metal finishes have a unique texture. Metallic finish paint uses metal particles for shades like gold or silver. Painting metal gives it new life.
Protective Sealants
After painting, protect your work. A clear topcoat or wax will seal the paint. For outdoor metal decor, durability is important. Nyalic® Sculpture Corrosion Protectant is a clear coat. It protects against corrosion and oxidation. It is highly UV resistant. It maintains a like-new appearance for years. It has been used to restore and protect stainless steel monuments.
Safety Gear
Your safety is important during this DIY project. Always wear appropriate gear.
You need safety glasses to protect your eyes.
Wear a mask for respiratory protection.
Use protective work clothing and gloves.
Step-by-Step Refinishing Guide
Repainting metal items needs care. You cannot just slap paint on them. This DIY makeover requires a bit of effort, but the results are worth it! Follow these steps to update old metal decor properly.
Step 1: Cleaning & Prep
Good preparation is the secret to a lasting finish. Do not skip these steps!
Remove Loose Debris
First, get rid of anything loose on your metal piece.
For lower areas, use soft brushing or dry wiping.
If you are working on larger items, pre-rinse them from top to bottom with clean water. This washes away dirt and grime.
Degrease the Surface
Grease and oil stop paint from sticking. You need a clean surface for your paint to bond well.
Use special degreasers. These can be based on organic solvents or alcohol solutions.
Apply the degreaser with a clean, lint-free cloth or sponge.
Wipe the surface in a circular motion. You can also use special equipment for bigger jobs.
Make sure the degreaser removes all fats and oils. It should not leave any residue behind.
After degreasing, you might want to use other agents. These can improve paint adhesion and protect against corrosion.
Address & Remove Rust
Rust is a common problem with old metal. You have several ways to tackle it.
Salt and Lemon: Make a thick paste with lemon juice and salt. Put it on rusty spots. Let it sit for a few hours. Then, scrub it with a rough sponge. Rinse and dry the area.
Baking Soda: Mix baking soda with water to make a paste. For tougher rust, use hydrogen peroxide instead of water. Apply the paste to the rusty surface. Let it sit for 15-20 minutes. Scrub it with wire wool or an abrasive scrubber.
White Vinegar: Wash the rusted area with vinegar. Wait 10-15 minutes. Wipe off the dissolved rust with a stiff brush or rag. Use sandpaper for really stubborn stains.
Potato: Cut a potato in half. Put salt or dish soap on the cut surface. Rub it on the rusty area. This starts a chemical reaction. Clean it with an old rag.
Cola: Pour cola onto the rusted surface. Let it sit for a few minutes. Rub it clean with a soft cloth or sponge. Rinse it with water.
Aluminum Foil: Mix salt and warm water. Scrunch aluminum foil into a ball. Dip it in the solution. Rub the rusted surface to loosen residue. Rinse and repeat if needed.
Mild Cleaning Agent: Put a suitable metal cleaning agent on a rag or directly on the rusty area. Gently rub until rust stains turn brownish-red and come off. Wipe with a clean, dry cloth.
If natural methods do not work on stubborn rust, you can use commercial chemical removers. These are strong chemicals. Always follow the instructions carefully. Wear protective gear like gloves and goggles. They can be expensive, but they work fast and well.
After removing rust, you want to prevent it from coming back.
Cover outdoor metal furniture with foil or store it during bad weather. Dry it right away if it gets wet.
Apply protective coatings. Use metal paint or clear varnish. Waterproof, rust-proof types like WD40 create a protective layer.
Clean regularly. Check and clean your metal decor often. This helps you find and fix rust early.
Here is the overall process for dealing with rust:
Preparation: Clean the metal surface well. Remove loose debris, dirt, and flaking rust. Use a wire brush or sandpaper. This helps your rust removal method work best.
Rust Removal: You can scrub or sand it by hand. Or, use chemical treatments like acids to dissolve the rust. The best method depends on how much rust there is and what kind of metal you have.
Surface Protection: After removing rust, protect the bare metal. Use a good rust prevention coating. This creates a barrier against moisture and oxygen.
Other Options like Topcoats: You can add a topcoat in your favorite color. This goes over the rust prevention coating. It gives more protection, makes it last longer, and looks great.
Light Sanding for Adhesion
Sanding helps the primer and paint stick better. It creates tiny scratches for the paint to grip.
Clean the Metal Surface: Before you sand, use a degreaser or a mix of water and mild soap. This removes oil, dirt, or grease. Make sure the surface is completely dry.
Choose the Right Sandpaper Grit: Pick the grit based on what you need to do.
Grit Level | Purpose |
|---|---|
60-80 grit | For heavy rust, removing a lot of material, or taking off old paint. |
120-180 grit | For smoothing edges and general surface preparation. |
220-240 grit | For the final finish to get a smooth, polished surface. |
Start Sanding with a Coarse Grit: Apply even pressure. Move your hand in a circular or back-and-forth motion. If you use a power sander, keep it moving. This stops deep scratches. For small areas, sand by hand with a block or sponge.
Progress to Finer Grits: Slowly move to finer grits. This removes scratches from the coarser grits. It creates a smooth, even surface. Wipe down the metal often to check your progress.
Use Lubricants for a Smoother Finish: When you use fine grit sandpaper, especially on softer metals, use water or oil. This acts as a lubricant. It reduces friction and heat. Wet sanding gives a very smooth, polished finish. Oil can help you get a mirror-like finish on stainless steel.
Step 2: Priming for Success
Priming is a crucial step for how to paint metal. It helps your paint last and look great.
Choose the Right Primer
The right primer depends on your metal type.
Ferrous Metals (like stainless steel, carbon steel, wrought iron): You can use many primers here. Solvent-based, water-based, and epoxy primers all work well.
Galvanized Steel (a special ferrous metal): Do not use alkyd-based primers. They can react badly. Waterborne Acrylic Primer 2700 or Flexi-Coat 3601 Primer are good choices.
Non-Ferrous Metals (like aluminum, tin, copper, zinc): Water-based primers are best for these. They give great adhesion. Try Waterborne Acrylic Primer 2700 or Flexi-Coat 3601 Primer.
Paint Finishes (Primer and Topcoat): Usually, a separate primer and topcoat give the best protection and finish. Sometimes, a primer can also be a finish coat. For example, Universal Primer works for wrought iron fences.
Apply Thin Primer Coats
Applying primer correctly prevents drips and gives you a smooth base.
Choose the Right Primer: Pick a primer that fits your metal type and where the item will be. For outdoor use, a rust-inhibitive primer is smart.
Apply the Primer: Use the best method for your project. A spray can works for small areas. A spray gun is good for bigger projects. Use a brush for details or a roller for flat surfaces. Always follow the manufacturer’s instructions for applying and drying. One coat is usually enough. A second coat can add more protection.
Drying Time: Let the primer dry completely. Check the product’s instructions. This can take a few hours or even overnight.
Inspect and Sand: Look at the primed surface. Did you miss any spots? Are there drips or uneven areas? If you find flaws, lightly sand them with fine-grit sandpaper (220-grit) to smooth them out.
Clean the Surface Again: Remove any sanding dust with a clean, dry cloth. Make sure the surface is clean before you apply the topcoat.
Apply the Topcoat: When you apply the final paint, use the same methods as for the primer. Apply multiple thin, even layers. Do not use one thick coat. This stops drips and gives a smoother finish. Let each coat dry fully before adding the next.
To prevent drips and get a smoother finish, apply multiple thin, even layers. Do not use one thick coat. This stops too much material from building up. Too much material causes drips and uneven coverage. After priming, check for drips or uneven spots. Lightly sand them with fine-grit sandpaper if needed. Then, clean the surface before you paint.
Allow Adequate Drying
Patience is key! Let each primer coat dry fully. Rushing this step can lead to peeling paint later.
Step 3: Painting Techniques: How to Paint Metal
Now for the fun part: adding color! How to paint metal depends on your chosen method.
Spray Painting Tips
Spray paint, especially with primer included, is a cheap and easy way to update old metal decor. It gives a smooth finish quickly.
Surface Preparation: Make sure the metal surface has no rust, debris, oils, grease, water, or old paint. Use tools like wire brushes, sandpaper, or steel wool. Finish by cleaning with denatured alcohol or acetone. This removes any leftover oils. Avoid touching the prepared surface with bare hands.
Controlled Environment: Set up your painting area. It should be free from direct sunlight, wind, dust, and debris. A cardboard box can be a temporary spray booth for small items. For bigger pieces, you can make an enclosure with plastic sheets.
Multiple Thin Coats: Apply several thin coats of paint. Do not use one thick coat. For a perfect finish, aim for at least three coats. Let each coat dry completely before adding the next. This stops drips and ensures even coverage.
Continuous Sweeping Motion: When you spray paint, keep the can moving. Use a continuous sweeping motion across the item. Do not stop spraying while the paint hits the work. This will cause paint buildup and drips. Practice this motion on a scrap piece of material. Find the best distance and technique.
Primer Application: Always use the recommended primer before your finish coats. Primer adds protection. It makes the paint last longer. It also helps the final coats lay smoothly. Plus, it gives you a chance to practice your spray painting technique.
Drip Correction: If you get drips, stop painting right away. Use a rag (terrycloth works best) to remove all the fresh paint before it dries. Let the item dry completely. Then, carefully remove any bumps or flaws with fine steel wool or 200-grit emery cloth. Re-prime the area if needed before you continue.
Practice makes perfect! Buy a couple of cans of good spray paint. Use aluminum foil on cardboard to act like a metal surface. Practice your sweeping motion. Find the “just right” distance from your work. This small investment helps a lot for special projects. Remember to clear your nozzle after each practice session.
Brush-On Painting Tips
For brush-on paint, use a good quality brush. Apply thin, even strokes. Avoid overloading your brush. This prevents drips and brush marks. For painting metal, work in small sections.
Specialty Finishes
You can get creative with painting metal!
Faux Rust: To achieve a rust look, mix regular cheap brands of orange and brown paint. Dab it on with a small, stiff brush. This creates a realistic texture.
Distressed Look: To create a distressed look, sand some paint off. You can also use a razor blade to scrape away paint. This gives your decor a vintage feel. This paint and distressing technique works great on an arched metal wall decor piece.
Antiquing: To antique metal art, use silver rub and buff. This highlights raised areas. Start lightly. Add more with your finger as you like.
Other ways to create a distressed look or antique finish include:
Aging galvanized metal with a heat gun.
Using paints for metal and distressed chalk paint.
Creating a faux rust finish.
Achieving a metal patina finish.
Giving painted metal a distressed, rustic, or vintage look.
Applying Rustoleum hammered paint for a blackened metal look.
Physically distressing steel by hitting it, dragging it on a gravel road, and leaving it in the rain.
Spritzing muriatic acid on metal to accelerate aging.
Applying multiple thick coats of paint, beating it with a chain, then adding more paint.
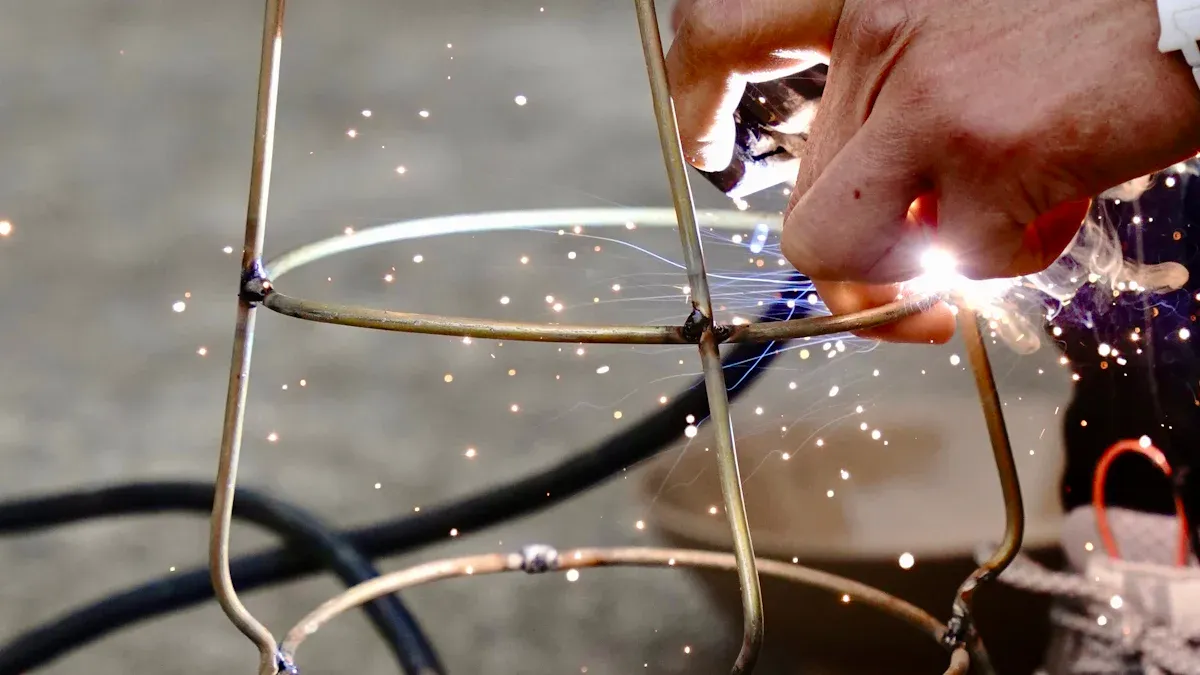
Using an arc welder for interesting effects.
Driving over steel on a gravel driveway, spraying with salt water, then painting and scraping for an aged appearance.
Exposing metal to livestock pens for natural distressing from kicks and urine.
Step 4: Sealing & Protection
You have done all that work, so protect it!
Apply Clear Topcoat
After painting metal decor, it is a good idea to clearcoat it. A clear topcoat protects your beautiful new finish. Products like KBS Diamond Clear are available in rattle cans.
Product Name: Top Coat Clear Non-Slip Protective Paint
Type: Clear polyester polyurethane topcoat paint
Key Features:
Hard Wearing High Gloss Coating
Excellent Weather Resistance
Abrasion and Impact Resistance
Non-chalking or yellowing
Easy to clean
Purpose: This paint is designed for amazing durability. It stands up to daily harsh use. It protects the paint underneath. It stops early wear and tear.
Applicable Surfaces (by category): Metal
Consider Wax for Finishes
For certain finishes, especially matte or chalk paint, a protective wax can be a good choice. It adds a soft sheen and a layer of protection.
Ensure Full Curing Time
Your paint job is not truly finished until it has fully cured. This can take days or even weeks, depending on the product and humidity. Avoid heavy use during this time. This ensures your new coat of paint hardens completely.
Troubleshooting Common Issues
Sometimes, your DIY painting metal project might hit a snag. Don’t worry! You can fix common problems. Here are some tips to help you out.
Preventing Paint Drips
Paint drips can be frustrating, but you can easily avoid them.
Prepare your surface well. Make sure it’s clean and smooth. You need to clean and degrease it, maybe with mineral spirits. Lightly sand it with 320-grit sandpaper. This gives the paint something to grab onto. Always use a primer for better adhesion and durability.
Shake your paint can. Shake it for two minutes after you hear the mixing ball rattle. If the can feels cold, warm it in warm water. This helps the paint spray better. Always test the spray on scrap material first.
Master your technique. Hold the can 8 to 12 inches from the surface. If you get too close, you’ll get thick blobs. Too far, and the paint looks bumpy. Move your arm in constant, smooth sweeps. Start spraying before you hit the item and stop after you pass it. Overlap each pass by 50% for even coverage.
Apply thin coats. This is the golden rule! Apply several light coats instead of one heavy one. Start with a light “tack coat.” Then, apply more thin coats. Let each coat get a little sticky before you add the next.
Achieving Even Coverage
Getting paint everywhere, especially on detailed metal pieces, can be tricky.
Use aerosol cans for small items. HVLP sprayers work well for larger, intricate pieces. They give you better coverage.
Elevate your item on a turntable. You can rotate it and spray from all angles.
For tight spots, use small artist brushes. Don’t load too much paint on them. Paint recessed areas first.
Apply 3-4 thin coats. Each coat should be barely visible when wet. This prevents drips and builds even coverage. Rotate the piece between coats.
If you have hard-to-reach areas, use cotton swabs for tiny crevices. Foam brushes cut into thin strips work for narrow spaces. You can also spray at different angles.
Paint in ideal conditions, around 65-75°F with 40-60% humidity. This helps the paint flow smoothly.
Dealing with Rust Reappearance
You don’t want rust to come back after all your hard work!
Use Penetrol. Apply this oil-based product as a base coat on bare metal. It seals and stops rust. It also helps preserve the look of existing rust if you want that style.
Add a polyurethane top coat. After the Penetrol dries, put on one or two coats of matte polyurethane. Penetrol alone isn’t very durable. This top coat makes your finish last longer.
Repaint with weather-resistant paint. This restores the look and adds a protective layer. Choose acrylic, enamel, or epoxy-based paint.
Apply a UV protective spray. This fights fading from the sun. Clean the surface, apply an even coat, and reapply as needed.
Consider powder coating. This is a super strong option. It bakes a dry powder onto the metal. This creates a very durable coating that resists rust, fading, and UV damage.
Improving Poor Adhesion
If your paint isn’t sticking, it’s usually because of poor preparation. Make sure you clean your metal piece thoroughly. Remove all dirt, grease, and rust. Sanding lightly creates a surface the paint can grip. Always use the right primer for your type of metal. Finally, give each coat, especially the primer, enough time to dry completely. Rushing these steps can cause the paint to peel or chip later.
Maintaining Refinished Metal
You put effort into your refinished pieces. Now, keep them looking great! A little care goes a long way.
Gentle Cleaning Practices
You want your refinished metal to look great for a long time. Regular cleaning is simple. Use a soft, damp cloth. Add a very mild soap to the water. Gently wipe the surface. Avoid abrasive cleaners. They can scratch your beautiful paint finish. Harsh chemicals can also strip the protective layers. Always dry the item completely with a clean, soft towel. This prevents water spots and potential new rust.
Performing Periodic Touch-Ups
Even the most careful diy projects can get small imperfections. Check your refinished items regularly. Look for tiny chips, scratches, or worn spots in the paint. You can fix these easily. Keep a small amount of your original paint handy. Clean the damaged area first. Make sure it is dry. Apply a very thin layer of paint with a small brush. Blend it carefully. This keeps your metal piece looking flawless. It also prevents bigger problems from starting.
Protecting Outdoor Decor
Outdoor metal items endure a lot. They face sun, rain, and temperature changes. You need extra protection for them. A high-quality clear coat is essential. For example, Rustoleum’s 2x spray paint works wonders. It restores rusty metal yard art. It also provides strong, lasting protection against the elements. You can also apply a protective wax. This adds another barrier. For smaller pieces, like an arched metal wall decor, bring them indoors during harsh weather. This simple step significantly extends their life. Regular maintenance ensures your outdoor pieces stay vibrant.
You’ve seen the amazing transformation possible! Updating old metal decor is incredibly rewarding. This DIY makeover saves money, personalizes your space, and supports sustainability. You can confidently start your own DIY projects now. With the right tools and techniques, giving your metal pieces a new life is an achievable and enjoyable makeover. Go ahead, create something beautiful!
FAQ
Can I paint any type of metal?
Yes, you can paint most metals! You just need the right preparation and primer. For example, galvanized steel needs a special primer. Always clean and prep your metal well. This helps the paint stick.
How long will my painted metal decor last?
Your painted metal decor can last for years. It depends on how well you prepare it. Also, good paint and a protective topcoat help. Outdoor items need more care. Regular touch-ups keep them looking fresh.
Do I always need to sand before painting metal?
You do not always need heavy sanding. But, light sanding helps a lot. It creates a rough surface. This lets the primer and paint grip better. For smooth or glossy metal, sanding is very important.
What if my paint starts to peel after a while?
Paint peeling often means poor preparation. The surface might not have been clean enough. Or, you skipped the primer. To fix it, sand the peeling area. Clean it well. Then, re-prime and repaint.
Can I use regular house paint on metal?
You can use some house paints on metal. But, specialty metal paints work best. They offer better adhesion and durability. Look for paints designed for metal. They often include rust inhibitors.