Discover the captivating beauty of marbling. Its unique patterns create elegant, visually pleasing art. Marbling is an accessible and fun DIY technique for everyone, even kids. This guide explores 10 creative marbling crafts. You will find simple diy craft ideas to make stunning decor. Learn essential materials and steps for each diy marbling crafts project. Transform everyday objects into personalized art, boosting your creativity. Each craft project is easy to follow.
Marbling Basics for DIY Craft Ideas
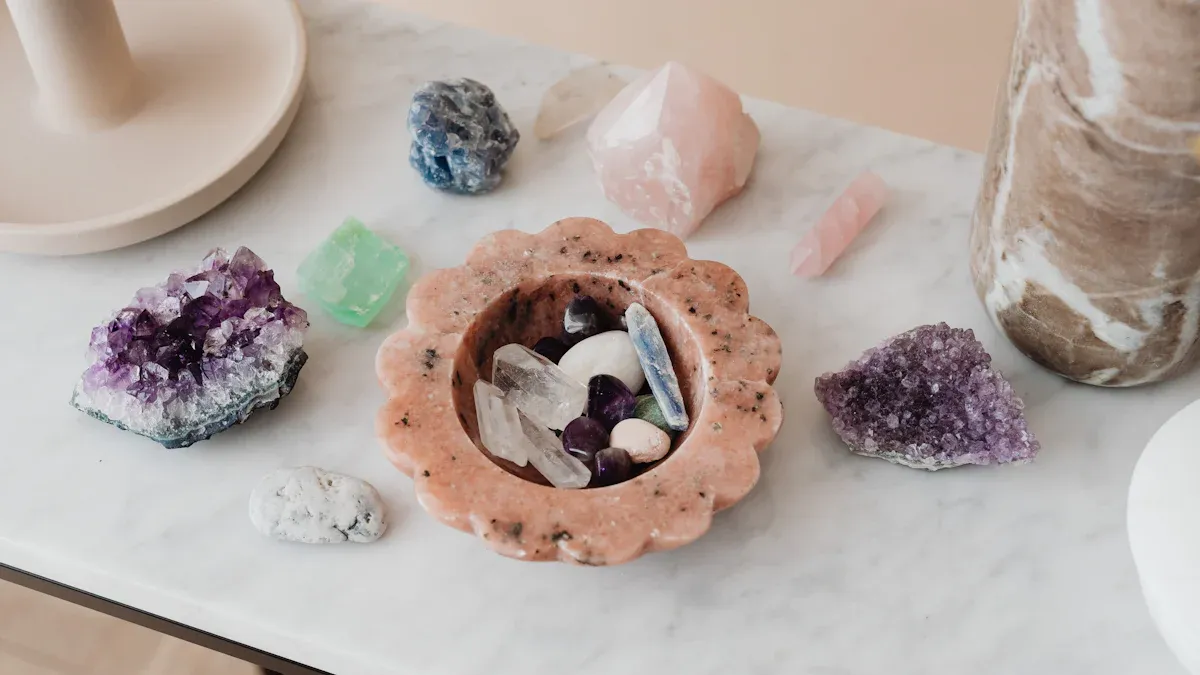
Understanding Marbling Techniques
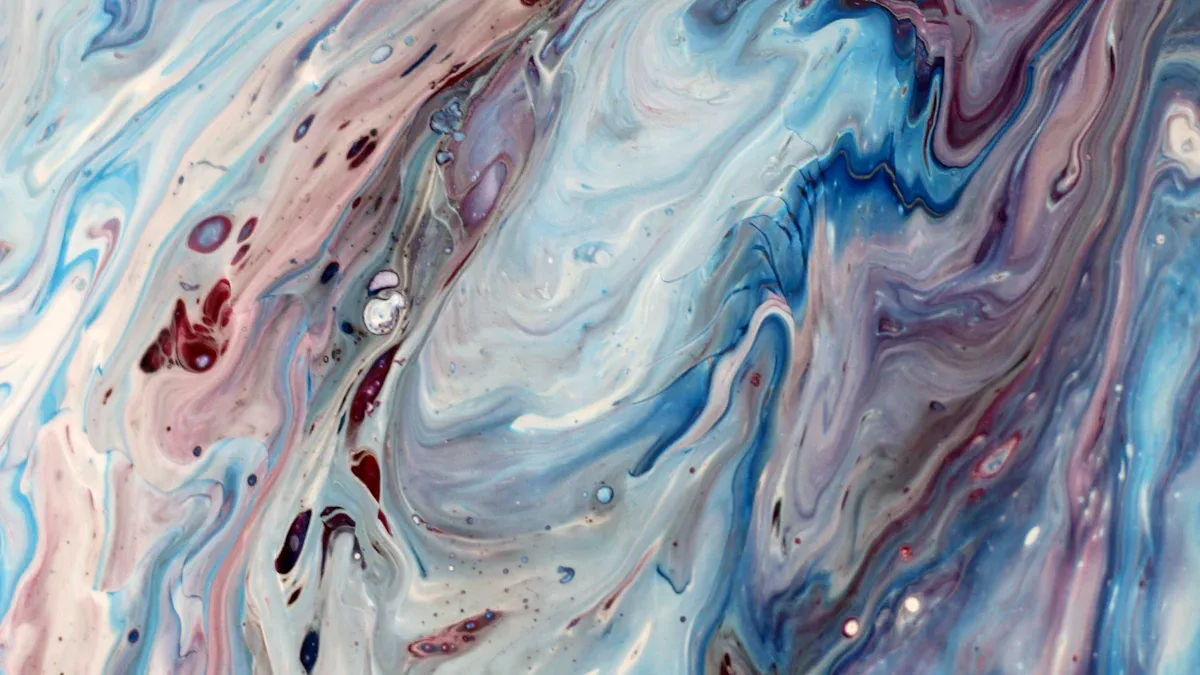
Marbling creates beautiful patterns. You can use several easy techniques. One popular method is paper marbling with shaving cream. You spread shaving cream, add colors, and then press paper onto it. Another common way is marbling with nail polish. You drip nail polish into water.
Then you dip your item into the floating polish. Acrylic paint marbling also works well. You float acrylic paints on a thickened water surface. You then transfer the design to your chosen object. These methods make each marbling project unique.
Essential Marbling Supplies
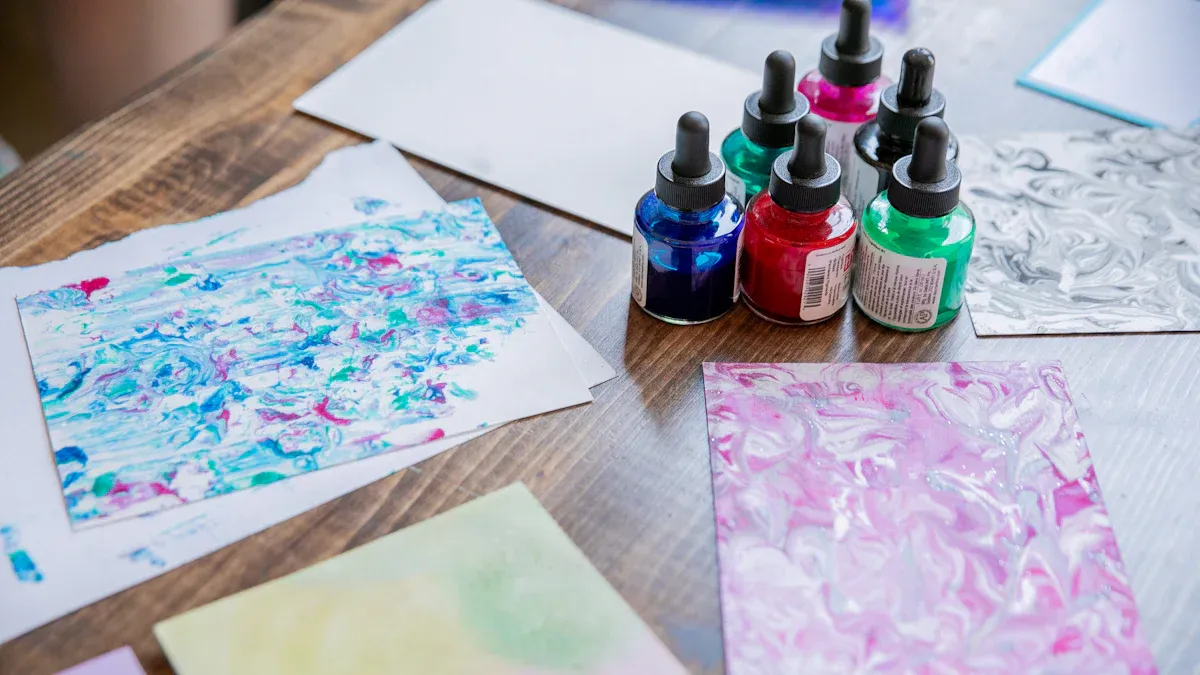
You need some basic items for any marbling craft. A shallow tray or pan holds your water or shaving cream. Water is a key component for many techniques. Various paints like acrylics, liquid food coloring, or nail polish provide your colors. For shaving cream marbling, you need foaming shaving cream, not gel. You also need a tool for stirring, like a bamboo skewer.
A squeegee or cardboard piece helps remove excess cream. For nail polish marbling, you need room temperature water and a disposable cup. A toothpick helps swirl the polish. Marbling kits are also available. They offer convenience and include many necessary items for your next craft.
Creative Marbling Crafts: 10 DIY Projects
You can transform many everyday items into unique pieces of art with creative marbling crafts. These craft ideas are fun and accessible for everyone, including kids. You will discover how to make beautiful marbled items for your home or as gifts. Each project offers a chance to explore your creativity.
Marbled Coasters
Marbled coasters add a touch of elegance to any table. You create a unique design that protects your surfaces. This craft is both practical and beautiful.
Materials:
Option 1 (Contact Paper): Metal plates or chalkboard circles, marble contact paper, gold foil kit (with adhesive and sealer), X-Acto knife, ruler, paintbrush.
Option 2 (Liquid Starch): Sta-Flo liquid starch, acrylic craft paint, plastic cups, popsicle sticks for mixing, leather circles, large baking sheet, toothpick for marbling, straw for dropping paint.
Option 3 (Polymer Clay): Polymer clay (2-3 colors), rolling pin, circle cookie cutter (at least 4” in diameter), baking sheet, parchment paper, acrylic paint (e.g., gold), paintbrush.
You can also use ceramic (Diatomite) coasters, typically 10.3cm x 10.3cm, for a sturdy base.
Steps:
Choose your method: Decide if you want to use contact paper, liquid starch, or polymer clay.
Prepare your surface: For contact paper, cut it to fit your coaster base. For liquid starch, pour starch into a baking sheet. For polymer clay, condition your clay.
Create the marble effect:
Contact Paper: Apply contact paper to your coaster, then add gold foil details.
Liquid Starch: Drip acrylic paints onto the starch. Swirl gently with a toothpick. Dip your leather circles into the design.
Polymer Clay: Combine different clay colors. Gently knead them to create swirls without fully mixing. Roll out the clay and cut out coaster shapes.
Finish your coasters: Let liquid starch coasters dry. Bake polymer clay coasters according to package directions. Seal your finished coasters for durability.
Marbled Paper
Marbled paper is a classic marbling craft. You can use it for greeting cards, book covers, or even as framed art. This diy project is simple and yields stunning results.
Materials:
Acrylic paint
Water
Liquid starch
Container (shallow tray)
Skewer
Cardstock or thick paper
Paper towels
Heavy books
Steps:
Thin your paint: Mix equal parts acrylic paint and water. You want a milky consistency. This keeps the colors vibrant.
Add paint to starch: Slowly drip or pour the thinned paint into liquid starch in a container.
Swirl the colors: Use a skewer to gently swirl the paints. Create a marbled effect. Avoid over-stirring; this prevents muddy colors.
Dip your paper: Cut your paper to size. Lightly dip one side of the paper into the paint and starch mixture. You do not need to fully submerge it.
Dry and flatten: Place the dipped paper on paper towels to dry. Once dry, put it under heavy books to flatten it.
Marbled Mugs and Ceramics
You can personalize mugs and other ceramic items with beautiful marbled patterns. These make great gifts or additions to your kitchen.
Materials:
For Nail Polish Method: Plain mug or ceramic item, 1-3 nail polish colors, nail polish remover, toothpicks, paper towel/cotton ball, plastic bowl, optional sealant, optional stickers.
For Clay Method: Different colored clays, pottery wheel, metal rib, optional handle, kiln, glazes (colored slips, underglazes).
For Paint Method: Multi-surface paints (like DecoArt or Americana MultiSurface Paint), clear glaze (food-safe for functional pieces).
Steps (Nail Polish Method):
Prepare your workspace: Gather materials. Ensure good ventilation. Cover your work surface.
Fill the bowl: Fill a plastic bowl with warm water. One inch is enough if you only marble the bottom of the mug.
Add stickers (optional): Apply stickers firmly to the mug for unique patterns.
Drip nail polish: Quickly drip several drops of nail polish onto the water. Swirl with a toothpick. Work fast; nail polish hardens quickly.
Dip the mug: Submerge the mug. Turn it to cover the desired area. Do not release the mug.
Clean excess: Remove the mug. Use nail polish remover with a paper towel or cotton ball to clean any polish from the inside rim or drips.
Dry and repeat: Let the mug dry for about five minutes. Repeat steps 4-7 with different colors if you want. Remove stickers after all colors are dry.
Enjoy: Apply a sealant for longer-lasting results.
Steps (Clay Method):
Prep the clay: Gather small balls of different clays. Gently ‘shmoosh’ them together, avoiding air bubbles. ‘Wedge’ (knead) the clay to mix colors without over-blending.
Form your cup: Use a pottery wheel to form the cup. Minimize touches to prevent colors from blending too much. Scrape off slip with a metal rib to reveal the marbled clay.
Trim and add handle: Trimming can enhance the patterns. Adding a handle is optional.
Fire and glaze: Glaze the inside, handle, and rim for the best appearance. Glazing is optional.
Marbled Planters and Vases
Give your plants a stylish home with marbled planters and vases. This diy project adds a personalized touch to your home decor.
Materials:
For Paint Method: Unfinished concrete or ceramic planters, Martha Stewart Multi Surface acrylic paint (or similar), deep bowl (large enough for the planter), plastic disposable cups, popsicle sticks, Staflo liquid starch, Krylon Triple thick gloss glaze spray paint.
For Clay Method: White and black Sculpey (or any oven bake clay), rolling pin, knife, parchment paper, oven.
Steps (Paint Method):
Prepare your starch bath: Pour liquid starch into a deep bowl.
Mix paints: Pour different paint colors into separate plastic cups.
Create marble design: Drip paints onto the surface of the starch. Swirl gently with a popsicle stick.
Dip the planter: Carefully dip your planter into the marbled design.
Seal: Let the planter dry completely. Apply Krylon Triple thick gloss glaze spray paint for protection.
Steps (Clay Method):
Combine clay: Mix white and black Sculpey clay. Gently knead to create marbled patterns.
Form your planter: Roll out the marbled clay. Cut and shape it into a planter or vase.
Bake: Place the clay planter on parchment paper on a baking sheet. Bake according to Sculpey instructions.
Marbled Phone Cases
You can protect your phone with a custom marbled case. This craft lets you express your style.
Materials:
For Paper Insert: Clear phone case, A4 paper, marbling ink colors, tray, newspaper, pencil.
For Direct Dip: Clear phone case, deep container, warm water, nail polish colors, toothpick.
Steps (Paper Insert Method):
Set up: Protect your work surface.
Prepare water: Fill a tray with about 2cm (3/4 inches) of water.
Add ink: Choose marbling ink colors. Add 3 to 6 drops of several colors to the water. Swirl gently.
Marble paper: Gently place a piece of paper onto the water in a ‘U’ shape. Count to about 20 seconds. Carefully lift it out. Place it on newspaper to dry.
Dry paper: Allow the marbled paper to dry. Thin ink dries in a few hours. Thicker parts may take days. Press kitchen roll on thicker areas to speed drying.
Cut for case: Once dry, select a marbled piece. Place it in a clear phone case. Mark the camera and microphone apertures with a pencil. Cut out the shapes.
Steps (Direct Dip Method):
Fill container: Fill a deep container with warm water.
Add nail polish: Add drops of nail polish into the water. Swirl with a toothpick.
Dip case: Dip the front of the cell phone cover into the water.
Dry: Let the case dry for 24 hours.
Marbled Fabric and Tote Bags
You can create unique patterns on fabric for clothing, accessories, or home decor. Marbled fabric can become a stylish tote bag. This diy project is a great way to personalize your belongings.
Materials:
Fabric item (e.g., tote bag, t-shirt, scarf)
Liquid fabric dye/paint or RIT dye (powdered form, mixed with hot water)
Marbling medium (if using acrylic paints)
Shallow tray or container
Water
Skewer or comb
Iron (for heat setting)
Steps:
Prepare fabric: Wash and dry your fabric item. This removes any sizing.
Prepare dye bath: If using RIT dye, mix it with hot water according to package directions. For liquid fabric paint or acrylics, mix with marbling medium and water in a shallow tray.
Create design: Drip or pour dyes onto the surface of the water/medium. Swirl gently with a skewer or comb to create your marbled pattern.
Dip fabric: Carefully lay your fabric onto the marbled surface. Ensure good contact.
Rinse and dry: Lift the fabric. Rinse gently under cold water until the water runs clear. Hang to dry.
Heat set: Follow dye instructions for heat setting, usually with an iron, to make the design permanent.
Marbled Ornaments
Marbled ornaments add a festive and personalized touch to your holiday decorations. This craft is also a fun crafting with kids activity.
Materials:
Marabu Easy Marble paints
Plastic tub, bowl, or container
Room temperature water
Craft stick
Ornaments (plastic, glass, or ceramic)
Steps:
Prepare water: Fill your plastic tub or bowl with room temperature water.
Add paint: Drip several drops of Marabu Easy Marble paints onto the water’s surface. The paints will spread.
Swirl: Use a craft stick to gently swirl the colors. Create your desired marbled pattern.
Dip ornament: Hold your ornament by its hanger or a skewer. Slowly dip it into the marbled water. Rotate it to cover the surface.
Dry: Carefully lift the ornament. Hang it to dry completely.
Marbled Candles
You can create beautiful marbled candles to enhance your home’s ambiance. This project offers several methods for unique results.
Materials:
Method 1 & 2 (Wax Marbling): Candle wax, container, wick, double boiler, thermometer, candle dye, essential/fragrance oils, thin skewer or wire, hairdryer.
Method 3 (Paint Marbling): Candles, marbling medium, craft paint, small disposable cups, painter’s tape, craft sticks, large disposable cup, craft knife.
Steps (Method 1: Dye in Holes):
Prepare container and wax: Choose a container. Measure wax, leaving a small gap at the top. Reserve extra wax for sinkholes. Add the wick.
Melt wax: Melt wax in a double boiler. Stir regularly. Monitor temperature; do not exceed 65°C.
Add dye and fragrance: Remove melted wax from heat. Let it cool slightly. Add dye and oils. Mix well.
Pour and cool: Pour mixture into the container. Stir. Let it cool for 30-45 minutes until it begins to solidify.
Create holes: Use a thin skewer or wire to make holes around the edge of the wax. Pierce some holes to the bottom, others halfway. More holes mean more color blending.
Add dye to holes: Carefully pour a very small amount of dye into each hole.
Re-melt and blend: Use a hairdryer to re-melt the wax. This allows dye to move down the holes. Direct the hairdryer to control dye movement and blending. Roll the container for more movement if it’s not too hot.
Cool and finish: Let the wax cool for at least 24 hours to harden. Trim wicks to about ¼ inch.
Steps (Method 2: Swirling Dye in Wax):
Prepare wax: Follow steps 1-4 from Method 1.
Pour and partially set wax: Pour melted wax into the container. Let it set partially, aiming for around 55°C. This prevents excessive dye bleeding.
Create swirling pattern: Add some dye to a skewer. Insert it into the side of the wax inside the jar. Move it around to create a swirling pattern.
Cool and finish: Set the container aside. Let it cool for at least 24 hours. Trim wicks to about ¼ inch.
Steps (Method 3: Paint Marbling):
Mix marbling medium: Combine marbling medium with craft paint in a 1:1 ratio in small disposable cups. Prepare colors. Let them rest to reduce air bubbles. Cover unwanted areas of the candle with painter’s tape.
Paint the candles: Drip mixed paints randomly over the candles. The paint will naturally run and marble. Use craft sticks to push paint around for full coverage. Use a large disposable cup to hold the candle upright while it drips and dries. Turn the candle to check for uncovered areas. Add more paint or spread existing paint as needed.
Dry and finish: Allow candles to dry for about 24 hours. Carefully remove them from the cups. Use a craft knife to trim away any excess dried paint.
Marbled Jewelry
You can create unique and stylish jewelry pieces with marbling techniques. This diy craft allows for endless color combinations and patterns. You can make earrings, pendants, or bangles.
Materials:
Polymer clay (various colors)
Rolling pin
Cookie cutters or craft knife
Baking sheet
Parchment paper
Jewelry findings (earring hooks, jump rings, necklace chains)
Jewelry pliers
Clear glaze or varnish
Steps:
Condition clay: Condition small pieces of different colored polymer clay.
Create marble effect: Gently twist and fold the clay colors together. Avoid over-mixing to keep distinct marble lines.
Shape jewelry: Roll out the marbled clay. Use cookie cutters or a craft knife to cut out desired shapes for earrings or pendants.
Bake: Place the clay pieces on parchment paper on a baking sheet. Bake according to polymer clay instructions.
Assemble: Once cooled, attach jewelry findings using pliers.
Seal: Apply a clear glaze or varnish to protect the design and give it a finished look.
Marbled Picture Frames
Marbled picture frames add a personalized touch to your cherished memories. This simple diy project makes a great gift or home accent.
Materials:
1-2 nail polish colors
1 wood frame
A disposable container (as large or larger than the frame)
Very warm water
Wax paper for drying
Steps:
Prepare water: Fill a disposable container with very warm water.
Add nail polish: Gently drop 3-6 drops of nail polish onto the water’s surface. Hold the bottle close to prevent sinking. If using two colors, drop them simultaneously.
Swirl colors: Quickly swirl the colors together a bit with a toothpick or pencil.
Dip frame: Dip the frame face down into the colors.
Dry: Lay the marbled frame face up on wax paper. Allow it to dry overnight in a well-ventilated area.
Tips for Successful Marbling
Experiment with Colors and Techniques
You can make your marbling unique. Try different color combinations. Mix bright colors with pastels. See what happens when you use just two colors or many. Also, explore various techniques. Use shaving cream for one look. Try nail polish for another. Each method gives a different result. This helps you find your favorite style for any marbling.
Ensure Proper Ventilation
Good airflow is very important. Some supplies have strong smells. These include nail polish and spray paint. Always work in a well-ventilated area. You can open windows or use a fan. If you use these methods, wear a mask. This protects you from fumes. Proper ventilation is also key when heat-setting marbled fabric. Products like GOLDEN GAC 900 release low levels of formaldehyde. A dryer vented to the outdoors is a good idea for general marbling processes.
Practice on Scrap Materials
Before you start your main item, practice. Use scrap materials first. This helps you get the feel of the technique. You can try out new patterns. You can also test color mixes. Practicing on scrap materials, like linen or cotton, is great. It helps you use up old fabric pieces. This also saves your good materials for the final piece.
Seal Finished Projects
Sealing your finished items protects them. It makes your hard work last longer. For many ceramic projects, you do not always need to seal the surface. Some porous ceramic tiles might need a light coat. A penetrating sealer works well for these. It fills tiny holes without changing the look. This helps prevent dirt from collecting. Sealing ensures your beautiful marbled project stays vibrant.
You will find great joy and satisfaction creating unique marbled decor. These diy craft ideas are easy and accessible for everyone. Marbling is very versatile. You can apply these techniques to many items. Explore your own creativity. Experiment with different colors and patterns. This boosts your artistic creativity. Share your creative marbling crafts masterpieces. This craft is fun. Start your diy journey today. Transform everyday objects into personalized art. Embrace this amazing craft.
FAQ
What is marbling?
You create unique patterns on a liquid surface. Then you transfer these designs to another item. This makes beautiful, swirled art. You can turn everyday objects into special pieces.
What materials do I need for marbling?
You need a shallow tray and water. You also need paints like acrylics or nail polish. Do not forget the item you want to marble. A skewer helps you swirl colors. Marbling kits offer many supplies.
What surfaces can I marble?
You can marble many surfaces. Try paper, fabric, or ceramic items. Wood and plastic also work well. You can even marble phone cases or planters. You can make many different projects.
What makes marbling patterns unique?
The paint spreads on the water’s surface. How you swirl the colors makes each pattern special. No two marbled items look exactly alike. You create one-of-a-kind designs every time.