
Are you dreaming of stylish, affordable storage for your bathroom? DIY rustic bathroom shelving is a rewarding project! It’s perfect for anyone wanting to boost their bathroom’s look and organization. This project blends charming farmhouse aesthetics with real practicality. You can achieve this beautiful, cost-effective storage yourself. Get ready to transform your bathroom with a personal, handcrafted touch.
Why Farmhouse Bathroom Shelving

Aesthetic Appeal and Timeless Charm
You want your bathroom to feel welcoming, right? Farmhouse style brings a special warmth and charm that never goes out of fashion. It’s a look that feels both classic and cozy. Think about its core elements:
Utilitarian Simplicity: This design focuses on function. It’s plain but warm, reflecting the practical nature of old farmhouses.
Neutral Colors: You’ll see crisp whites, creams, soft grays, and warm earth tones. Natural wood also plays a big part.
Natural Materials: Farmhouse design uses real wood, natural stone, and vintage metals. These materials add texture and character.
Functional Styling: Every decorative item serves a purpose. You might see linen towels, woven baskets, or simple plants.
This style creates a relaxing retreat. It gives your bathroom a timeless, inviting feel. You’ll love the cozy atmosphere a farmhouse look creates.
Maximizing Space and Decluttering
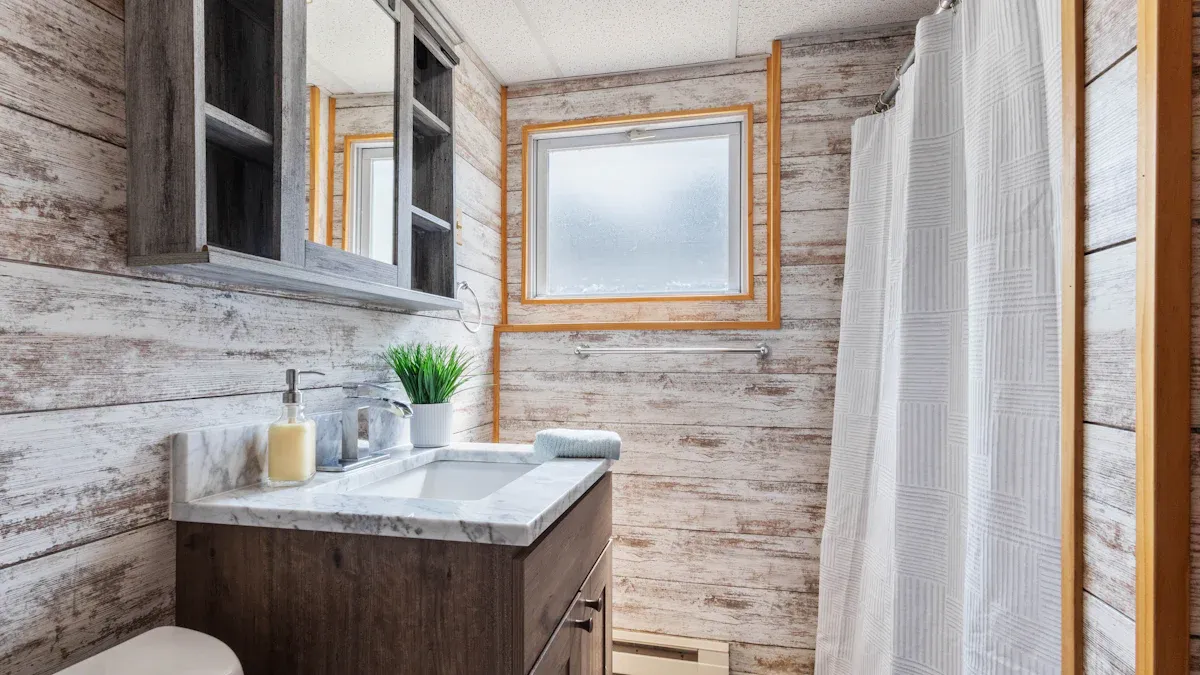
Bathrooms often feel cramped. You need smart storage solutions. Farmhouse shelves are perfect for this! They let you use vertical space you might otherwise waste. Imagine shelves above your toilet or next to your vanity. You can store towels, toiletries, and other essentials. This keeps your countertops clear and tidy. You gain valuable storage without taking up precious floor space. It helps you keep your bathroom organized and clutter-free.
Cost-Effective DIY Storage
You might think stylish storage costs a lot. But diy rustic bathroom shelving offers a budget-friendly option. You can create beautiful, custom storage without breaking the bank. Many store-bought options are expensive. Doing it yourself saves you money. In fact, you can complete a project like this for less than $5 for materials! That’s right, under $5. This makes farmhouse shelves an incredibly smart choice for your home. You get a custom look for a fraction of the price.
Planning Your Rustic Shelving Project
Before you grab your tools, a little planning goes a long way. Thinking through your project now saves you time and headaches later. You want your new farmhouse shelves to look great and function perfectly.
Assess Your Bathroom Space
First, look at your bathroom. Where do you need extra storage? Common spots include above the toilet, next to the vanity, or on an empty wall. Grab a measuring tape!
Measure the Width: How wide can your shelves be? Consider any obstacles like light fixtures or door frames.
Measure the Height: How much vertical space do you have? Think about how many shelves you want and the height of items you will store. You need enough room between shelves for towels or tall bottles.
Check Your Walls: What are your walls made of? Most bathrooms have drywall. You will need to find wall studs for the most secure mounting. A stud finder is your best friend here! If you cannot hit a stud, you will need special wall anchors. We will talk more about those later.
Choose Wood and Finishes
The wood you pick sets the tone for your rustic look. You have a few great options.
Reclaimed Wood: This wood has a story! It often comes from old barns or buildings. It brings unique character with its natural weathering, knots, and even old nail holes. Reclaimed wood is very durable because it is already aged. It also feels good to use something sustainable. However, it can be more expensive and might need extra cleaning or preparation to remove old nails or residues.
New Pine: Pine is a popular choice for diy rustic bathroom shelving. It is affordable and easy to find. Pine has a pale yellow color and distinct grain patterns. Its open grain takes stain well, creating beautiful variations that enhance a rustic style. You can easily distress new pine to give it an aged look.
Distressed Wood: This is new lumber that craftsmen treat to look old. It gives you the character of reclaimed wood without the potential issues like hidden nails or uncertain durability. Distressed wood offers consistency and is often more affordable.
Once you pick your wood, think about the finish. This is where you really bring out that farmhouse charm.
Stains for a Rustic Look:
Minwax Shipboard: This gives you a weathered gray tint. It lets the wood grain show through for an aged, worn-in feel.
Minwax Weathered Oak: A warm gray stain. It adds a slight worn look while keeping the wood’s natural warmth.
Minwax Early American: A perfect mid-tone brown. It offers warmth without looking orange and gives a weathered appearance.
Minwax Dark Walnut: A rich, deep brown. This stain gives you a true dark brown without any red or orange undertones.
Varathane Golden Pecan: This is a lighter stain. It still looks deep and rich, enhancing the wood grain beautifully.
Other Popular Finishes:
Gray Wash: This modern rustic option softens wood tones. It creates a weathered, reclaimed look that pairs well with neutral colors.
Natural Finish: If you love the raw beauty of wood, a clear natural finish is perfect. It highlights the grain, knots, and imperfections.
White or Cream: These colors create a bright, airy feel. They work well for a classic farmhouse look, especially when distressed.
Select Brackets and Hardware
Your brackets hold your shelves up and add to the style. For a rustic or industrial farmhouse look, metal brackets are a top choice.
Metal Brackets: These are very popular and versatile. They offer excellent weight support, which is great for chunky wood shelves. Metal brackets are also low maintenance. Look for options like wrought iron or steel with a matte black finish. These types of brackets are very durable. For example, some industrial shelf brackets are made from solid 6mm thick metal. They can hold over 250 pounds per pair! This makes them perfect for a bathroom where you might store heavier items. They also resist corrosion, which is a plus in a moist bathroom environment.
Pipe Brackets: These use industrial pipes and fittings. They give a strong, urban rustic vibe.
Wood Brackets: You can also use simple wood corbels or brackets. These offer a softer, more traditional farmhouse feel.
Make sure your brackets match the style you want and can hold the weight of your shelves and what you plan to put on them.
Gather Essential Tools
Having the right tools makes your project much easier and safer. Here is what you will need:
Measuring Tape and Pencil: For accurate measurements and marking.
Stud Finder: To locate wall studs for secure mounting.
Level: To ensure your shelves are perfectly straight.
Saw: You will need a saw to cut your wood to size. A miter saw is great for precise cuts, but a hand saw can work too.
Sander or Sandpaper: To smooth your wood and prepare it for finishing.
Drill and Drill Bits: Essential for making pilot holes and driving screws. A cordless drill is super convenient. Make sure your drill bits match the size of your screws and wall anchors. Pilot holes stop your wood from splitting.
Screwdriver or Screwdriver Bits: You will use these to drive screws. Using bits with your power drill is much faster than a manual screwdriver.
Hardware and Fasteners:
Screws: Make sure they are long enough to go at least an inch into a wall stud.
Wall Anchors: If you cannot find a stud, you will need these. They expand in drywall to create a secure hold. Choose anchors based on the weight your shelves will hold.
Safety Gear: Always wear safety glasses to protect your eyes. Gloves can also be helpful.
With your plan in place and tools ready, you are set for the next exciting step: building your beautiful rustic shelves!
DIY Rustic Bathroom Shelves: Step-by-Step
Now for the fun part! You have planned everything, and your tools are ready. Let’s get those rustic shelves built. This is where your vision comes to life.
Prepare Your Wood
First, you need to get your wood ready. If you bought new lumber, you might need to cut it to the right size. Use your saw to make precise cuts based on your measurements.
After cutting, sanding is super important. It makes your wood smooth and ready for staining or painting. Sanding removes tiny bits of wood using an abrasive. This creates an an even surface and makes the wood look better. You should always start with a lower grit sandpaper and then move to higher grits.
Start with coarse grit sandpaper (40-50). This removes a lot of material quickly. It’s good for shaping wood or roughing up surfaces if you plan to glue them.
Next, use medium grit (60-80). This smooths the surface and gets rid of marks from the coarser paper.
Then, move to fine grit (80-120). This gives you a nice smooth finish and prepares the wood for stains or paints.
For an even finer finish, use very fine grit (150-220). This is perfect before you apply any finish.
If you are sanding between coats of paint or finish, use micro grits (240-3000). This helps you get a super smooth result.
Always sand thoroughly at each stage. A good trick is to scribble pencil marks on the wood. Sand until all the marks disappear. This helps you see if you have sanded evenly. Remember, some woods are softer and will sand faster. After you finish sanding, clean the surface well with a lint-free cloth. This removes all the dust. Don’t use a damp cloth, as water can make the wood swell.
Do you want your new wood to look old and weathered? You can distress it! This gives your farmhouse shelves that authentic, aged look.
Dry brush technique: Use a very dry brush with just a little paint. Apply it in quick, varied strokes. This creates an aged, scratched look without full coverage.
Sanding technique: This is simple. Apply a coat of paint, then sand some of it off. Focus on areas that would naturally get bumped or scratched. This makes it look organic. You can do this with multiple paint layers.
Tea Staining (With Vinegar + Steel Wool): This is a chemical reaction. You use tannins from steeped tea and iron acetate (made from steel wool and vinegar). First, apply the tea. Then, apply the iron acetate solution. This will darken the wood.
Wire Brushing: Use a wire brush with a drill. This digs out soft wood fibers and leaves the denser grains. It adds texture to the wood, especially softwoods.
Stain or Paint for Farmhouse Look
Now it’s time to give your wood that perfect farmhouse finish. Proper preparation is key for great results. Make sure your wood is sanded, clean, and conditioned. This creates a smooth, even base so the stain absorbs well.
Always sand the wood before you apply any stain or wash. This ensures a smooth surface and prevents splinters.
Use a stain conditioner before staining. This helps the wood absorb the stain evenly and beautifully.
For a weathered gray look, you can make a paint wash. Mix gray paint (like Sherwin Williams Peppercorn) with a couple of tablespoons of water.
Apply this watery paint mixture liberally with a foam brush, paintbrush, or even an old sock. Let it soak for about 30 seconds. Then, wipe off the excess with an old t-shirt or paper towel. This helps it dry.
If you want a darker shade, apply a second coat of the wash. You can also sand in some spots to show more of the natural wood for a distressed effect.
To make it look even more weathered, you can intentionally distress the wood. Hit it with a hammer or add nail holes before you apply the stain or wash.
After the finish is dry, you can distress edges, legs, and other natural wear points with a sander. This creates a “wear and tear” look. Finally, apply a clear wax sealant with a lint-free rag. Follow the manufacturer’s instructions. This protects your beautiful finish. Remember, different wood species react differently to stains. Always test your stain on a scrap piece of wood first!
Install Brackets Securely
You’re ready to put up your diy rustic bathroom shelving! This step needs precision to make sure your shelves are strong and safe.
Measure and Mark Bracket Placement:
Hold your brackets up to the wall where you want them. Use a pencil to mark their initial placement.
Make sure your brackets are evenly spaced and level. A level is your best friend here!
Use a measuring tape and pencil to mark where the screw holes will go. Double-check all your measurements.
Drill Pilot Holes:
Use a 3/32″ or 5/64″ drill bit to pre-drill small pilot holes. This stops your wall from cracking and makes it easier to put in screws.
If you are drilling into drywall, you will need to insert anchors into these holes for extra support. If you hit a solid wood stud, you don’t need anchors.
Experts suggest pre-drilling pilot holes and starting screws before you hold the bracket to the wall. This makes alignment easier.
Install Brackets:
Secure your brackets with a screwdriver. Tighten them firmly. But be careful not to overtighten, as this can strip the screws or damage the wall.
Here’s a quick look at some hardware you might use:
Item | Purpose | Details |
|---|---|---|
Drill & Bits | Pre-drilling pilot holes | Use 3/32″ or 5/64″ bits |
Wall Anchors | Securing brackets in walls | Plastic for drywall; toggle for plaster |
Screws | Attaching brackets | #6 or #8 wood screws, 1¼”–1½” long |
Mount and Level Shelves
Almost there! Now you need to get your diy rustic bathroom shelves onto those brackets and make sure they are perfectly level.
Select a Location: Hold your bracket against the wall to decide where it will go. Mark this spot with a pencil.
Find Wall Studs: Use a stud finder to locate the vertical beams inside your wall. These are usually 16 to 24 inches apart. Attaching to studs gives you maximum stability.
Pre-Drill Holes: Drill holes into the spots you marked on the studs. If you can’t hit a stud, you will need to use drywall anchors. For anchors, you might need to drill slightly larger holes.
Install Bracket: Attach the bracket using the right screws. Try to get at least one screw into a stud. Use your level to confirm the bracket is straight.
Install Shelving: Place your shelf material onto the bracket. Secure it according to the manufacturer’s instructions for your specific brackets. Check for levelness one last time.
Dealing with Uneven Walls: If your walls are not perfectly flat, you can use thin wooden shims. Place these small wedges behind the brackets to make sure your shelf is level.
Double-Check Your Work: Measure everything again. Align your brackets carefully. Use a level before you drill. After installation, give the shelf a gentle shake to make sure it feels secure.
Regularly Inspect: Over time, weight and use can loosen things. Periodically check your farmhouse shelves for any sagging or wobbling. Tighten screws or adjust brackets if needed.
For larger projects or if you are putting up many farmhouse shelves across a long wall, a laser level can be a huge help. It projects a perfectly level line, making it easy to align everything.
Styling Your Farmhouse Shelves
You have built your beautiful new farmhouse shelves. Now, you get to make them shine! Styling your shelves is where your personality comes through. You want them to look good and work well for your bathroom needs.
Functional Storage Ideas
Your farmhouse shelves are perfect for practical storage. Think about what you use every day.
You can store neatly rolled towels. Place them directly on the shelves or tuck them into woven storage baskets. These baskets offer a stylish way to keep things tidy.
Use apothecary jars for small items. These jars are great for cotton rounds or Q-tips. They look nice and free up space in your cabinets.
Consider repurposed vintage crates. They add character and hold extra toilet paper or cleaning supplies.
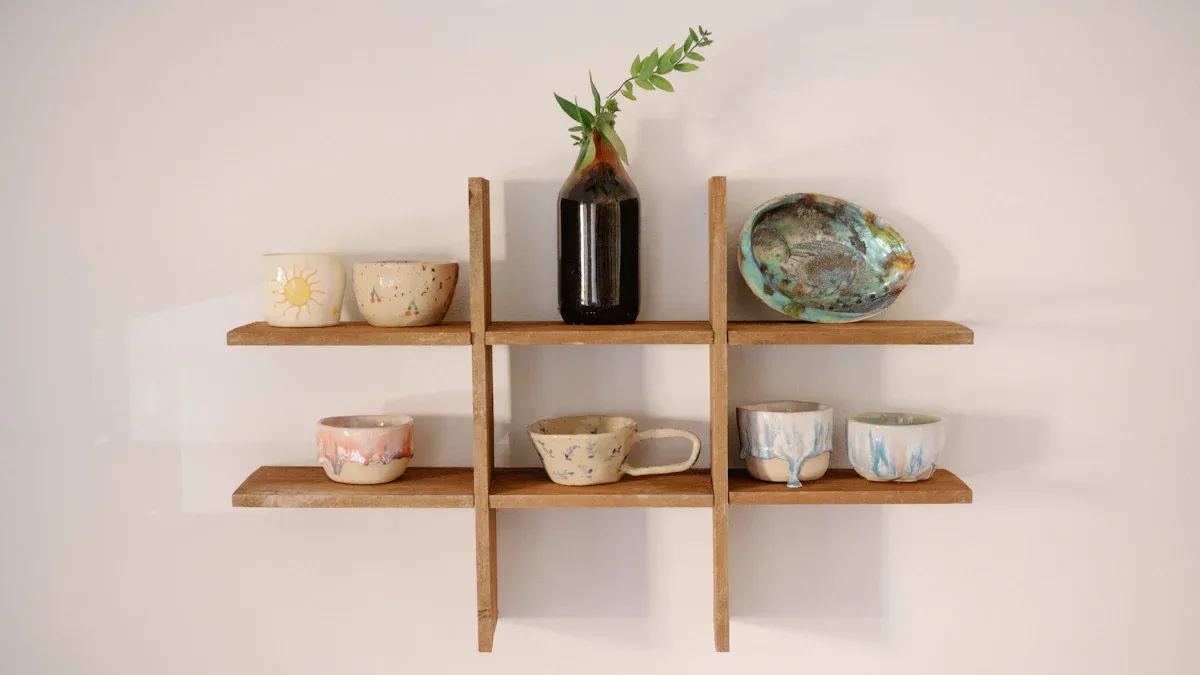
Decorative Touches and Vignettes
Now, add some charm! Decorative items make your shelves feel special.
Bring in some greenery. Small potted plants, like ferns or snake plants, add life.
Place scented candles for a cozy feel.
You can display small art pieces or vintage finds. Botanical prints with wildflowers or herbs look lovely.
Think about galvanized metal accents. A small tray or a decorative bucket adds a rustic touch.
DIY Mason jar accessories are fun. Use them as vases for flowers or holders for toothbrushes.
Balance Aesthetics and Practicality
You want your shelves to look curated, not cluttered.
Leave some breathing room. Do not fill every inch of your shelves. This makes your favorite pieces stand out. It also creates a sense of calm.
Stick to a cohesive color palette. Choose three or four colors that match your bathroom. Repeating these colors helps your shelves feel like a collection.
Group objects together. This is pleasing to your eye. For example, put a small plant next to a candle on a tray. This prevents too many tiny items from making the space look chaotic. Avoid overloading your shelves with too much small decor.
Vary your arrangements. Do not use the same setup on every shelf. Mix it up to keep things interesting.
Troubleshooting DIY Shelving Issues
Even the best DIY projects can hit a snag. Don’t worry if your new farmhouse shelves aren’t perfect right away. You can fix common issues easily.
Fixing Uneven Shelves
Did your shelves end up a little crooked? You can fix this after installation.
Use shims: Small wedges are your secret weapon. You can place these behind your shelf brackets. This helps if your wall isn’t perfectly flat. Shims will make your shelf level and reliable.
Always check with a level after making adjustments. You want your items to sit flat and look good.
Wall Anchoring Solutions
Sometimes you can’t hit a wall stud. That’s when wall anchors become crucial. They give your shelves sturdy support.
For drywall, consider the Toggler AF5 Anchor. It’s made of polypropylene plastic. This anchor expands behind the wall. Each AF5 anchor supports up to 79 pounds on ½-inch drywall. You need a 3/16 inch hole for it.
If you need to hold heavier items, try a Toggler Toggle-Bolt Anchor. These can carry up to 300 pounds. They do need a larger hole, from ½ to ¼ inch.
For tile walls, especially when studs aren’t where you need them, #10 Cobra Triple-Grip (blue) anchors work well.
New York carpenter Bob Lucchesi advises, “Whatever you do, bore the right-size hole for the anchor, and that’s whatever the manufacturer recommends.” He emphasizes that “Even a slightly different hole size from what the manufacturer recommends can cause the anchor to pull loose.” Always follow the manufacturer’s instructions for the best hold.
Achieving Consistent Finish
You want all your shelf pieces to look the same. Getting a uniform stain or paint finish is possible with a few techniques.
Start by staining the raw wood. Often, you use a dye first to create a background color.
After you seal the wood, add a pigmented wiping stain.
Once that is sealed, apply a thicker ‘glaze’ of pigment stain. Wipe it on and off to bring out highlights and unify the color.
Finally, spray a clear coat with dye added. This blends everything together for a consistent color.
You can also use ‘toner’ or ‘shading lacquer’. These are clear finishes with dyes added. You spray or brush them on in thin layers. They act like theater gels, giving a translucent, colored finish. Applied evenly, they add a uniform color coat that floats atop the wood. This provides both color and uniformity.
You can easily create beautiful diy rustic bathroom shelving. This project brings great satisfaction. It transforms your bathroom into an organized, stylish space. You add a personal touch and unique farmhouse character. Embrace this rewarding project! It truly makes a difference. Share your completed farmhouse projects and tips with us.
FAQ
What kind of wood works best for rustic shelves?
You can use new pine for an affordable option. It stains well and you can easily distress it. Reclaimed wood also offers unique character and a truly authentic rustic feel. Choose what fits your budget and desired look.
What if my bathroom walls don’t have studs?
Don’t worry! You can use special wall anchors. For drywall, toggle anchors or heavy-duty plastic anchors work great. Always pick anchors that match the weight your shelves will hold. Follow the manufacturer’s instructions carefully for the best hold.
What’s an easy way to distress new wood?
You can make new wood look old with a few simple tricks. Try hitting it gently with a hammer or dragging a chain across it. You can also sand down edges after painting or staining. This creates a naturally worn appearance.
What should I use to seal my finished shelves?
After staining or painting, you need to protect your shelves. A clear wax sealant or a polyurethane topcoat works well. These finishes guard against moisture and wear. They help your beautiful farmhouse shelves last for years.
What items look good on farmhouse bathroom shelves?
Think about both function and style. Rolled towels, small plants 🌱, and scented candles add charm. You can also display apothecary jars for cotton balls or small vintage finds. Remember to leave some empty space for a clean look.

